Turned Leg Media Console
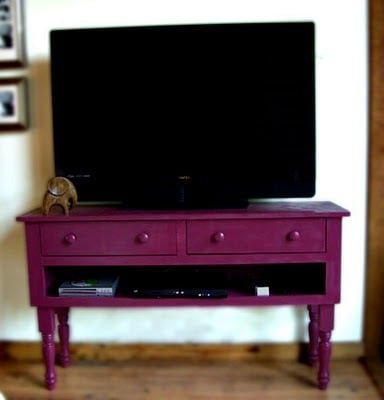
A media console with large controller space, turned legs, and an open bottom perfect for basket or bins. Two large drawers fit for DVDs.
Specifications
| Project type | Media and Entertainment Centers |
|---|---|
| Room | living room |
| Style | Cottage Style Furniture Plans |
| Difficulty | Advanced |
| Estimated cost | $50 - $100 |
Shopping List
1 - 1x12 @ 8 feet long
1 - 1x12 @ 10 feet long
4 - 1x2 @ 8 feet long
1 - 1x3 @ 8 feet long
1 - 1/4" Plywood @ 1/4 Sheet
4 - 15 1/4" Turned Legs Farmhouse Style
Cut List
See detailed cut list in the PDF.
Tools
- measuring tape
- square
- pencil
- safety glasses
- hearing protection
- drill
- circular saw
- nailer
- sander
- countersink drill bit
Step-by-step Instructions
Step 1
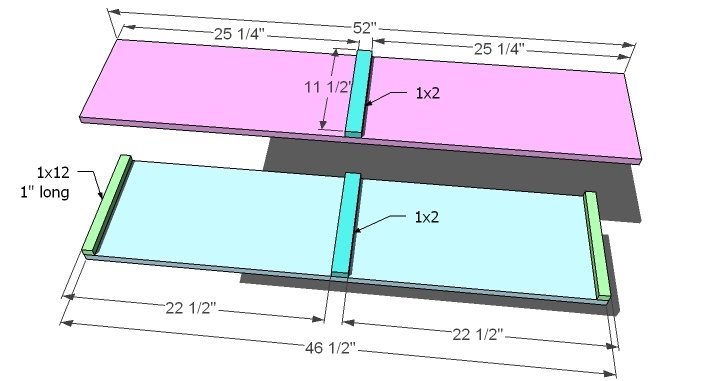
Nail the drawer guides to one of the shelves and the underside of the tops, as shown above. Use 1 1/4″ nails and glue.
Step 2
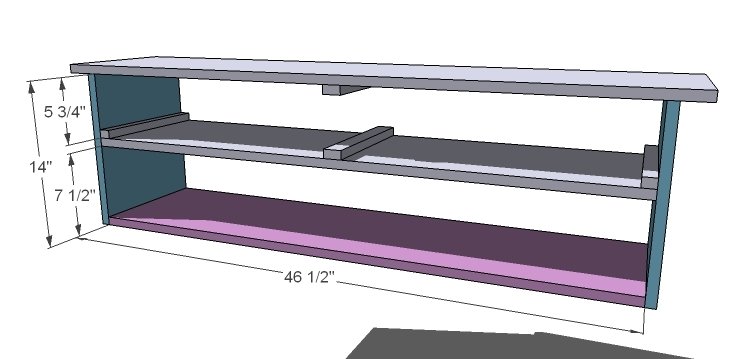
Along with the boards from the first step and the remaining shelf and sides, build the box using 2″ nails or pocket holes screws and glue.
Step 3
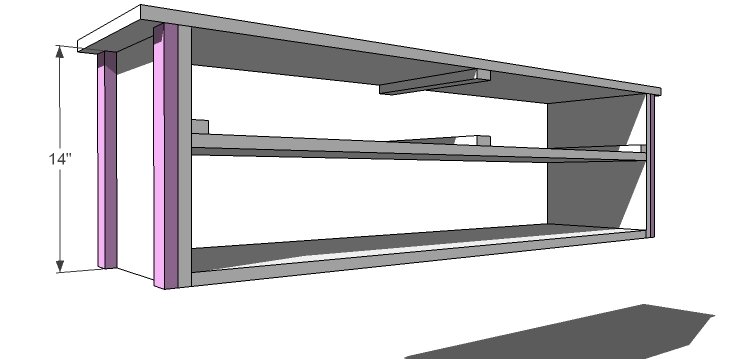
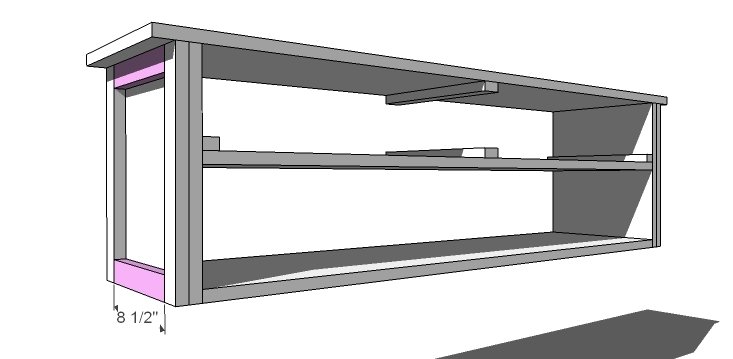
Use 1 1/4″ finish nails and glue to add the side trim
Step 4
A little more trim... 1 1/4″ finish nails and glue
Step 5
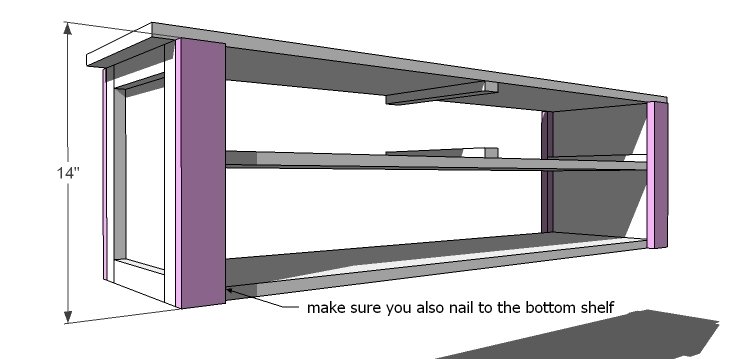
Step 6
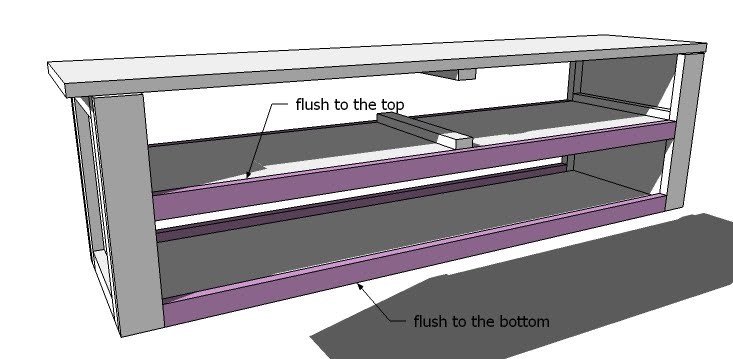
Shelf trim. Keep the top flush to the top, bottom flush to the bottom
Step 7
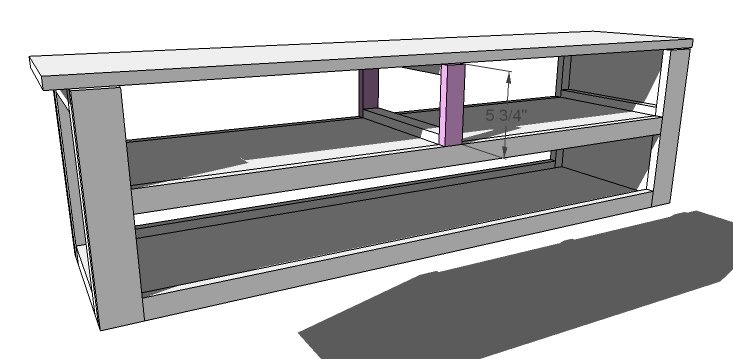
Pretty and strong. 2″ finish nails and glue
Step 8
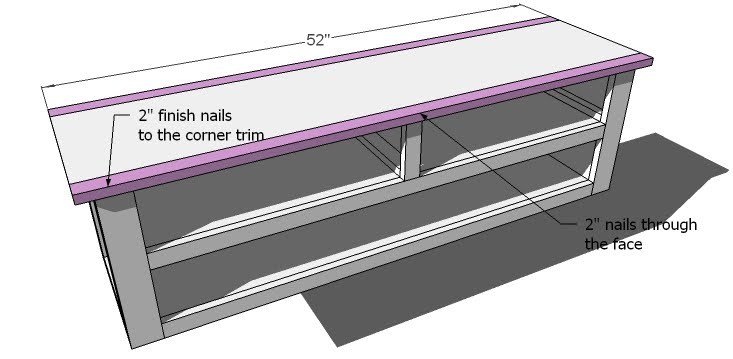
Overhangs can be a little tricky – just use glue and remember to fasten through the face and to the vertical trim pieces
Step 9
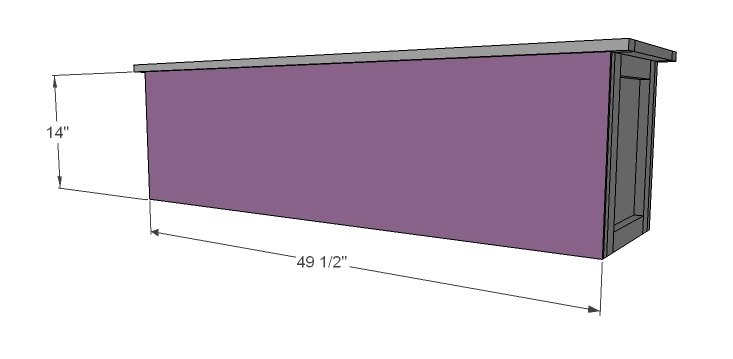
The back will make everything so strong. Remember to nail to the trim boards in the center shelf too.
Step 10
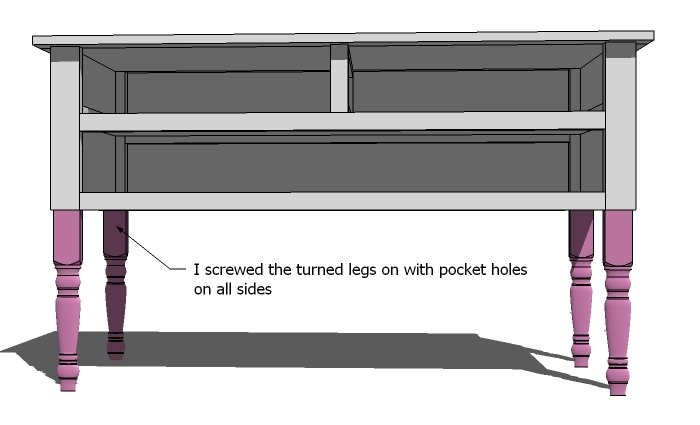
If your legs come with an existing screw, you can use that to attach your legs. Mine didn’t – they were on clearance, so I drilled pocket holes with my Kreg Jig™ in all four corners and attached it that way to the console. I inset the legs 1/2″ from the outsides.
Step 11
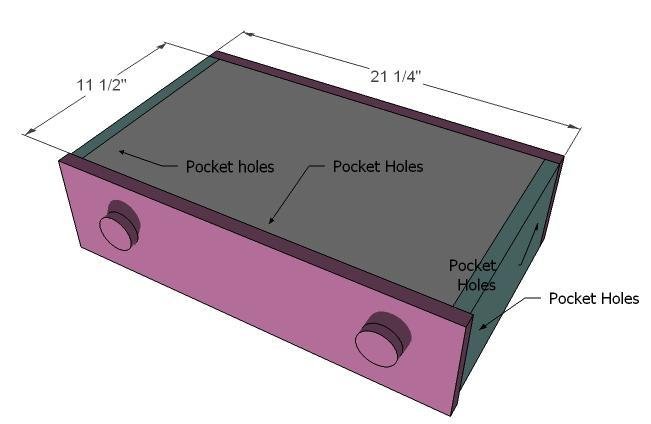
The drawers are simply 1x12s surrounded by 1x6s. I used pocket holes for added strength and built perfect drawers on the very first try!
Finishing
Sand all surfaces, starting with a medium grit and finishing with fine. Wipe off the dust, fill any holes or gaps with wood filler, and sand smooth once dry. Apply primer if you're painting, then finish with your choice of paint or stain and seal with a durable clear topcoat. For outdoor projects, use exterior-rated primer, paint or stain, and sealer so the piece stands up to the weather.
Source (temporary): https://www.ana-white.com/woodworking-projects/turned-leg-media-console