Turned Leg Traditional Desk
DIY Desk inspired by Pottery Barn Printer desk - from
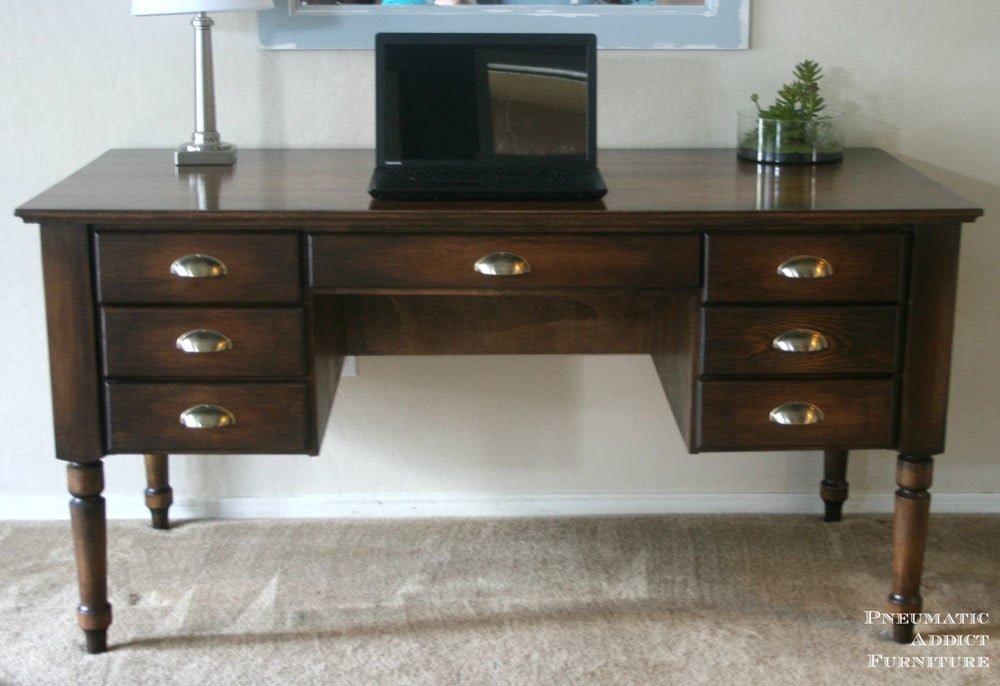
Specifications
| Project type | Desk, Desk Systems and Project Table Plans |
|---|---|
| Room | Craftroom |
| Style | Tradditional Style Furniture Plans |
| Difficulty | Advanced |
| Estimated cost | $150 - $200 |
Dimensions
Use the size-specific shopping and cut lists below.
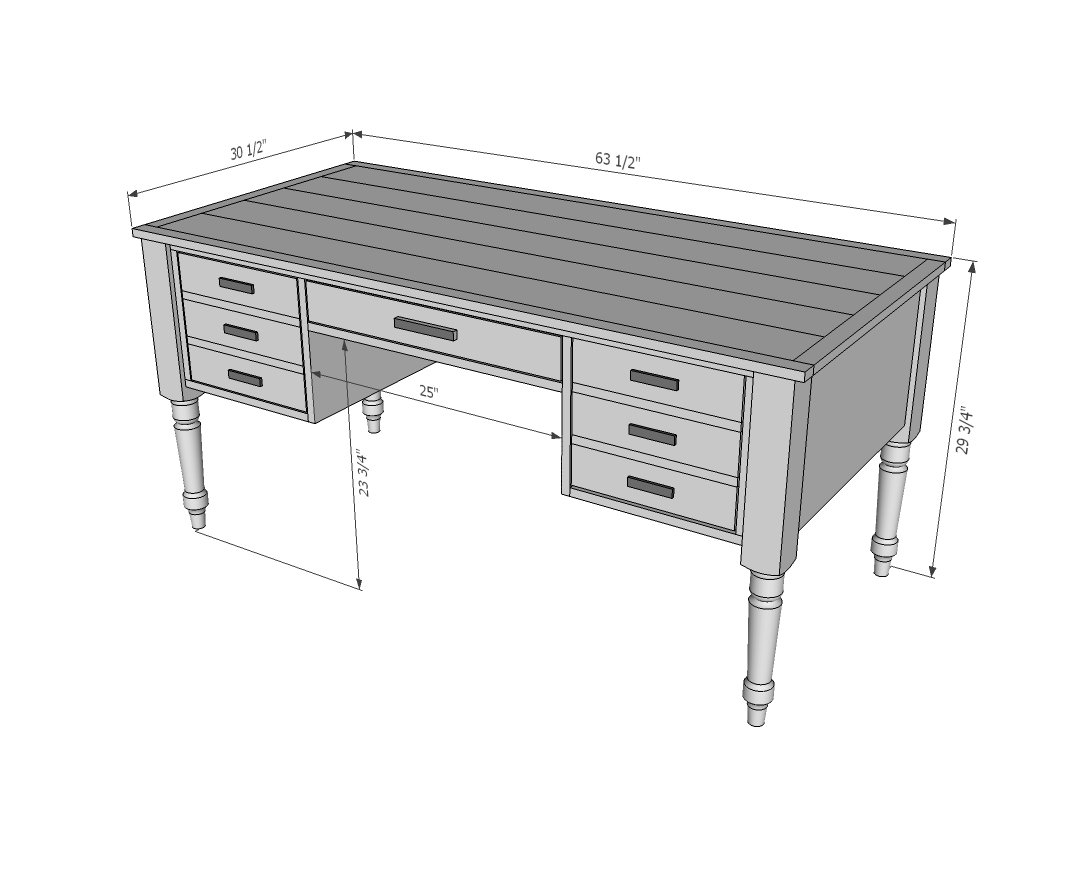
Shopping List
1 - sheet of 3/4" plywood (rip two strips 13-1/2" wide x 8 feet long and save scraps for drawer faces)
4 - turned legs ( Elisha used these ones )
4 - 1x2 @ 8 feet long
1 - 1x12 @ 10 feet long
1 - 1x3 @ 8 feet long
1 - 1x4 @ 3 feet long
5 - 1x6 @ 6 feet long
1/4 sheet of 1/4" thick plywood (for drawer bottoms)
3 - 16" Euro Drawer slides (the white cheap ones)
Cut List
1 - 3/4" plywood @ 13-1/2" x 56" (back)
2 - 3/4" plywood @ 13-1/2" x 24" (sides)
2 - 3/4" plywood @ 13-1/2" x 28-1/4" (inner sides - must notch top out for 1x2 - recommend edge banding front edge)
1 - 1x2 @ 56" (front top)
2 - 1x2 @ 12-1/4" (front side trim)
2 - 1x2 @ 14-3/4" (front bottom trim)
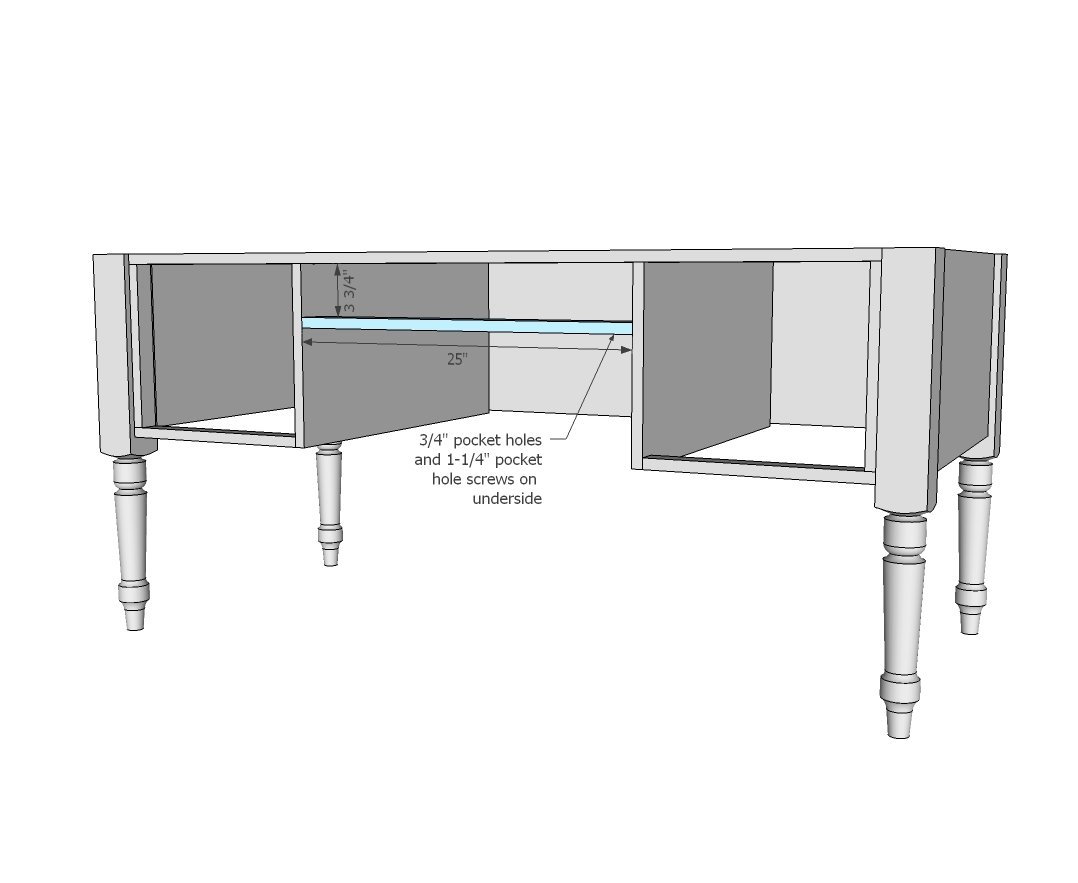
1 - 1x2 @ 25" (front center drawer bottom trim)
2 - 1x2 @ 26-3/4" (drawer slide supports)
DRAWERS - CUT TO FIT OPENINGS!!!
For the 2 Large Drawers, can also be made from 1x10 or 1x8 boards
4 - 1x12 @ 16" (sides)
4 - 1x12 @ 11-1/2" (front/back)
2 - 1/4" plywood @ 13" x 16" (bottoms)
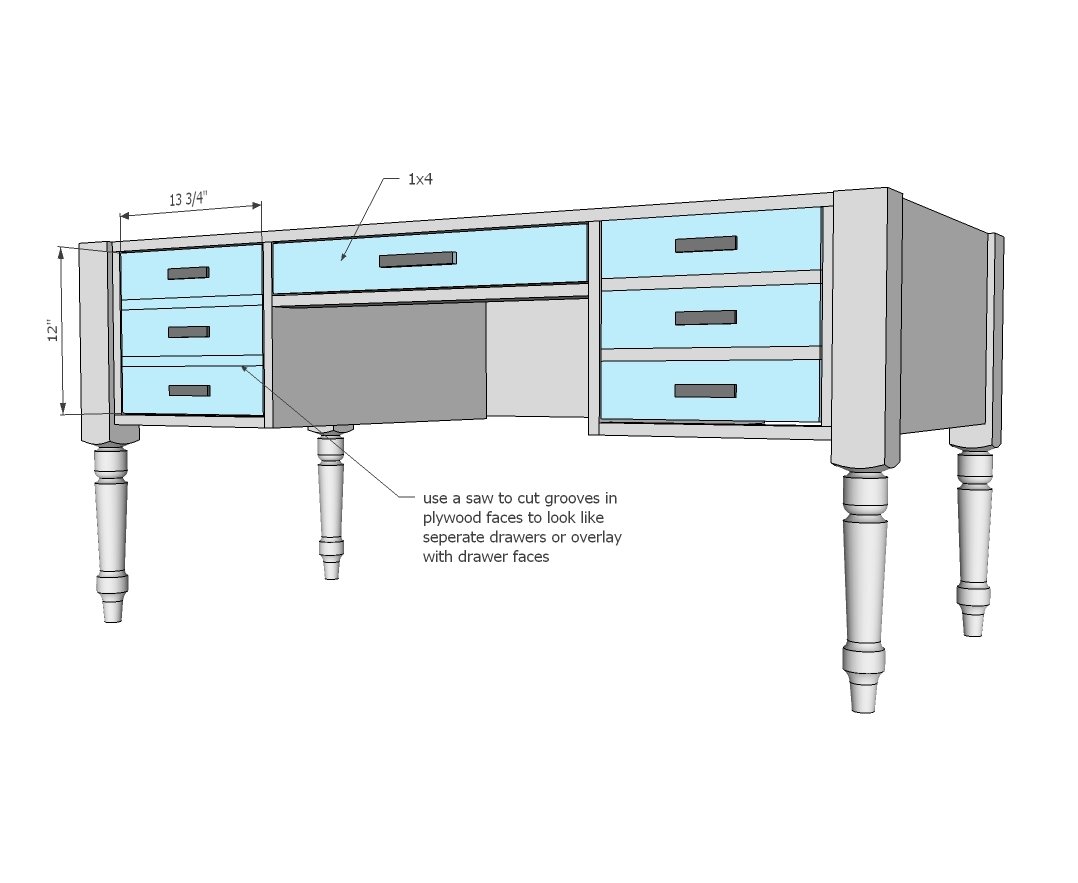
2 - 3/4" plywood @ 13-3/4" x 12" (faces)
For the 1 smaller drawer
2 - 1x3 @ 16" (sides)
2 - 1x3 @ 22-1/2" (front/back)
1 - 1/4" plywood @ 24" x 16" (bottom)
1 - 1x4 @ 24 - 3/4" (Face)
TOP
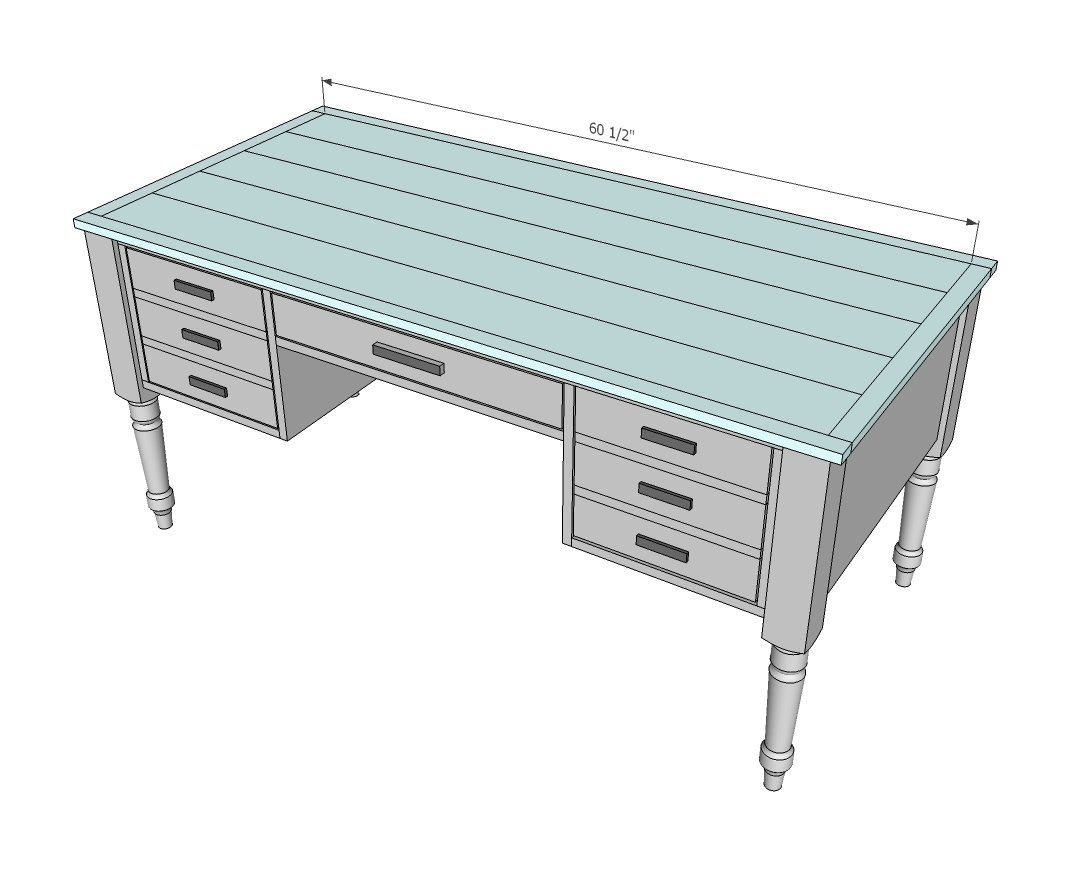
5 - 1x6 @ 60-1/2"
1x2s cut to fit around top
Tools
- measuring tape
- square
- pencil
- safety glasses
- hearing protection
- kreg-jig
- drill
- circular saw
- compound miter saw
- nailer
- sander
Step-by-step Instructions
Step 1
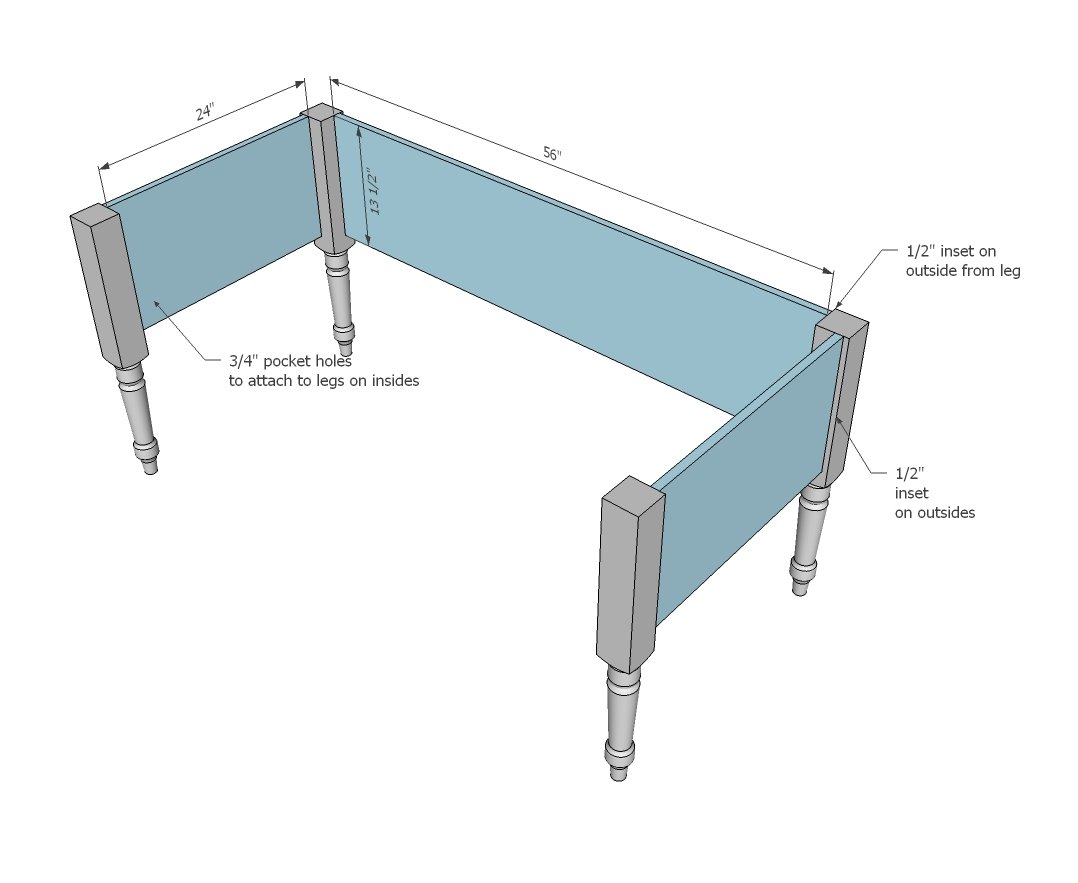
Drill 3/4" pocket holes on inside ends of all side and back plywood pieces. Attach with 1/2" space to legs. OPTIONAL: Also drill 3/4" pocket holes facing upward in sides to attach to top in later steps TIP: Use a piece of 1/2" thick plywood as a spacer to help guide you.
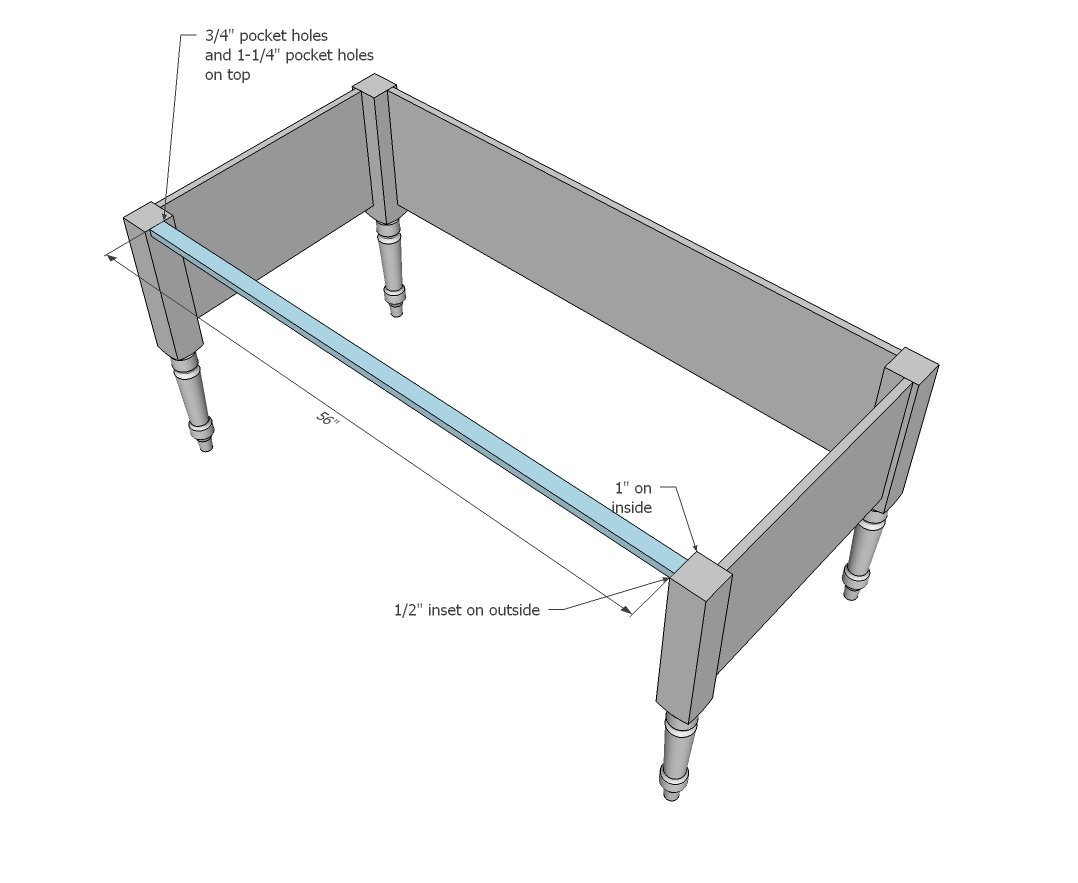
Attach 1x2 to front of cabinet at top.
Check for square and adjust for square.
Step 3
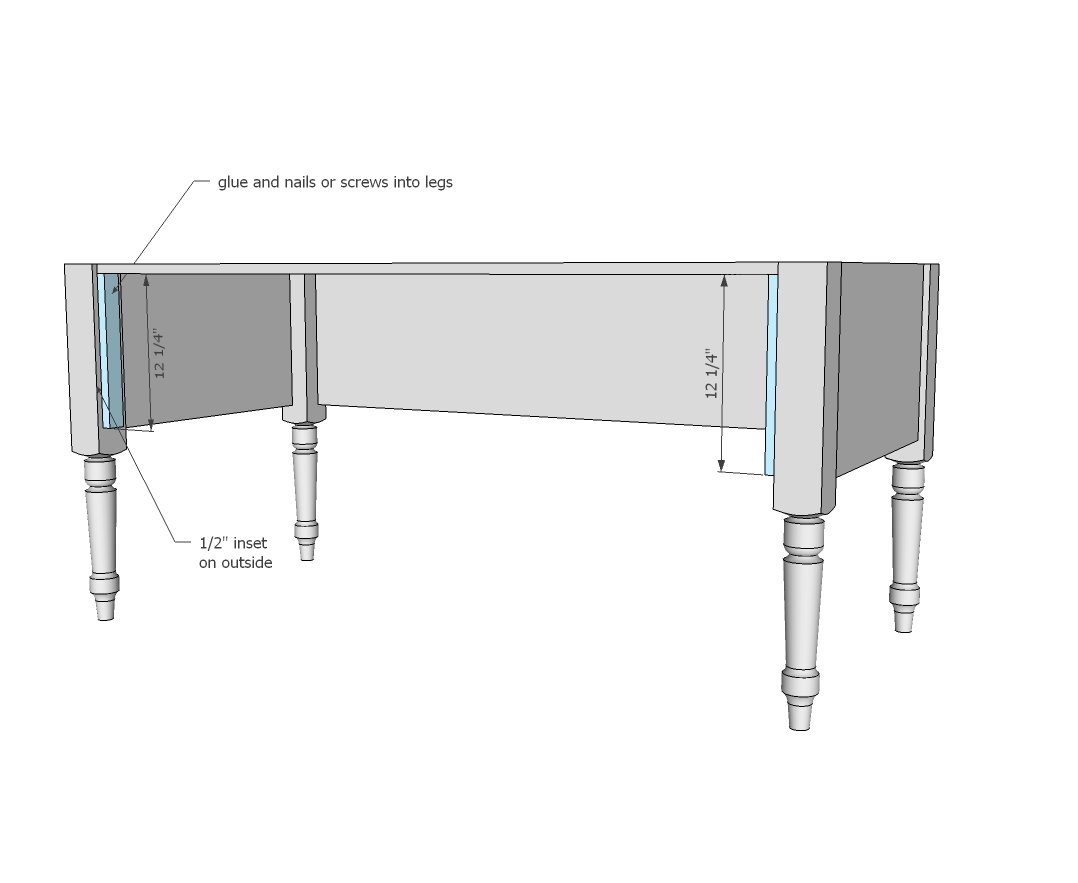
Nail or screw 1x2 trim to the front legs, inset 1/2" from front.
Step 4
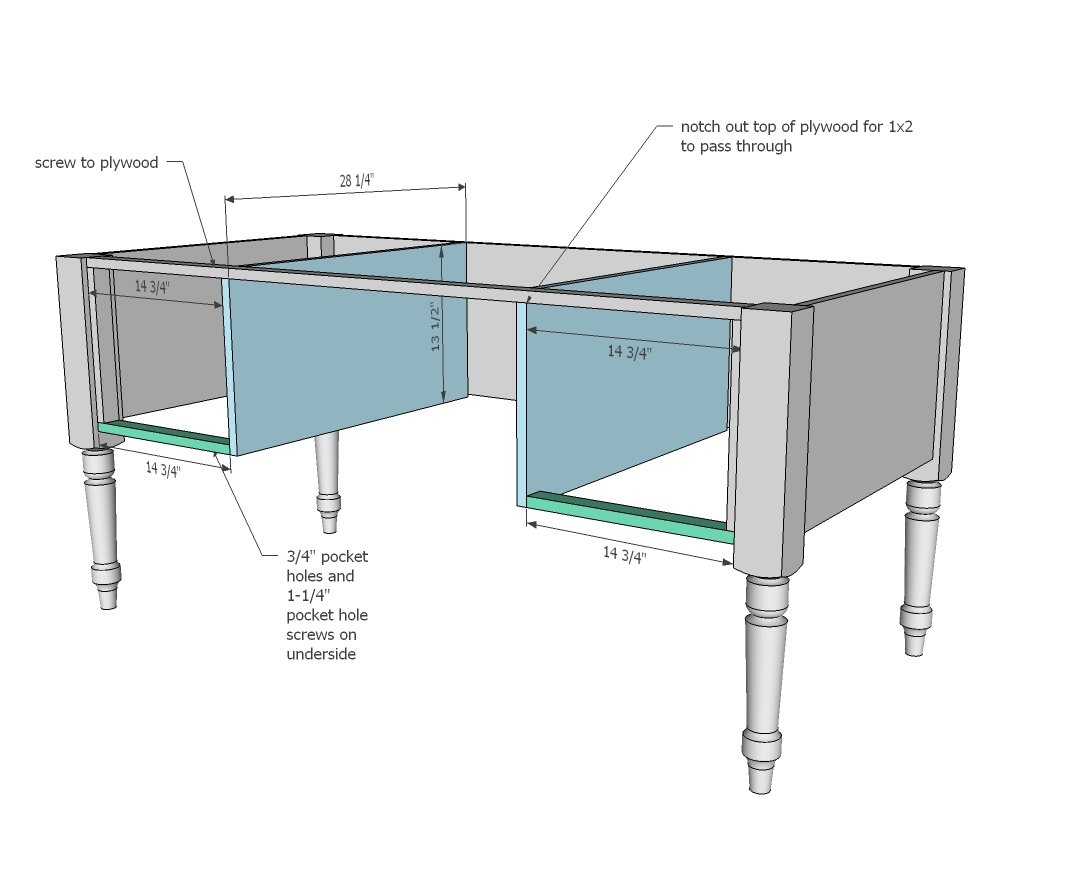
Notch drawer area sides out at top front for a 1x2 to pass over top. Edge band the front edge of the plywood piece. Attach with pocket holes on inside to back, 14-3/4" away from nearest leg. Take great care to make sure this piece is attached parallel to the outside plywood piece.
Step 5
Step 6
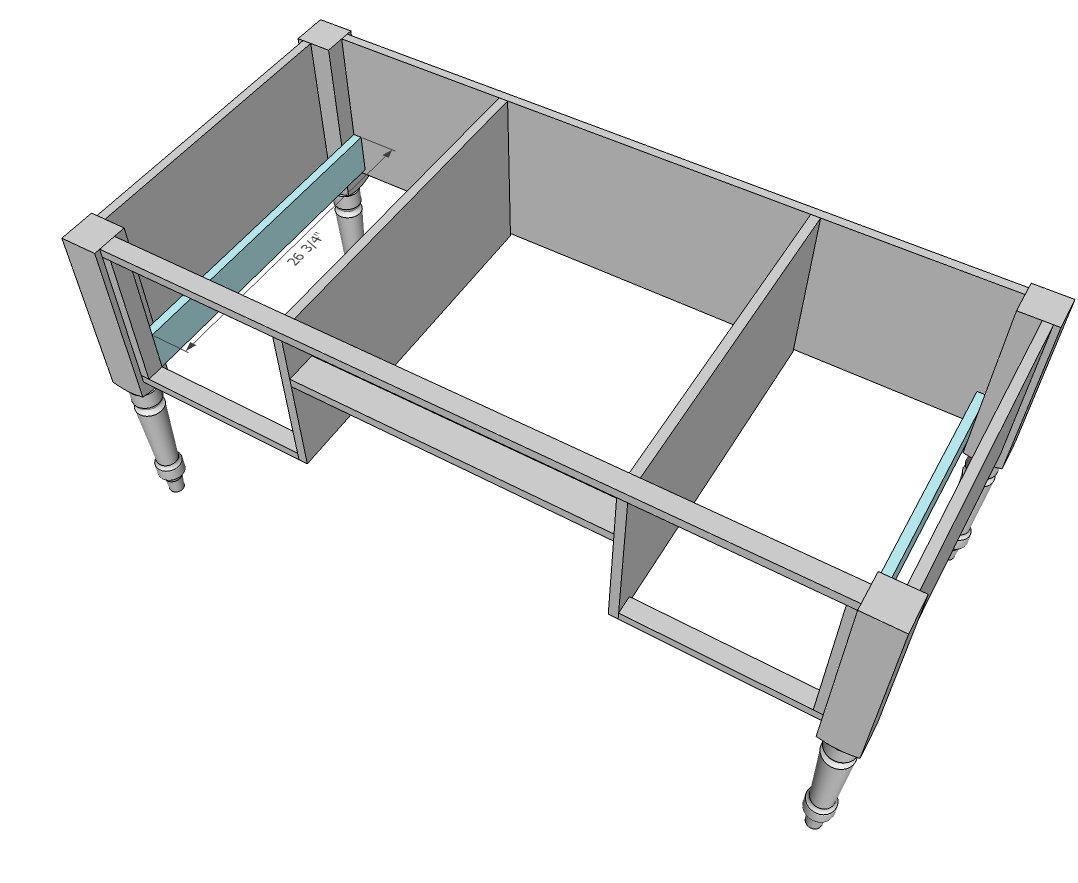
These boards are used for attaching drawer slides to. You may wish to place after drawers are built and you are installing the drawers. NOTE: For multiple drawers, add more where your drawer slides will need to be attached. See Elisha's post here for more details on how she did multiple smaller drawers.
Step 7
Build your drawers to fit your drawer slides and openings. Install drawers with drawer slides. Adjust by shimming if necessary until drawers slide easily. IMPORTANT: Drawers should be installed inset 3/4" to allow for drawer faces to be added in next step. For more details on how Pneumatic Addict installed a printer slide out tray and multiple smaller drawers, please go here for more information.
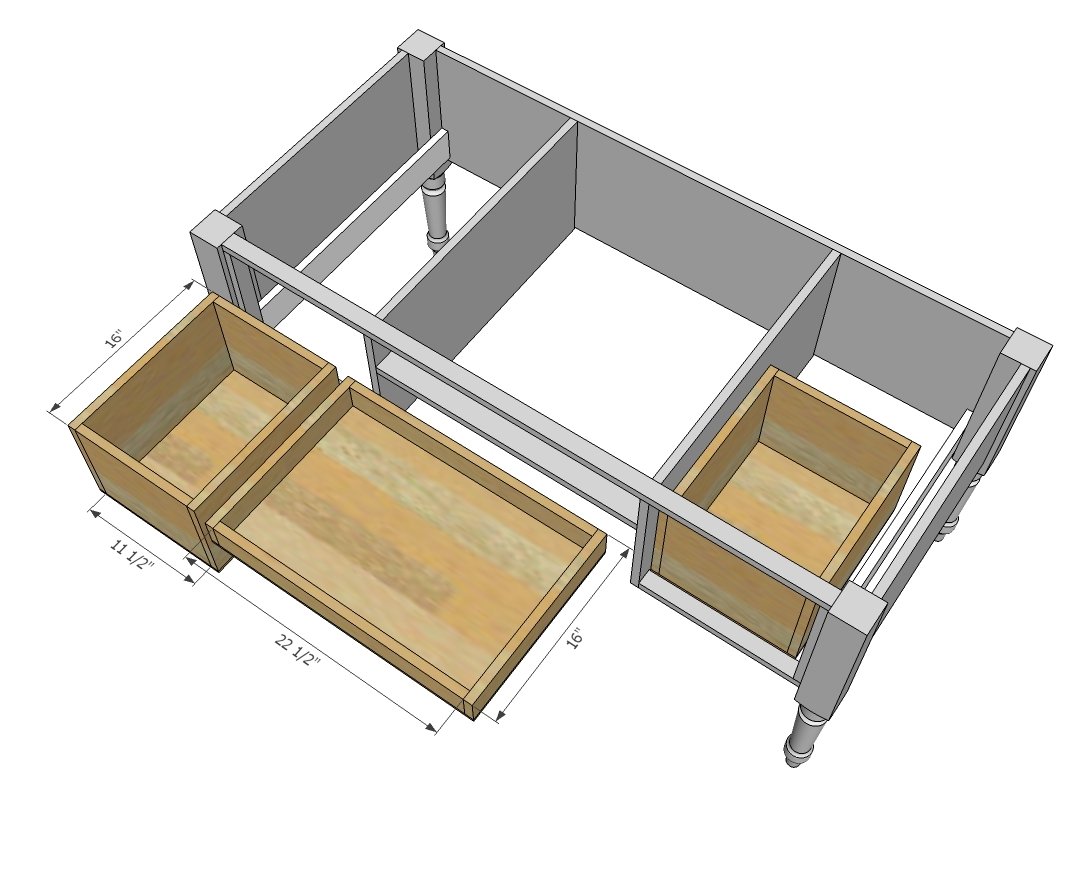
Attach drawer face to front of drawers, 1/8" gap around all sides.
For more information on how Pneumatic Addict added overlay door faces, please go here.
Step 9
Build top seperately with 3/4" pocket holes and 1-1/4" pocket hole screws. Trim with 1x2s. Attach to desk top. For more information on how Pneumatic Addict finished her top, please go here.
Finishing
Sand all surfaces, starting with a medium grit and finishing with fine. Wipe off the dust, fill any holes or gaps with wood filler, and sand smooth once dry. Apply primer if you're painting, then finish with your choice of paint or stain and seal with a durable clear topcoat. For outdoor projects, use exterior-rated primer, paint or stain, and sealer so the piece stands up to the weather.
Source (temporary): https://www.ana-white.com/woodworking-projects/turned-leg-traditional-desk