Twin Corner Beds System
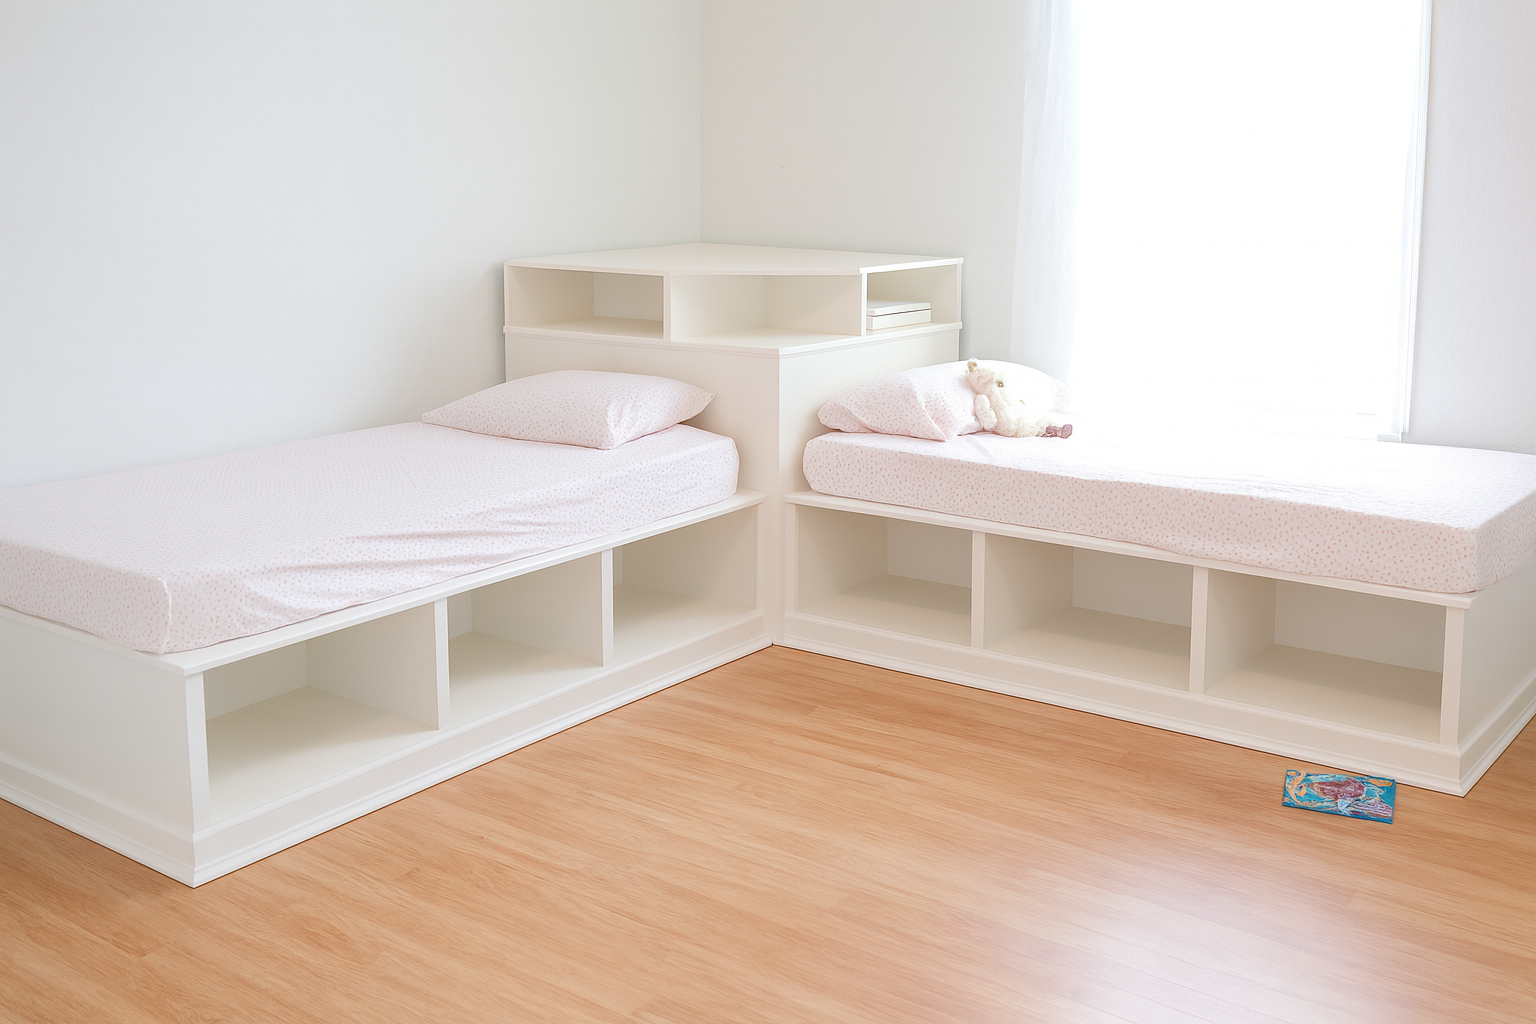
Shared rooms can be more creative than the awkward bunk bed or loft bed situation. If you have the space, twin corner beds might be the perfect solution. It acts as a headboard for both beds and contain storage, and a surface - much like a built-in table or nightstand for resting a book or water bottle. This is a space saving design compared with twin beds placed headboard to the wall - consuming the entire room! This solution can work even in a room with limited space. This is a DIY project from We also have plans for twin storage or captains beds here, this is the perfect pairing with platform beds or beds with drawers, so you can build the entire set!
Specifications
| Project type | Beds and Bed Frames |
|---|---|
| Room | Bedroom |
| Style | Children's and Kid's Room Furniture and Toy Plans |
| Difficulty | Intermediate |
| Estimated cost | $100-$150 |
Dimensions
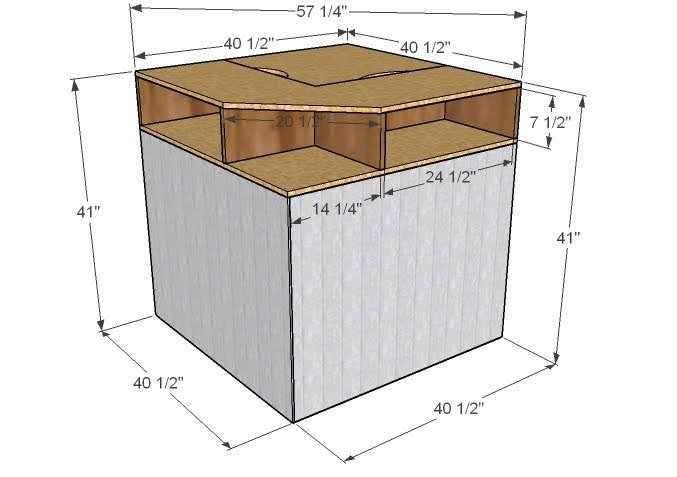
Use the size-specific shopping and cut lists below.
Shopping List
- 7 – 2×2, 8′ Long, Furring Strips
- 2 – 32″ High x 40 1/2″ Long (or longer) Wainscoting Panels OR 1 sheet of 1/4″ plywood or MDF
- 2 – 1×8 Boards, 8′ Length (Pine is cheapest)
- 1 – sheet of 3/4″ plywood or MDF
- Edge Banding (if you are using plywood and staining the bed)
- Wood Filler
- Wood Glue
Cut List
CUT LIST FOR THE BOX
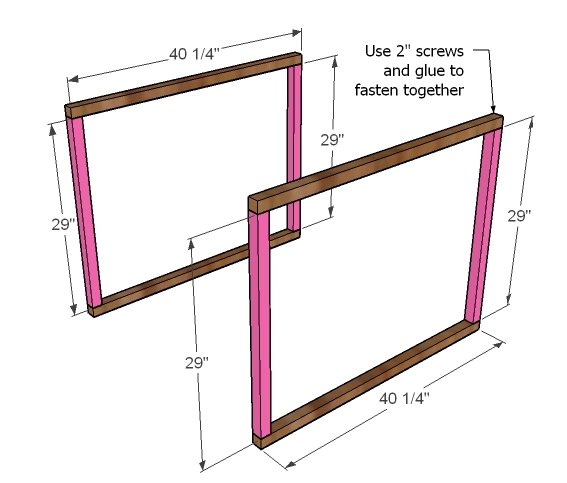
- 4 – 2×2 @ 40 1/4″ (Tops and Bottoms Box Ends)
- 4 – 2×2 @ 29″ (Legs for the Box Ends)
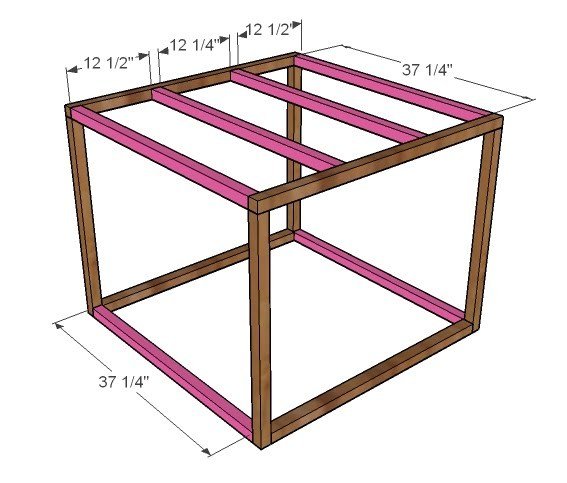
- 6 – 2×2 @ 37 1/4″ (Supports)
- 2 – 32″ High Wainscoting @ 40 1/2″ (Panels)
CUT LIST FOR THE TOP UNIT
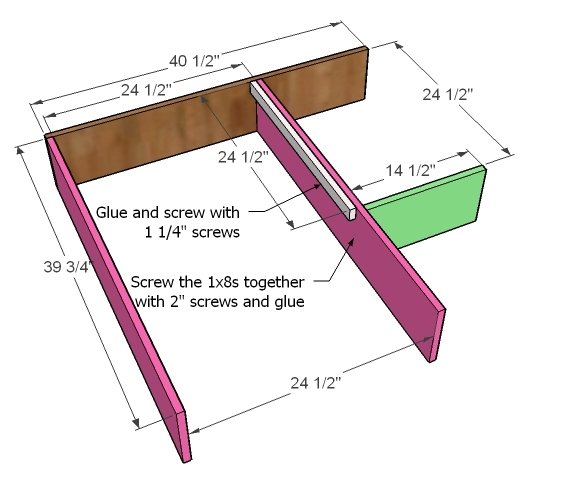
- 1 – 1×8 @ 40 1/2″ (End)
- 2 – 1×8 @ 39 3/4″ (Long Dividers)
- 1 – 1×8 @ 14 1/2″ (Short Divider)
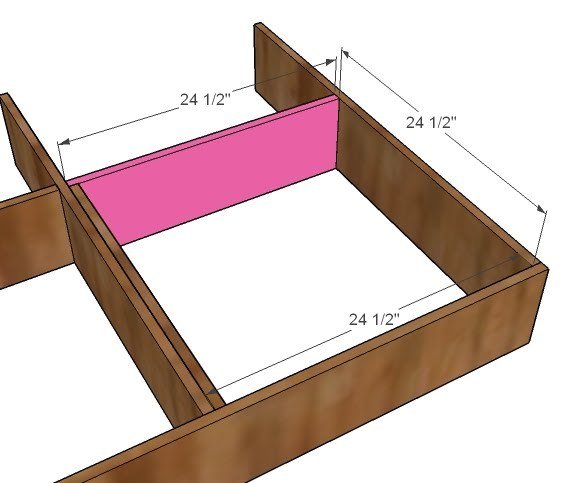
- 1 – 1×8 @ 24 1/2″ (Final Divider)
- 1 -1×2 @ 24 1/2″ (Cleat for Support Lid, 1st one installed)
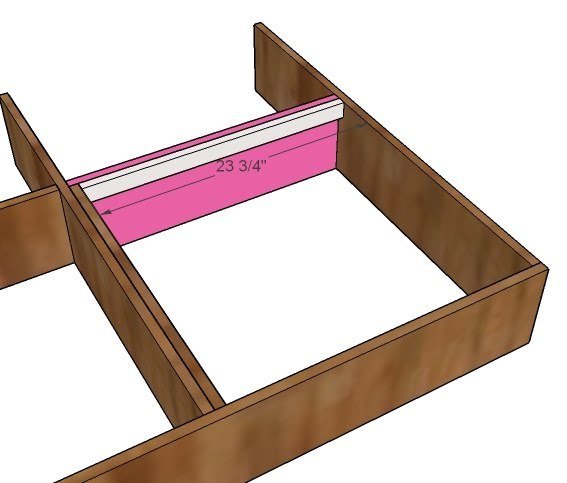
- 1 – 1×2 @ 23 3/4″ (Cleat for Support Lid, 2nd one installed)
Tools
- measuring tape
- square
- pencil
- safety glasses
- hearing protection
- drill
- circular saw
- nailer
- level
Step-by-step Instructions
Step 1
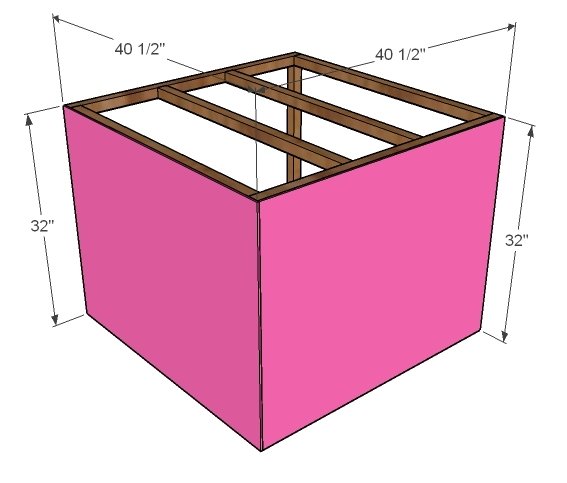
BOX ENDS Build the box ends as shown above using 2″ screws and glue.
Step 2
SUPPORTS FOR THE BOX Add the box supports using 2″ screws and DO NOT GLUE. Make sure your project is square at this point. To relocate the bed, you can simply unscrew, disassemble, and then reassemble.
Step 3
WAINSCOTING Measure and cut your wainscoting to fit one side of the box. Then add the second piece. Attach with 1 1/4″ screws and DO NOT GLUE on all four edges. You want these pieces removeable so that you can move it in and out of a room. NOTE: If your doorways are larger than 32″ you can move this unit without disassembling, but just in case you move to a different home, I would still not glue this step.
Step 4
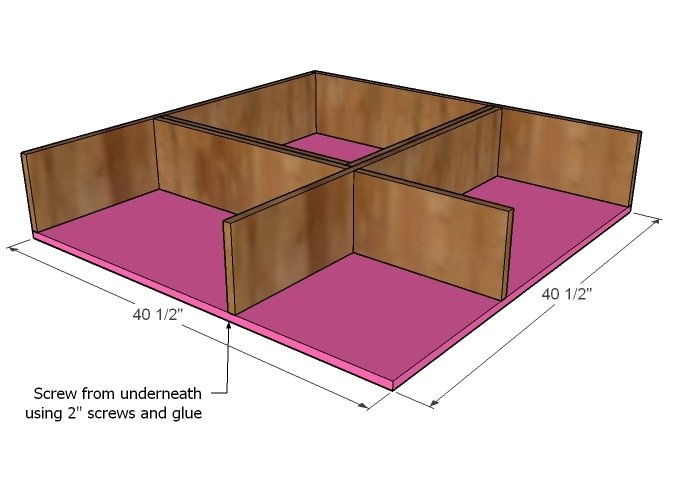
DIVIDERS Use 2″ screws and glue to build your dividers as shown above. Then add the 1×2 cleat (shown above in white) with 1 1/4″ screws and glue.
Step 5
Step 6
FINAL CLEAT Add the final cleat, using 1 1/4″ screws and glue. Then also attach from the outside of the project using 2″ screws and glue.
Step 7
BOTTOM Cut your bottom plywood and attach it to the bottom of your unit (cleats are on the top) as shown above. Use 2″ screws and glue. This is just like attaching a back to a bookcase.
Step 8
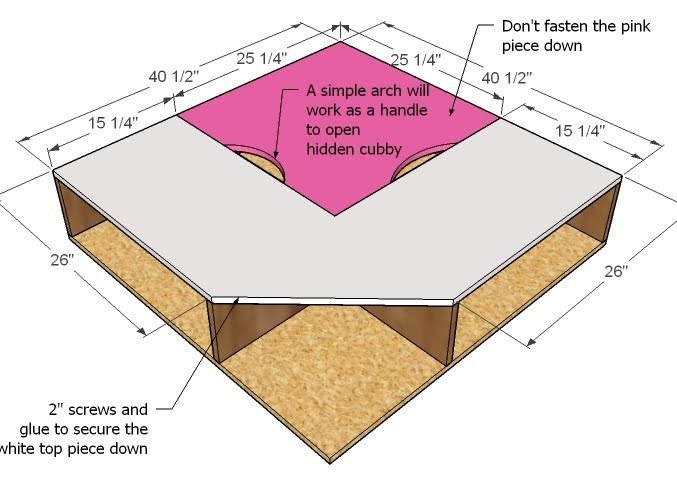
TOP Cut your top, as directed above. Attach only the white piece to the top of your project. The pink piece is removable for storage (might be scary in a teens room
Step 9
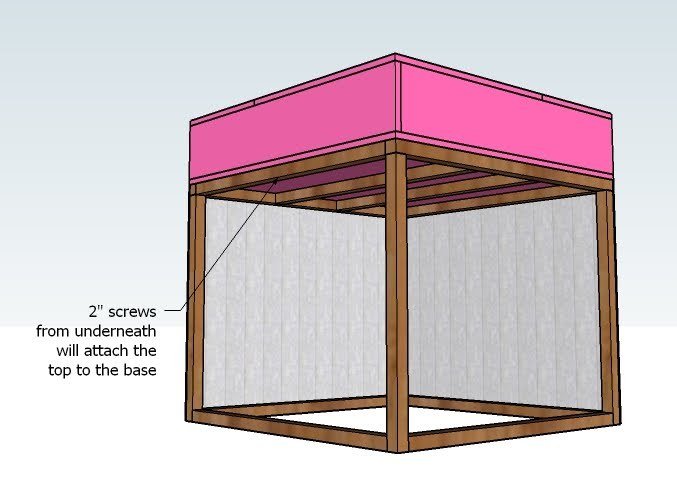
ASSEMBLY Attach from underneath the top unit to the base unit using 2″ screws. Don’t glue so that removal is easy to do. You may also wish at this point to drill holes in certain point to create a “Smart” storage unit. You could hide cords in the “secret compartment” and keep cell phone chargers, laptop cords, or cords for media units tucked away neatly.
Finishing
Sand all surfaces, starting with a medium grit and finishing with fine. Wipe off the dust, fill any holes or gaps with wood filler, and sand smooth once dry. Apply primer if you're painting, then finish with your choice of paint or stain and seal with a durable clear topcoat. For outdoor projects, use exterior-rated primer, paint or stain, and sealer so the piece stands up to the weather.
Source (temporary): https://www.ana-white.com/woodworking-projects/twin-corner-beds-system