Twin Pioneer Bed
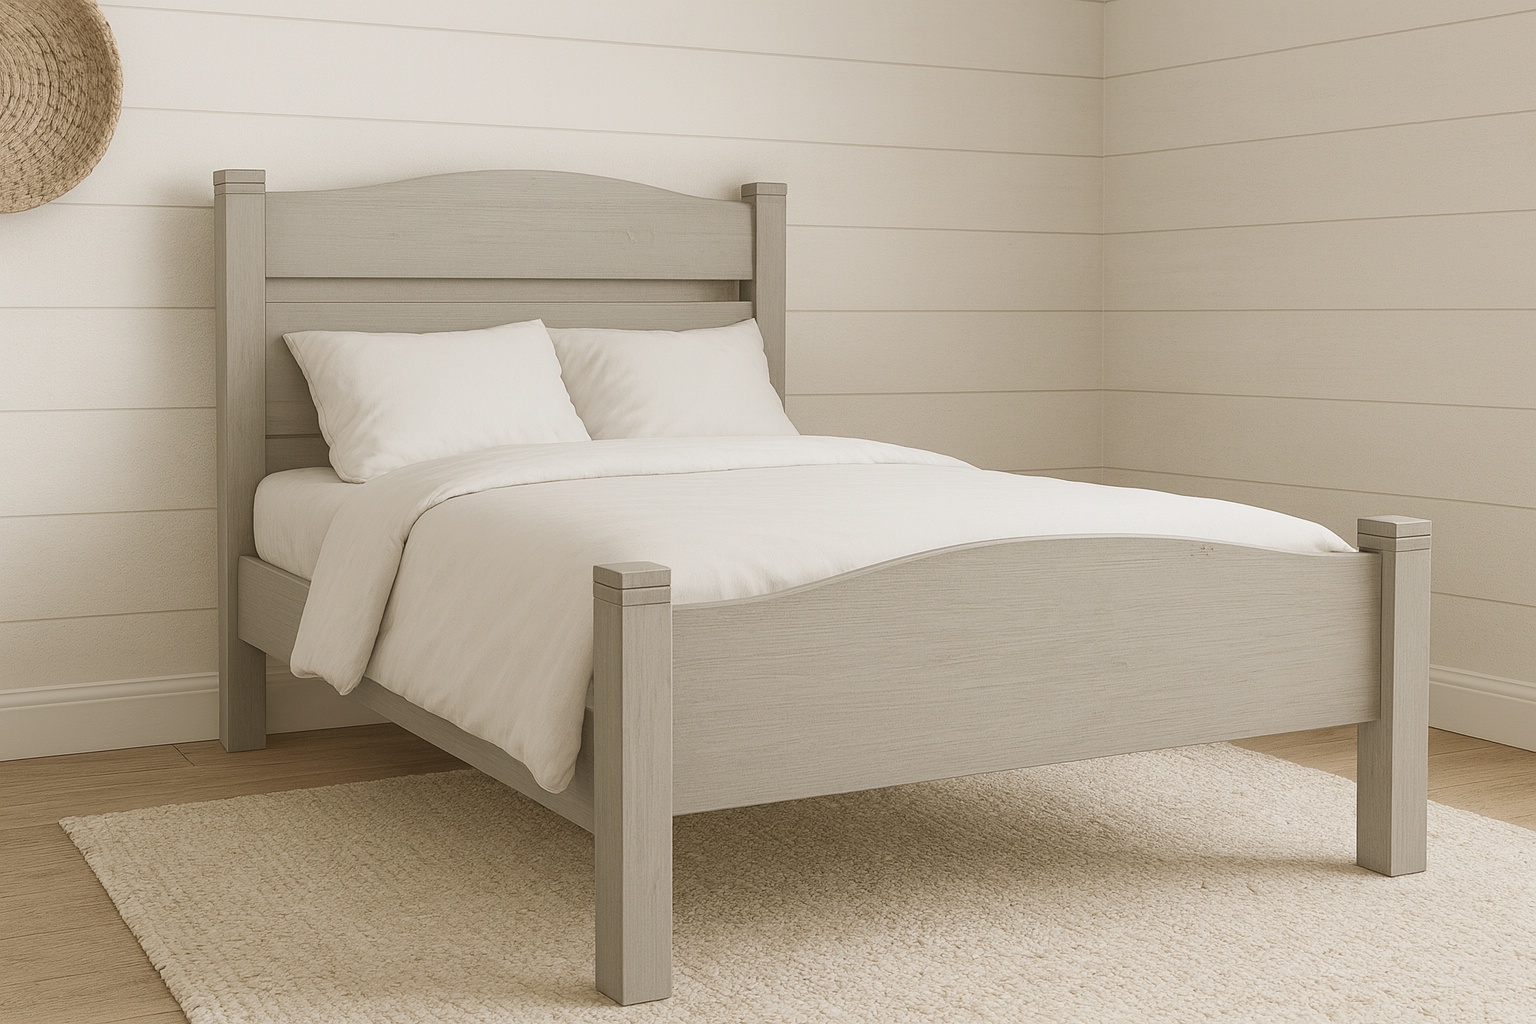
Build your own stylish and sturdy twin bed with this free farmhouse bed plan, perfect for kids’ rooms or guest spaces. Featuring clean lines, a curved headboard and footboard, and a timeless silhouette, this DIY bed design fits seamlessly into any neutral, modern farmhouse decor. The easy-to-follow instructions make it beginner-friendly and budget-conscious—ideal for anyone looking to create custom furniture at home. Download the and start building today!
Specifications
| Project type | Beds and Bed Frames |
|---|---|
| Room | Bedroom |
| Style | Primitive or Early American Style Furniture Plans |
| Difficulty | Intermediate |
| Estimated cost | $50 - $100 |
Dimensions
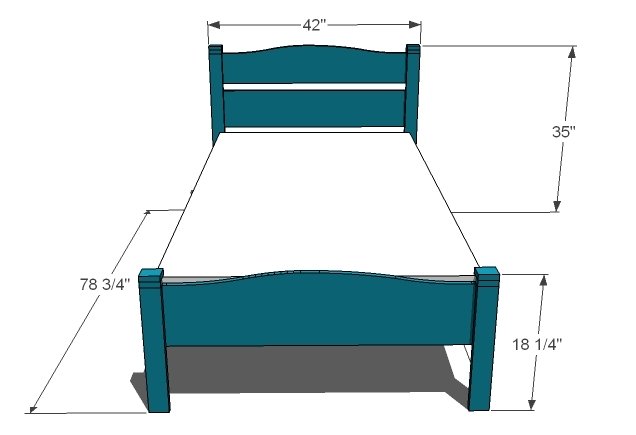
Use the size-specific shopping and cut lists below.
Shopping List
- 2 – 1×6, 8′ Long
- 1 – 1×8, 8′ Long
- 1 – 1×10, 4′ Long
- 2 – 1×3 (DOES NOT INCLUDE OPTIONAL SLATS)
- 3 – 1×2 2″ Finish Nails
- 1 1/4″ Brad Nails
- 1 1/4″ Screws
- Wood Glue
Cut List
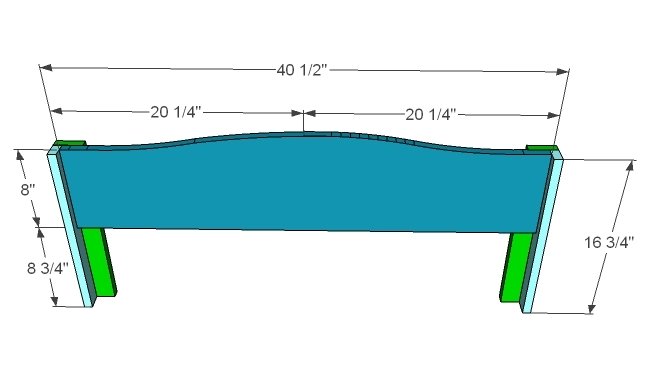
- 2 – 1×8 @ 40 1/2″ (Headboard Rails)
- 2 – 1×3 @ 33 1/2″ (Headboard Front Legs)
- 2 – 1×2 @ 33 1/2″ (Headboard Side Legs)
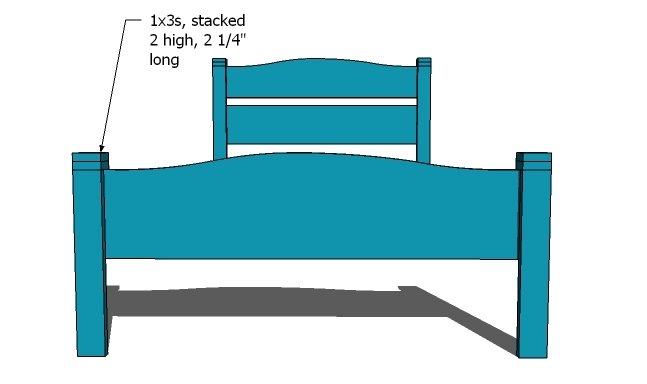
- 8 – 1×2 @ 2 1/4″ (Headboard and Footboard top trim)
- 1 – 1×10 @ 40 1/2″ (Footboard Panel)
- 2 – 1×3 @ 16 3/4″ (Footboard Front Legs)
- 2 – 1×2 @ 16 3/4″ (Footboard Side Legs)
- 2 – 1×6 @ 75″ (Siderails)
- 2 – 1×2 @ 75″ (Cleats)
- 15 – 1×3 @ 39″ (Optional Slats)
Tools
- measuring tape
- square
- pencil
- safety glasses
- hearing protection
- drill
- jigsaw
- nailer
- sander
- level
- countersink drill bit
Step-by-step Instructions
Headboard
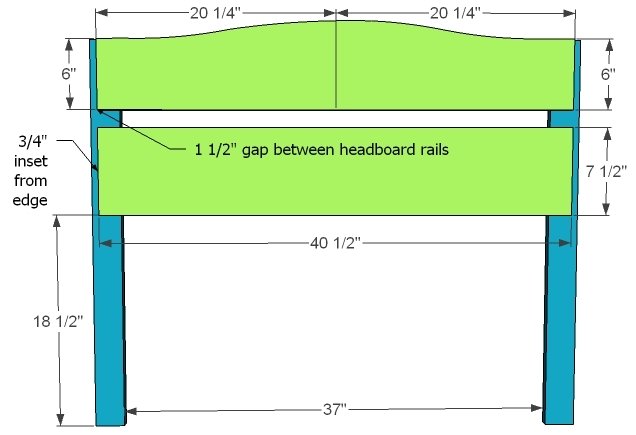
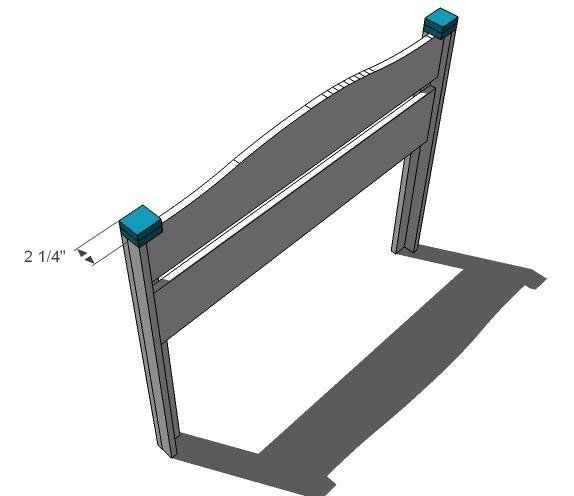
From one of the 1x8s, mark out a gentle curved top. Carefully cut the top as shown in the diagram with a jigsaw. Sand the edge smooth, starting with coarse sandpaper, and working to fine sandpaper. After you have cut out and sanded the top of the headboard, lay the two headboard slats (one is cut and one is not) on top of the 1×3 legs, leaving 3/4″ on the outside of the legs as shown in the diagram. TIP: Use the 1×2 leg board to guide you. Nail on with 1 1/4″ nails and glue. You can also use 1 1/4″ screws and glue.
Headboard Sides
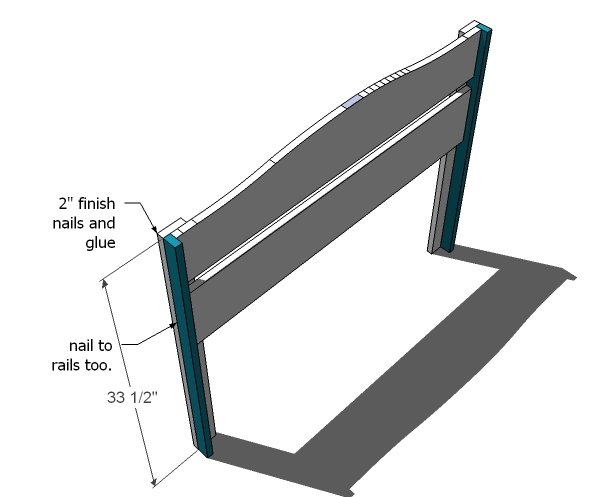
Attach the 1×2 legs to the sides of the headboard as shown in the diagram with 2″ nails and glue.
Headboard Top Trim
Nail on each piece separately, with 2″ finish nails and gl
Footboard
Build the footboard exactly as you built the headboard. Note that the footboard is a 1×10 instead of 2 1x8s.
Step 5
Siderails and Cleats
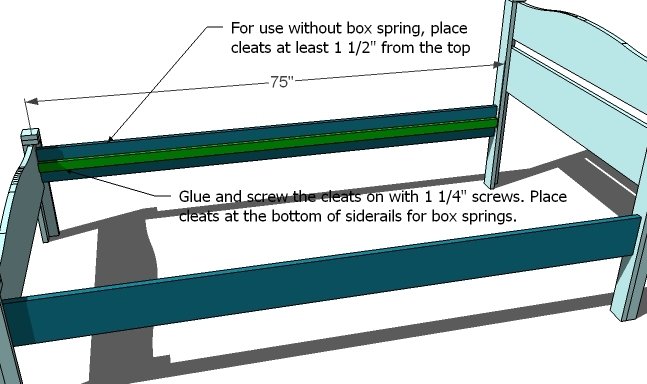
Use 1 1/4″ screws and glue to attach the cleats to the siderails. Position the cleats at the base for boxspring installation, or 1 1/2″ from the top for slat installation. Attach the siderails to the headboard and footboard with 2″ screws. You can also purchase metal brackets to make assembly / disassembly easier.
Slats
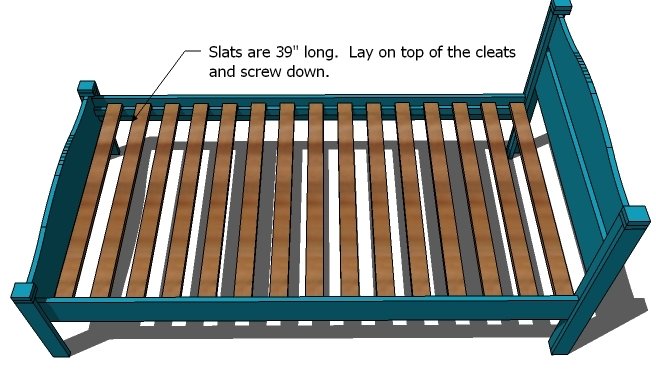
If you are NOT using a boxspring, lay 15 1×3 slats, spaced 2″ apart, on top of the cleats. Screw down with 1 1/4″ screws. Do not glue.
Finishing
Sand all surfaces, starting with a medium grit and finishing with fine. Wipe off the dust, fill any holes or gaps with wood filler, and sand smooth once dry. Apply primer if you're painting, then finish with your choice of paint or stain and seal with a durable clear topcoat. For outdoor projects, use exterior-rated primer, paint or stain, and sealer so the piece stands up to the weather.
Source (temporary): https://www.ana-white.com/woodworking-projects/twin-pioneer-bed-free-plans