Two Month Calendar Shelf with Key Hooks and Mail Organization
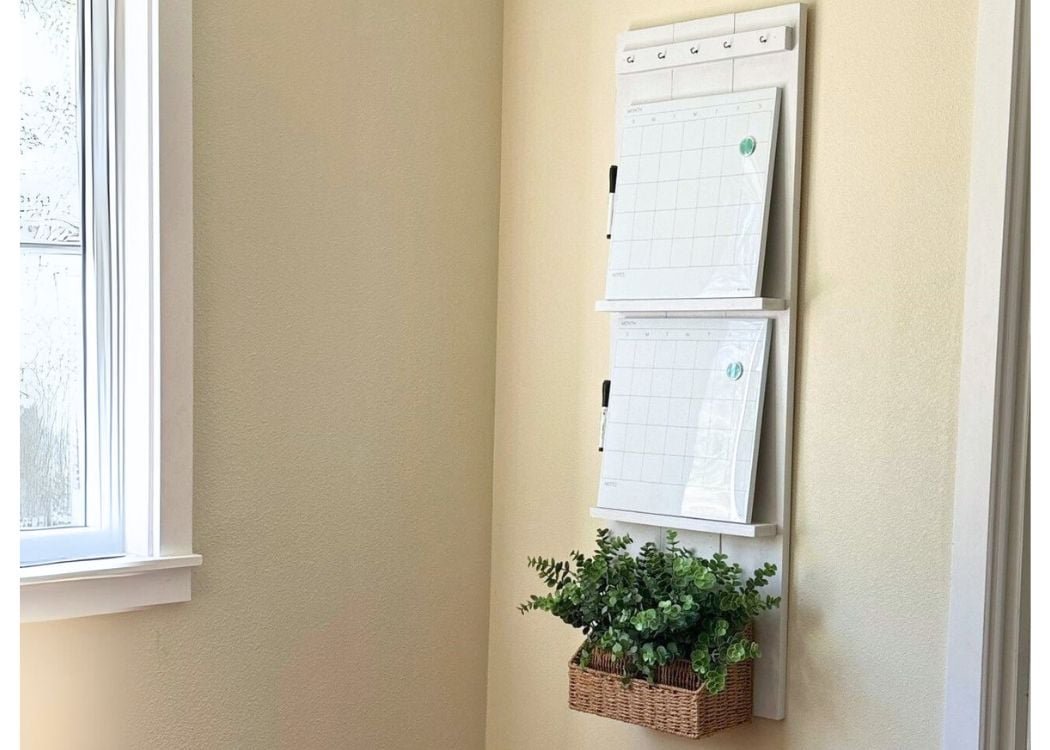
Keep your schedule organized with this rotating 2 calendar wall system. This easy build dry erase calendar holder is a must build for busy families! We love that it adds a wood and decor element for your organizing solutions. The vertical format takes up minimal space. Key hooks keep your keys within easy reach. Add an organizing basket to the bottom to keep mail where you need it! with detailed diagram, shopping and cut list, all 1x boards, just cut a nail together, this is a great beginner project! Fits standard sized 14" x 14" dry erase calendars.
Specifications
| Project type | Home Decor |
|---|---|
| Room | Entryway and Mudroom |
| Difficulty | Starter Projects |
| Estimated cost | $20 - $50 |
Dimensions
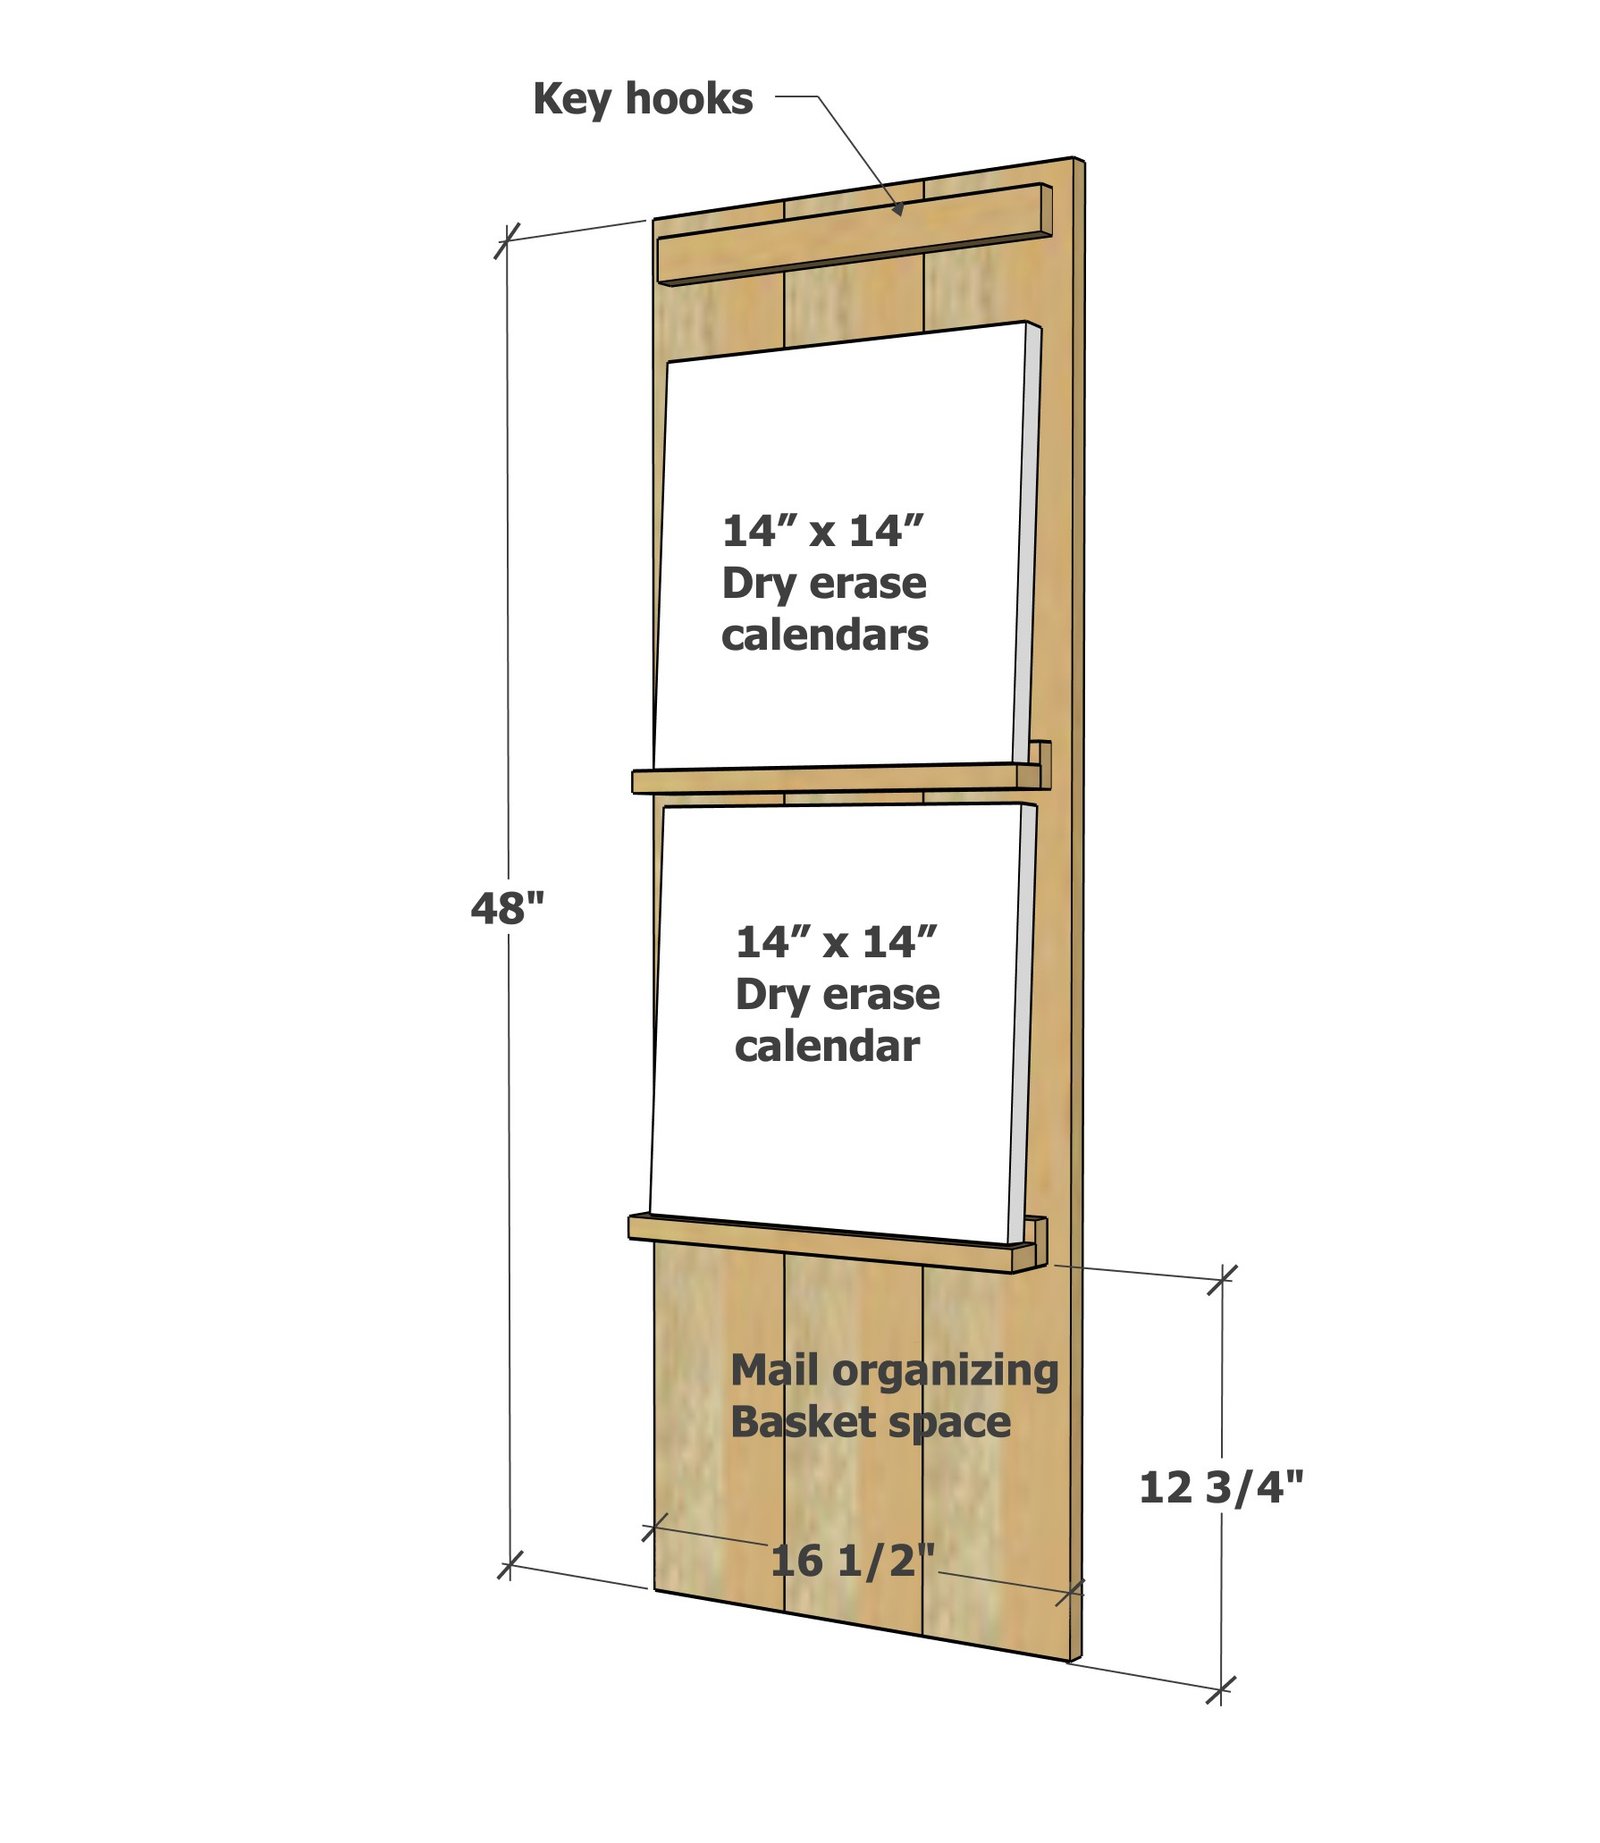
Use the size-specific shopping and cut lists below.
Shopping List
- 2 - 14" x 14" dry erase calendars ( these are the ones I used )
- 1 - mail basket organizer ( here is what I used )
- 12 board feet of 1x6 (can be three 4' long boards or an 8' and a 4')
- 1 - 1x2 @ 8 feet long
- 1-1/4" brad nails
- wood glue
- Cup Hooks
- Heavy Duty Picture Hanger
- Paint or Stain
- 120 grit sandpaper
Cut List
- 3 - 1x6 @48"
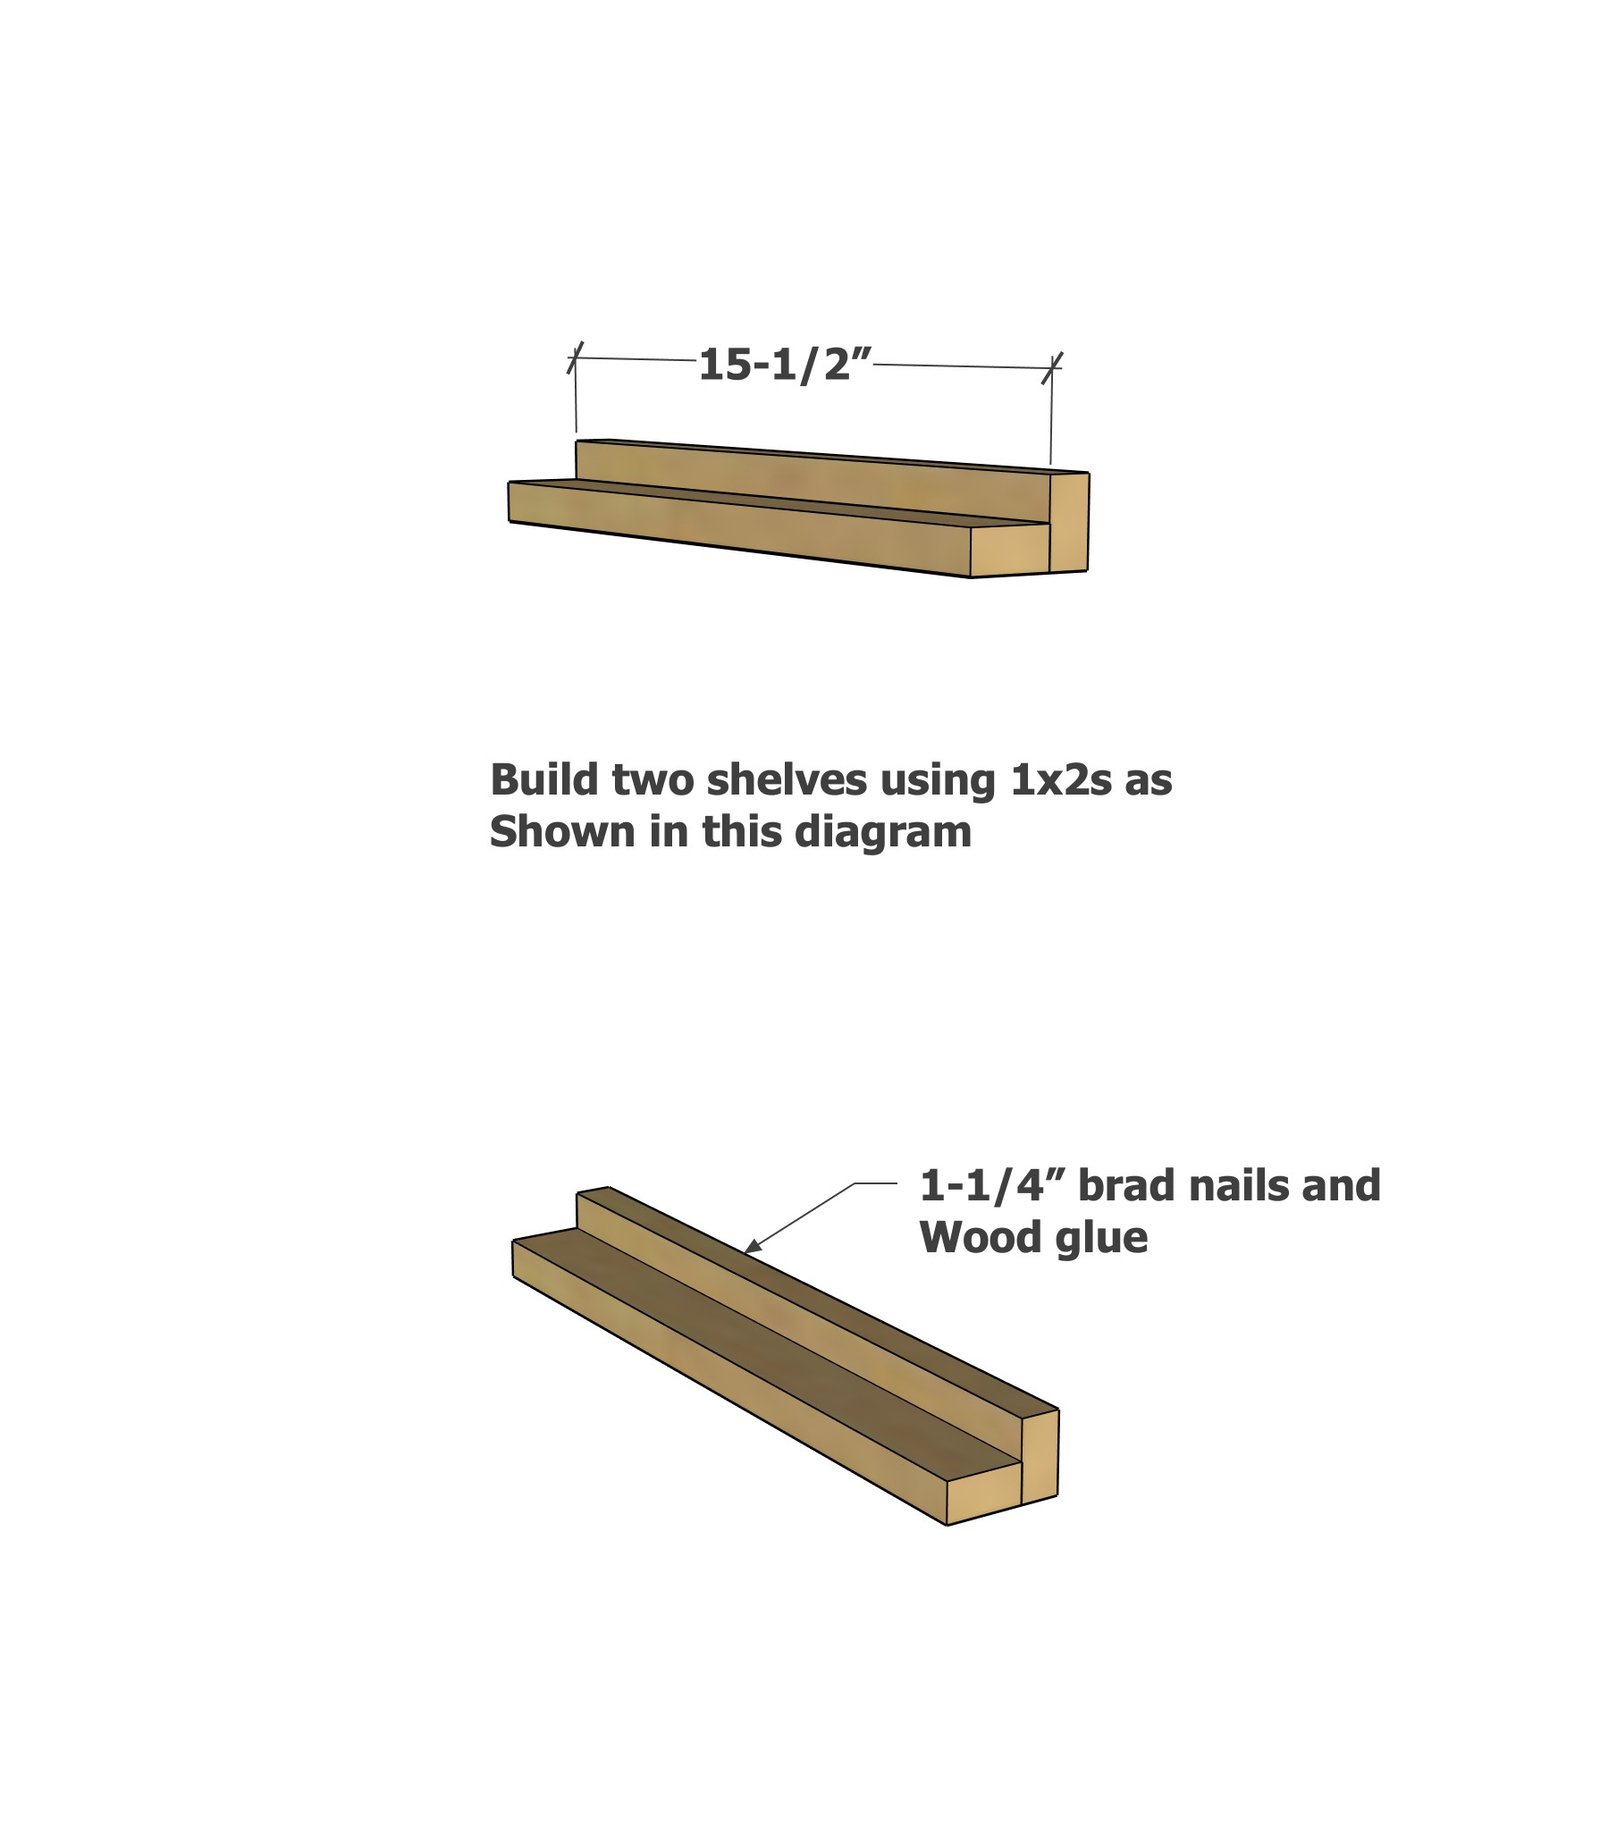
- 5 - 1x2 @ 15.5"
Tools
- measuring tape
- square
- pencil
- safety glasses
- hearing protection
- drill
- circular saw
- nailer
- sander
Step-by-step Instructions
Step 1
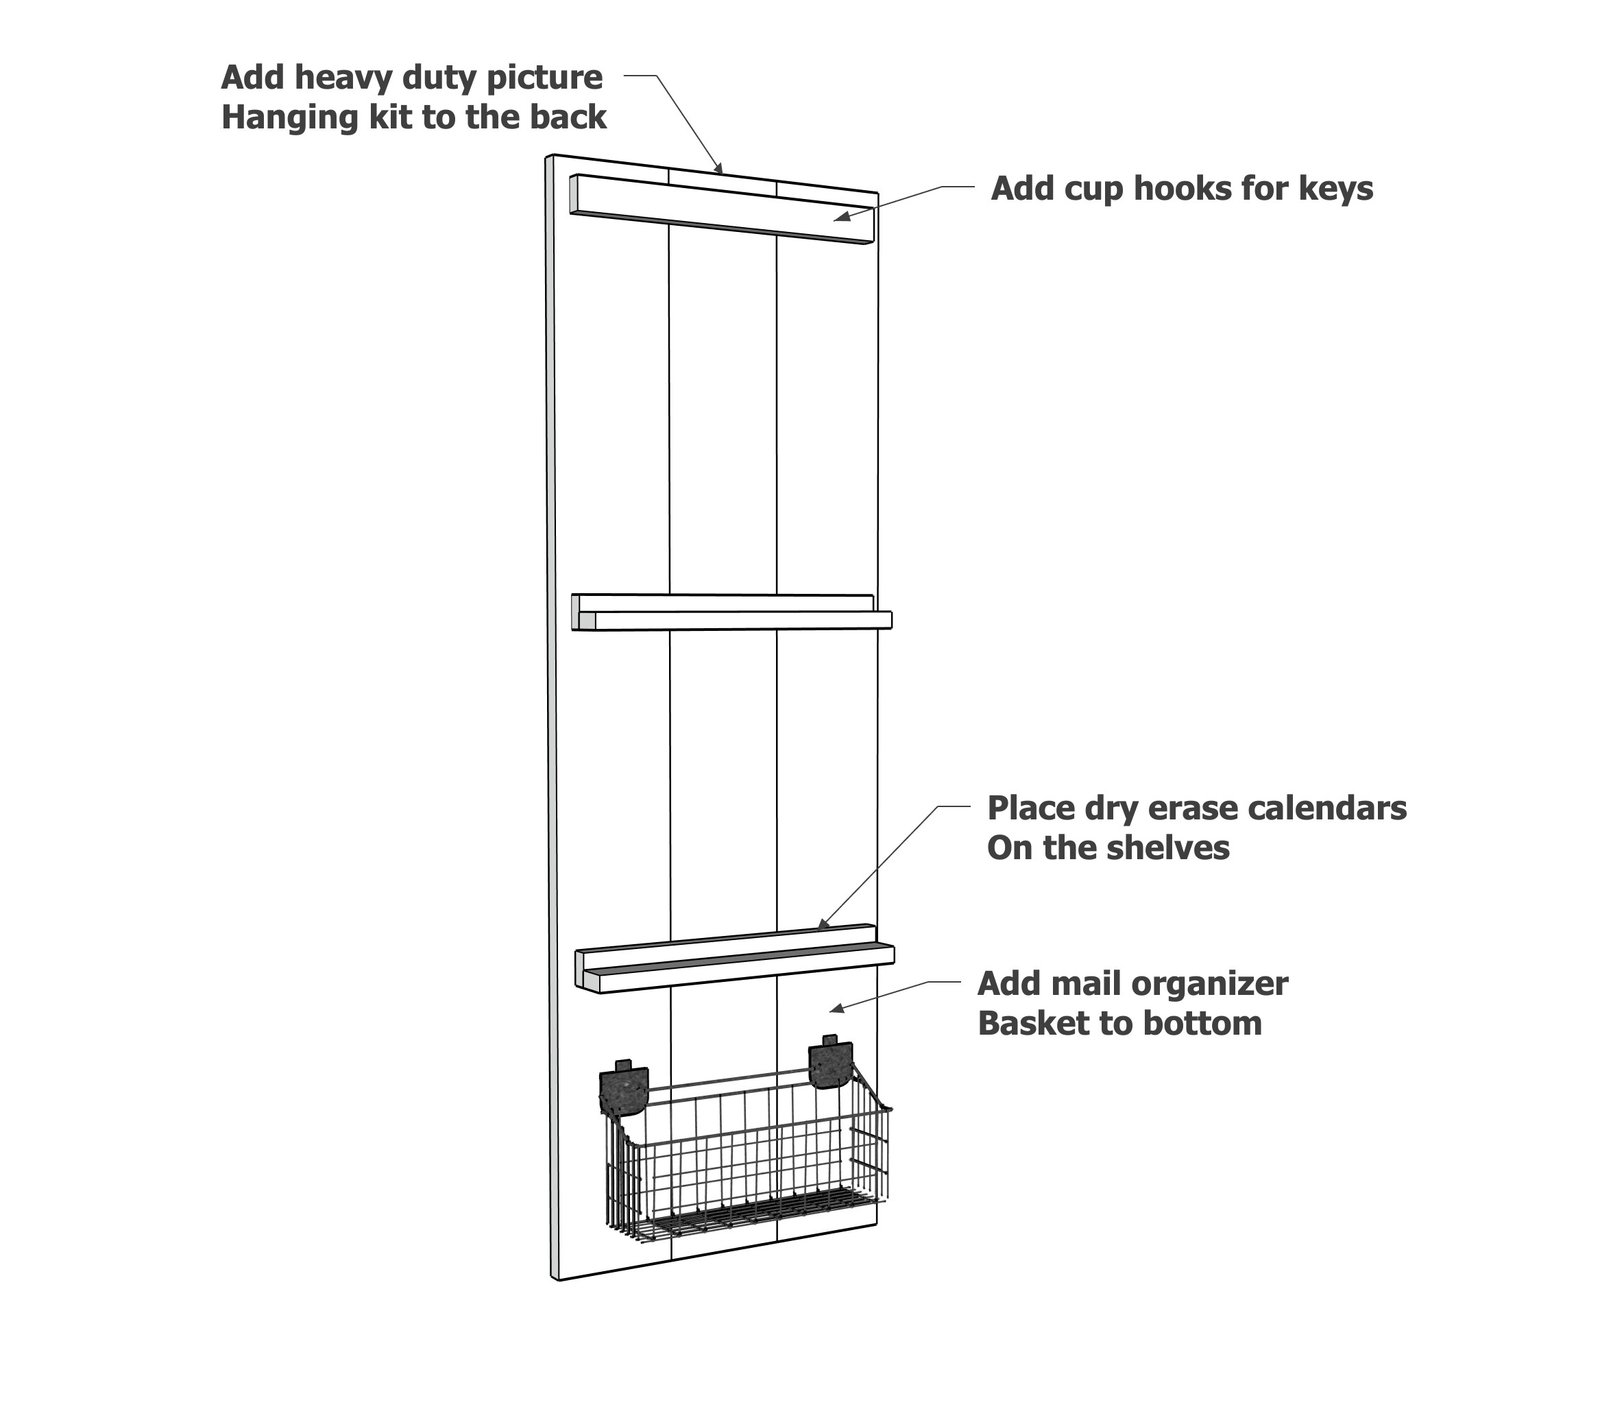
Attach 1x2s together to make ledge shelves, build two.
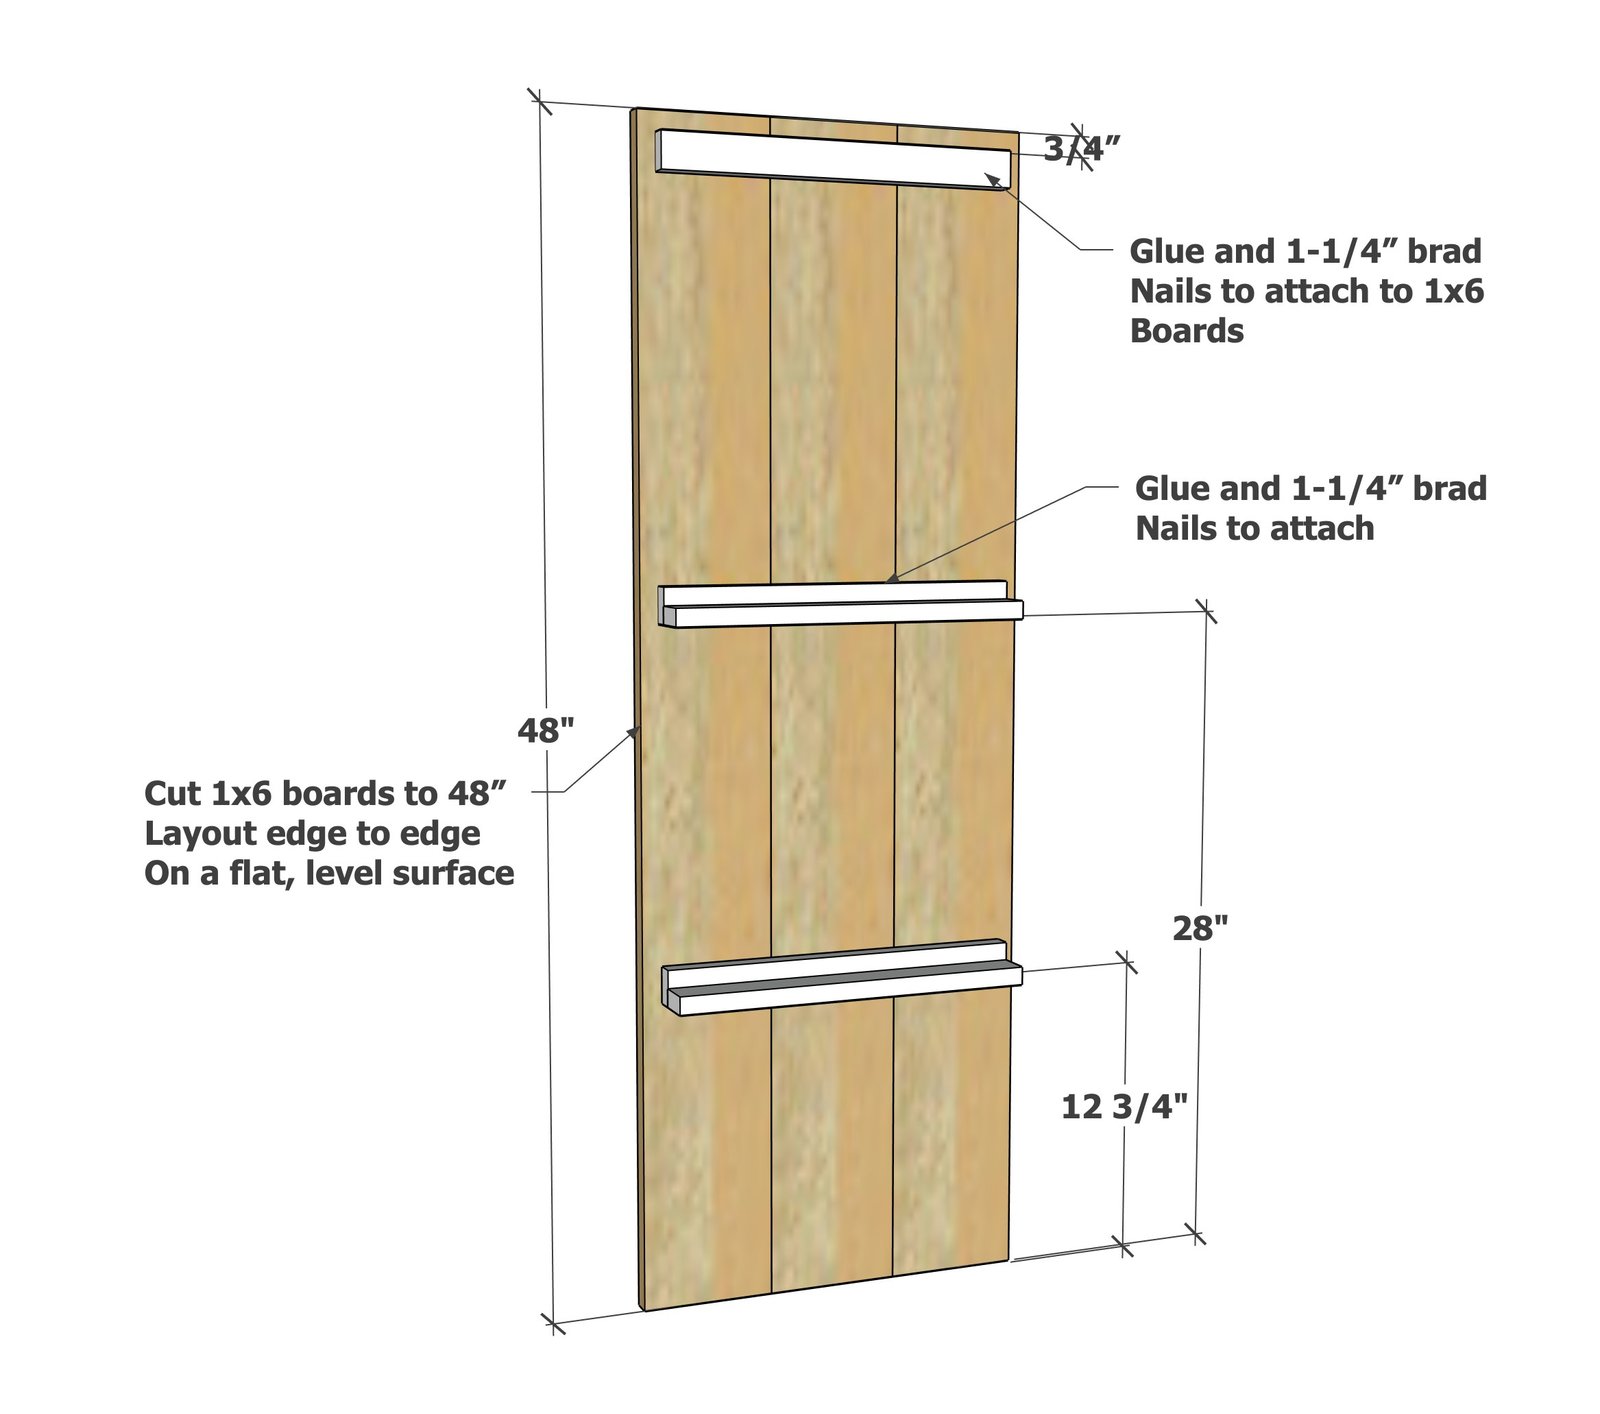
Layout the 1x6 boards. Place the 1x2 shelves and the key hook base on the 1x6s
Attach with 1-1/4" brad nails and wood glue.
Add the organizing basket and attach the heavy duty hanging kit.
Hang to a stud in the wall or with a 30 pound hanger.
Finishing
Sand all surfaces, starting with a medium grit and finishing with fine. Wipe off the dust, fill any holes or gaps with wood filler, and sand smooth once dry. Apply primer if you're painting, then finish with your choice of paint or stain and seal with a durable clear topcoat. For outdoor projects, use exterior-rated primer, paint or stain, and sealer so the piece stands up to the weather.
Source (temporary): https://www.ana-white.com/woodworking-projects/two-month-calendar-shelf-key-hooks-and-mail-organization