U Shaped Table or Desk for School
to build your own U Shaped Table or desk, sometimes called a horseshoe table, designed to work with up to four students at once. This desk is perfect for homeschool, work groups, kindergartens, preschools, or anywhere multiple students can work, with the teacher in the middle. The use a 2x4 base, with a 1x10 top. It is easy to build with basic lumber, you can upgrade the construction using pocket holes if you wish. Plans include user photos, step by step diagrams, detailed shopping list and a cut list - everything you need to build your own U shaped table or desk.
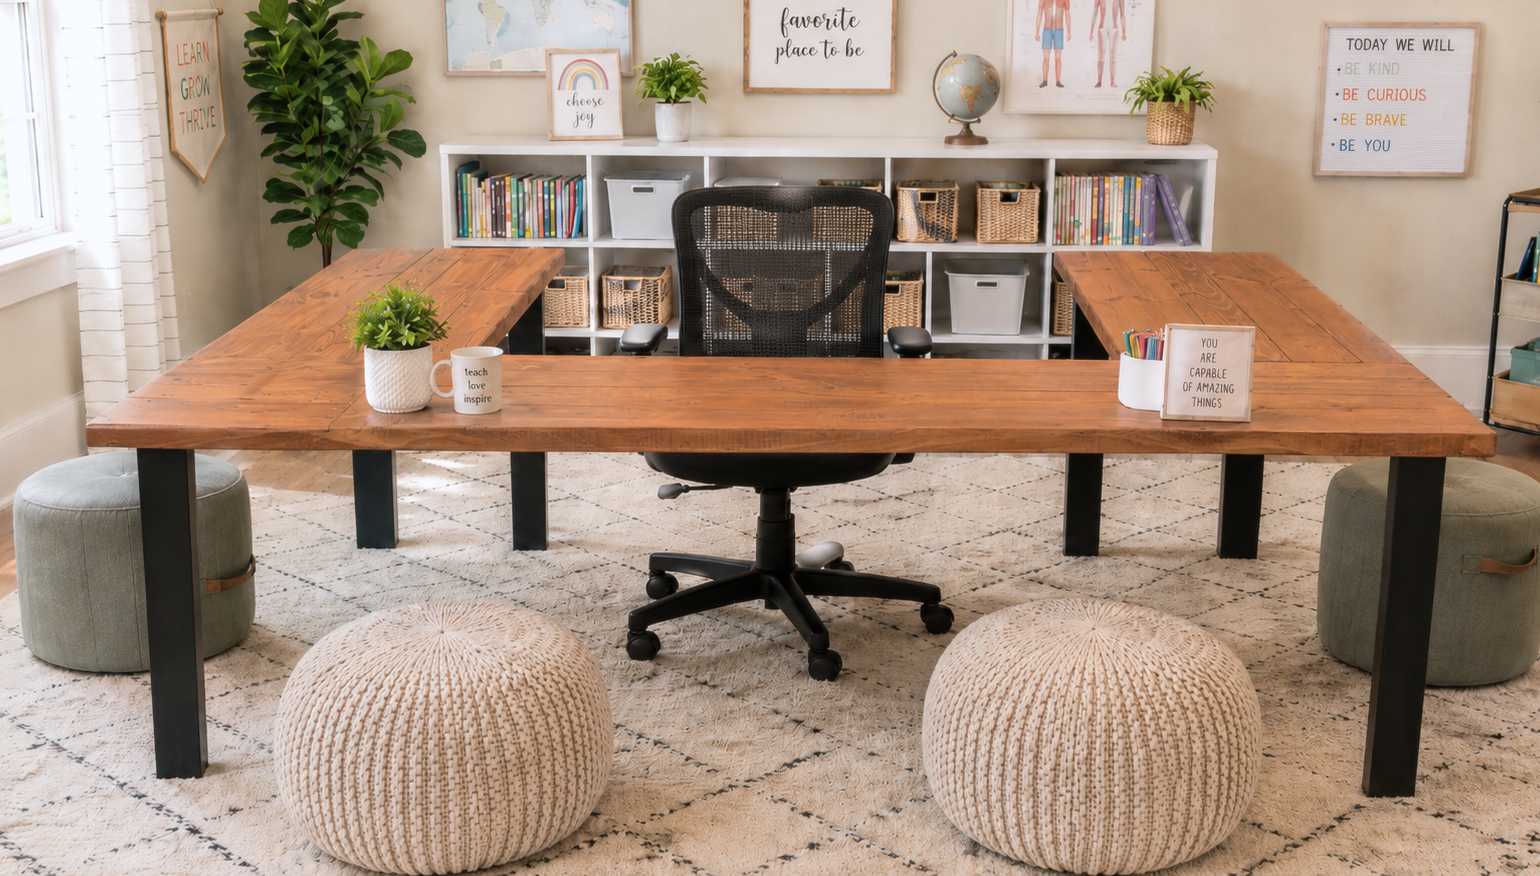
Specifications
| Project type | Desk, Desk Systems and Project Table Plans |
|---|---|
| Room | office |
| Difficulty | Intermediate |
Dimensions
Use the size-specific shopping and cut lists below.
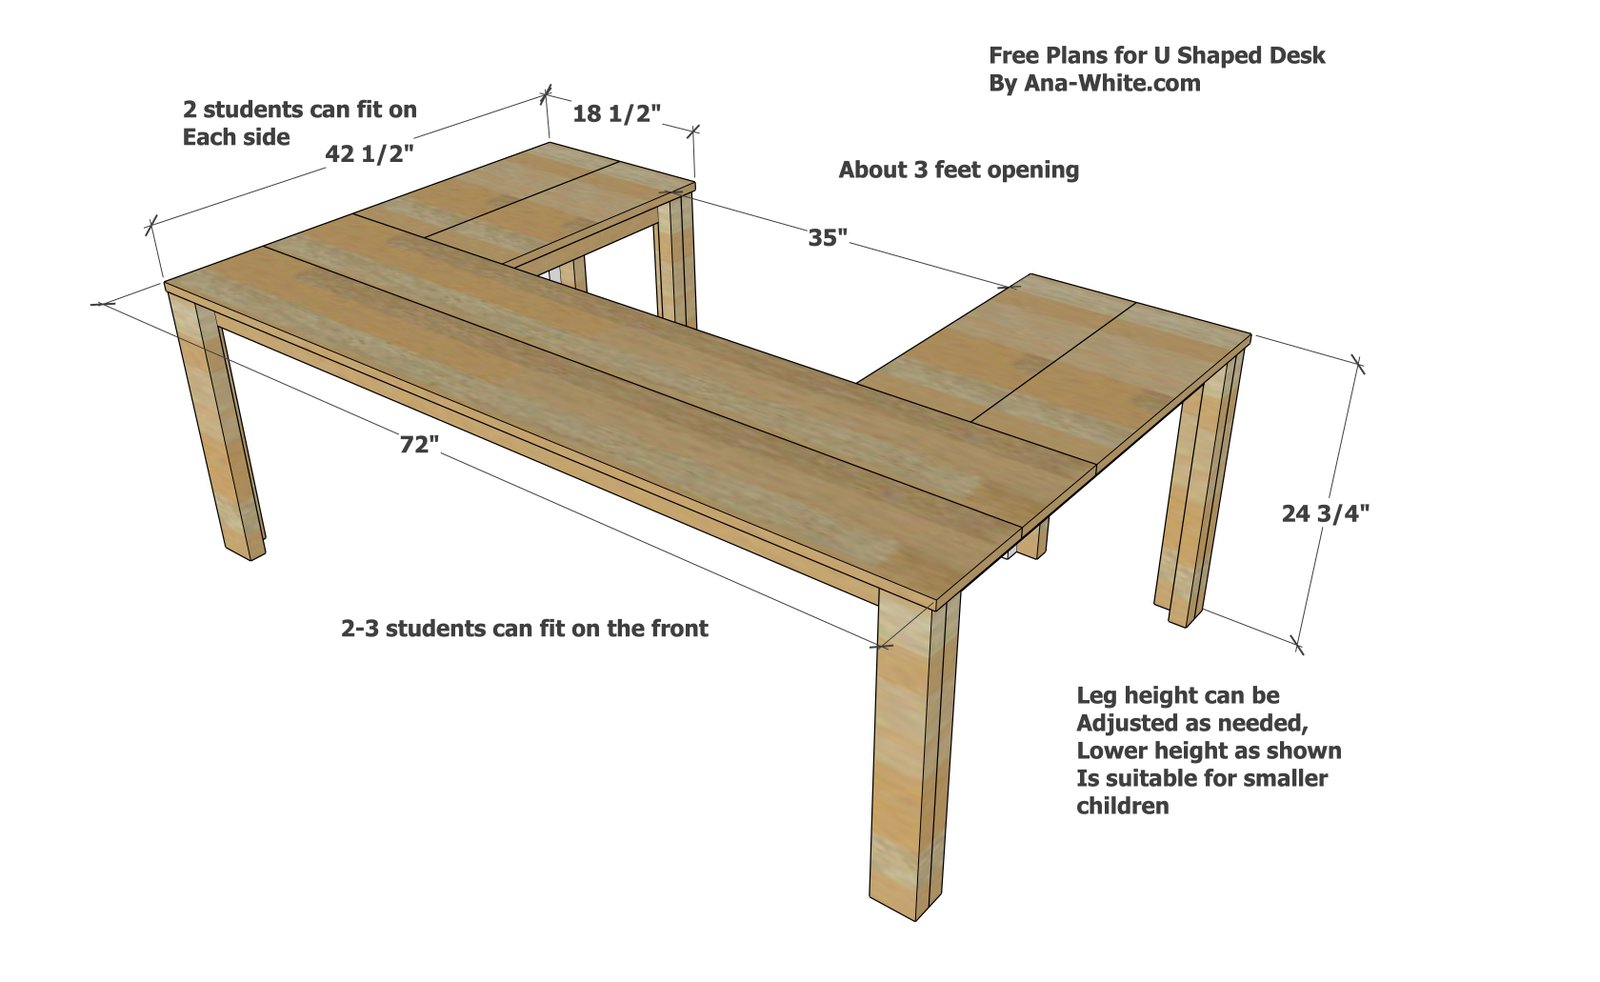
Shopping List
- 4 - 1x3 @ 8 feet long
- 1 - 2x2 @ 8 feet long
- 1 - 2x4 @ 10 feet long
- 1 - 2x4 @ 8 feet long
- 2 - 1x10 @ 6 feet long
- 1 - 1x10 @ 8 feet long
- 1 - 1/4" brad nails
- 2" self tapping star bit wood screws (about 50)
- wood glue
- wood filler
- 120 grit sand paper
- primer and paint or wood stain
- polyurethane for desk top is recommended for durability
Cut List
- 5 - 1x3 @ 38-1/2"
- 2 - 1x3 @ 13-1/2"
- 1 - 1x3 @ 68-1/2"
- 6 - 2x4 @ 24"
- 6 - 2x2 @ 24"
- 3 - 2x4 @ 13-1/2"
- 2 - 1x10 @ 72"
- 4 - 1x10 @ 23-7/8"
Tools
- measuring tape
- square
- pencil
- safety glasses
- drill
- compound miter saw
- nailer
- sander
Step-by-step Instructions
Step 1
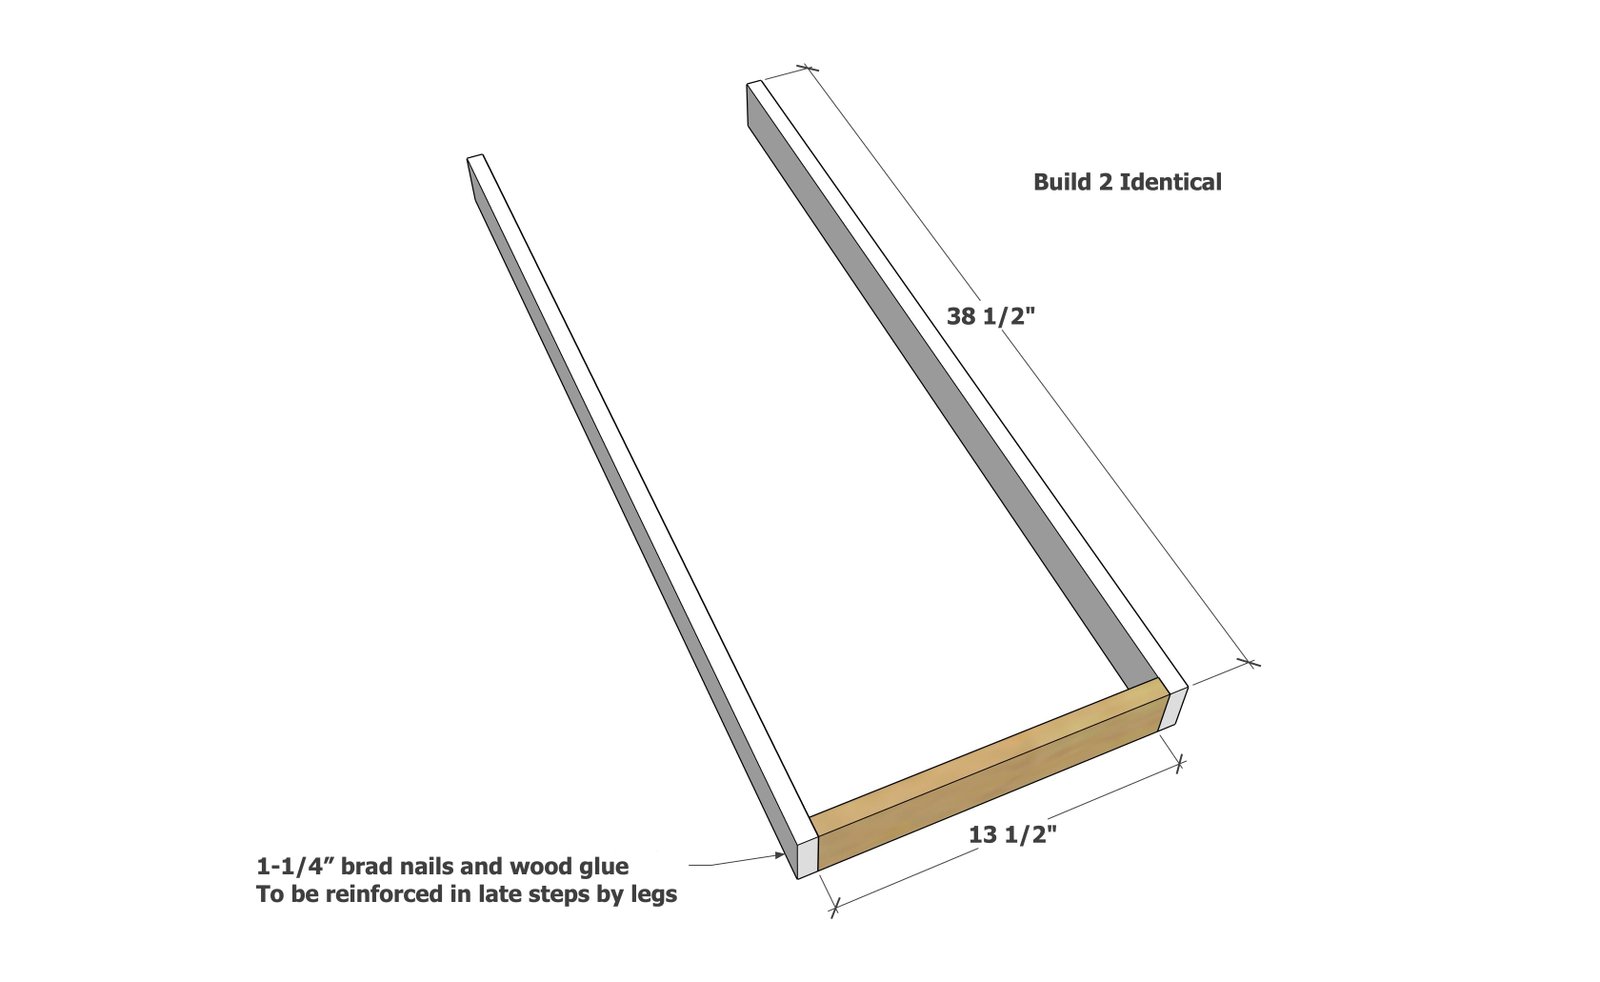
Build two frames as shown. For greater strength, predrill and use 2" screws.
Step 2
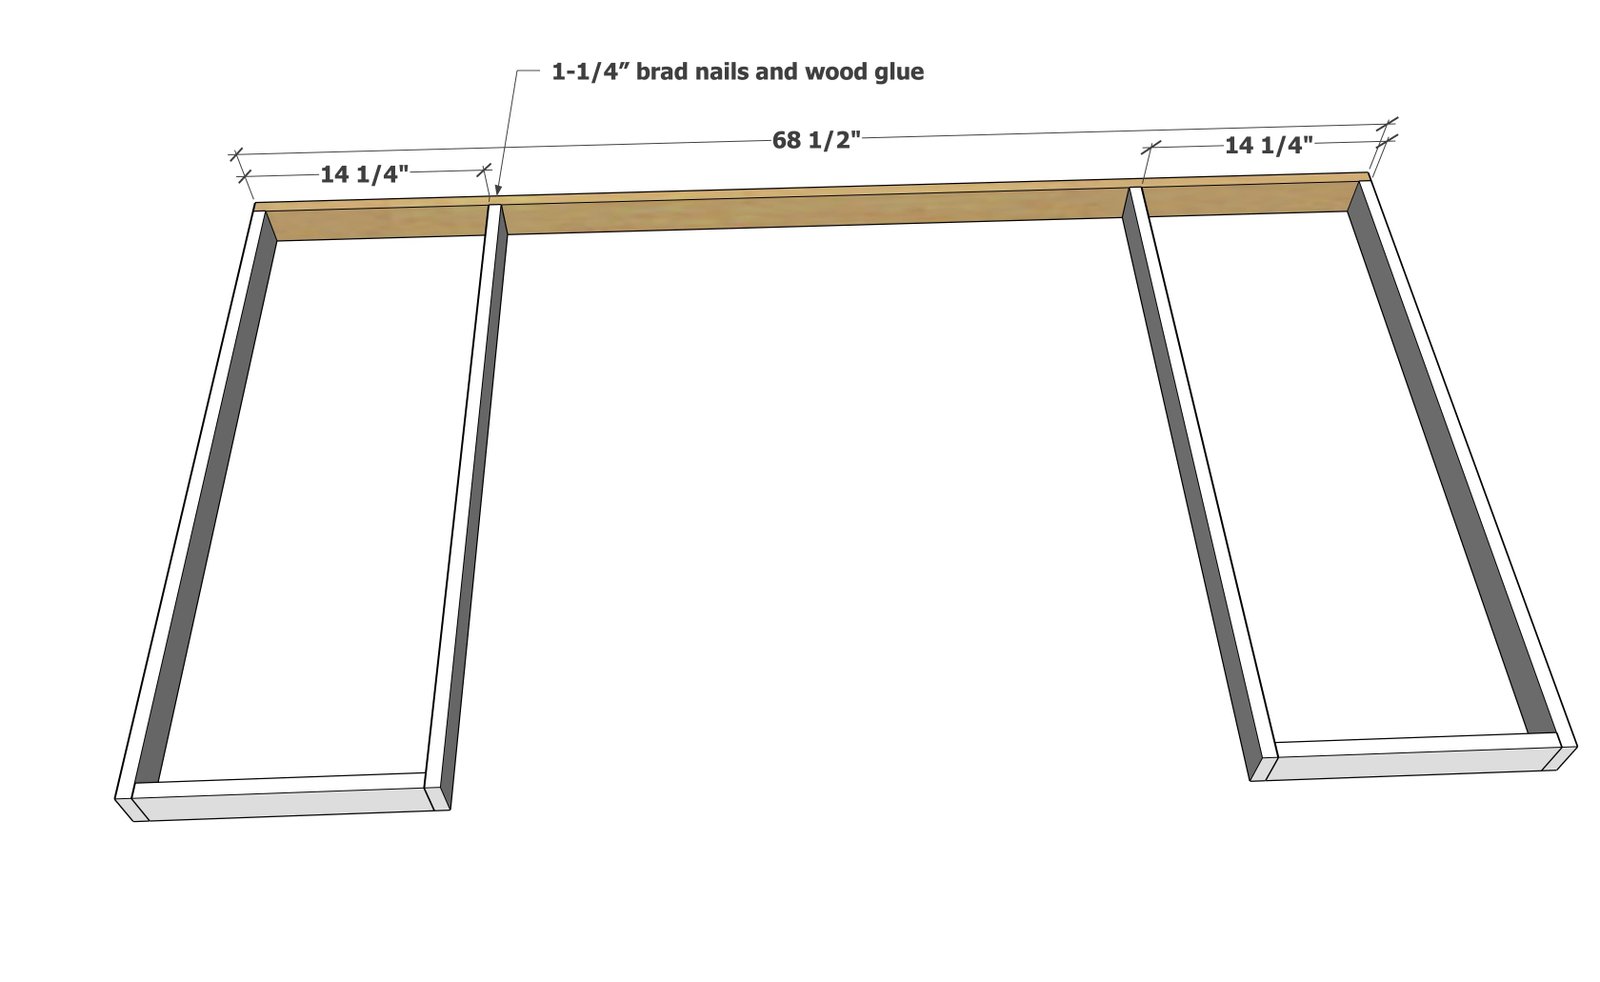
Attach the back apron board as shown to the two pieces built in step 1.
Step 3
Attach the inner support frame piece as shown.
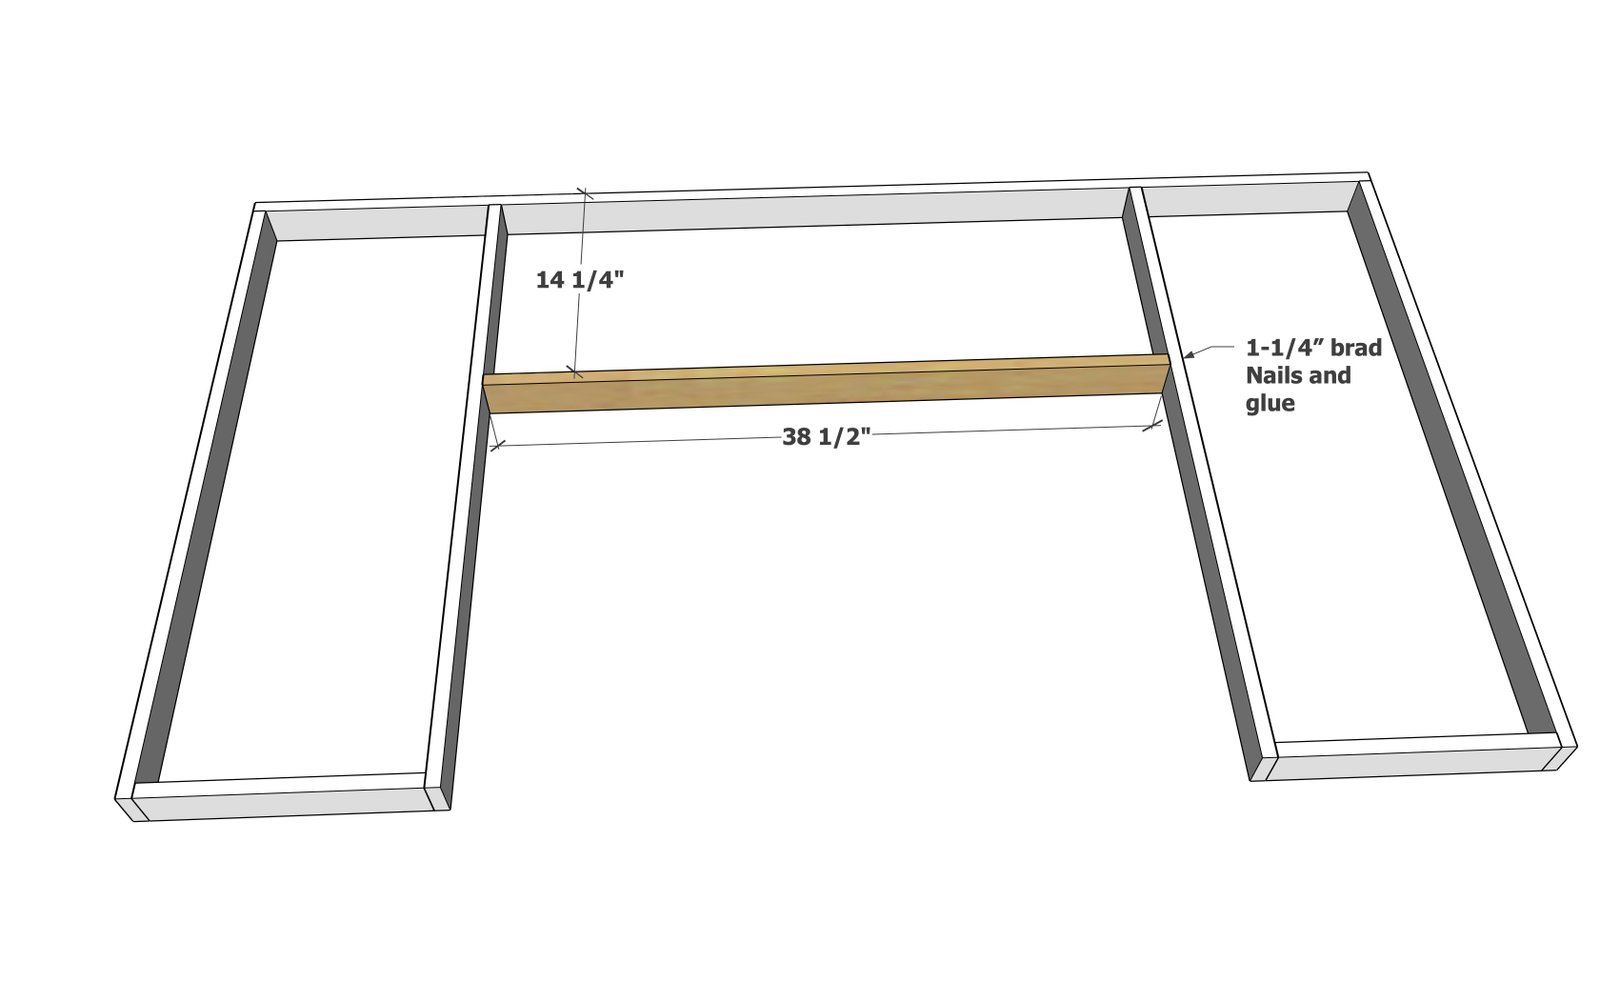
Step 4
Build six legs by attaching 2x2s to 2x4s.
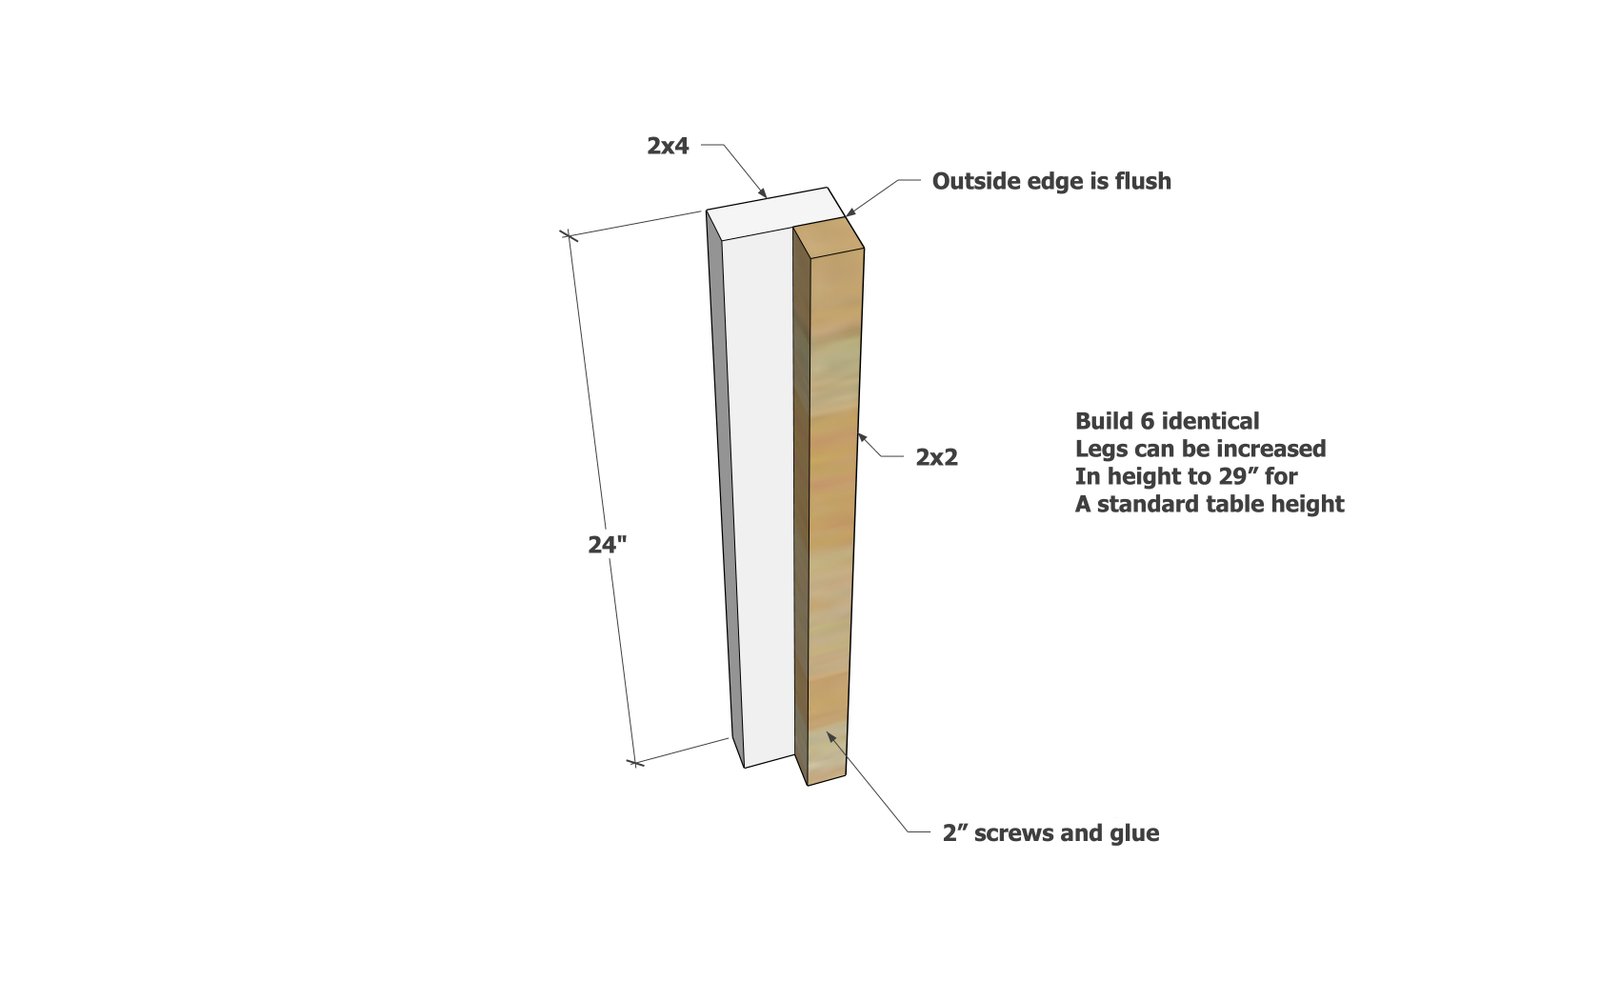
Step 5
Attach legs to the corners of the desk frame with multiple 2" screws and glue, using a level to make sure the legs are attached level.
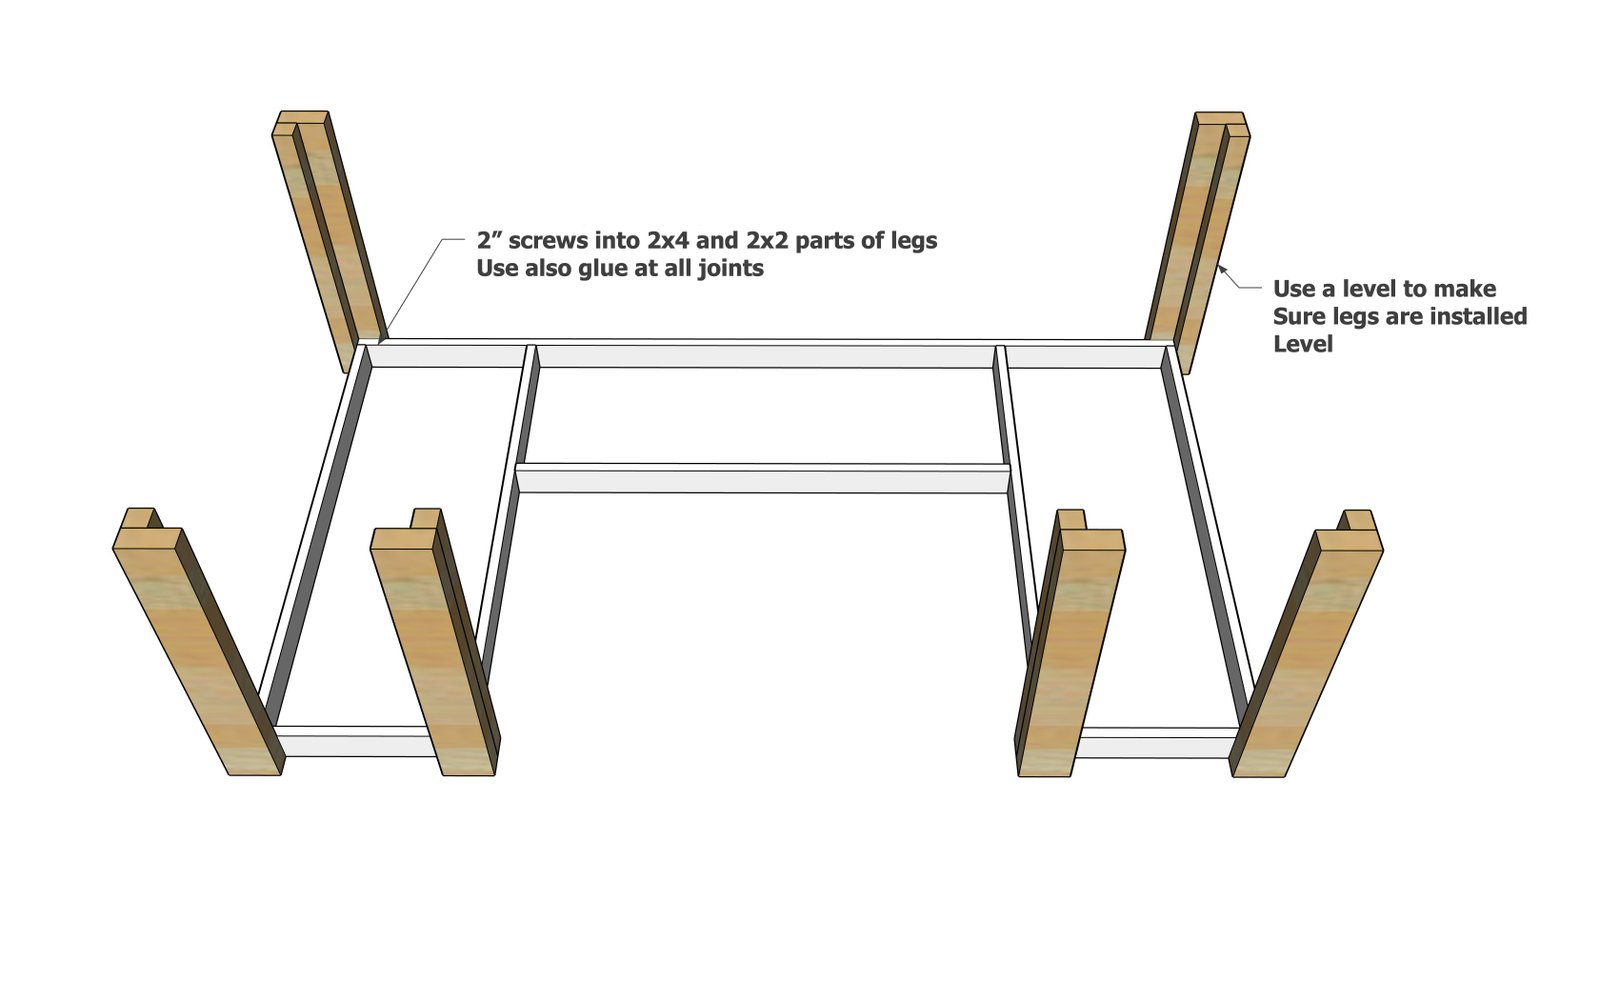
Step 6
Add blocking as shown.
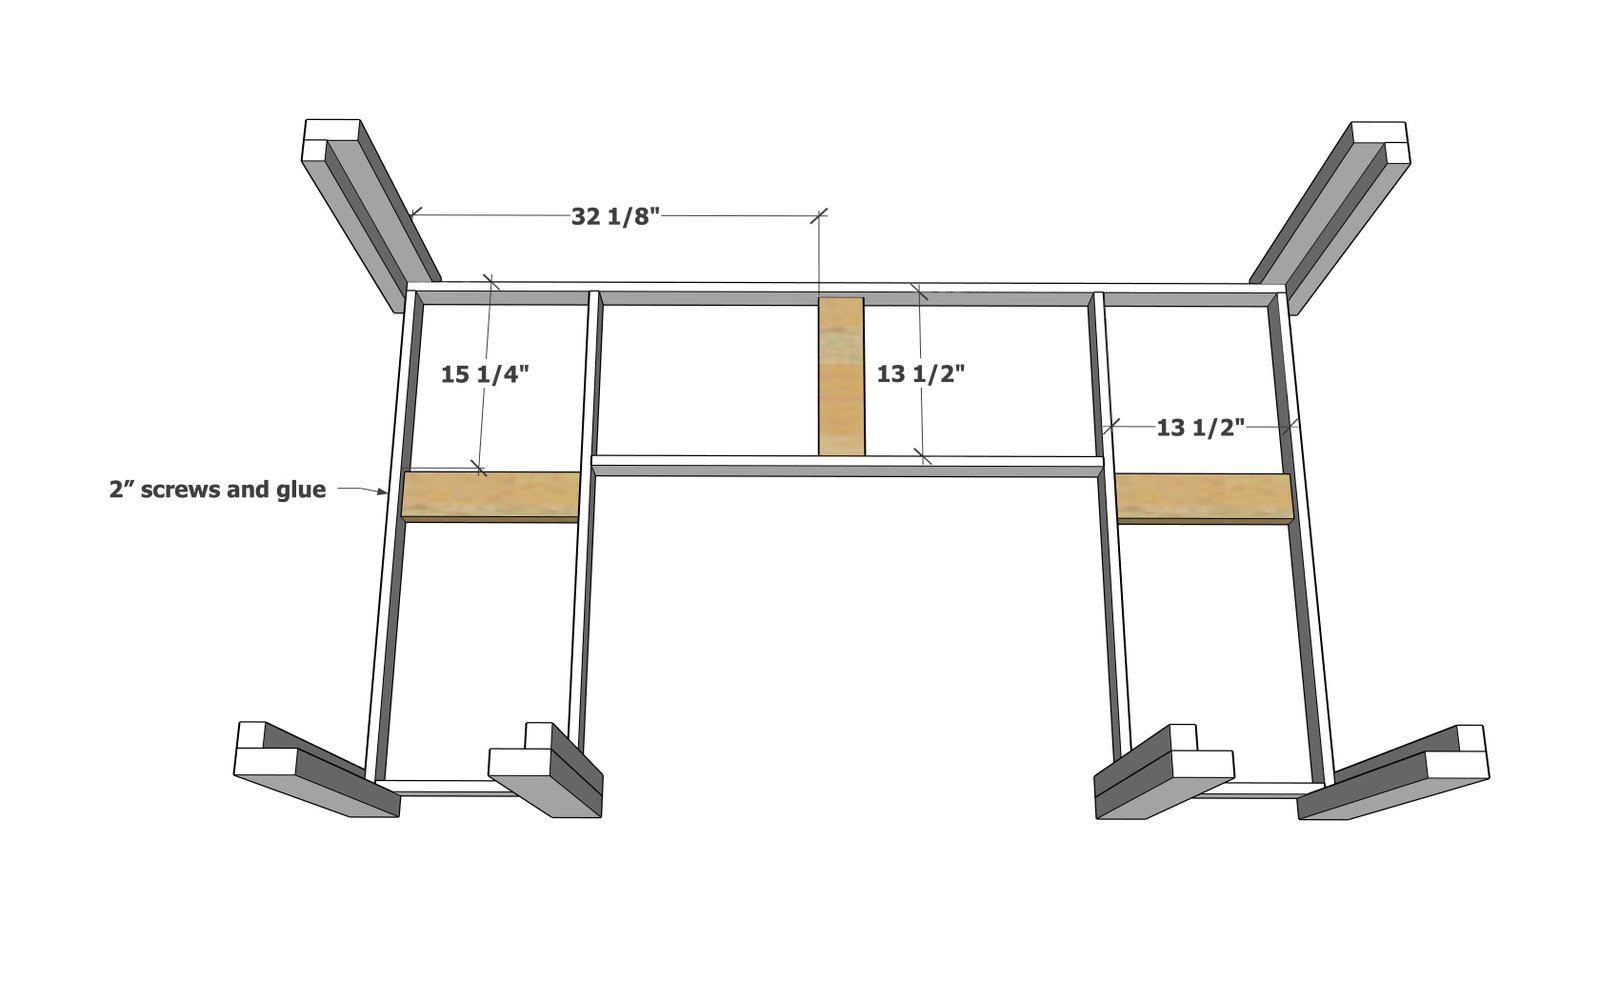
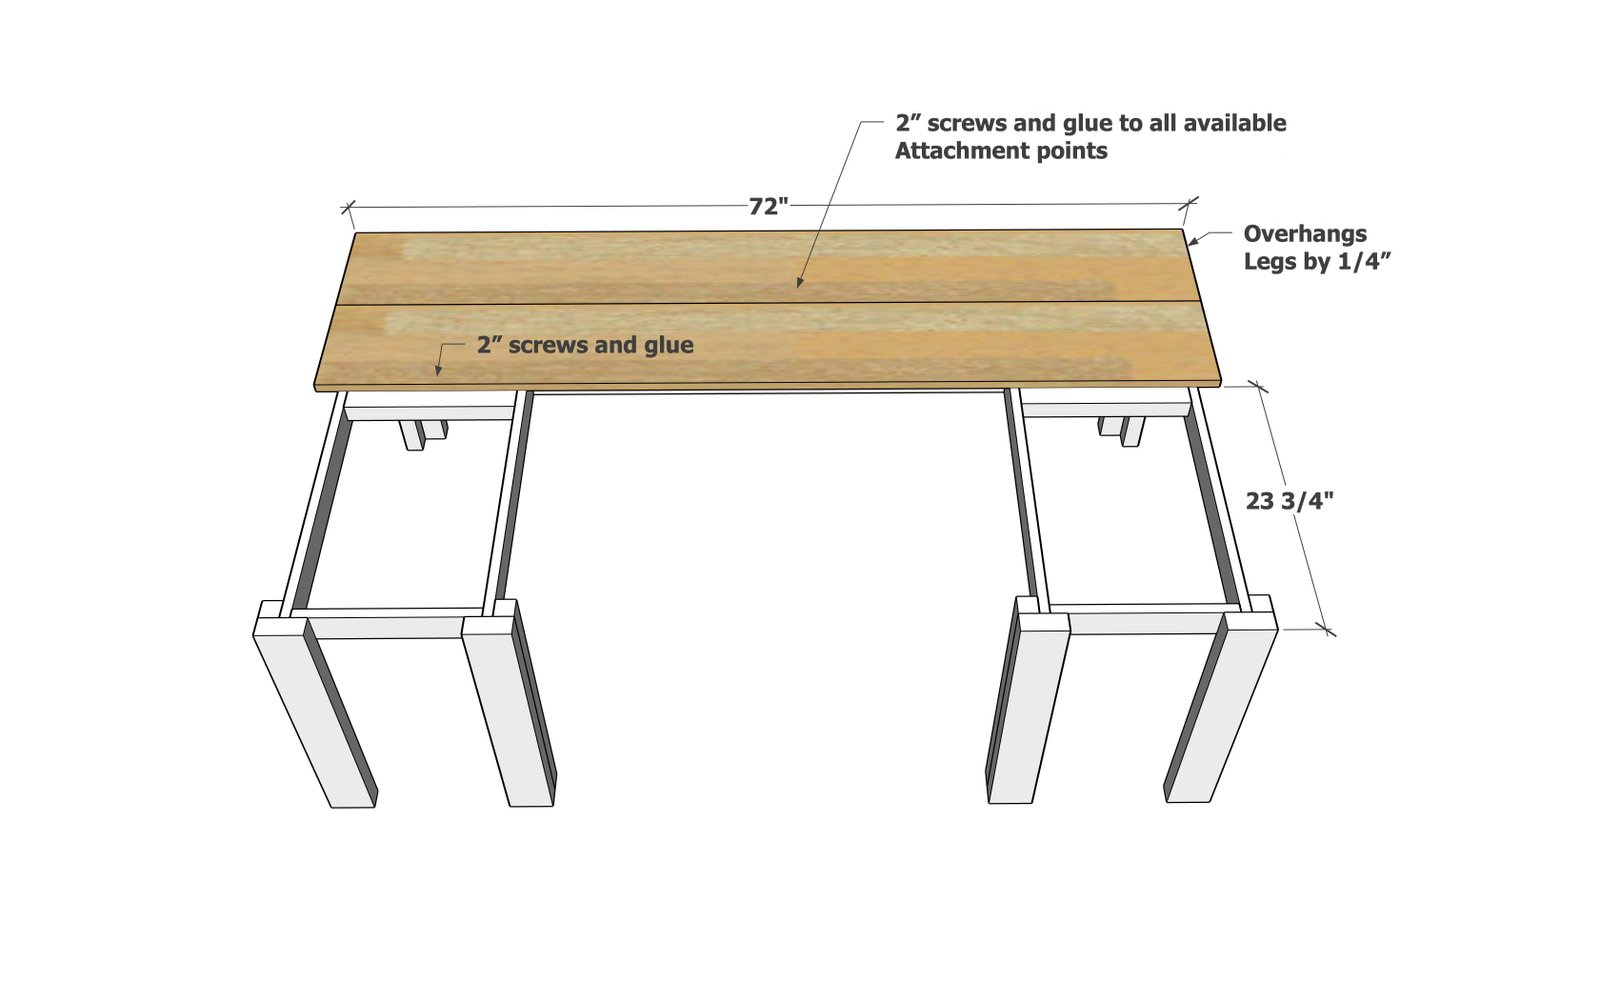
Position the 1x10 desktop pieces on top and screw down.
TIP: For a nicer top, build the entire top first with pocket holes, then attach the completed top to the frame.
Step 8
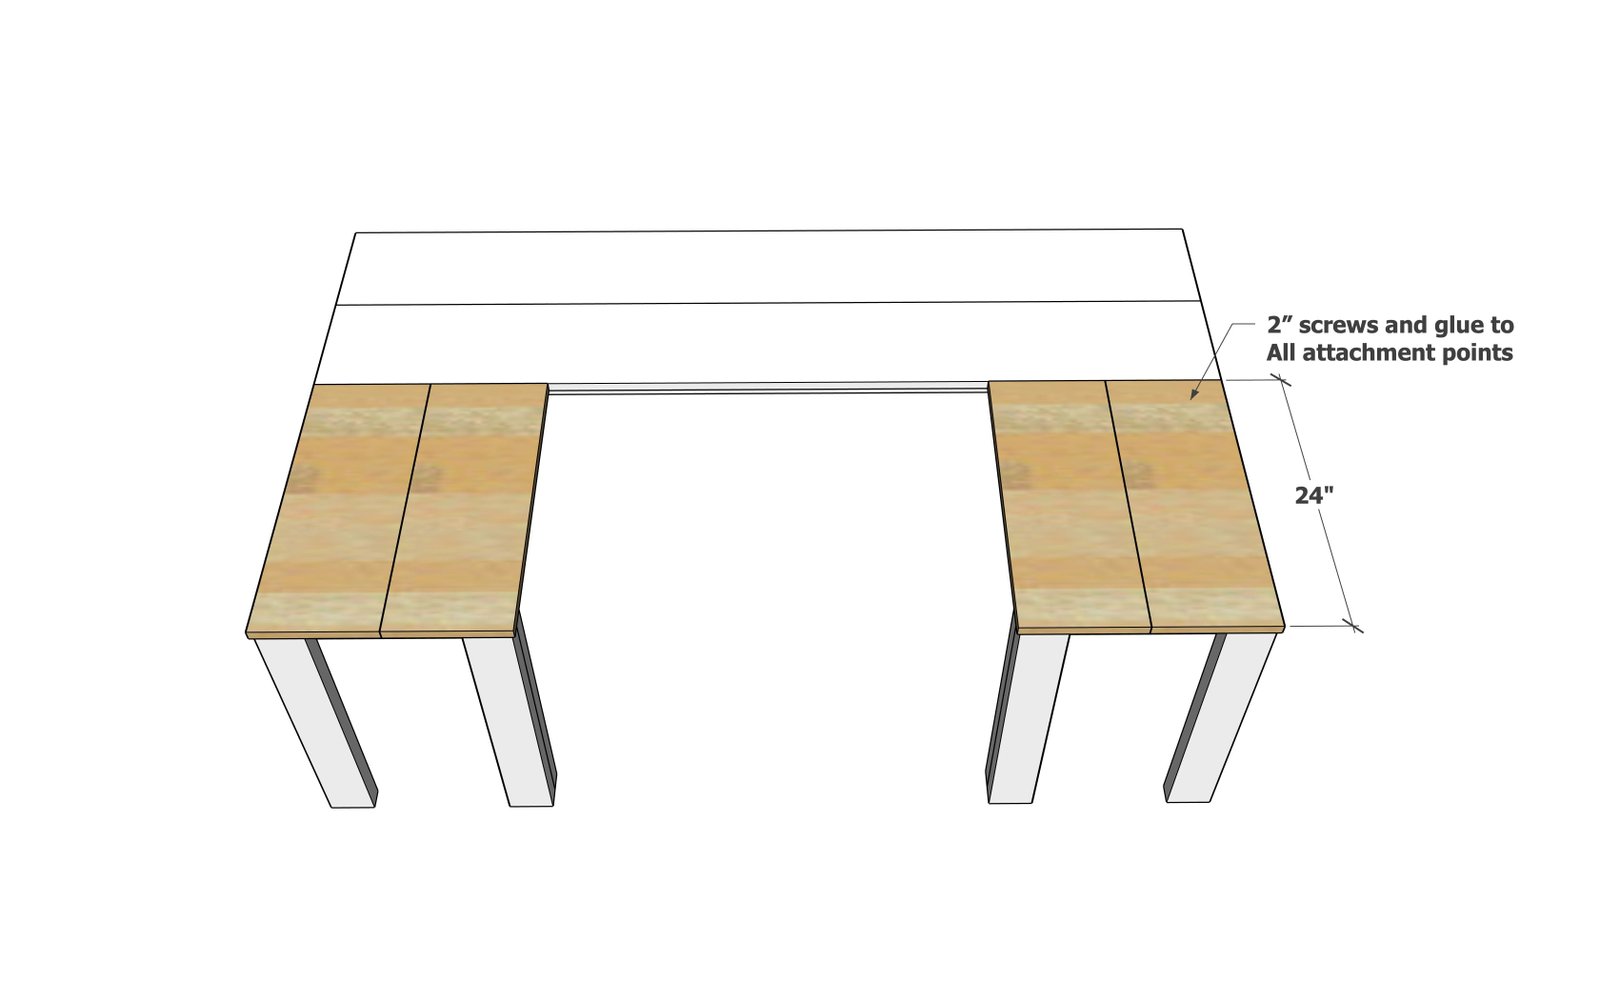
Add the remaining desktop pieces and screw down.
Finishing
Sand all surfaces, starting with a medium grit and finishing with fine. Wipe off the dust, fill any holes or gaps with wood filler, and sand smooth once dry. Apply primer if you're painting, then finish with your choice of paint or stain and seal with a durable clear topcoat. For outdoor projects, use exterior-rated primer, paint or stain, and sealer so the piece stands up to the weather.
Source (temporary): https://www.ana-white.com/woodworking-projects/u-shaped-table-or-desk-school