Ultimate 18" or American Girl Dollhouse
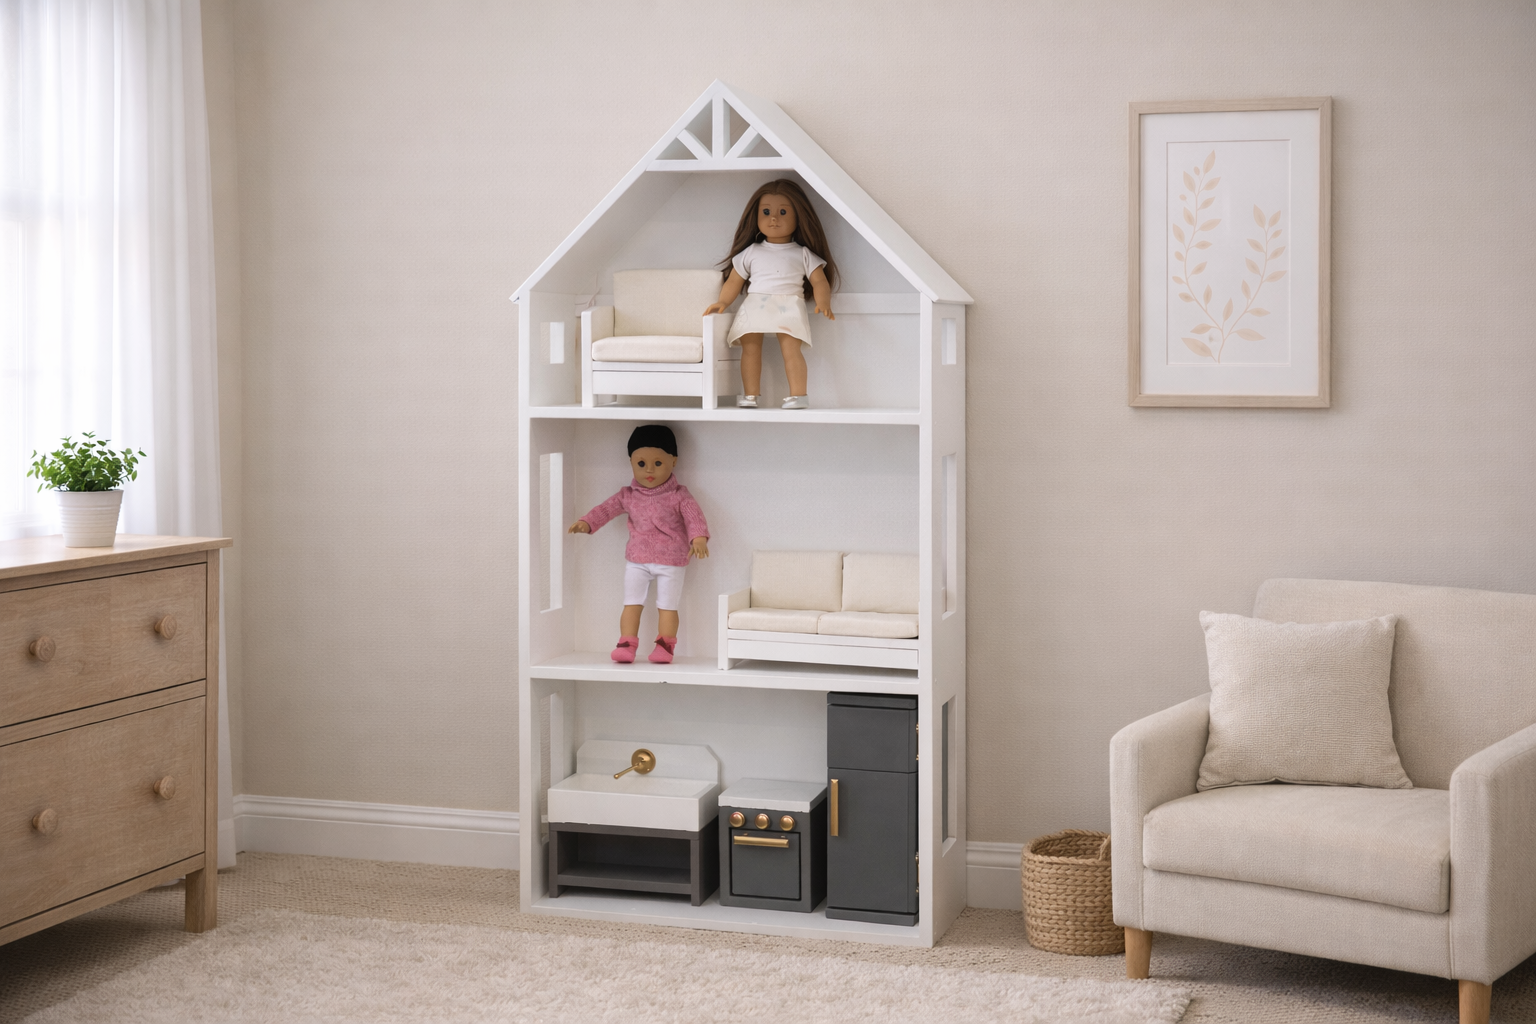
Free DIY Dollhouse Plans for 18" or American Girl Dolls – Compact & Stylish This free dollhouse plan is the perfect space-saving solution for doll lovers. Designed to hold all the dolls and their furniture in one tidy footprint, it keeps playtime fun without taking over the room. With three open levels and a charming house shape, it works as both a dollhouse and storage shelf. The compact design fits easily in bedrooms or playrooms, making it ideal for smaller spaces. Built from simple materials and beginner-friendly steps, it’s an easy and rewarding project. Perfect for American Girl–style dolls, this dollhouse keeps everything organized, visible, and ready for play. ✔️ Compact, vertical design ✔️ Holds dolls and furniture ✔️ Great for small rooms ✔️ Beginner-friendly build ✔️ Download the and build a dollhouse that’s as practical as it is cute.
Specifications
| Project type | Toys |
|---|---|
| Room | Bedroom |
| Style | Children's and Kid's Room Furniture and Toy Plans |
| Difficulty | Intermediate |
| Estimated cost | $50 - $100 |
Dimensions
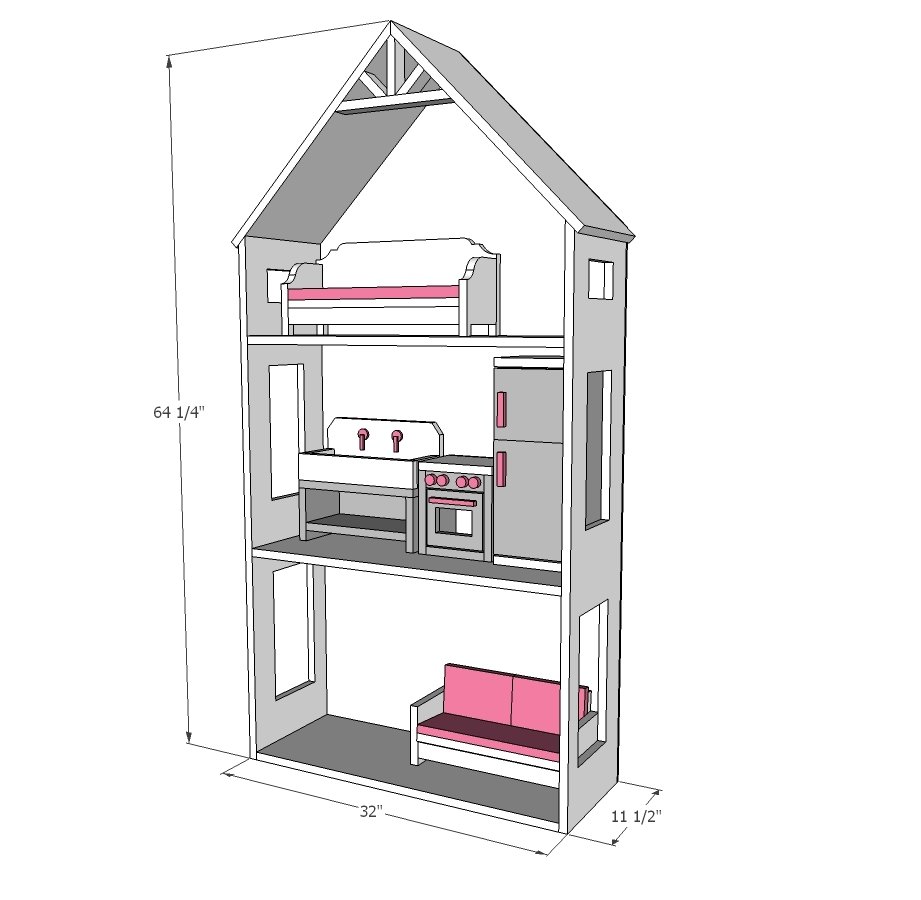
Use the size-specific shopping and cut lists below.
Shopping List
- 2 - 1x12 @ 6 feet long (for sides and roof)
- 1 - 1x12 @ 8 feet long (for floors or shelves)
- About 30" of 1x2 boards for the truss detail
- 1 4x8 sheet of 1/4" thick plywood, mdf, beadboard or other backing material
Cut List
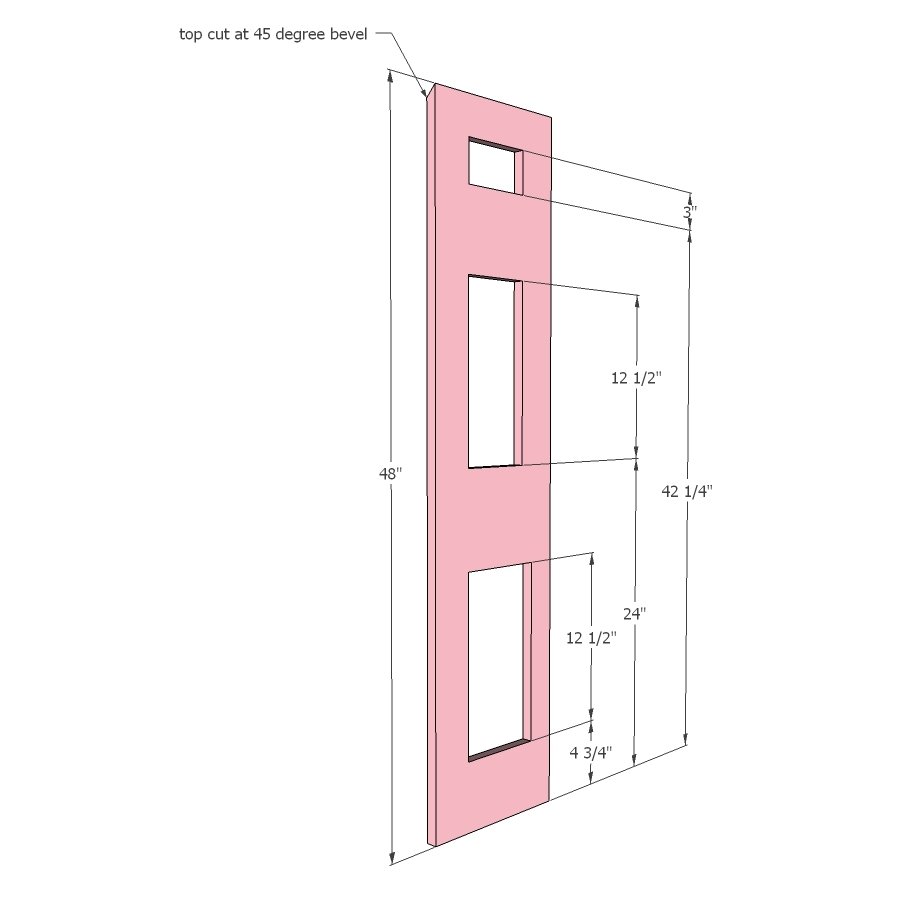
- 2 - 1x12 @ 48" long, one end cut at 45 degrees off square, longest point measurement (cut from 6' long 1x12)
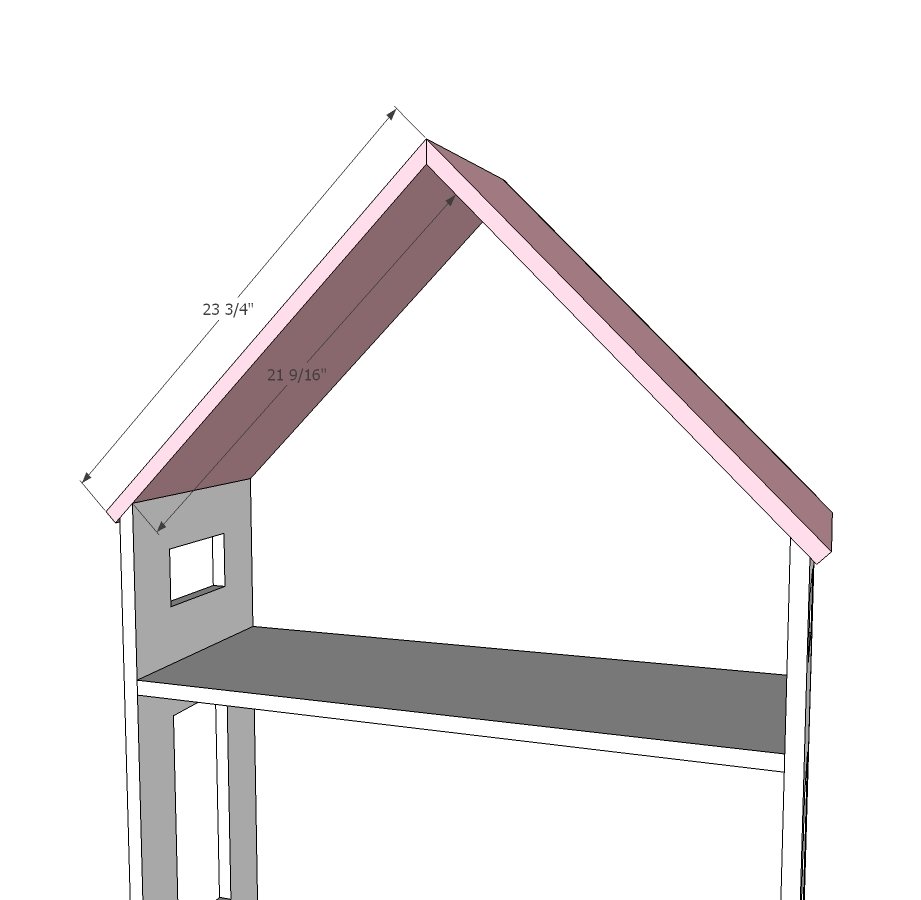
- 2 - 1x12 @ 23-3/4" long, one end cut at 45 degrees, longest point measurement (use scrap from 48" long cut, you don't even need to cut it, it can be longer as this is the roof and will just increase overhang)
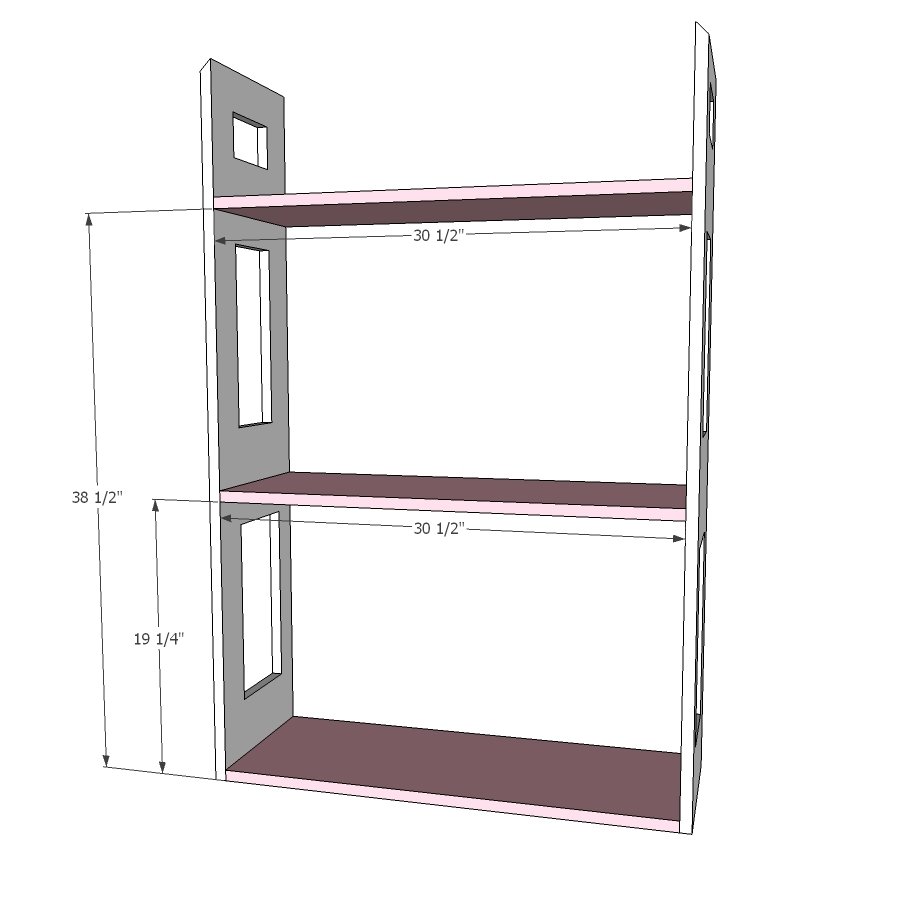
- 3 - 1x12 @ 30-1/2" - cut all of these from the 8 foot 1x12 board
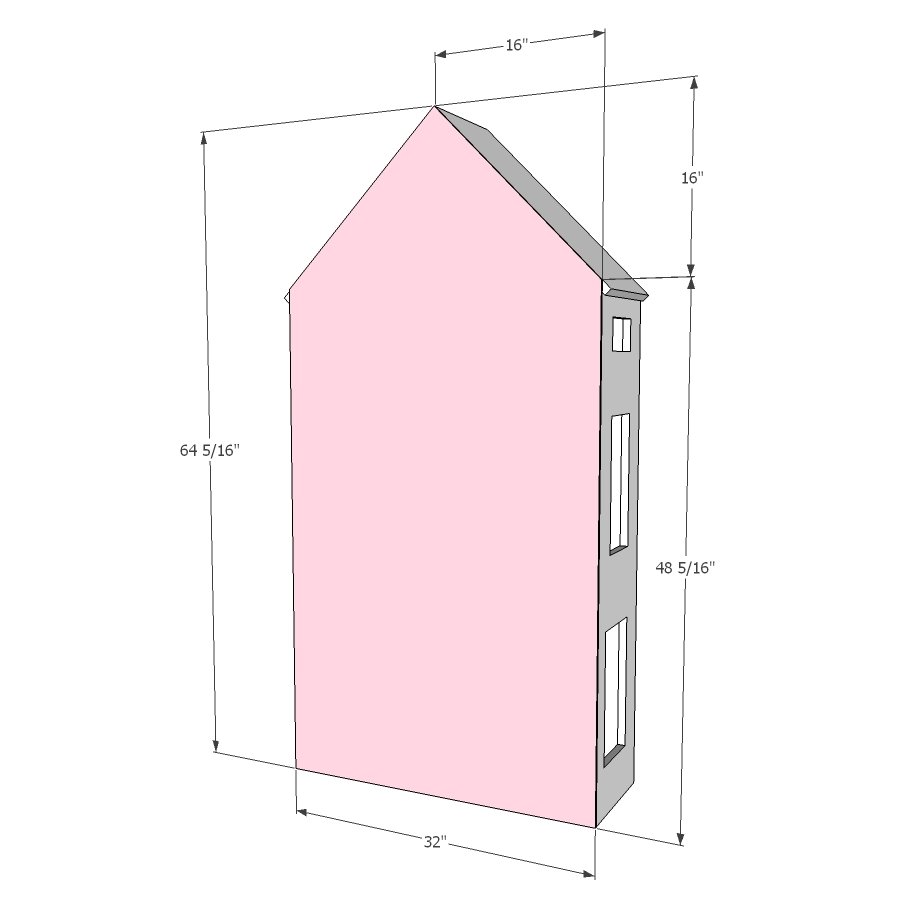
- 1/4" plywood @ 32" x 64-5/16"
TRUSS DETAIL
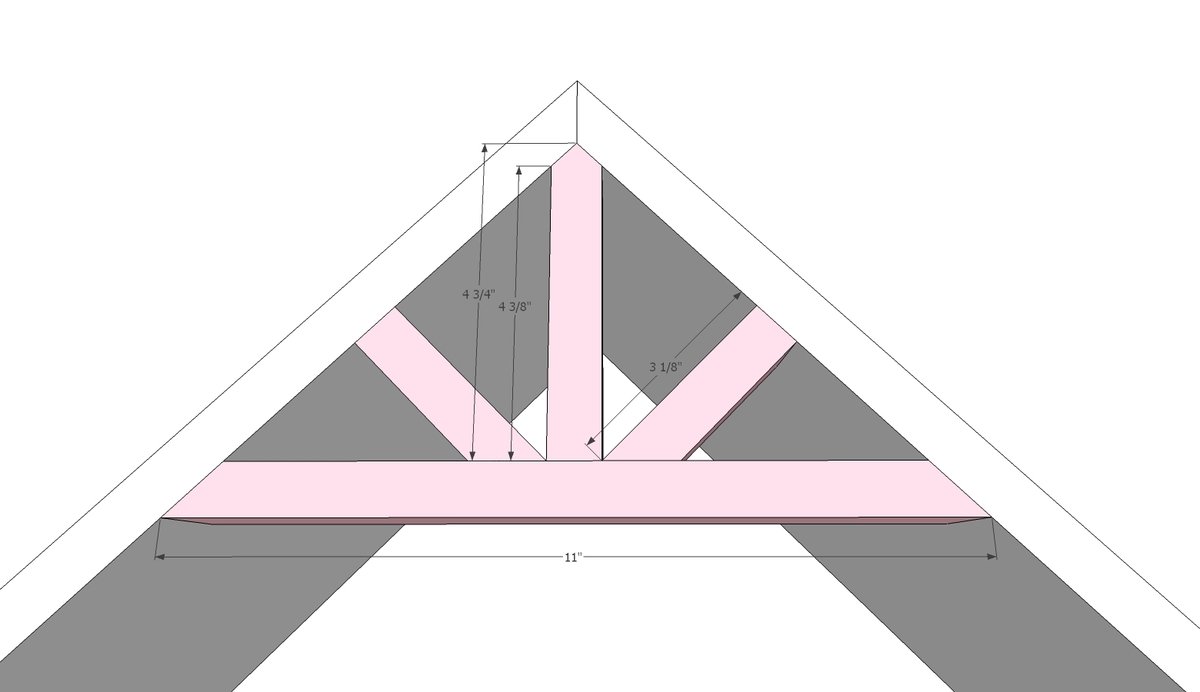
- 1 - 1x2 @ 11" - both ends cut at 45 degree BEVEL, long point to long point mesurement
- 1 - 1x2 @ 4-3/4" - dogeared to a 45 degree point
- 2 - 1x2 @ 3-1/8" - one end cut at 45 degrees, longest point measurement
Tools
- measuring tape
- square
- pencil
- safety glasses
- hearing protection
- kreg-jig
- drill
- circular saw
- jigsaw
- compound miter saw
- nailer
- sander
Step-by-step Instructions
Step 1
Cut out windows from the side panels. Use a drill to start cuts and then cut from the drilled holes with a jigsaw. Sand the rough edges. I recommend drilling two pocket holes facing upward for attaching the roof in later steps, on either side of the small window, on the inside.
Step 2
Drill three 3/4" pocket holes on each of the shelves. Attach shelves to the sides with 1-1/4" pocket holes and wood glue. NOTE: If using pocket holes to attach roof (and you drilled pocket holes on sides as suggested in step 1) do not attach the third floor until after you complete step 3 or your drill will not be able to fit.
Step 3
Attach the roof to the sides. Use glue and 1-1/4" nails to attach roof at peak. The truss detail and back will further support this joint.
Step 4
Attach back with 3/4" brad nails or staples and glue to all fixed shelves, sides and roof.
Step 5
Finishing
Sand all surfaces, starting with a medium grit and finishing with fine. Wipe off the dust, fill any holes or gaps with wood filler, and sand smooth once dry. Apply primer if you're painting, then finish with your choice of paint or stain and seal with a durable clear topcoat. For outdoor projects, use exterior-rated primer, paint or stain, and sealer so the piece stands up to the weather.
Source (temporary): https://www.ana-white.com/woodworking-projects/ultimate-18-or-american-girl-dollhouse-free-plans