Ultimate DIY Adirondack Chair
Easy to build, comfortable, strong, sturdy, inexpensive and durable, we call this Adirondack chair our "Ultimate" because it delivers on all the levels! Even a beginner woodworker can build these amazing outdoor chairs. This plan is easy to customize, to suit different sized cushions, or for size preferences. Build today with our free, step by step project plans with free PDF ( click here to start download of one page PDF Plan ), video tutorial and shopping and cut lists from
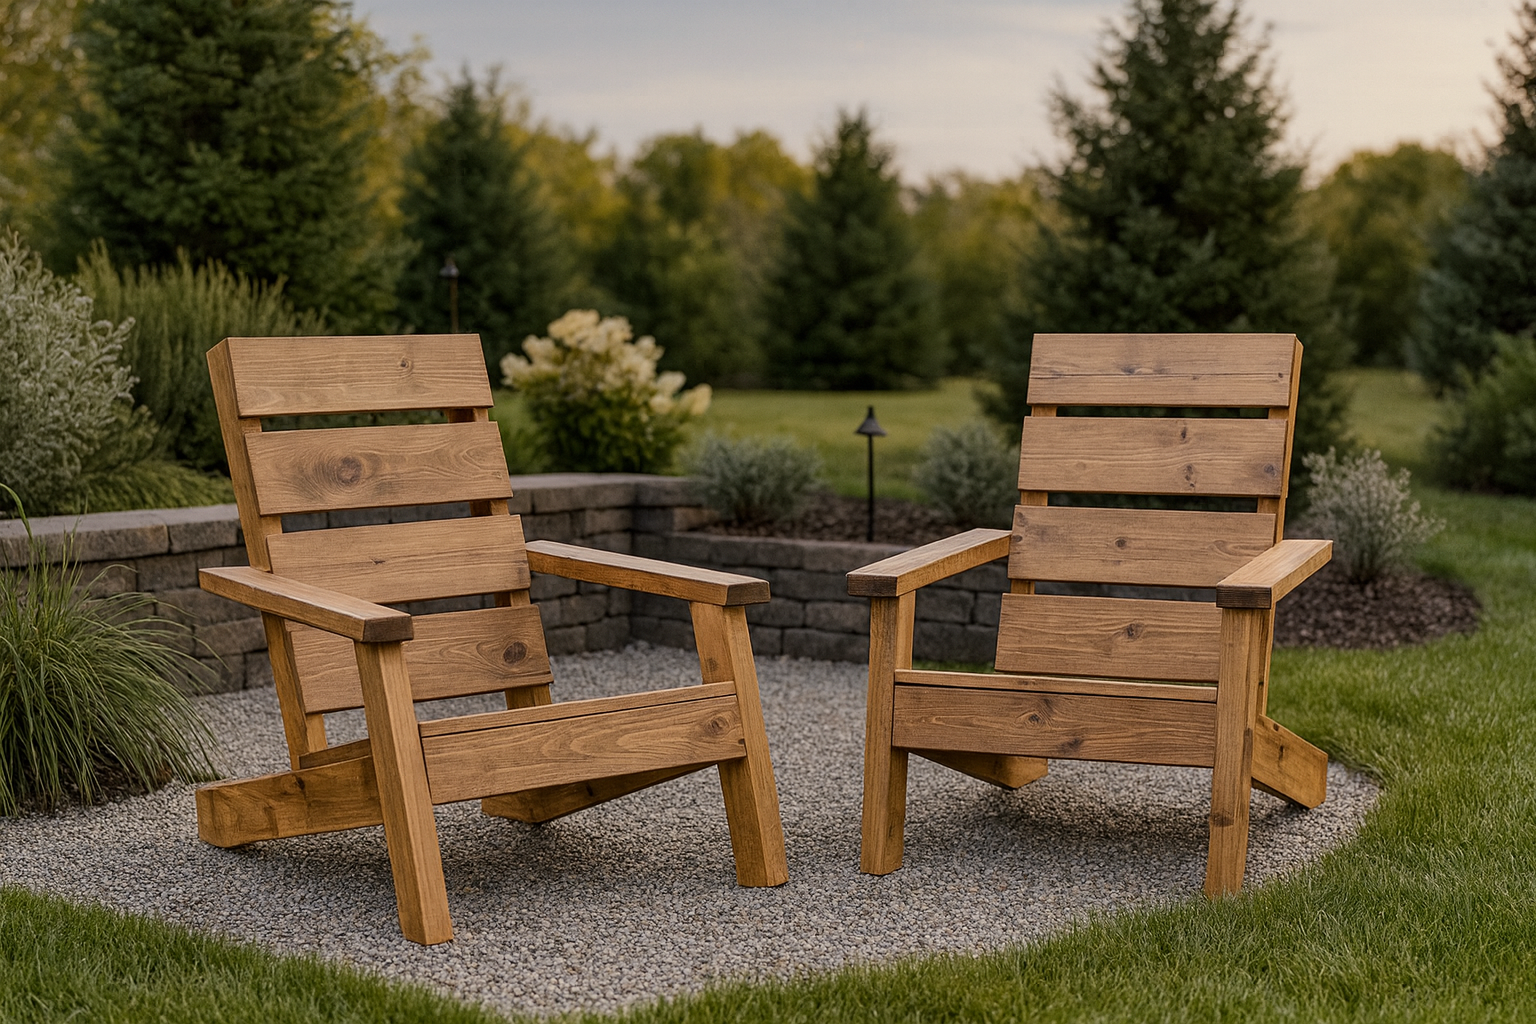
Specifications
| Project type | Outdoor Seating, Lounging and Accents |
|---|---|
| Room | Outdoor |
| Difficulty | Beginner Projects |
| Estimated cost | $50 - $100 |
Dimensions
Use the size-specific shopping and cut lists below.
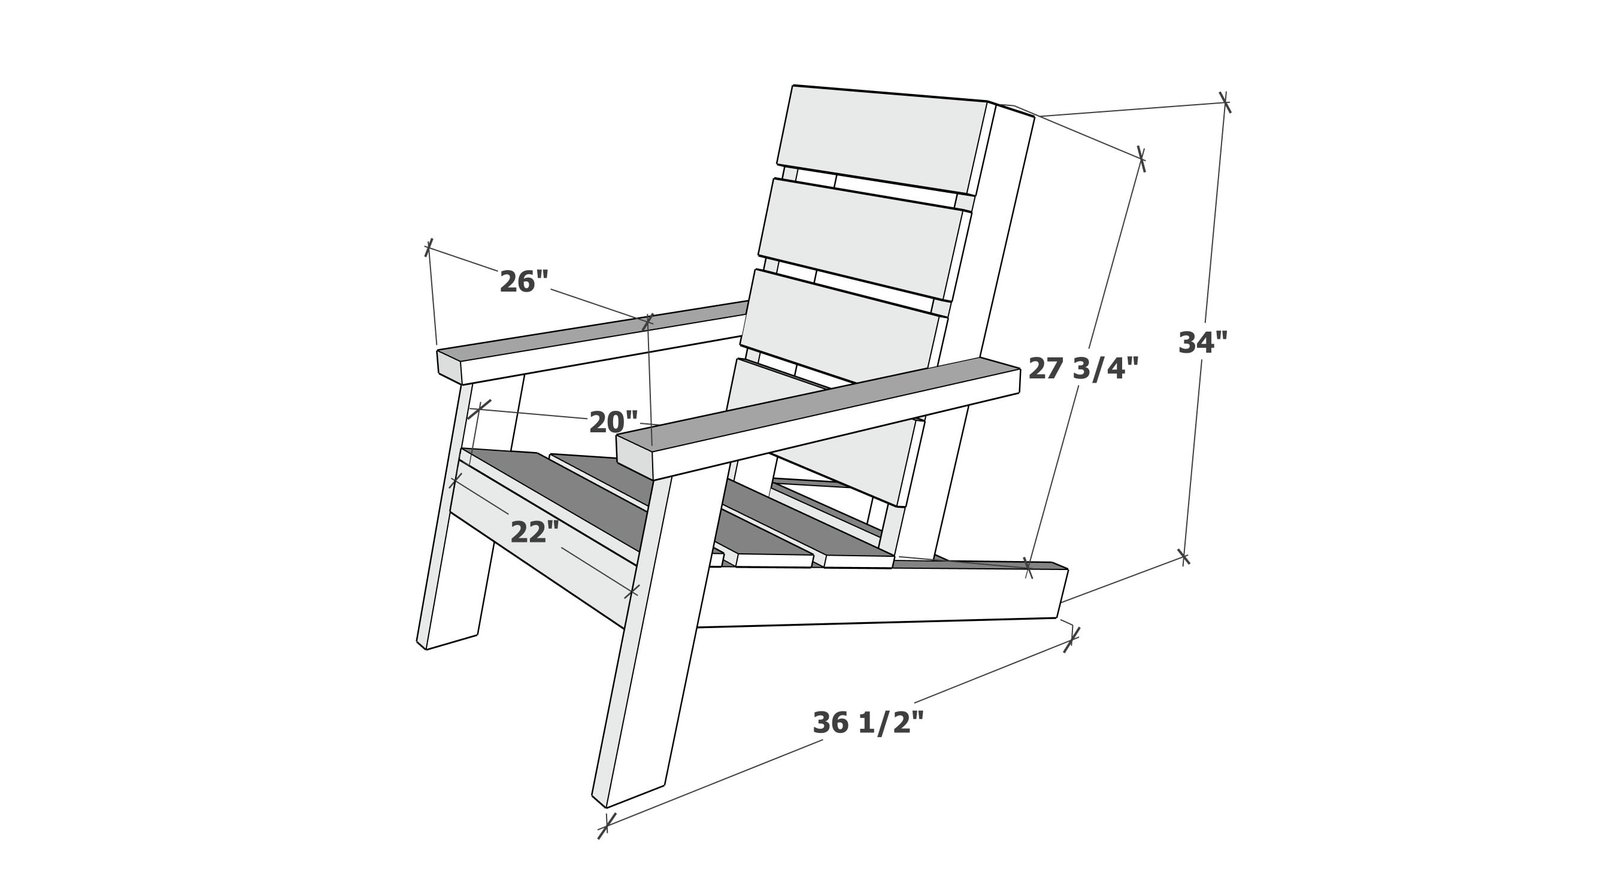
Shopping List
- 3 - 2x4 @ 8 feet long
- 1 - 1x6 @ 12 feet long *
- 1-3/4" and 2-1/2" self tapping exterior wood screws
Cut List
- 2 - 2x4 @ 33-3/4" - seat stringers
- 1 - 2x4 @ 22" - front seat apron
- 1 - 2x4 @ 19" - seat back support
- 3 - 1x6 @ 22" - seat boards
- 2 - 2x4 @ 32" - back supports
- 4 - 1x6 @ 19" - back boards
- 2 - 2x4 @ 18-1/2" - long point to short point measurement, both ends cut at 15 degrees off square, ends ARE parallel
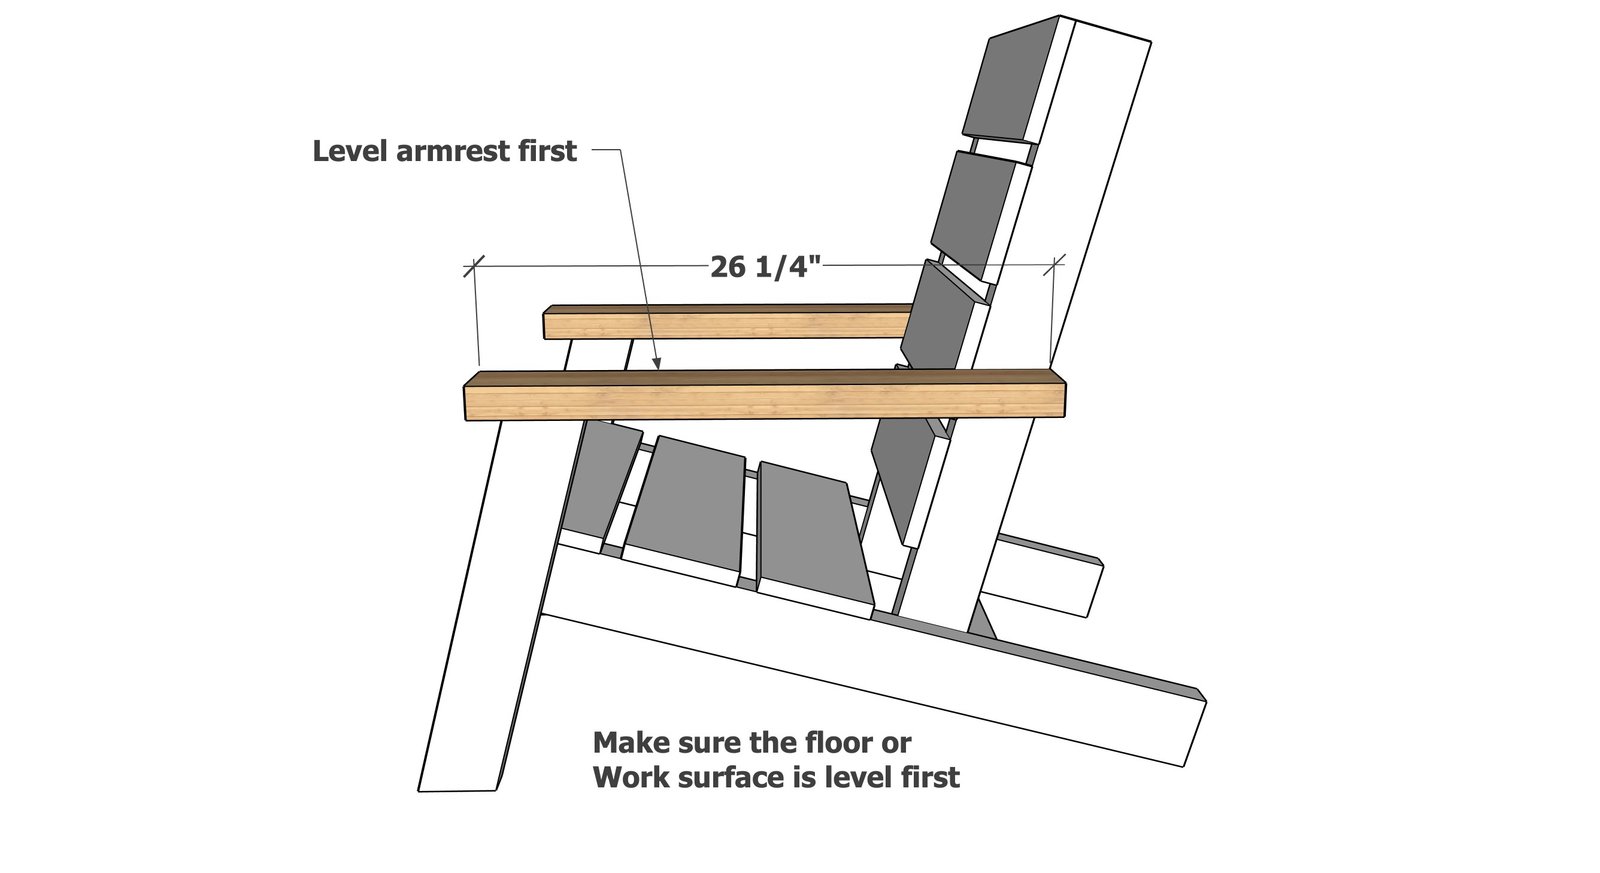
- 2 - 2x4 @ 26-1/4" - arm rests
Tools
- measuring tape
- square
- pencil
- safety glasses
- drill
- compound miter saw
- sander
- level
Step-by-step Instructions
Build the seat frame with 2x4s and 2-1/2" self tapping wood screws.
Use exterior wood glue for added durability.
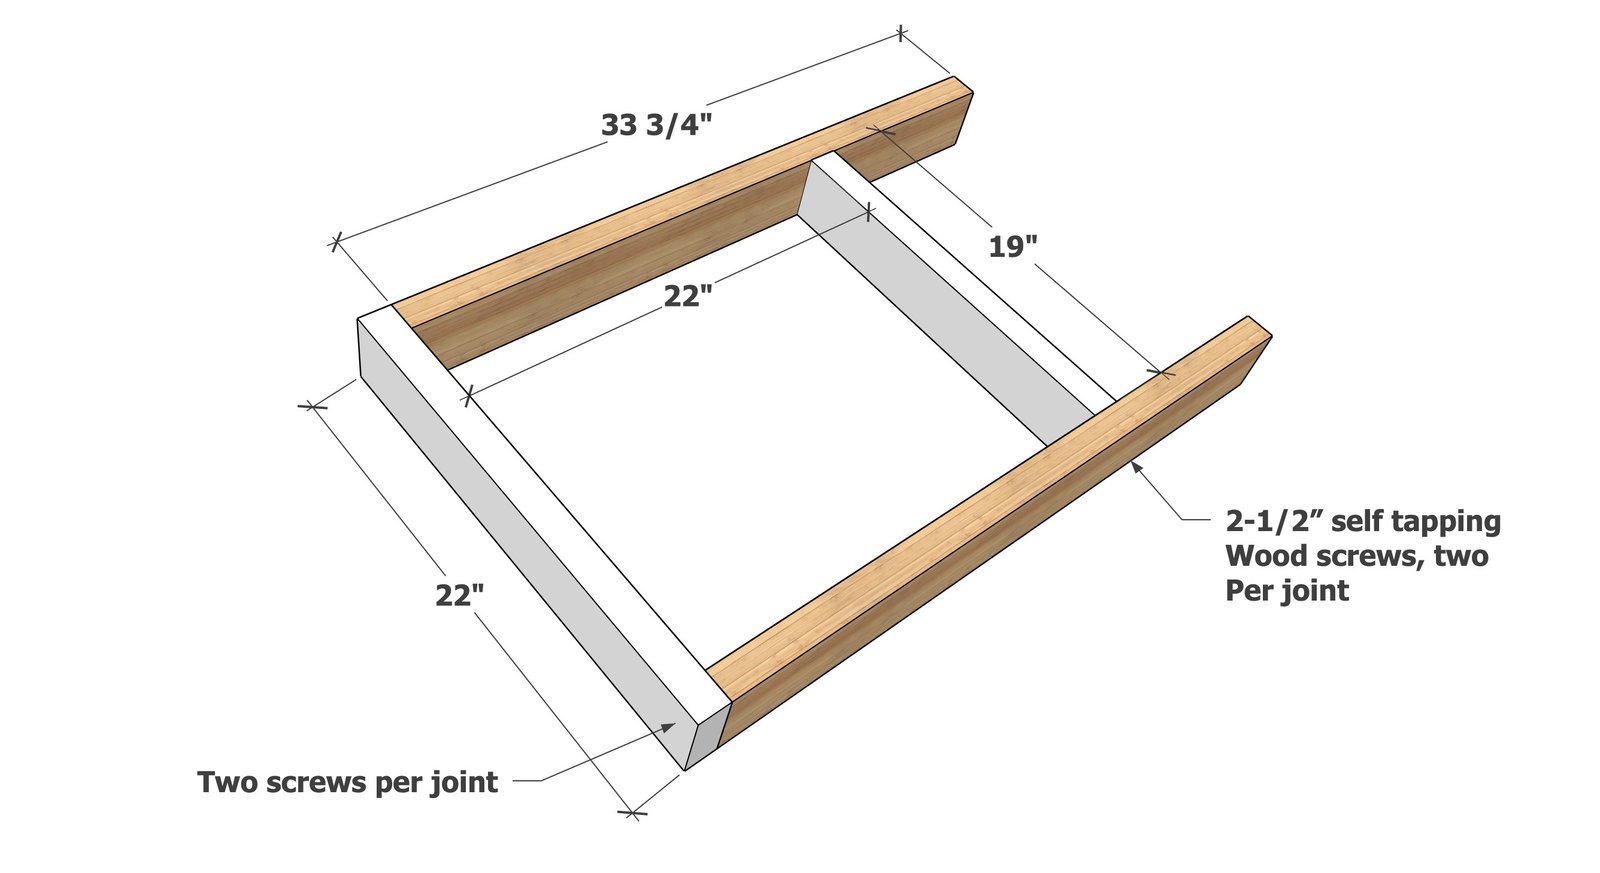
Step 2
Attach the seat support boards to the frame with 1-3/4" self tapping wood screws. Use exterior wood glue for added durability.
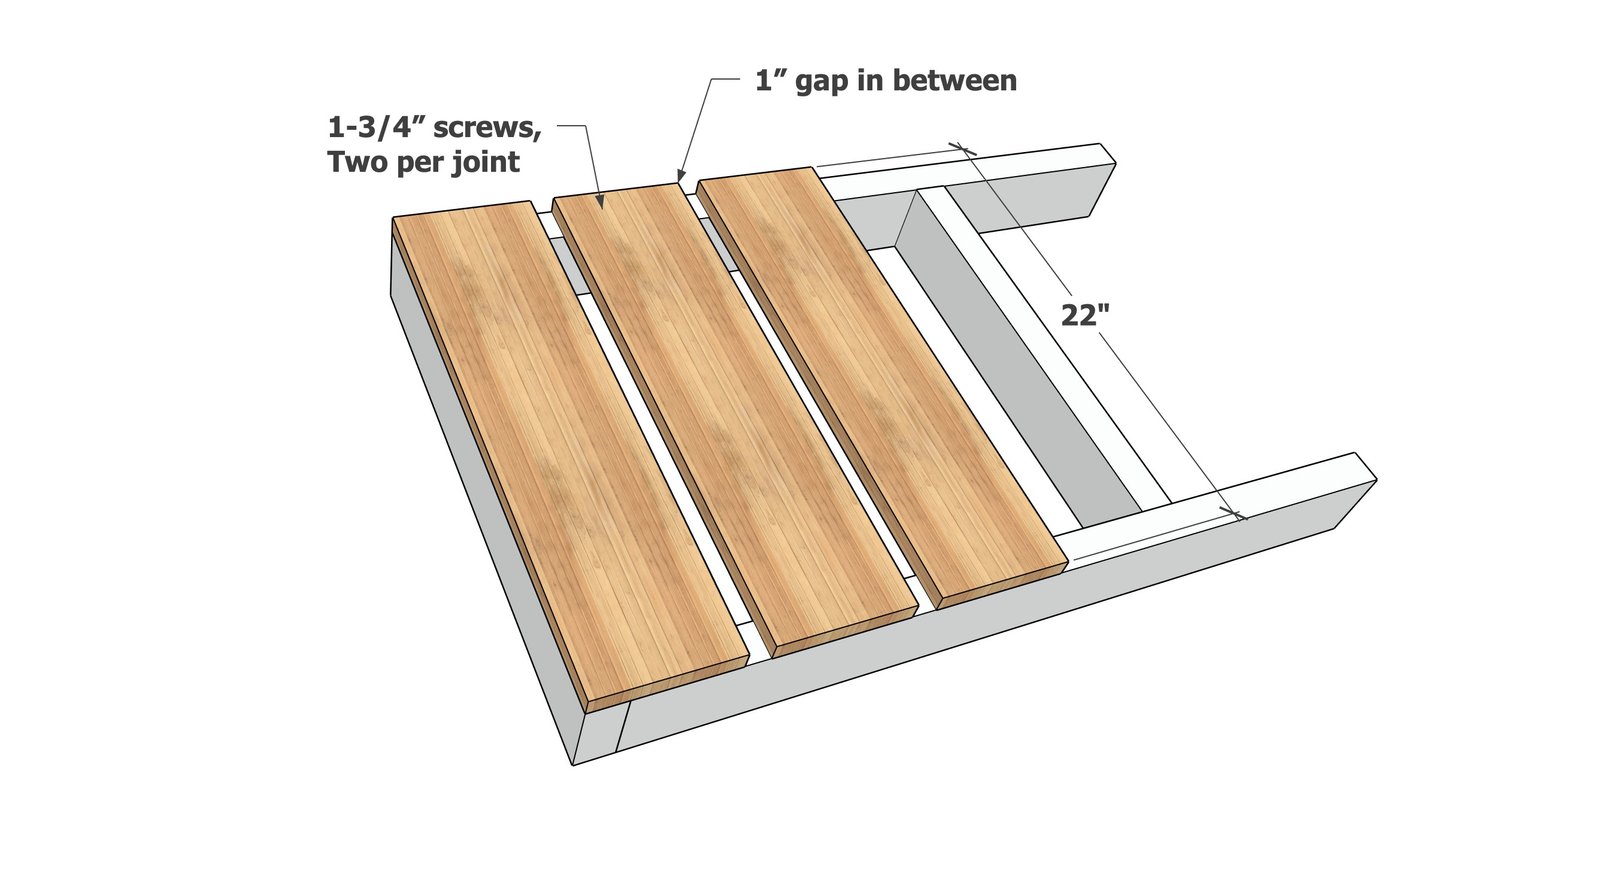
Step 3
Attach the back 1x6 boards to the seat back framing 2x4s with 1-3/4" self tapping wood screws. Use exterior wood glue for added durability.
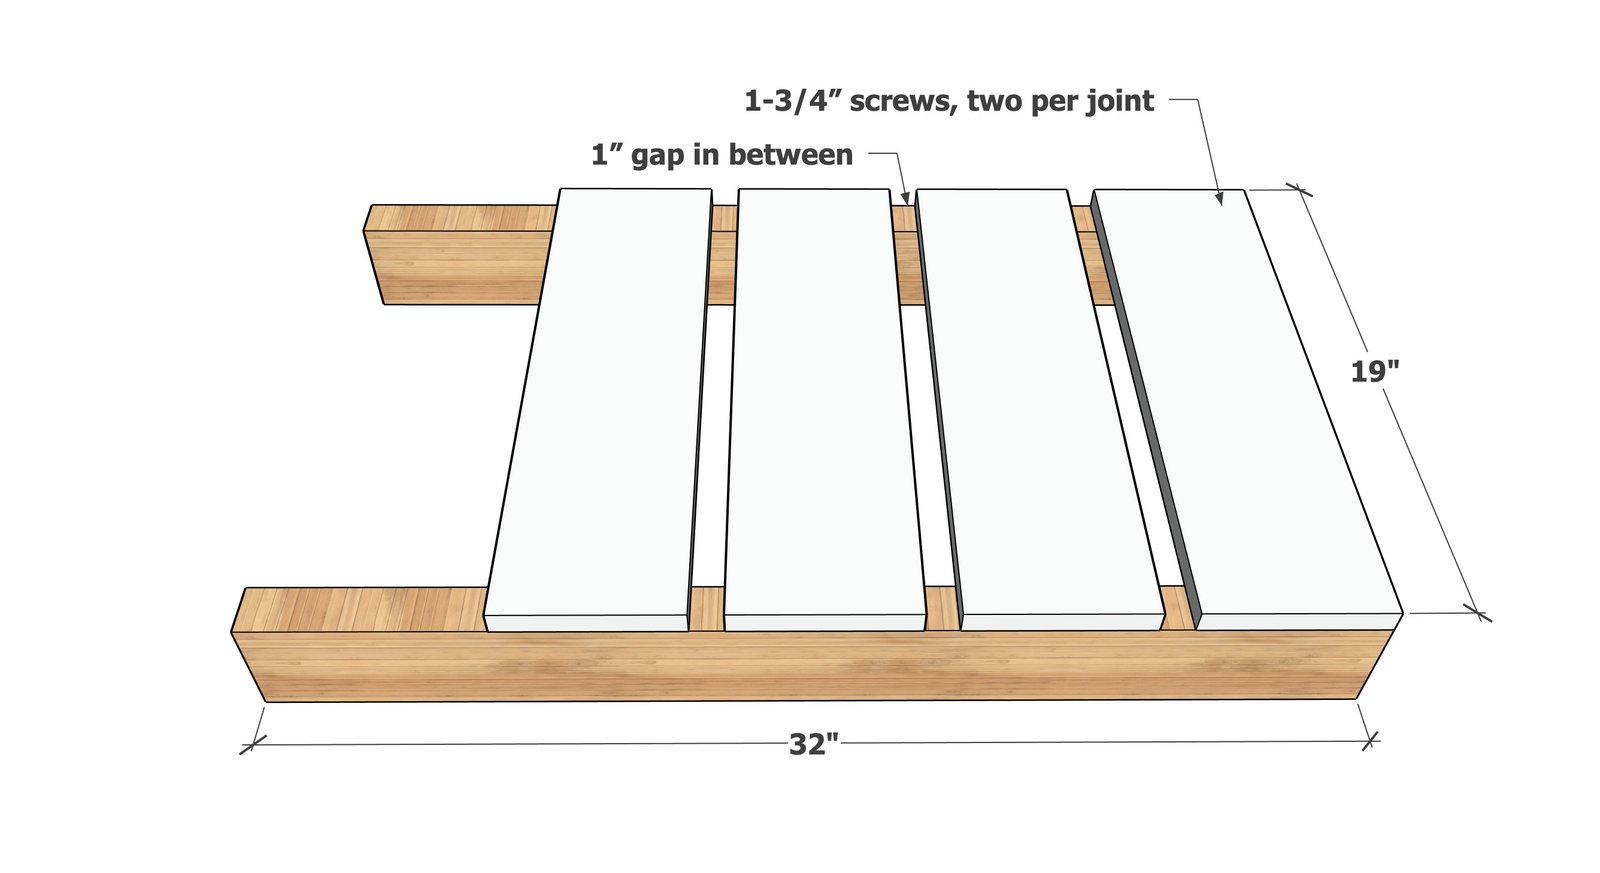
Step 4
Insert the seat back into the seat frame, attach from the back seat framing board as shown in the diagram with 2-1/2" screws. Position the angle of the seat at 90 degrees and attach from the sides with multiple 2-1/2" screws.
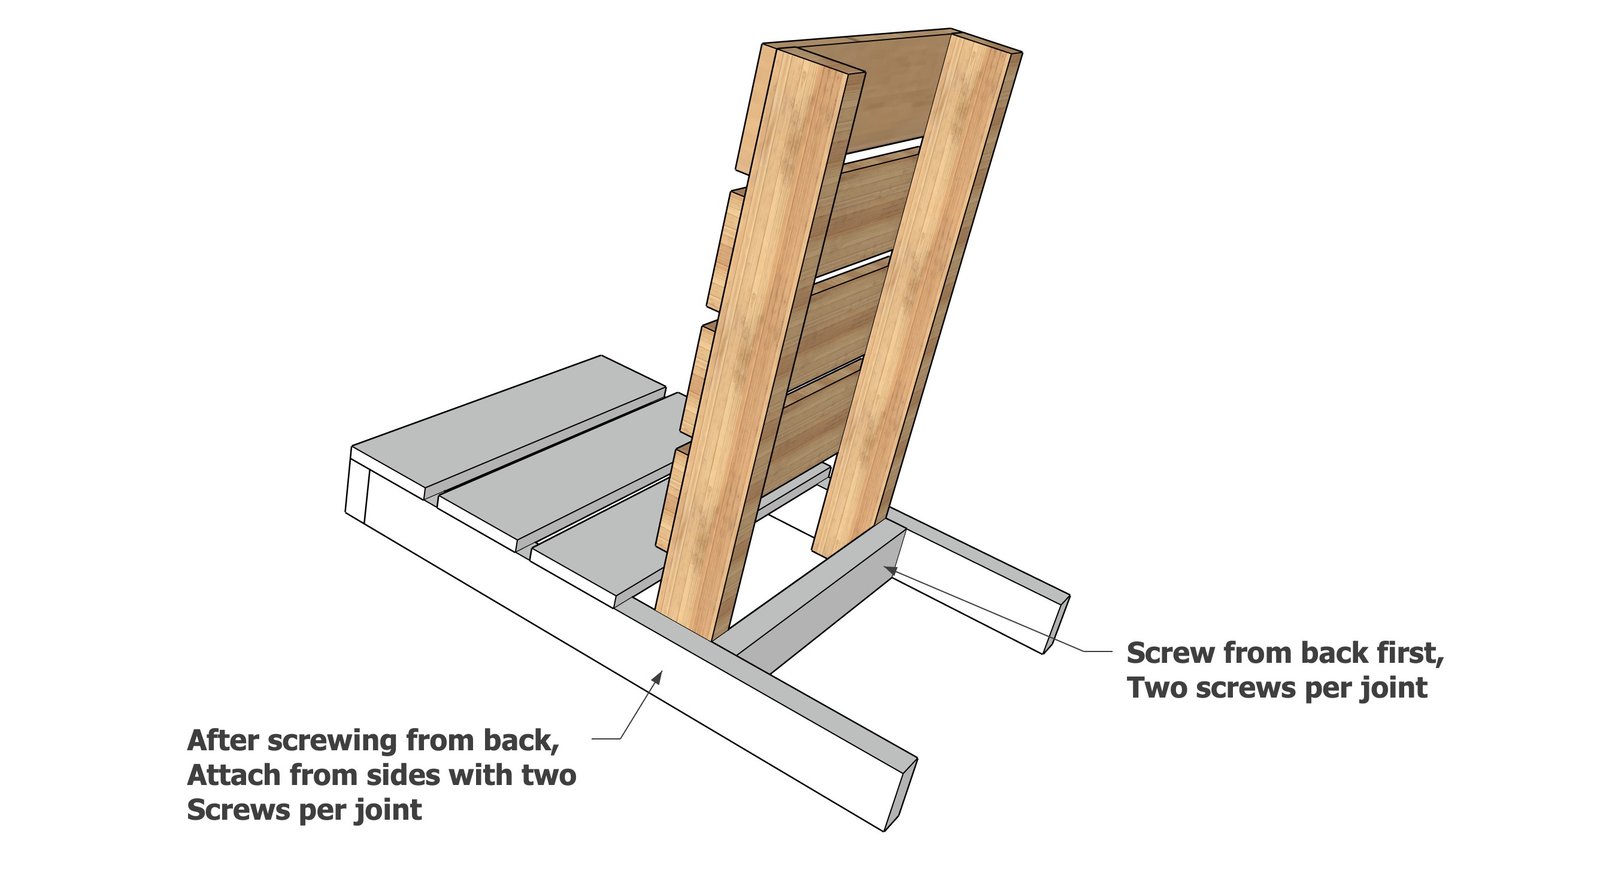
Step 5
Mark the legs as shown, the marking will be perpendicular to the the edge of the 2x4 leg (not parallel to the 15 degree angle cut) Attach to the seat stringer from the inside with multiple 2-1/2" screws at different angles for added durability.
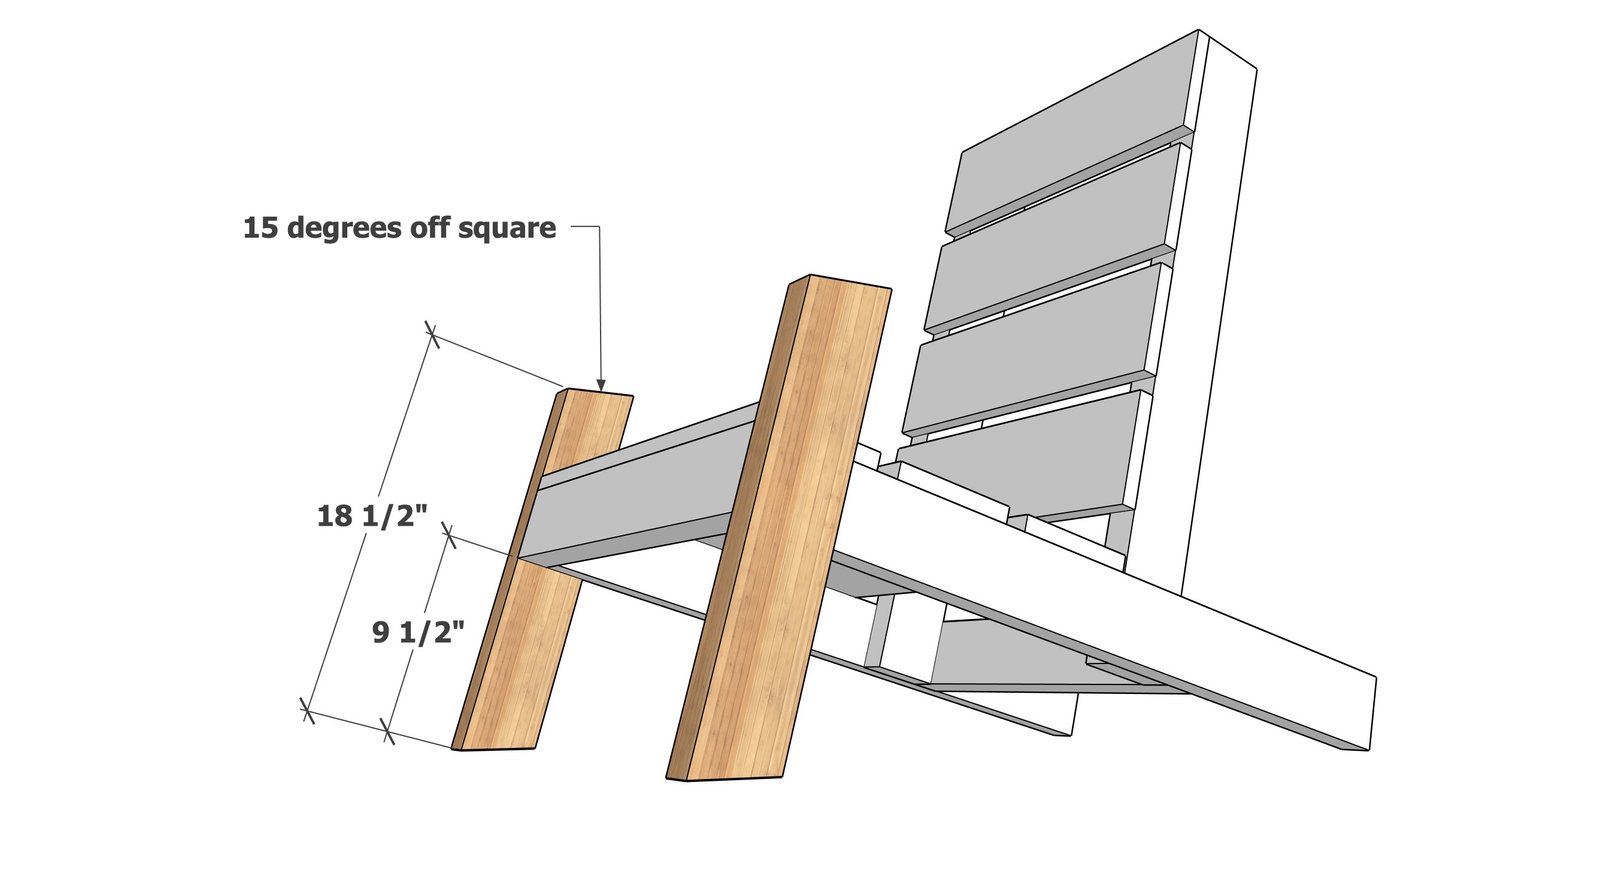
Place the chair on a level surface.
Set the arm rest on the leg and place a level on top of the arm rest. Mark level on the 2x4 seat back and then attach the arms to the seat back. Then attach the arms to the tops of the legs.
Finishing
Sand all surfaces, starting with a medium grit and finishing with fine. Wipe off the dust, fill any holes or gaps with wood filler, and sand smooth once dry. Apply primer if you're painting, then finish with your choice of paint or stain and seal with a durable clear topcoat. For outdoor projects, use exterior-rated primer, paint or stain, and sealer so the piece stands up to the weather.
Source (temporary): https://www.ana-white.com/woodworking-projects/ultimate-diy-adirondack-chair-plans