The Ultimate DIY Buffet Stand for Gatherings
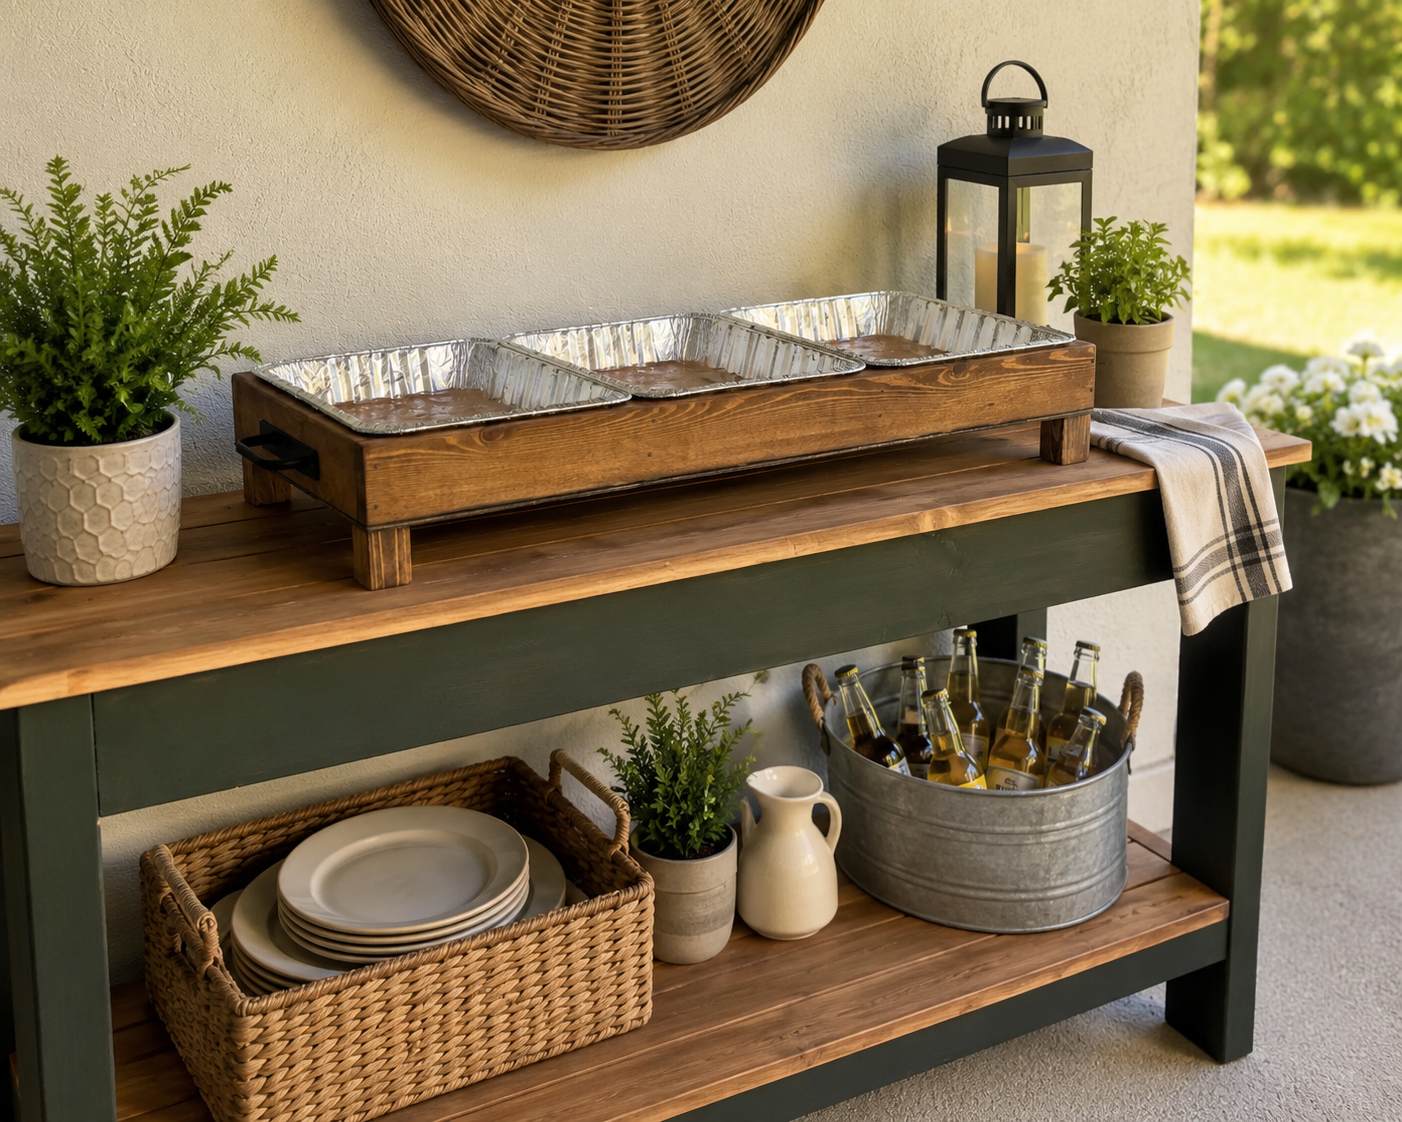
DIY Aluminum Serving Tray Stand – Perfect for Parties, Potlucks, and BBQs! If you're anything like us, you know presentation matters—especially when you're hosting. Whether it's a backyard BBQ, a birthday bash, or a cozy potluck dinner, how you serve your food can make all the difference in not just how it looks, but how easy it is to clean, serve, keep hot or cold, and keep looking great throughout the party. That’s why we’re excited to share a brand new DIY project you’re going to love: a DIY Aluminum Serving Tray Stand that holds three trays to elevate your food game—literally. This sleek, modern stand is made from lightweight aluminum angle and is designed to stack three standard-size serving trays vertically. It’s the perfect solution for saving table space while still putting your spread on full display. From sliders and charcuterie to desserts and sides, everything just looks better when it’s beautifully organized and easy to access. Add ice packs or heat packs underneath to keep to temperature. Easy to transport and clean up too! Tag us when you build one—we’d love to see how you use yours! #AnaWhite_BragPost
Specifications
| Project type | Food Serving and Display |
|---|---|
| Room | dining room |
| Difficulty | Starter Projects |
| Estimated cost | Under $20 |
Shopping List
- 1 - 10' long 1x3
- 2x2 - Scrap totaling 8" (legs)
- 1/8" Plywood - 30" x 14" (scrap)
- 2 - Handles
- Aluminum Trays
Cut List
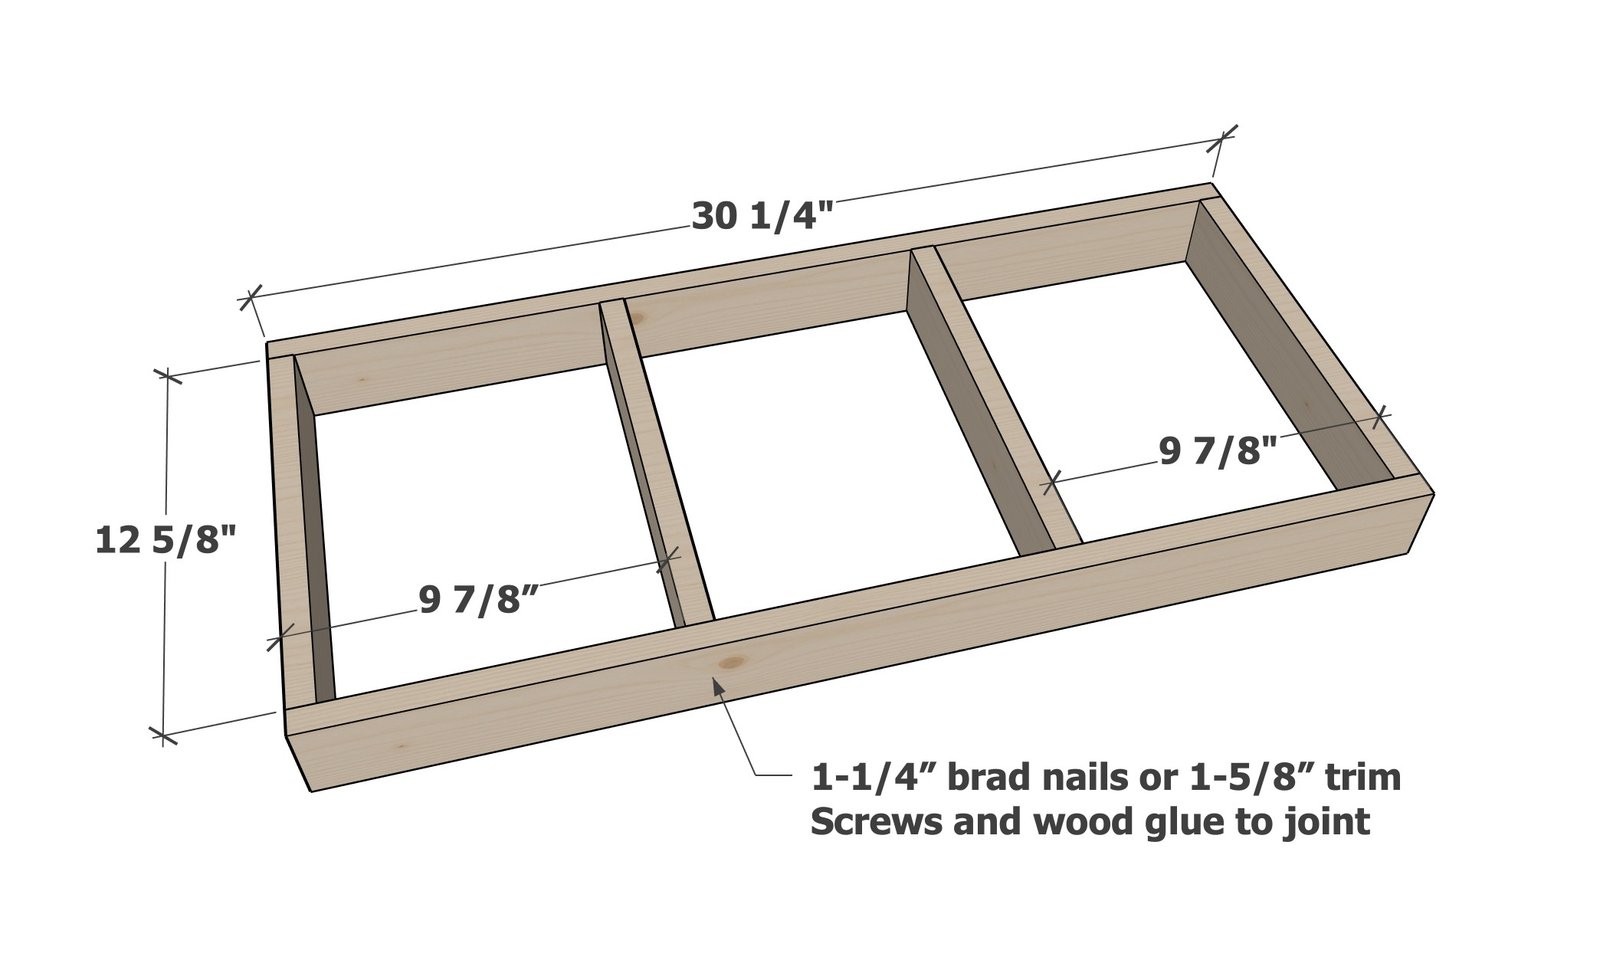
- 1x3 - 2 @ 30 1/4"
- 1x3 - 4 @ 12 5/8"
- 2x2 - 4 @ 2"
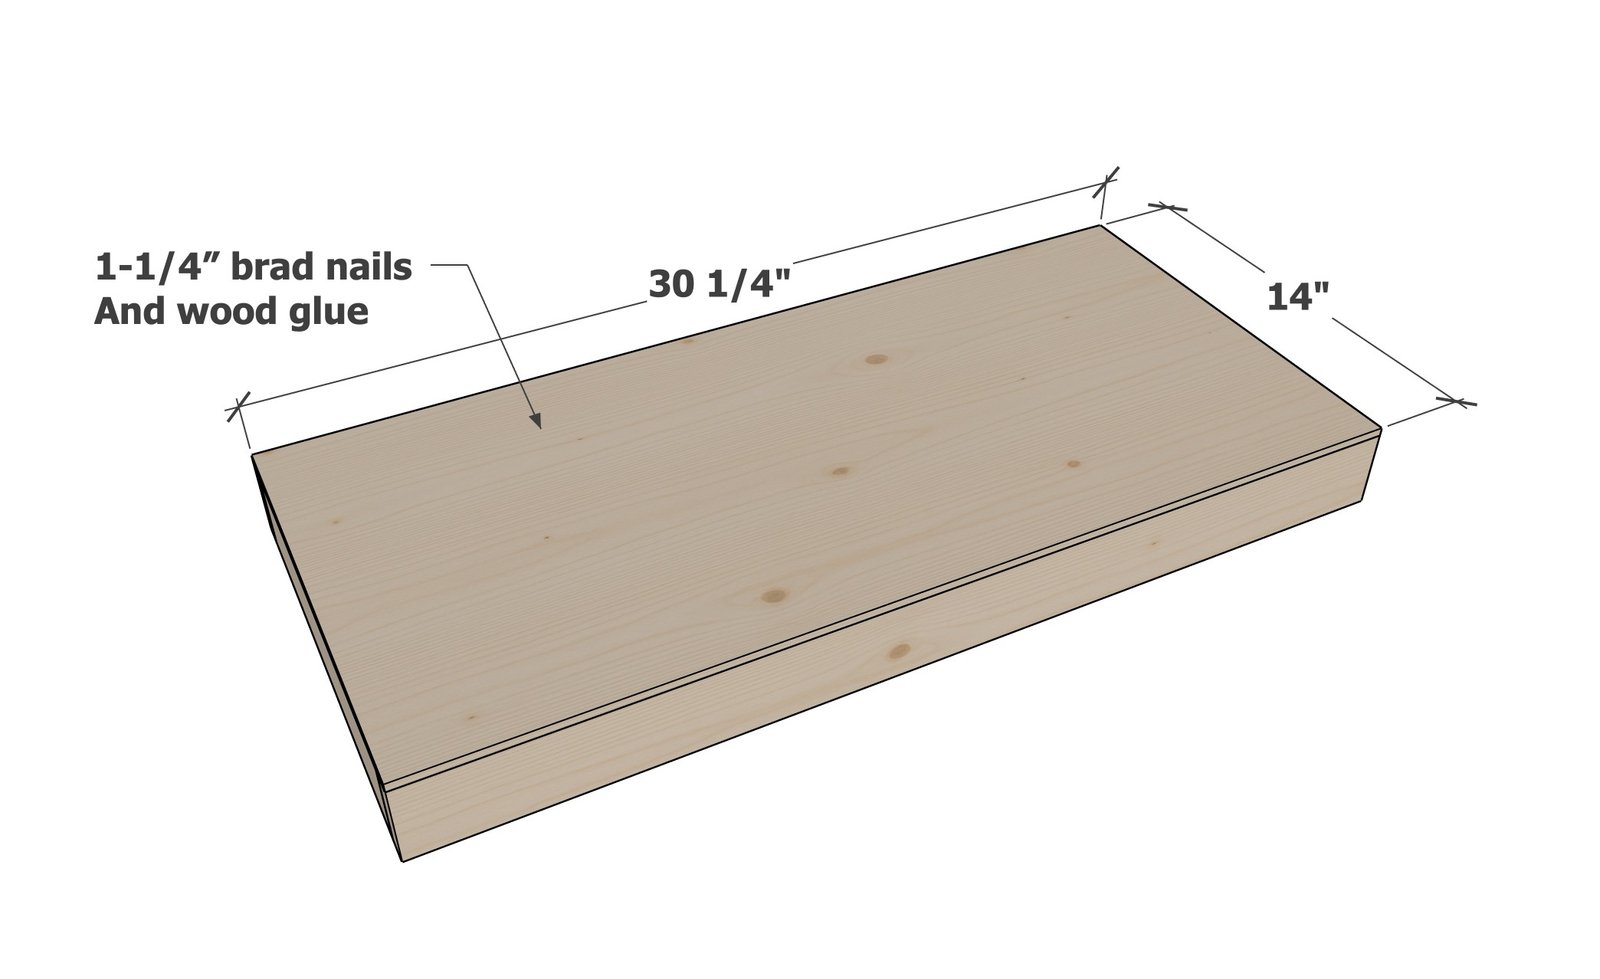
- 1/8" ply 30" x 14"
Tools
- measuring tape
- square
- pencil
- safety glasses
- hearing protection
- drill
- circular saw
- compound miter saw
- nailer
- sander
Step-by-step Instructions
Layout the 1x3 boards and check to make sure the trays will fit. Adjust if needed.
Attach with 1-1/4" brad nails and wood glue. You can alternatively use a self tapping trim screw, with a star head bit.
Step 2
Attach the bottom with brad nails and glue, or alternatively, screws. Brad nails are preferred as they are less expensive and faster.
Step 3
Add the 2x2 feet to the bottom with preferably screws. Alternatively, you can use multiple brad nails and wood glue, but will not be the most secure connection.
Finishing
Sand all surfaces, starting with a medium grit and finishing with fine. Wipe off the dust, fill any holes or gaps with wood filler, and sand smooth once dry. Apply primer if you're painting, then finish with your choice of paint or stain and seal with a durable clear topcoat. For outdoor projects, use exterior-rated primer, paint or stain, and sealer so the piece stands up to the weather.
Source (temporary): https://www.ana-white.com/woodworking-projects/ultimate-diy-buffet-stand-gatherings-holds-3-aluminum-trays