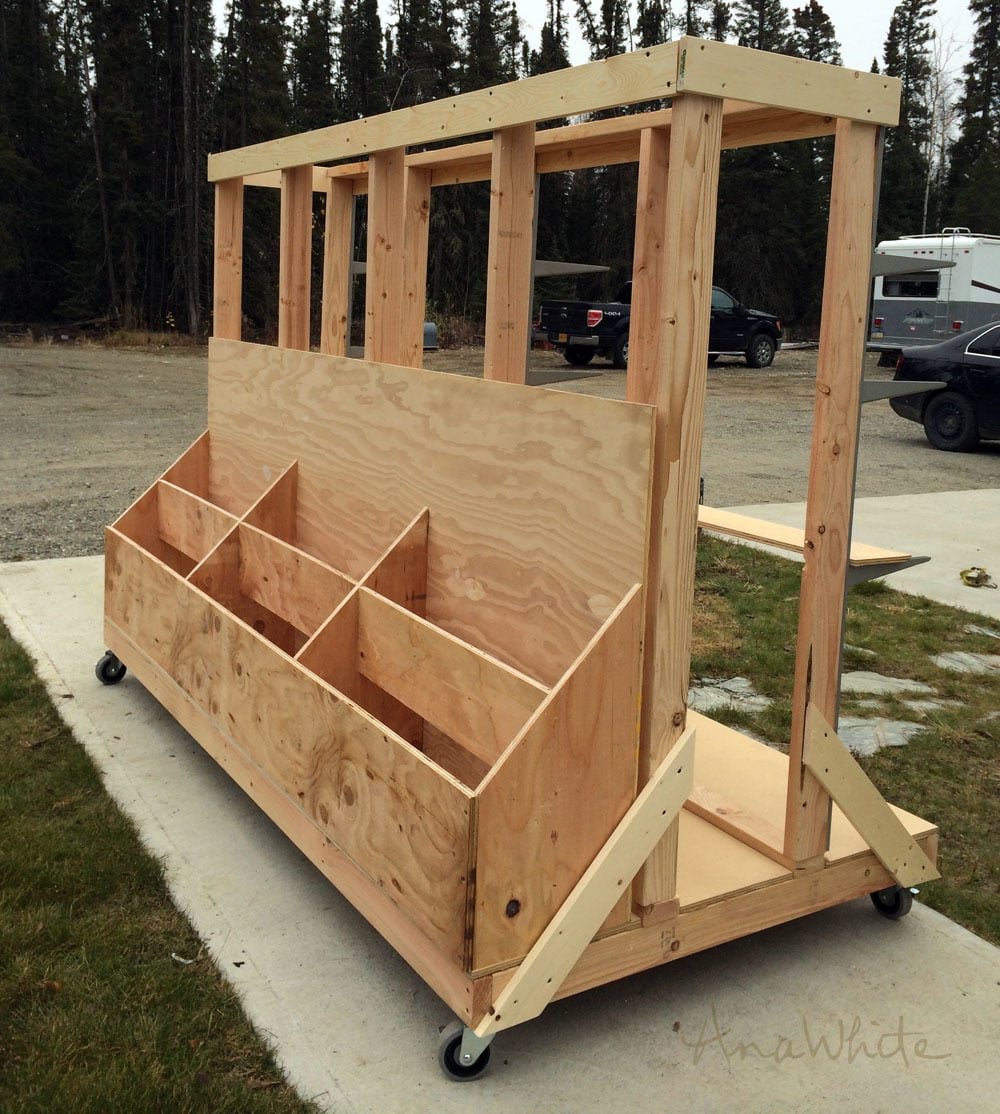
Ultimate Lumber and Plywood Storage Cart
We've been planning on building a dedicated wood shop for years. An awesome Build Cave just for creating projects out of wood.
Specifications
| Project type | Other Projects |
|---|---|
| Room | Outdoor |
| Difficulty | Intermediate |
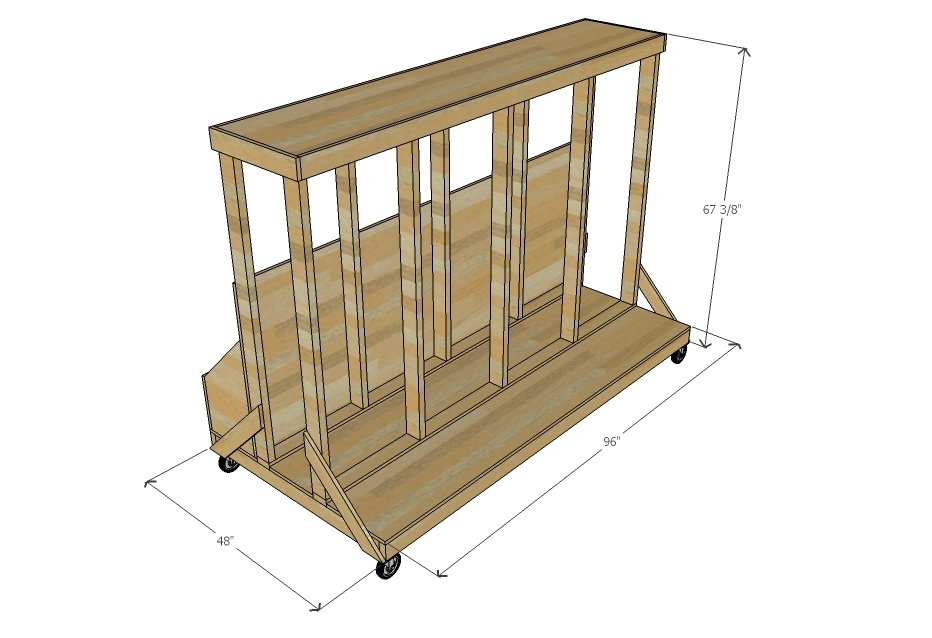
Dimensions
Use the size-specific shopping and cut lists below.
Shopping List
11 - 2x4 @ 8 feet
5 - 2x4 @ 10 feet (cut 60" long wall pieces from these)
4 - 1x4 or 1x3 boards
2 sheets of 1/2" plywood (can be construction grade)
1 sheet of 3/4" plywood or 1x material for scrap wood bins, top shelf
4 Heavy Duty Caster Wheels
Cut List
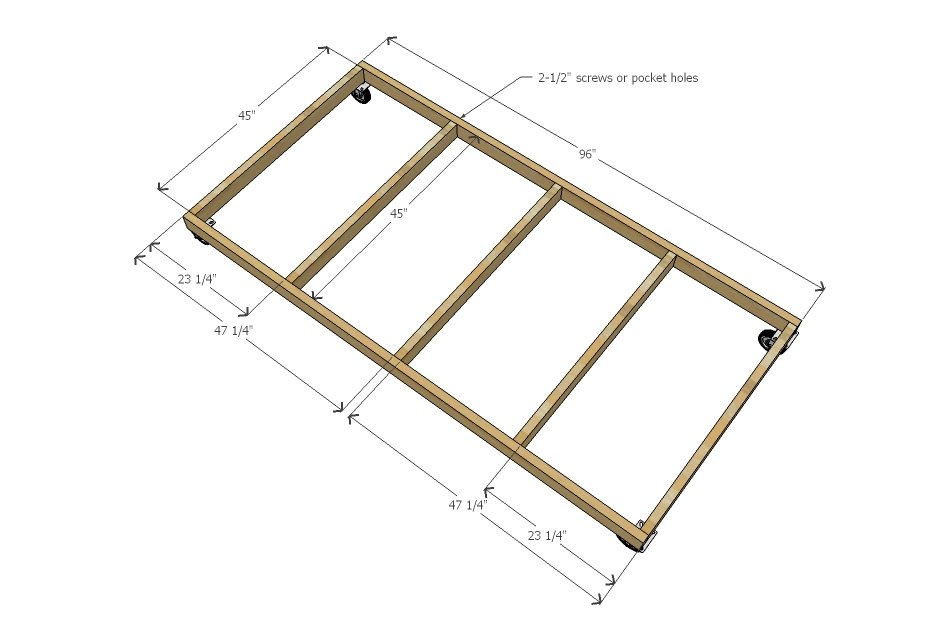
BASE
2 - 2x4 @ 96"
5 - 2x4 @ 45"
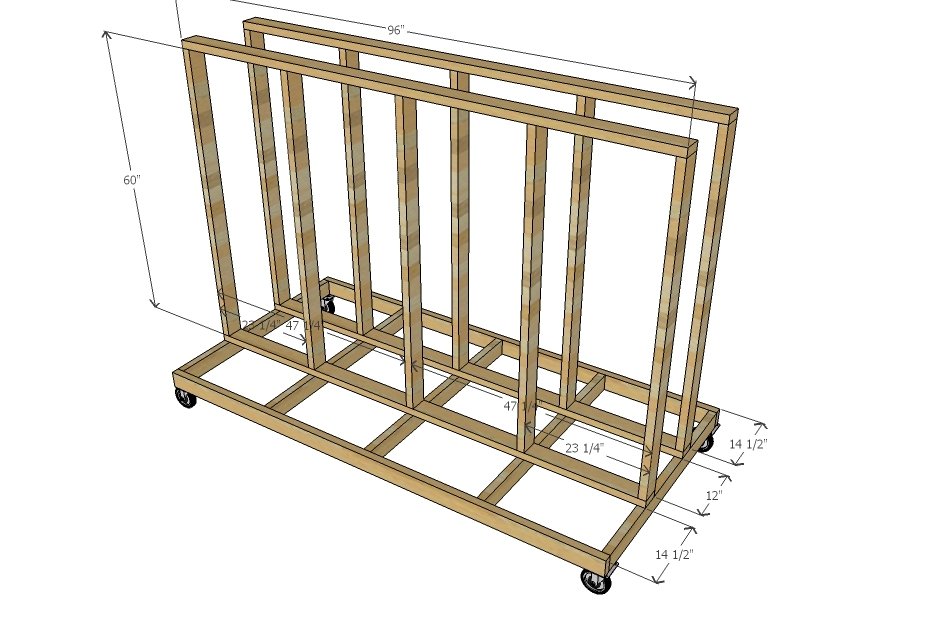
WALLS
10 - 2x4 @ 60"
4 - 2x4 @ 96"
FLOOR
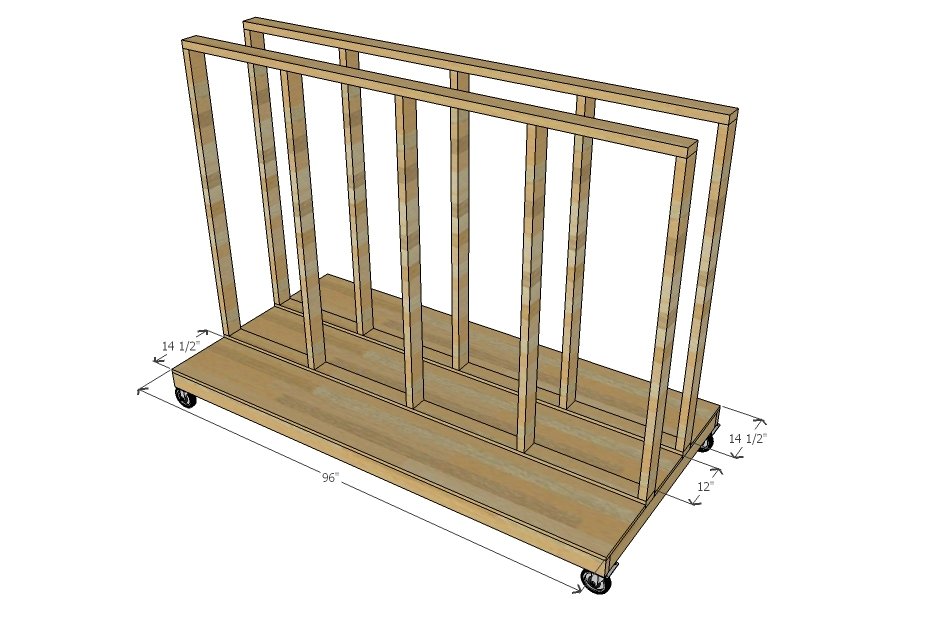
2 - 1/2" plywood @ 96" x 14-1/2"
1 - 1/2" plywood @ 96" x 12"
CROSS SUPPORTS
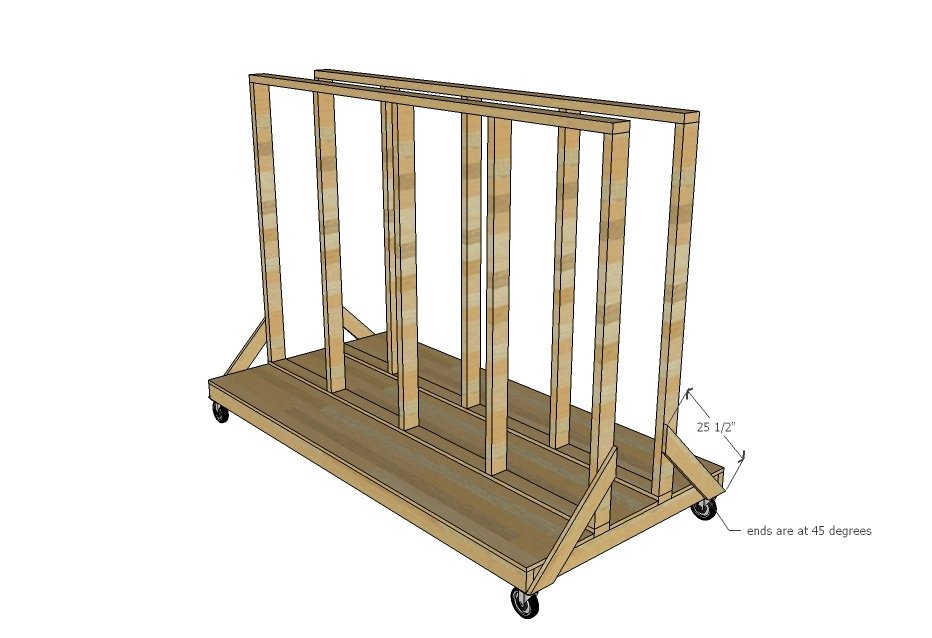
4 - 1x4 @ 25-1/2" (both ends cut at 45 degrees, not parallel, long point to long point measurement
TOP
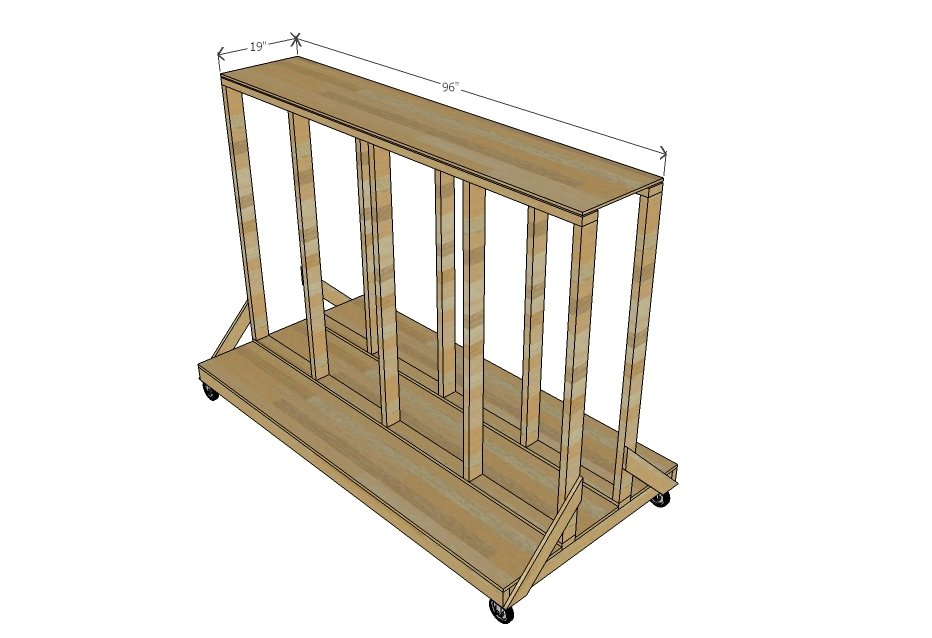
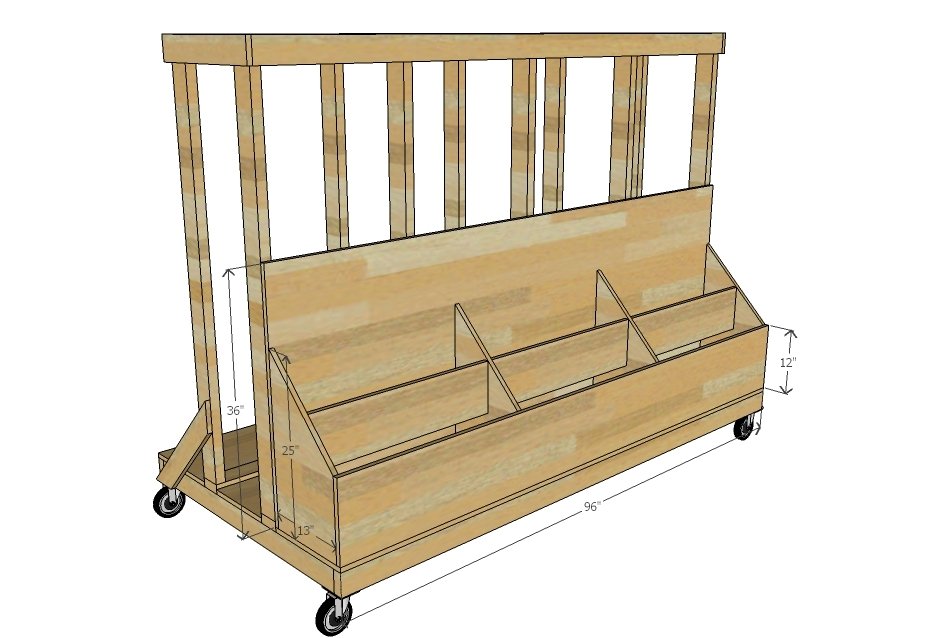
1 - 1/2" plywood @ 19" x 96"
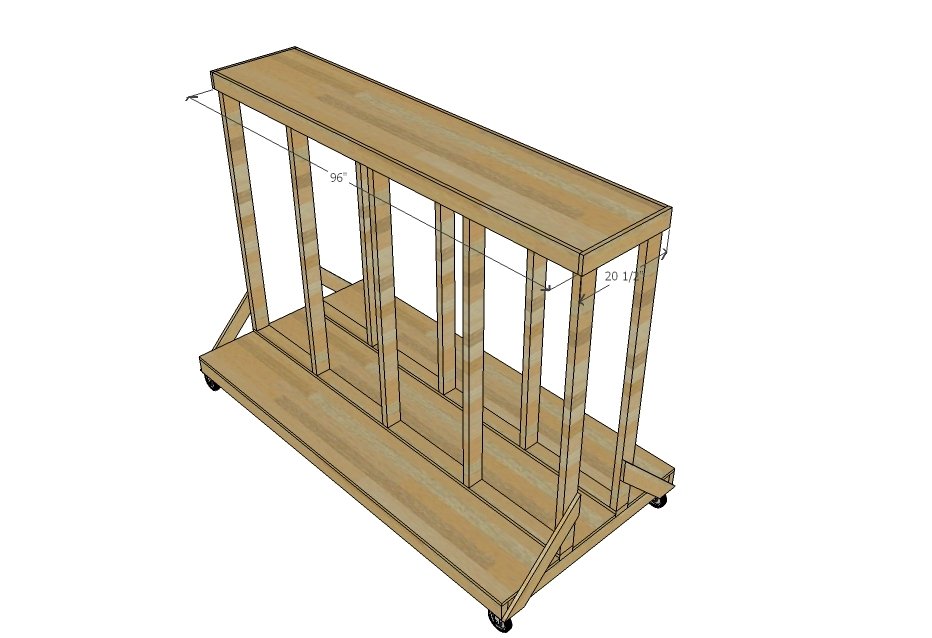
2 - 1x4 @ 96"
2 - 1x4 @ 20-1/2"
SCRAP WOOD BIN
1 - 1/2" plywood @ 36" x 96" (cut from same piece as 12" strip below)
1 - 1/2" plywood @ 12" x 96" (cut from same piece as 36" strip above)
4 - 3/4" plywood 13" x 25" tapered down to 12" on one side at 45 degree angle
dividers can be cut from 1x boards or 3/4" plywood
*can use 1x3s instead of 1x4s
Tools
- measuring tape
- square
- pencil
- safety glasses
- hearing protection
- drill
- circular saw
- compound miter saw
Step-by-step Instructions
Step 1
Screw together the base with either 2-1/2" screws or pocket holes (1-1/2" setting and 2-1/2" pocket hole screws). Adjust for square. I'd add the caster wheels at this stage as it will get super awkward to add after this step.
Step 2
Build the walls and then attach to top of floor framing. You'll need to screw at an angle to attach to the floor studs.
Step 3
Place plywood between the walls. Screw down with 1-1/2" screws.
Step 4
Add cross bracing to keep the walls square. Screw on with 1-1/2" screws.
Step 5
Step 6
For additional support, I also screwed 1x4s around the top. I use the top for storing smaller pieces of plywood as well.
Step 7
The scrap wood bins are actually pretty easy to make - just cut the four side/divider pieces with the angled top out of a strip of plywood. Then attach the front and back to those strips. And then add dividers in between. Super simple.
Finishing
Sand all surfaces, starting with a medium grit and finishing with fine. Wipe off the dust, fill any holes or gaps with wood filler, and sand smooth once dry. Apply primer if you're painting, then finish with your choice of paint or stain and seal with a durable clear topcoat. For outdoor projects, use exterior-rated primer, paint or stain, and sealer so the piece stands up to the weather.
Source (temporary): https://www.ana-white.com/woodworking-projects/ultimate-lumber-and-plywood-storage-cart