Ultimate Roll Away Workbench with Miter Saw Stand
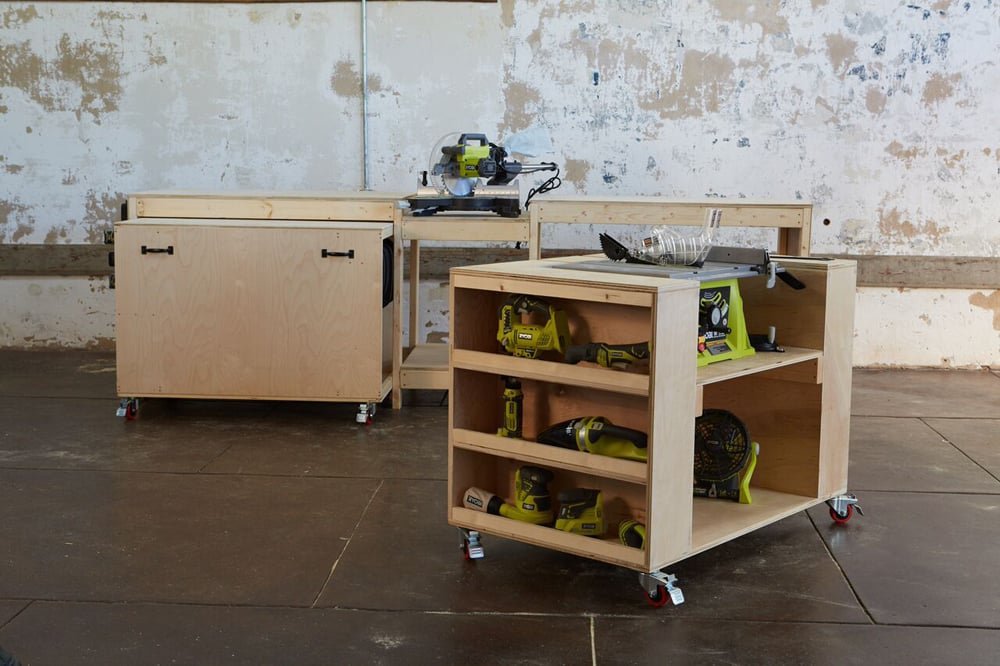
The best workbench you can build! This workbench features a miter saw stand, with roll away carts to hold all your tools and create work spaces. It's easy to customize, and the best part, it all rolls away when done! from
Specifications
| Project type | Workshop and Garage Plans |
|---|---|
| Room | Garage and Workshop |
| Difficulty | Intermediate |
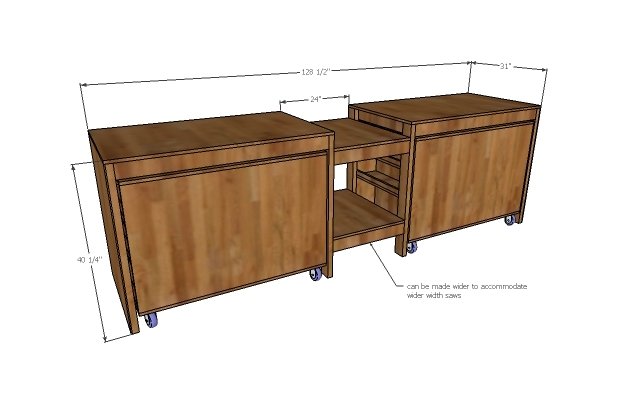
Dimensions
Use the size-specific shopping and cut lists below.
Shopping List
- 4 Sheets of 3/4” plywood
- 2 sheets of 1/4" plywood
- 8 – 3” casters with brakes
- 3/4” screws for attaching caster wheels
- 11 – 2x4 @ 8 feet long
- 8 – 1x2 @ 8 feet long
- 3” self tapping wood screws
- 2” and 1-1/4” 18 gauge staples
- 4 handles for carts
Cut List
Workbench Cut List
- 6 – 2x4 @ 49”
- 4 – 2x4 @ 28”
- 8 – 2x4 @ 39-1/2”
- 2 – 1/4” plywood @ 39-1/2” x 31” (see plywood cutting diagrams)
- 2 – 3/4” plywood @ 52-1/4” x 31” (see plywood cutting diagrams)
- 4 – 2x4 @ 29-1/2”
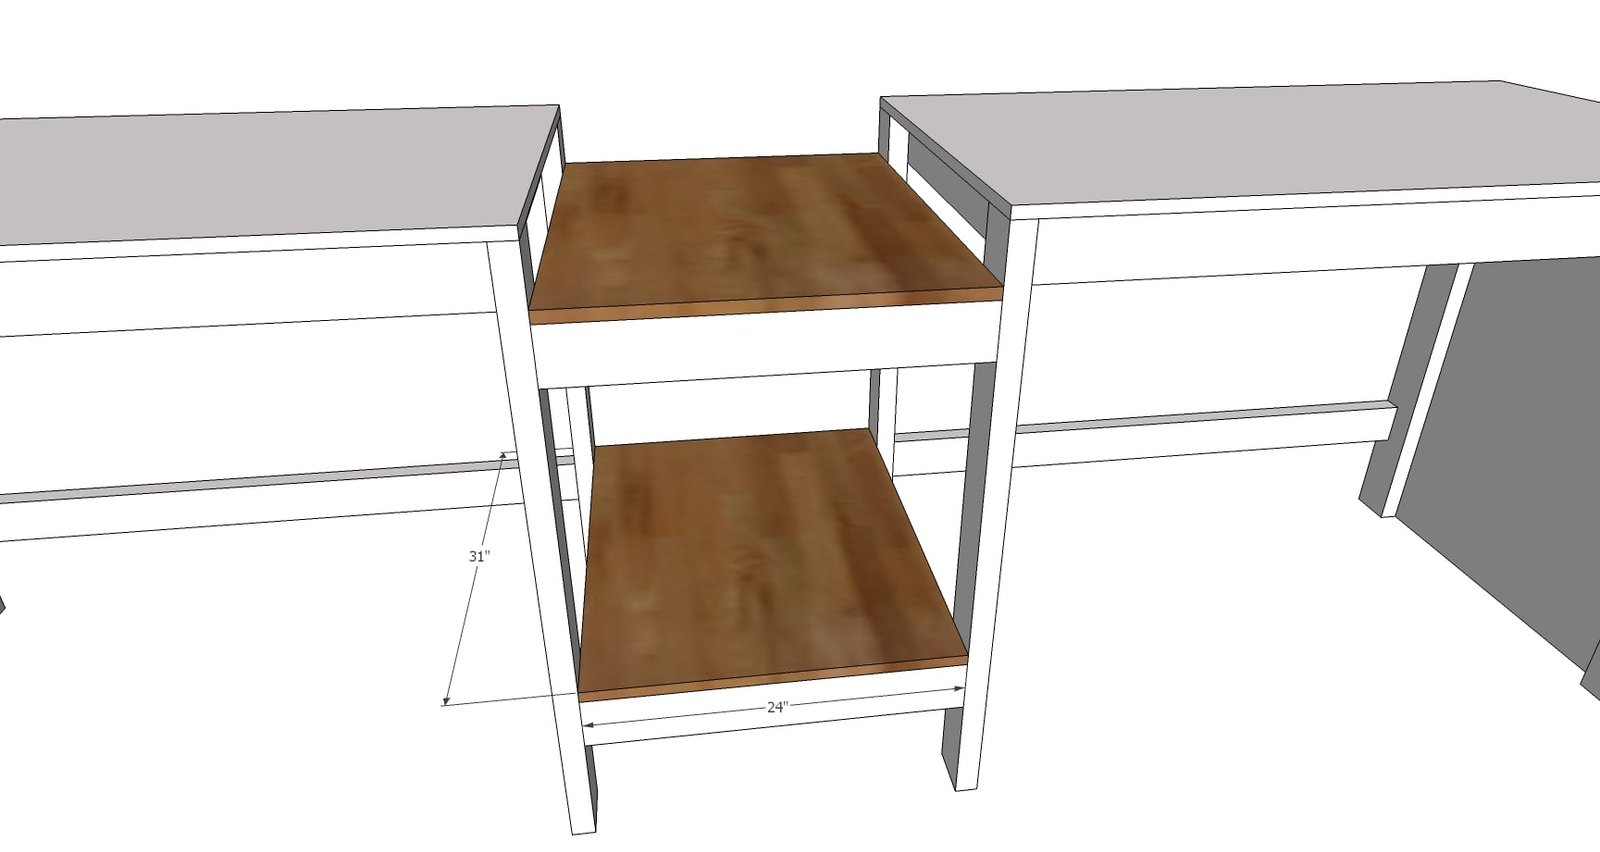
- 2 – 2x4 @ width of saw (shown at 24”)
- 2 – 3/4” plywood @ width of saw x 31” (shown at 24”)
Cart Cut List
- 2 –3/4” plywood @ 48” x 30” (see plywood cutting diagrams)
- 4 – 3/4” plywood @ 8-1/4” x 30” (cut from scraps, see plywood cutting diagrams)
- 24 – 1x2 @ 28”
- 8 – 3/4” plywood @ 8-1/4” x 28” (cut from scraps, see plywood cutting diagrams)
- 4 – 1/4” plywood @ 30” x 28-3/4”
- 4 – 3/4” plywood @ 48” x 29-1/2” (see plywood cutting diagrams)
Tools
- measuring tape
- square
- pencil
- safety glasses
- hearing protection
- drill
- circular saw
- compound miter saw
- nailer
- sander
Step-by-step Instructions
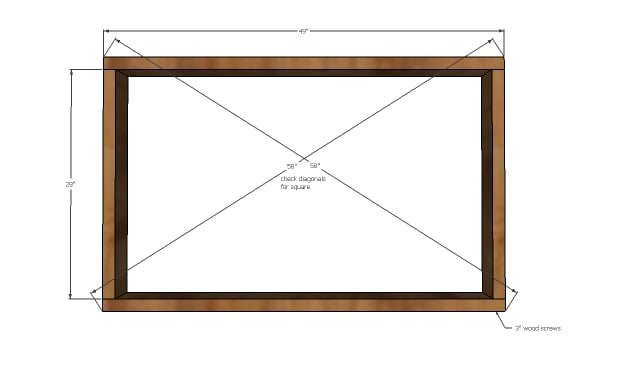
Workbench Step 1: Build Workbench Frames
Attach using 3” wood screws and glue at corners. Check for square and adjust as needed.
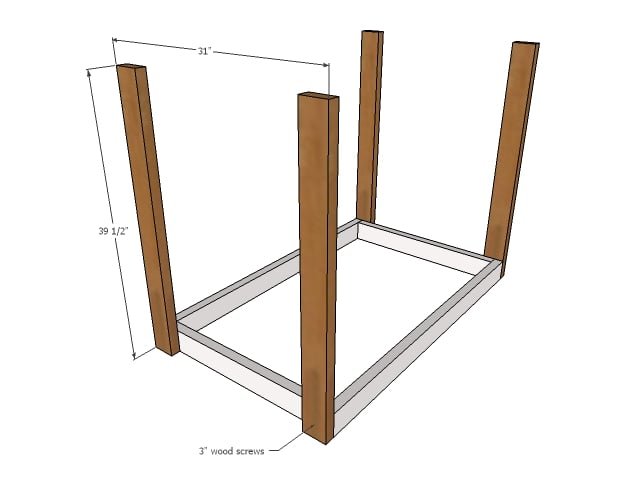
Workbench Step 2: Legs
Attach legs to frame with four 3” screws and glue. Check to make sure legs are installed square with the frame.
Workbench Step 3: Bottom Support
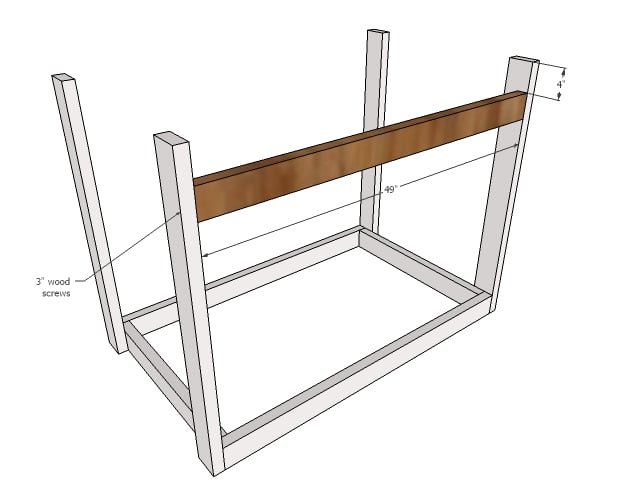
Attach bottom support to back legs of bench, 4” from bottom of legs. Use 3” wood screws and glue.
Workbench Step 4: Plywood Side
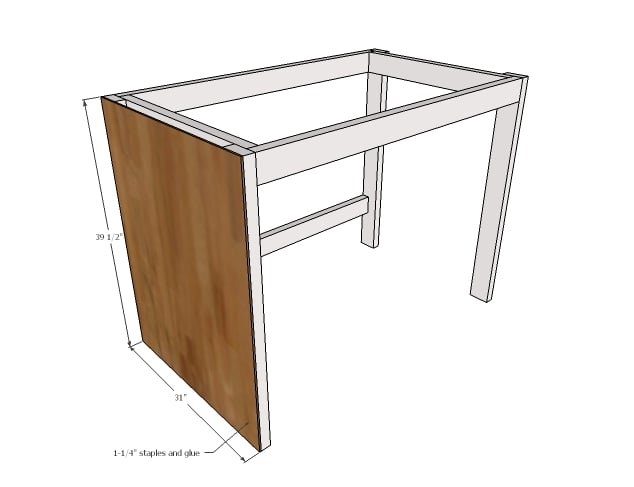
Use glue and 1-1/4” staples to attach ¼” plywood to side of workbench. Remember to plywood the outsides of the bench as shown in below diagram:
Workbench Step 5: Workbench Top
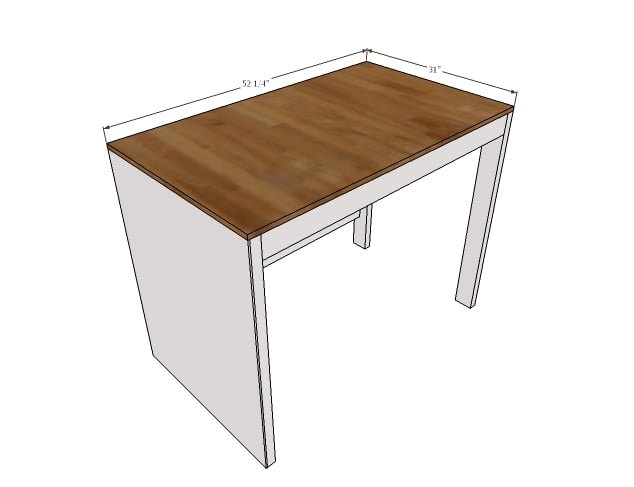
Attach workbench top to frame with 2” staples and wood glue.
Miter Saw Shelf Step 1: Cleats
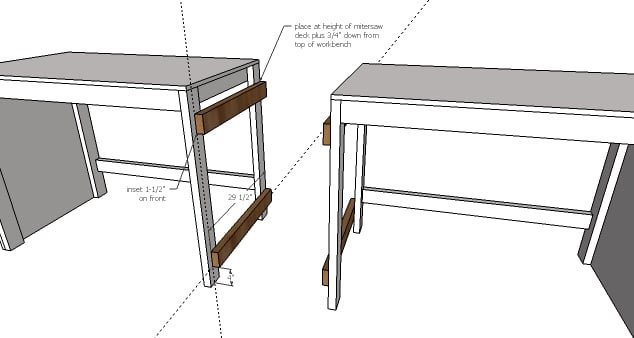
Measure the height of your miter saw deck. Add 3/4” to this measurement. Attach top cleats to sides of workbenches this measurement down from top of workbench. Cleats are flush to back, 1-1/2” less on front side. Use 3” screws. Attach bottom shelf cleats with 4” space underneath.
Miter Saw Shelf Step 2: Front Trim
Attach front trim to workbench legs and cleats with 3” screws.
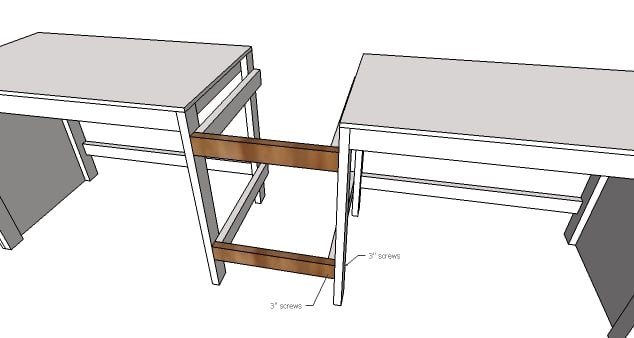
Miter Saw Shelf Step 3: Shelving
Place plywood shelving on cleats and attach with 1-1/4” staples and glue
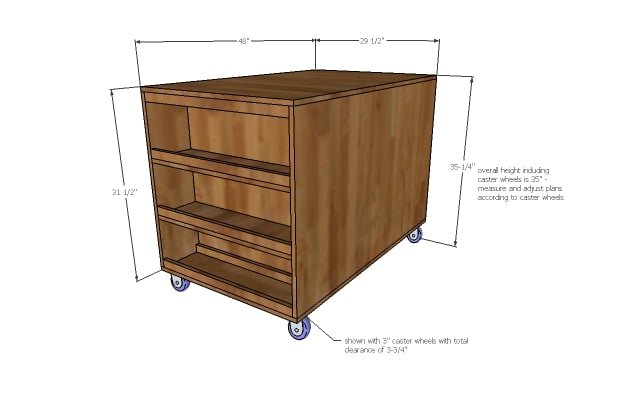
Cart Step 1: Caster Wheel Height
Measure the overall height of your caster wheels. Maximum clearance under workbench is 36” but some space should be left to allow cart to slide in. Cut list as shown is for casters with 3-3/4” clearance – adjust your cuts if your caster wheels are different heights. Also double check the final location of your workbench for sloping garage floors and give extra room if in doubt.
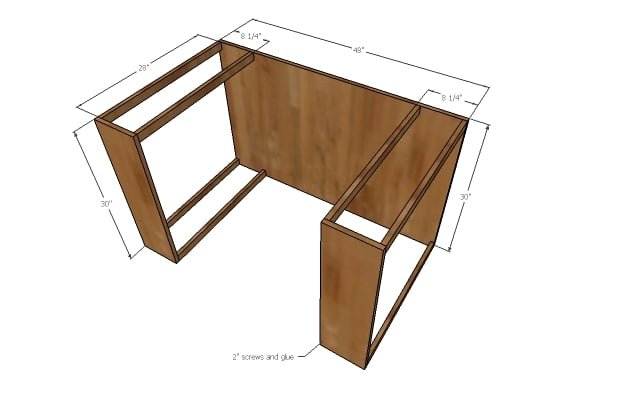
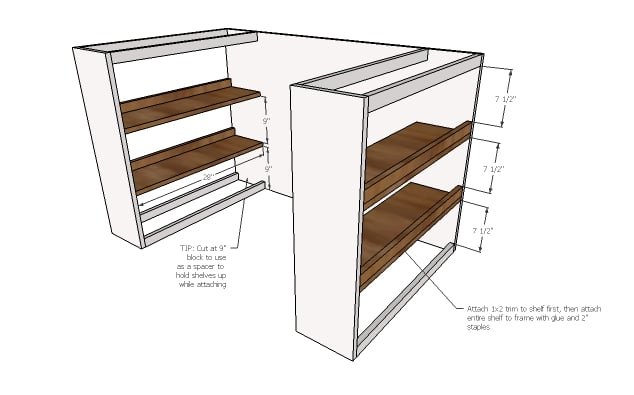
Cart Step 2: Cart Frame
Use 2” screws to attach cart front to cart shelf end with 1x2s. Build two of the cart frames.
Cart Step 3: Shelves
Attach remaining 1x2s to shelves with 1-1/4” staples from underside. Then attach shelves inside cart frames with 2” screws or staples and glue. TIP: Cut two 9” blocks of wood and use as spacers when placing shelves. NOTE: Shelves can be placed at any height – customize to fit your needs and toolset.
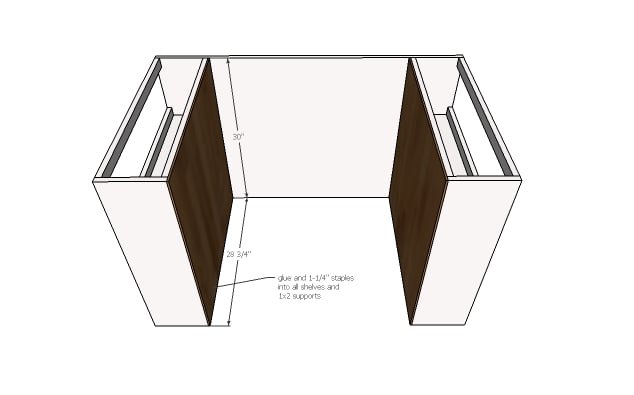
Cart Step 4: Shelf Backs
Attach backs to shelves with 1-1/4” staples and glue.
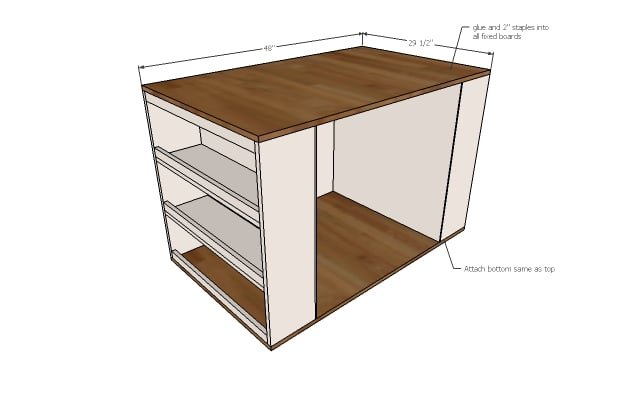
Cart Step 5: Top and Bottom
Attach top and bottom to cart frame with 2” staples and glue
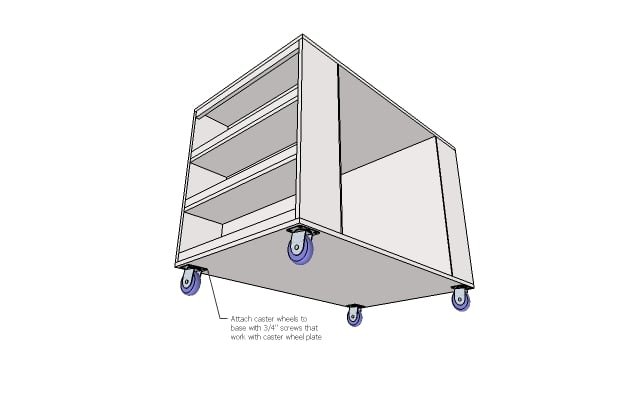
Cart Step 6: Caster Wheels
Install caster wheels on bottom of carts with ¾” screws.
Step 1: Benchtop Cutout
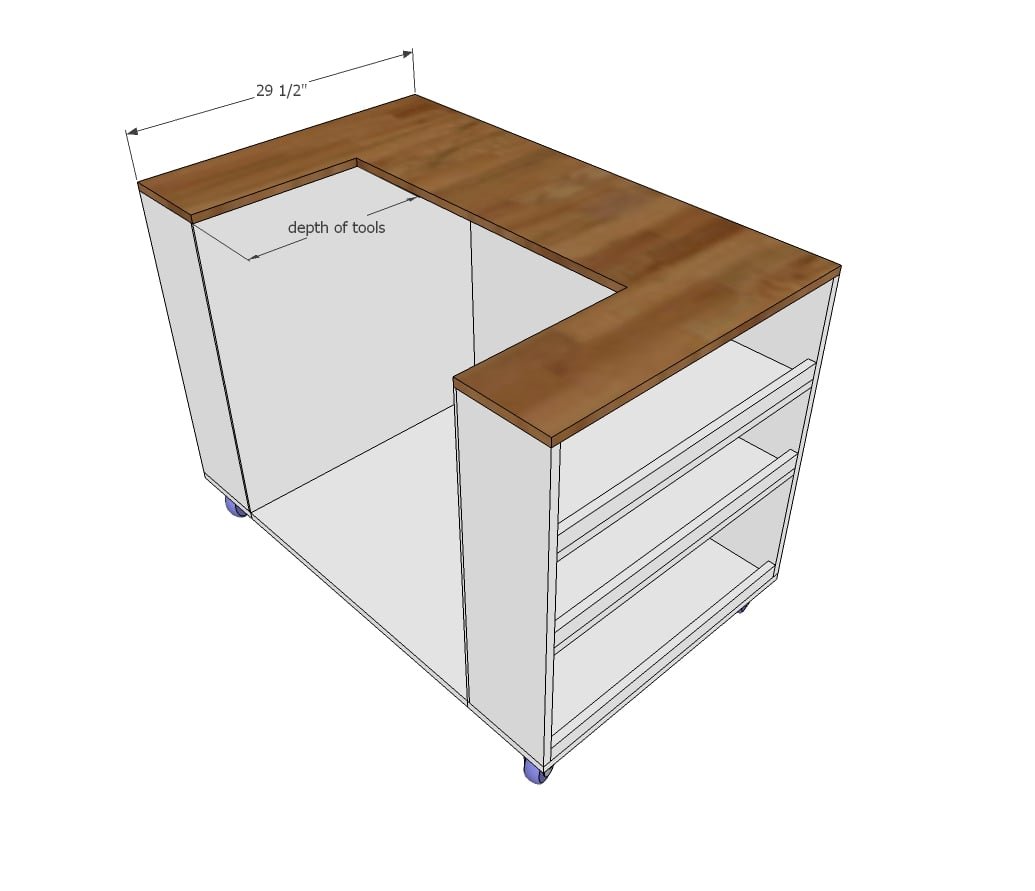
Use a circular saw or jigsaw to carefully cut out the top of the workbench cart, following back of shelves and cutting to depth needed for your bench top tools. Make sure you leave about 2” extra for adding the cleat in step 3.
Step 2: Bench Top Cleats
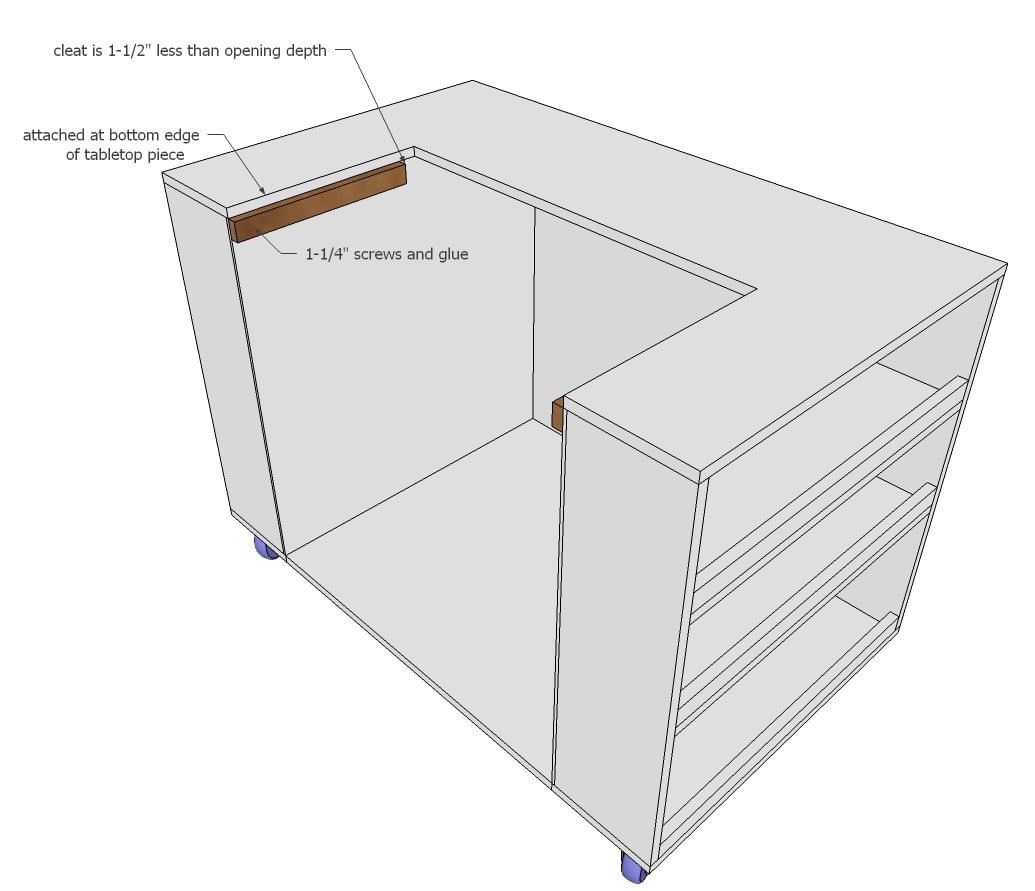
Cut 1x2 cleats 1-1/2” less than the opening depth. Screw to the insides of the workbench cart, so the 1x2 top is flush with the bottom edge of the plywood workbench top.
Step 3: Benchtop Tool Shelf
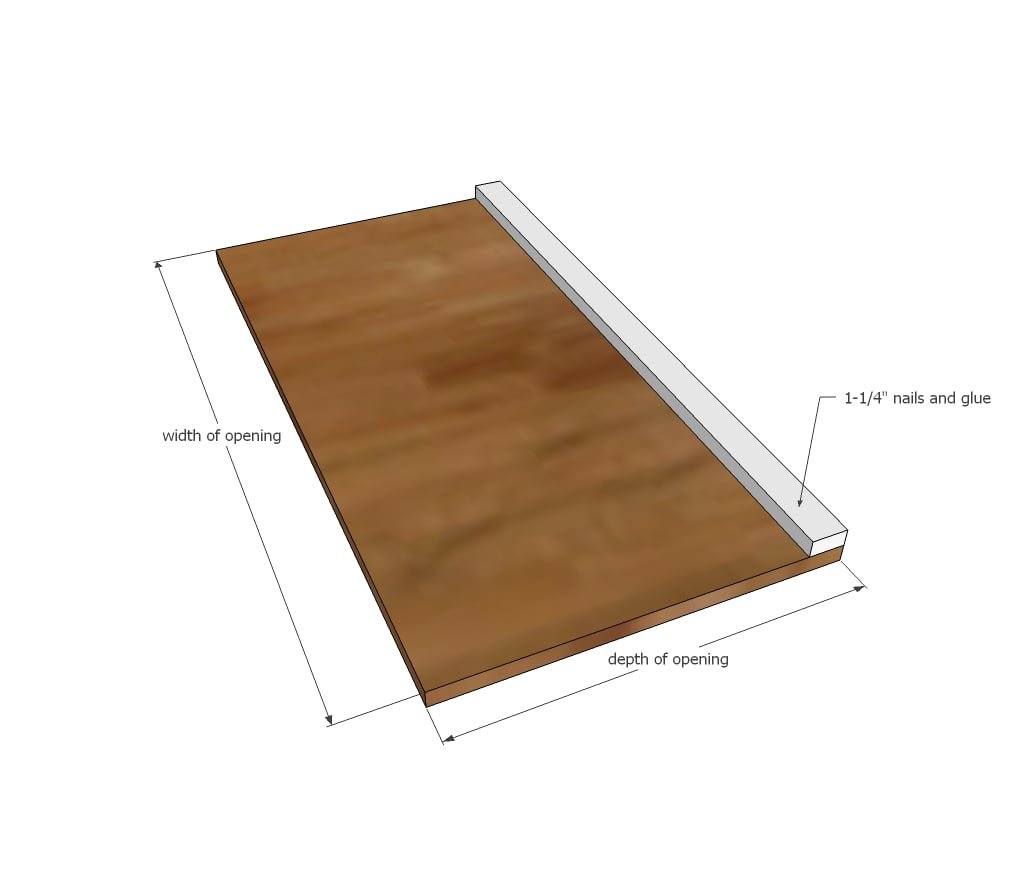
Attach a 1x2 cleat flat to 3/4” thick plywood cut to match the opening of the benchtop. Test fit and adjust if necessary.
Step 4: Bench Top Tool
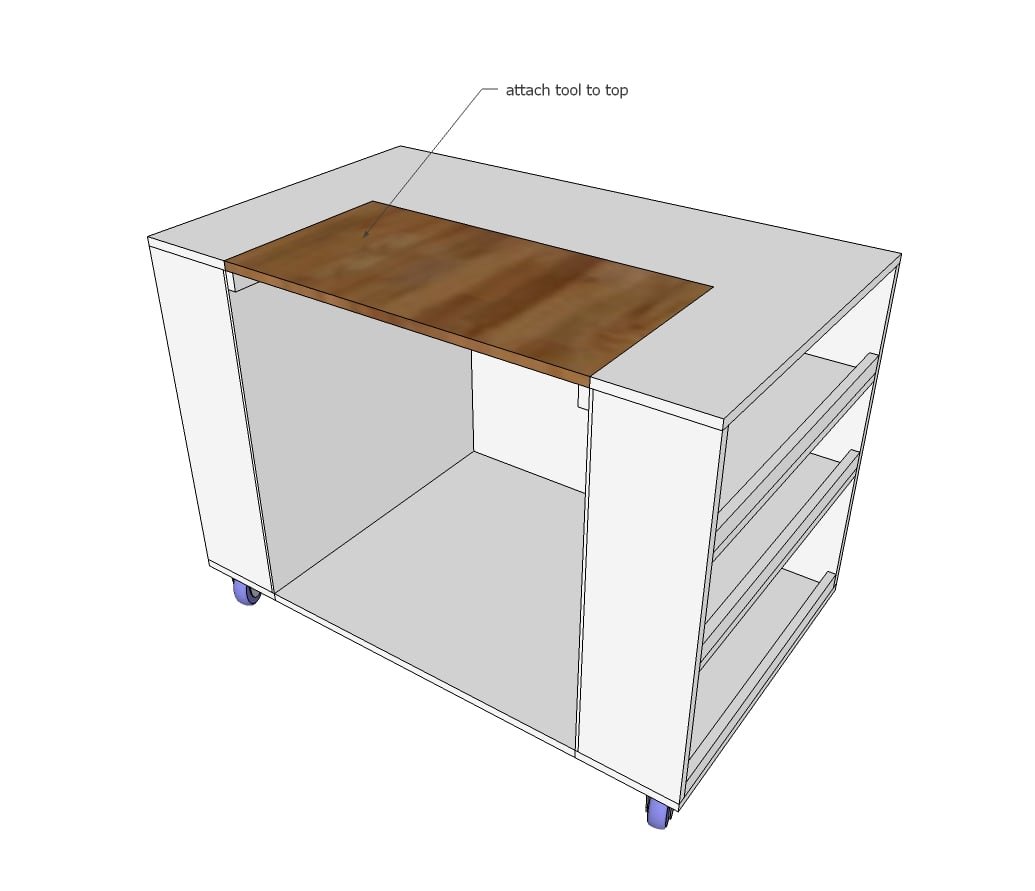
Attach Bench top tool to the removeable tabletop piece as recommended by the tool’s guide. Only lighter tools should be hung upside down. Additional cleats can be added inside cart for storing more benchtop tools.
Step 5: Tablesaw Modification
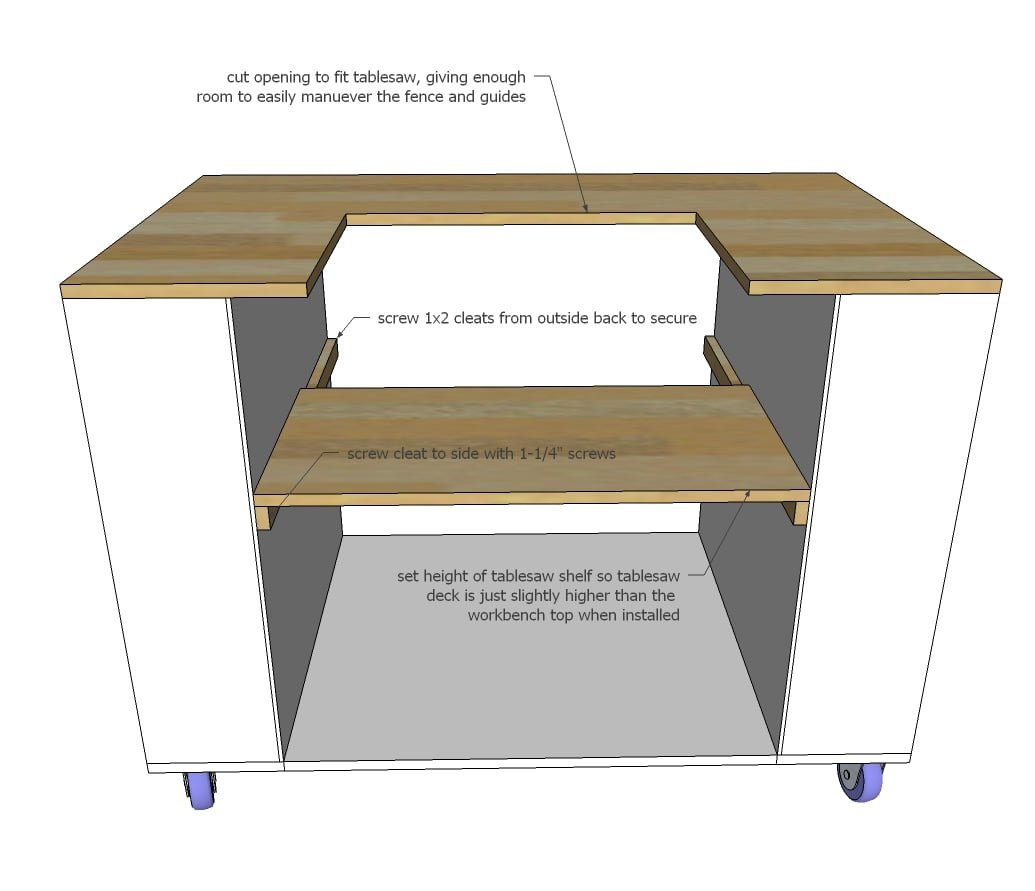
Repeat steps as directed for benchtop tools, except custom cut tabletop out to fit your tablesaw, leaving enough room for the tablesaw fence, guides and accessories to freely move. Use cleats and ¾” plywood to create a shelf for the tablesaw. When installation is complete, the tablesaw deck should be slightly higher than the tabletop itself. Secure tabletop to shelf.
Finishing
Sand all surfaces, starting with a medium grit and finishing with fine. Wipe off the dust, fill any holes or gaps with wood filler, and sand smooth once dry. Apply primer if you're painting, then finish with your choice of paint or stain and seal with a durable clear topcoat. For outdoor projects, use exterior-rated primer, paint or stain, and sealer so the piece stands up to the weather.
Source (temporary): https://www.ana-white.com/woodworking-projects/ultimate-roll-away-workbench-miter-saw-stand