Umbrella Stand Hampton
to DIY umbrella stand inspired by Pottery Barn Chesapeake Umbrella stand.
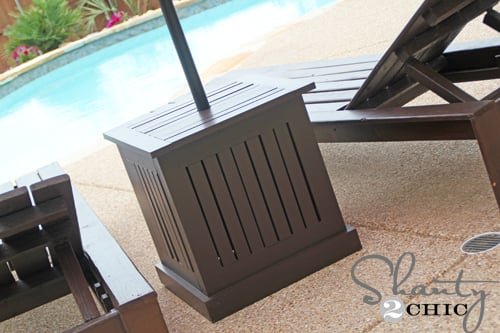
Specifications
| Project type | Table Plans |
|---|---|
| Room | Outdoor |
| Style | Cottage Style Furniture Plans |
| Difficulty | Beginner Projects |
| Estimated cost | Under $20 |
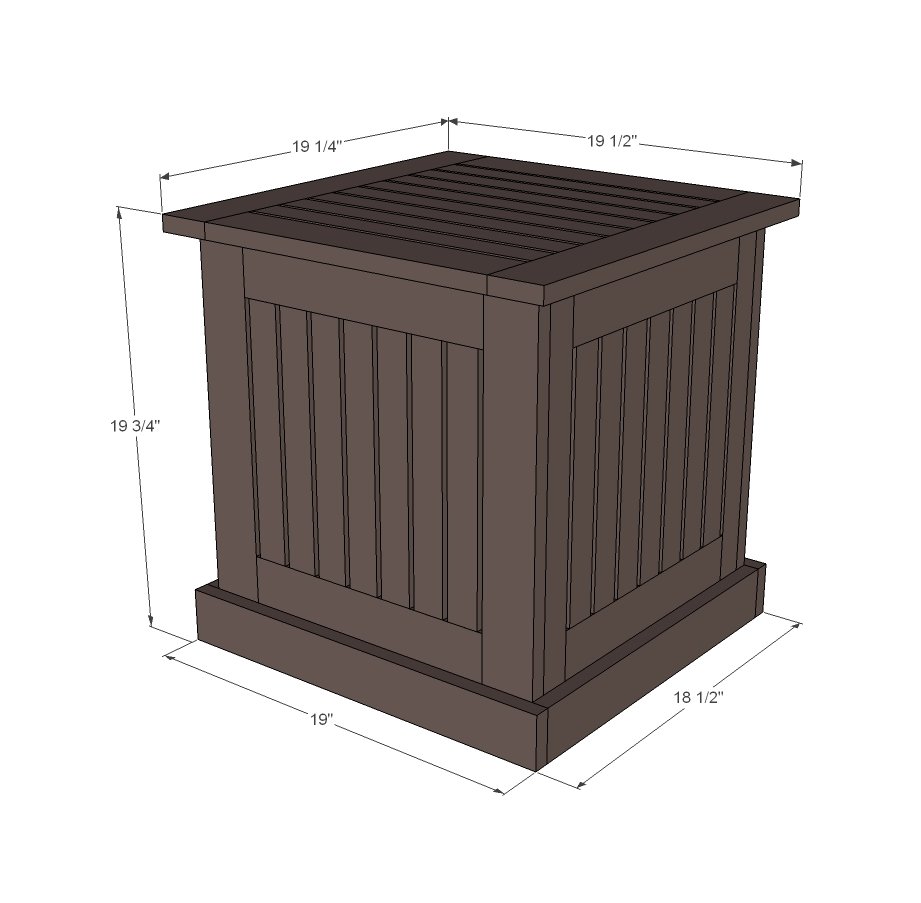
Dimensions
Use the size-specific shopping and cut lists below.
Shopping List
6 – 1x2 @ 8 feet long
3 – 1x3 @ 8 feet long
1 ¼” pocket hole screws
1 ¼” finish nails or screws
Wood glue
Cut List
28 – 1x2 @ 11 ¾”
8- 1x3 @ 12 ½”
4 – 1x2 @ 19”
4 – 1x3 @ 19”
2 – 1x3 @ 19 ¼”
2 – 1x3 @ 14 ½”
8 – 1x2 @ 14 ½”
2 – 1x3 @ 19”
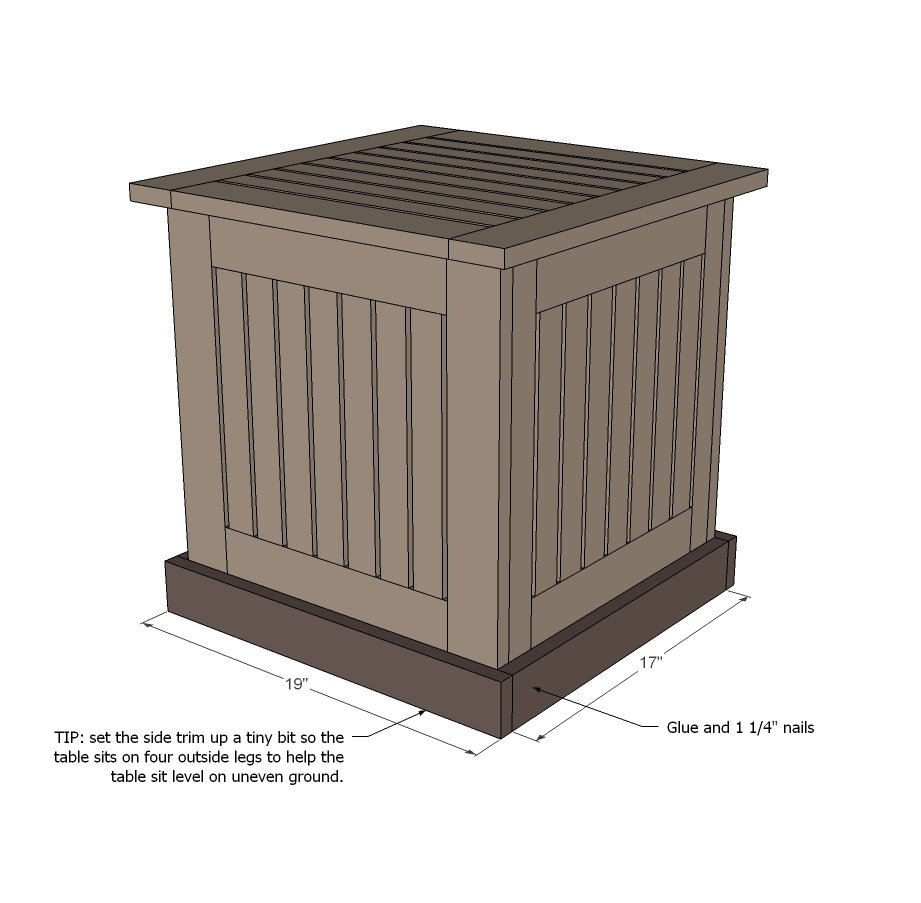
2 – 1x3 @ 17”
Tools
- measuring tape
- square
- pencil
- safety glasses
- hearing protection
- kreg-jig
- drill
- circular saw
- sander
Step-by-step Instructions
Step 1
Build two sides as shown in the diagram above. Note that a Kreg Jig is highly recommended here. If you use a single PH just make sure the joint is glued so it doesn't twist out on you later. TIP: Drill 3/4" PHs along the edges so you can attach the other sides in step 3 with screws all hidden on the insides. Also consider drilling 3/4" PHs facing upward for attaching top in later steps too.
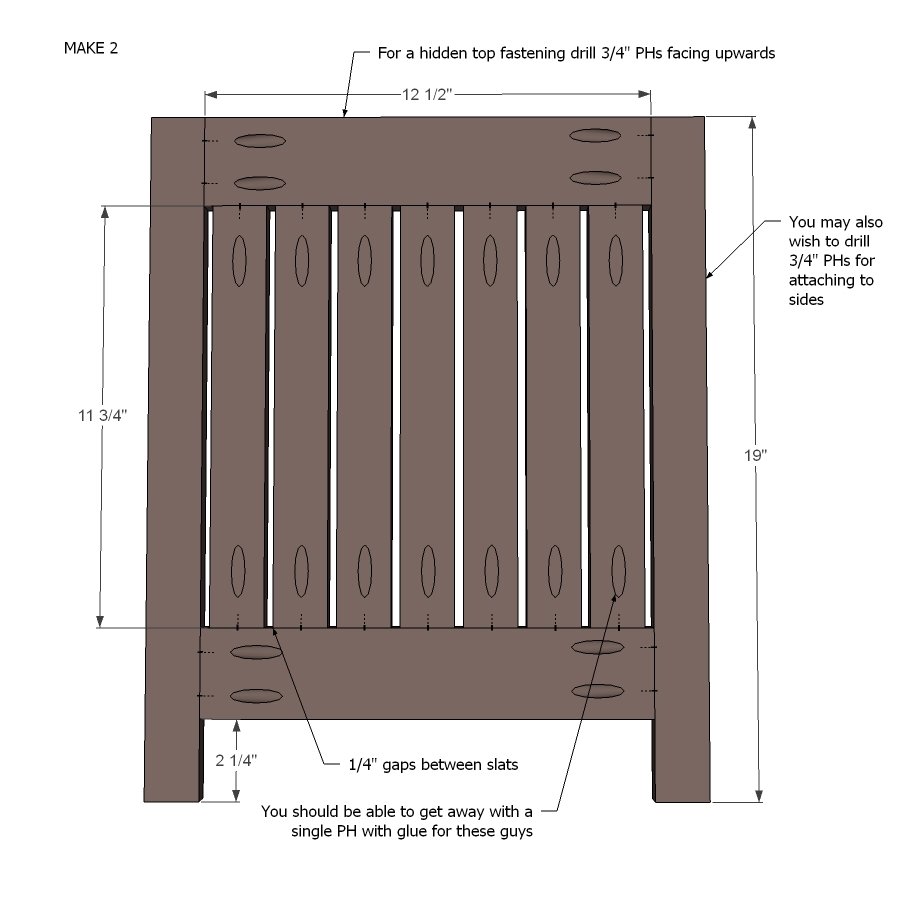
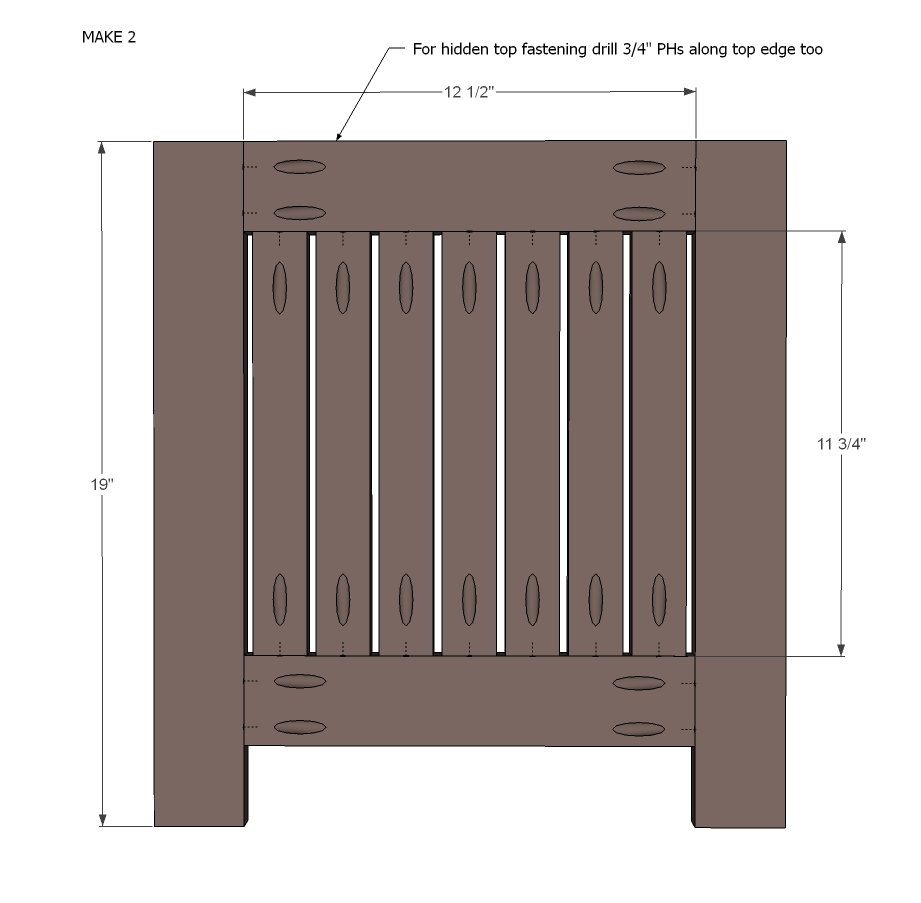
And build two of these guys too.
TIP: Consider drilling 3/4" PHs facing upward for attaching top in later steps.
Step 3
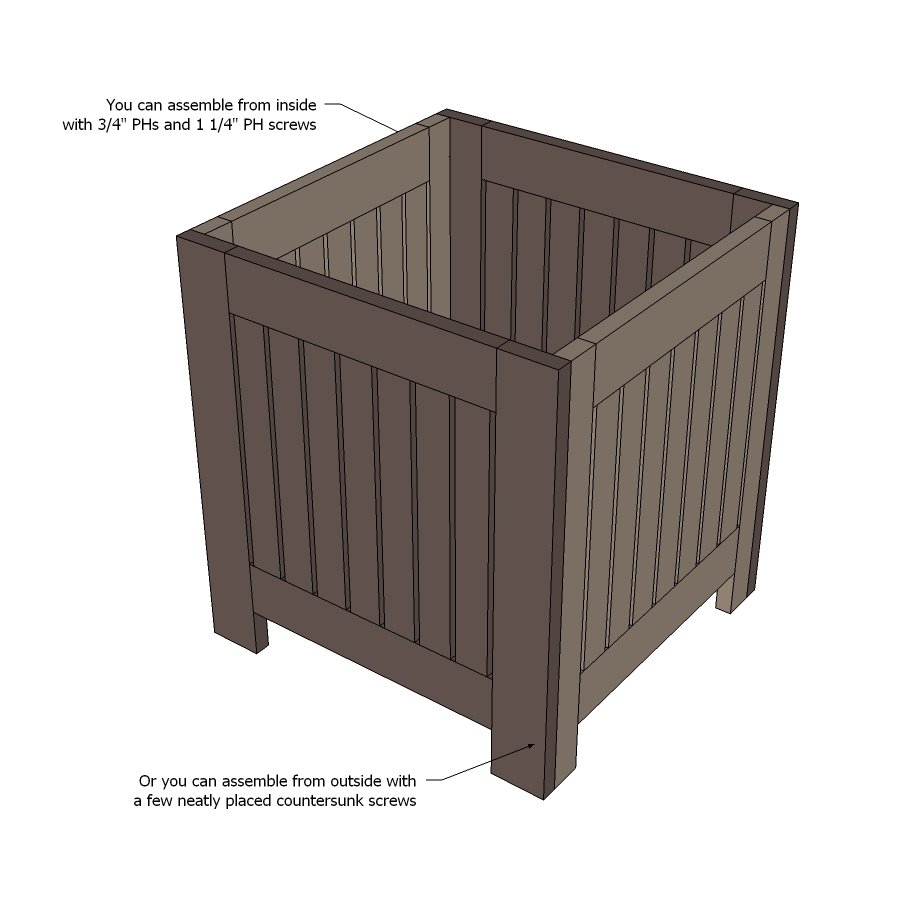
Now attach the four sides.
Step 4
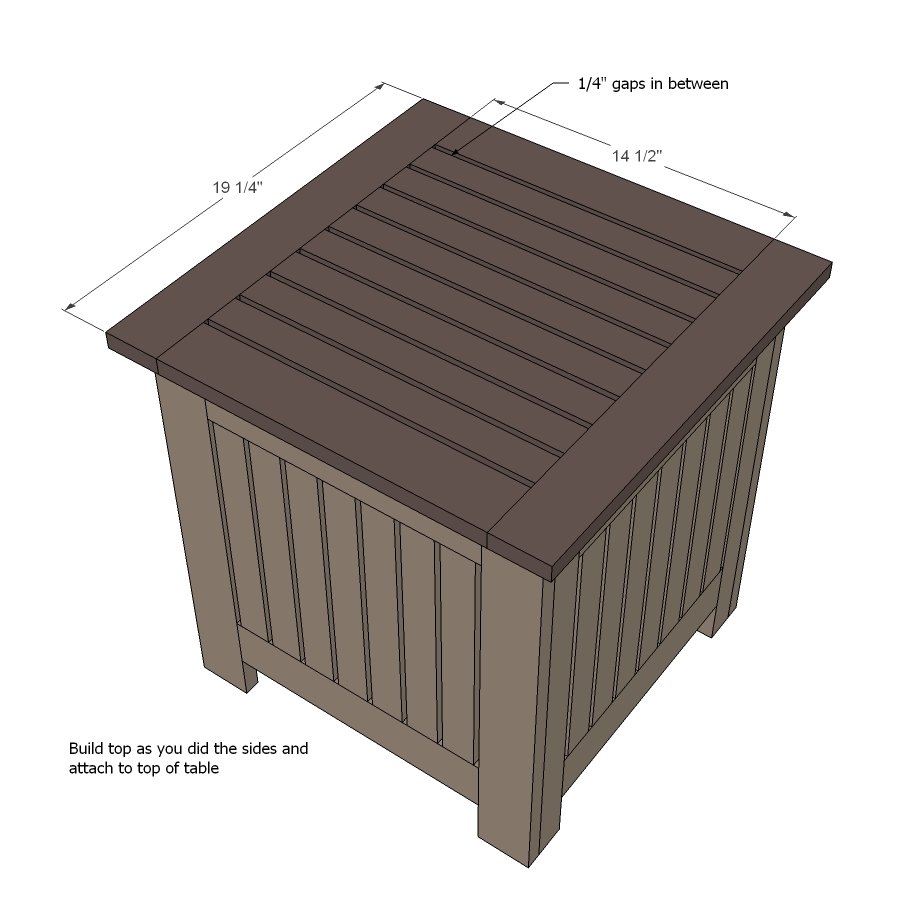
Build the top as shown above. To fit an umbrella through, you notch a half circle out of each of the center 1x2 boards.
Step 5
Finishing
Sand all surfaces, starting with a medium grit and finishing with fine. Wipe off the dust, fill any holes or gaps with wood filler, and sand smooth once dry. Apply primer if you're painting, then finish with your choice of paint or stain and seal with a durable clear topcoat. For outdoor projects, use exterior-rated primer, paint or stain, and sealer so the piece stands up to the weather.
Source (temporary): https://www.ana-white.com/woodworking-projects/umbrella-stand-hampton