Updated A Frame Chicken Coop
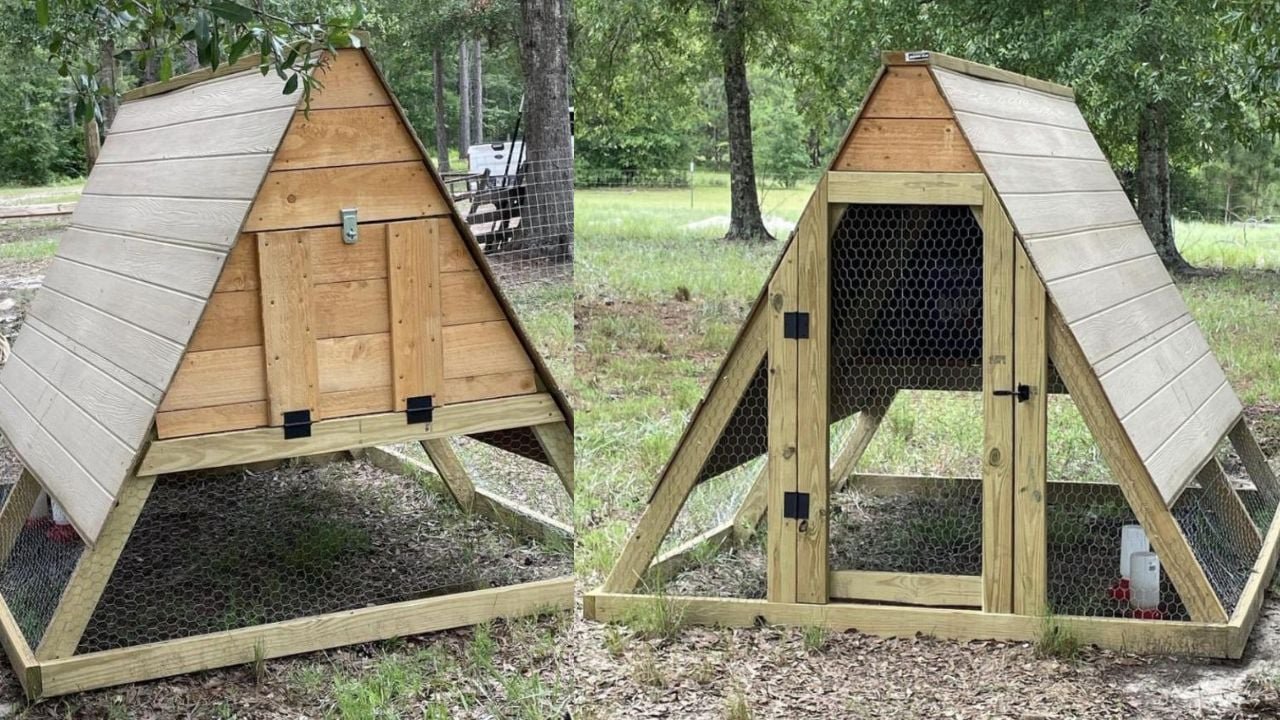
Free A Frame chicken coop plans designed by. This design is water tight at the top with fixed sides.
Specifications
| Project type | Chicken Coop Plans |
|---|---|
| Room | Outdoor |
| Difficulty | Intermediate |
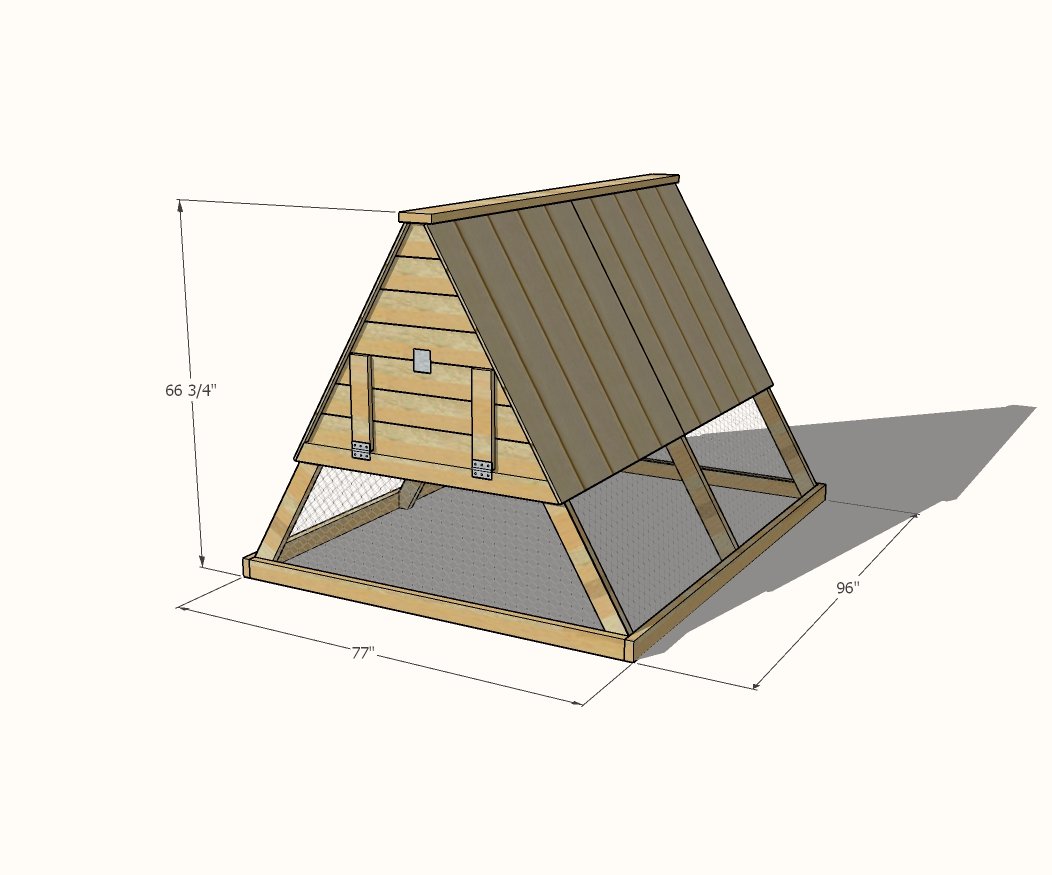
Dimensions
Use the size-specific shopping and cut lists below.
Shopping List
- 2 - 2x4 @ 8 feet long (DO NOT CUT)
- 2 - 2x4 @ 104-5/8" - cut the 51" pieces from these boards
- 8 - 2x4 @ 8' or 8' stud length (cut everything else from these boards)
- 1 - 2x6 @ 8 feet long (prefer cedar or treated as it is rot resistant - this is the peak of the A Frame)
- 12 - 6' x 5-1/2" wide cedar fence pickets
- 2 - 4x8 sheets of 3/8" thick T1-11 siding or exterior plywood
- 2 sets of 3" exterior hinges
- 2 exterior gate locks (small) or hook and eye closure
- 25 foot bundle of 2 foot wide chicken wire
- 1/2" staples for attaching chicken wire to wood frame and staple gun
- 60 - 3" exterior self tapping construction screws like these
- 100 - 1" self tapping screws like these
Cut List
2 - 2x4 @ 96" - base sides
2 - 2x4 @ 74" - base ends
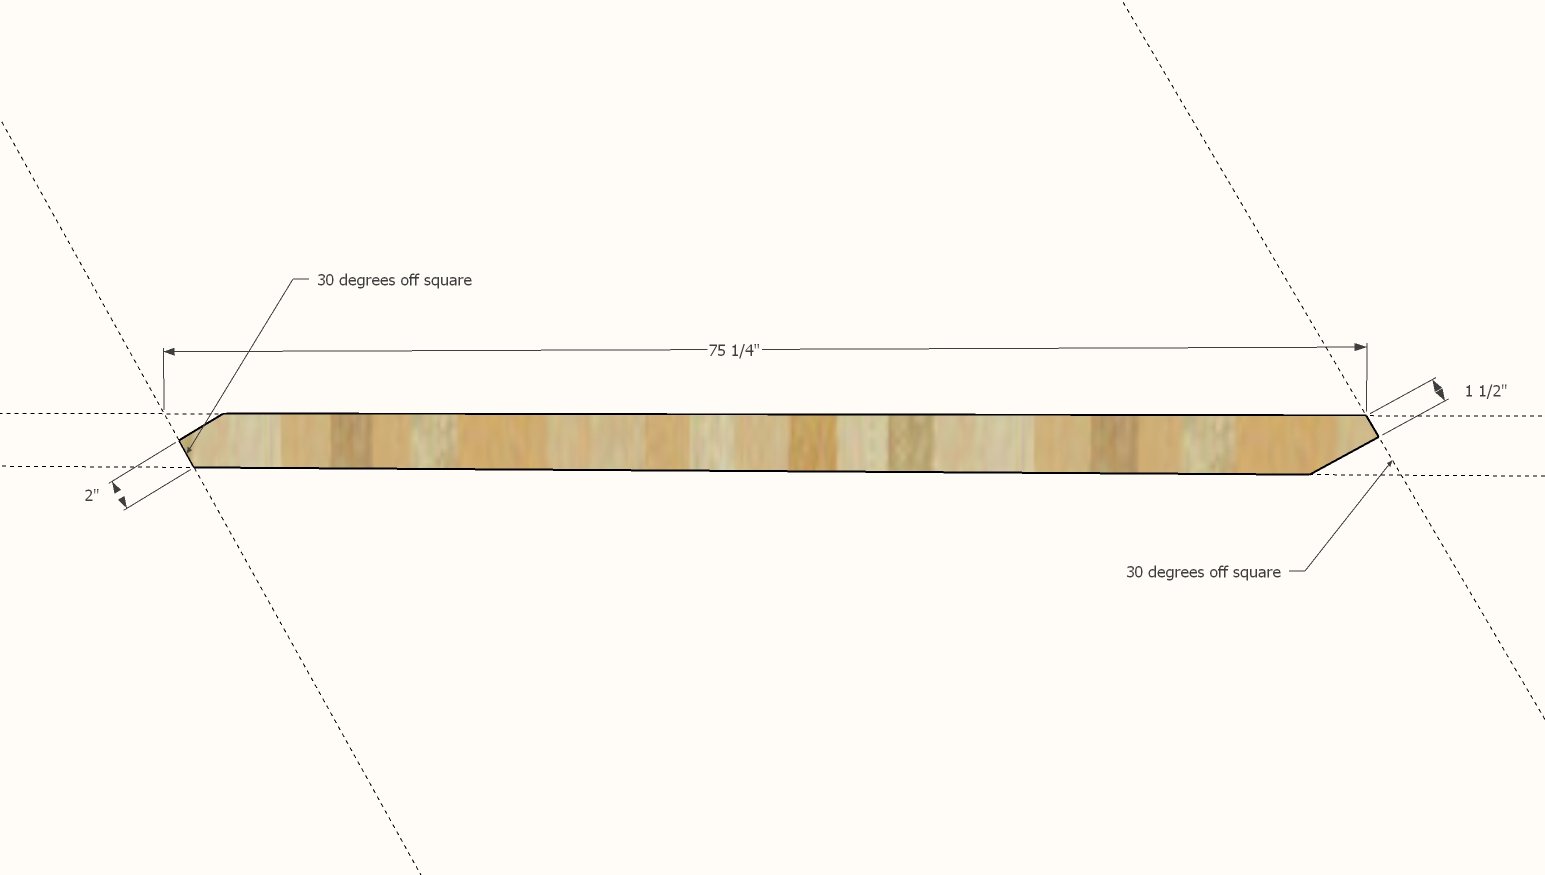
6 - 2x4 @ 75-1/4" - both ends cut at 30 degrees off square, long point to short point, ends ARE parallel
1 - 2x6 @ 96" - top
4 - 2x4 @ 51" - both ends are cut at 30 degrees off square, long point to long point, ends are NOT parallel
7 - cedar fence pickets @ 44" long - nesting box bottom
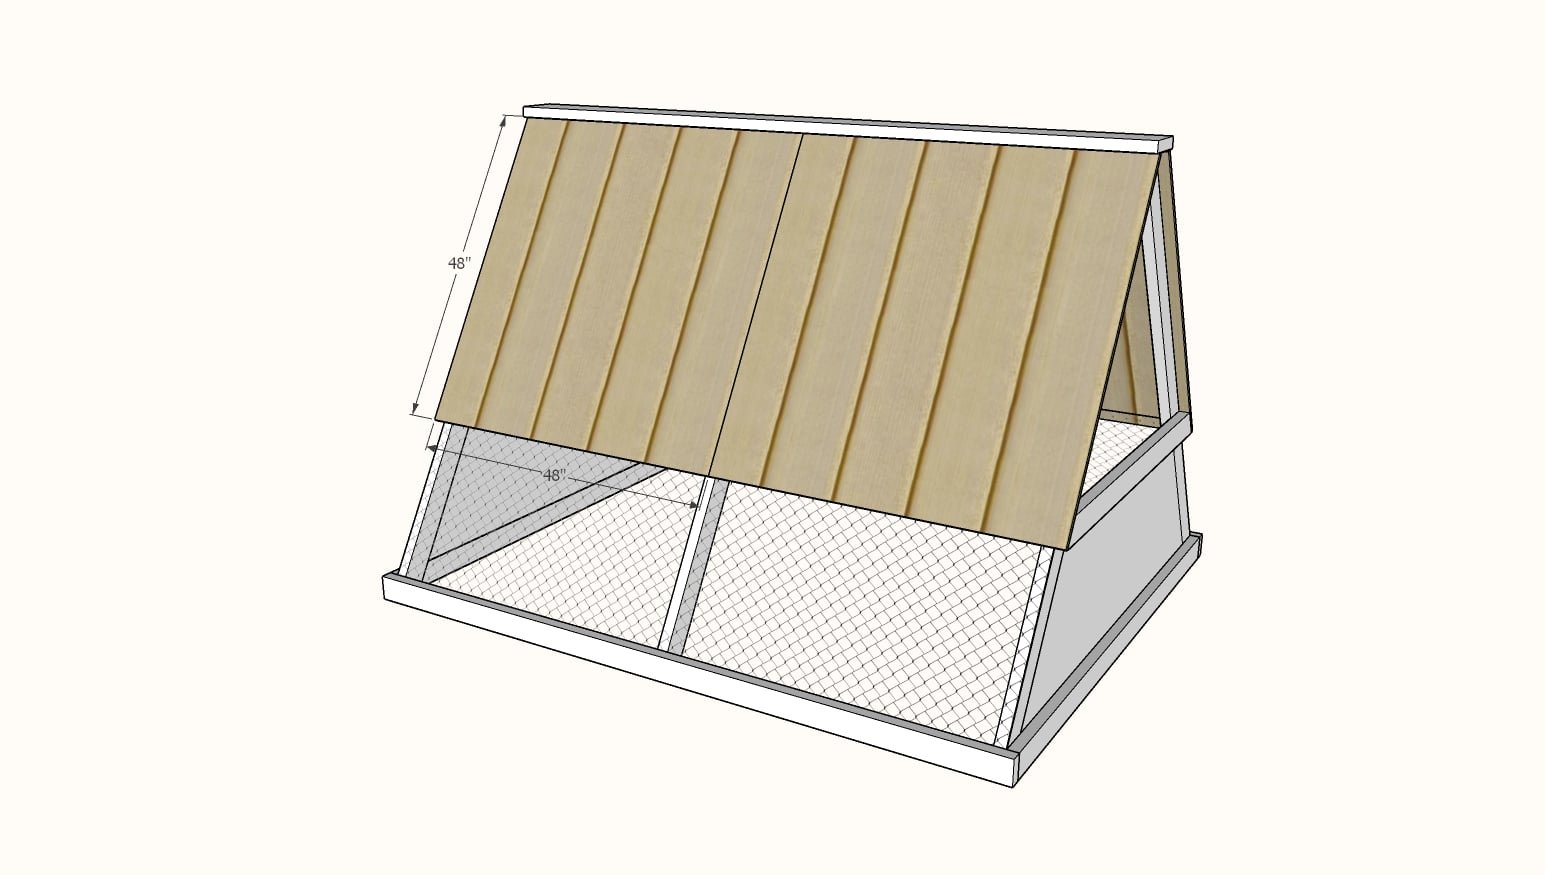
4 - 3/8" thick T1-11 wood siding @ 48" x 48" (cut each sheet in half)
Ends should be cut to fit for the best finish - see in plans
Tools
- measuring tape
- square
- pencil
- safety glasses
- hearing protection
- drill
- circular saw
- compound miter saw
Step-by-step Instructions
Step 1
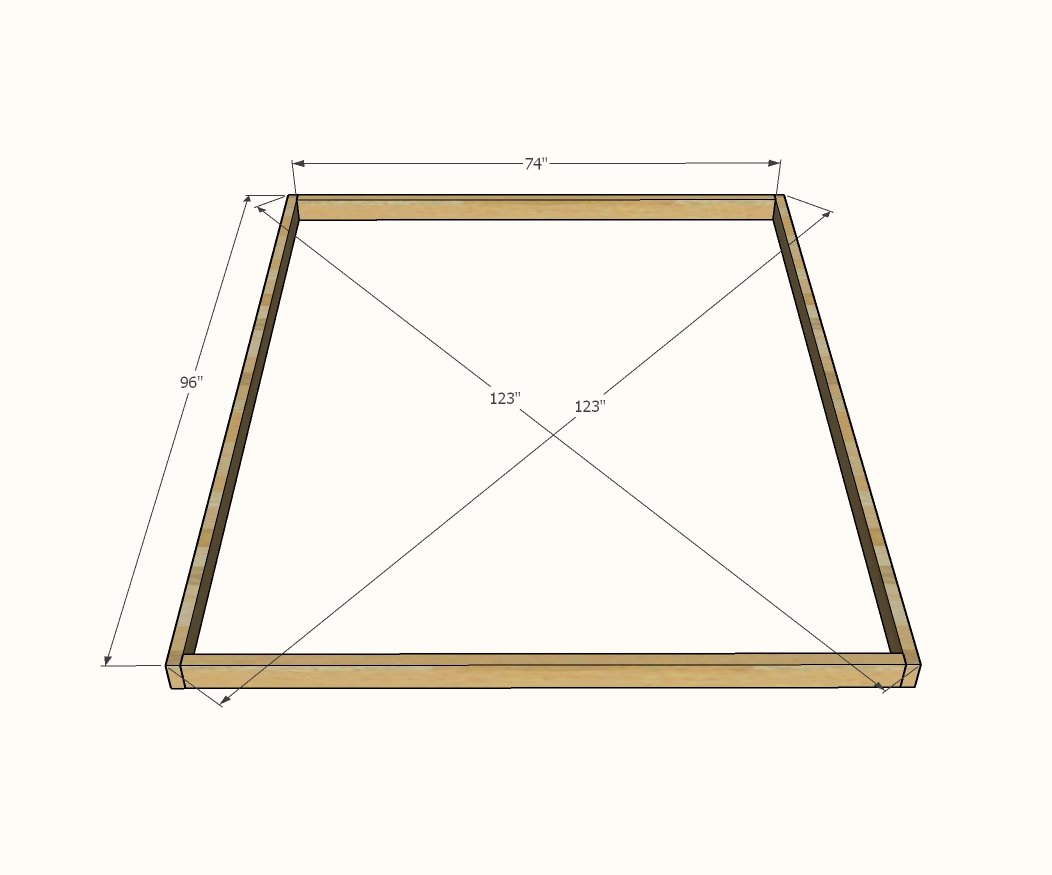
Build the frame for the chicken coop near it's final location on a flat, level surface. You can move the final coop - we designed it as lightweight as possible - if need be. Use two 3" screws at each corner. Take diagonal measurements as shown and make sure the measurements match. If not, push the longer diagonal corners together and check again for square.
Step 2
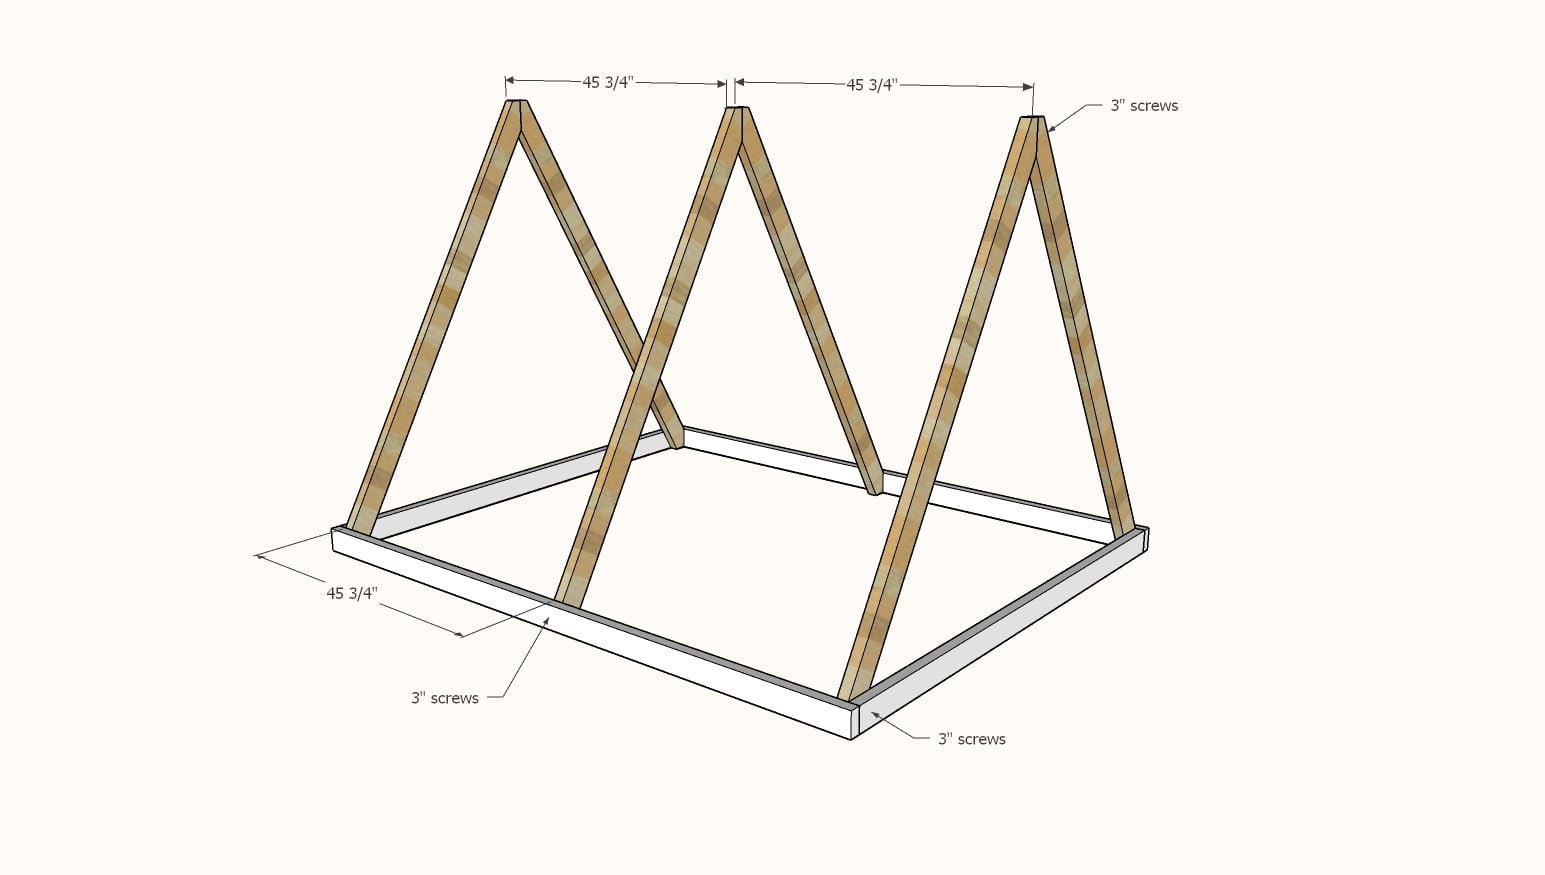
For the a frame wall boards, use a speed square to mark the ends at a 90 degree angle to your cut ends as shown in the diagram. Cut with a circular saw. Repeat for all six of the a frame wall boards.
Attach the outside a frame wall boards first inside your base frame with 3" screws.
Then add the remaining center a frame wall boards, centered on the base.
Step 4
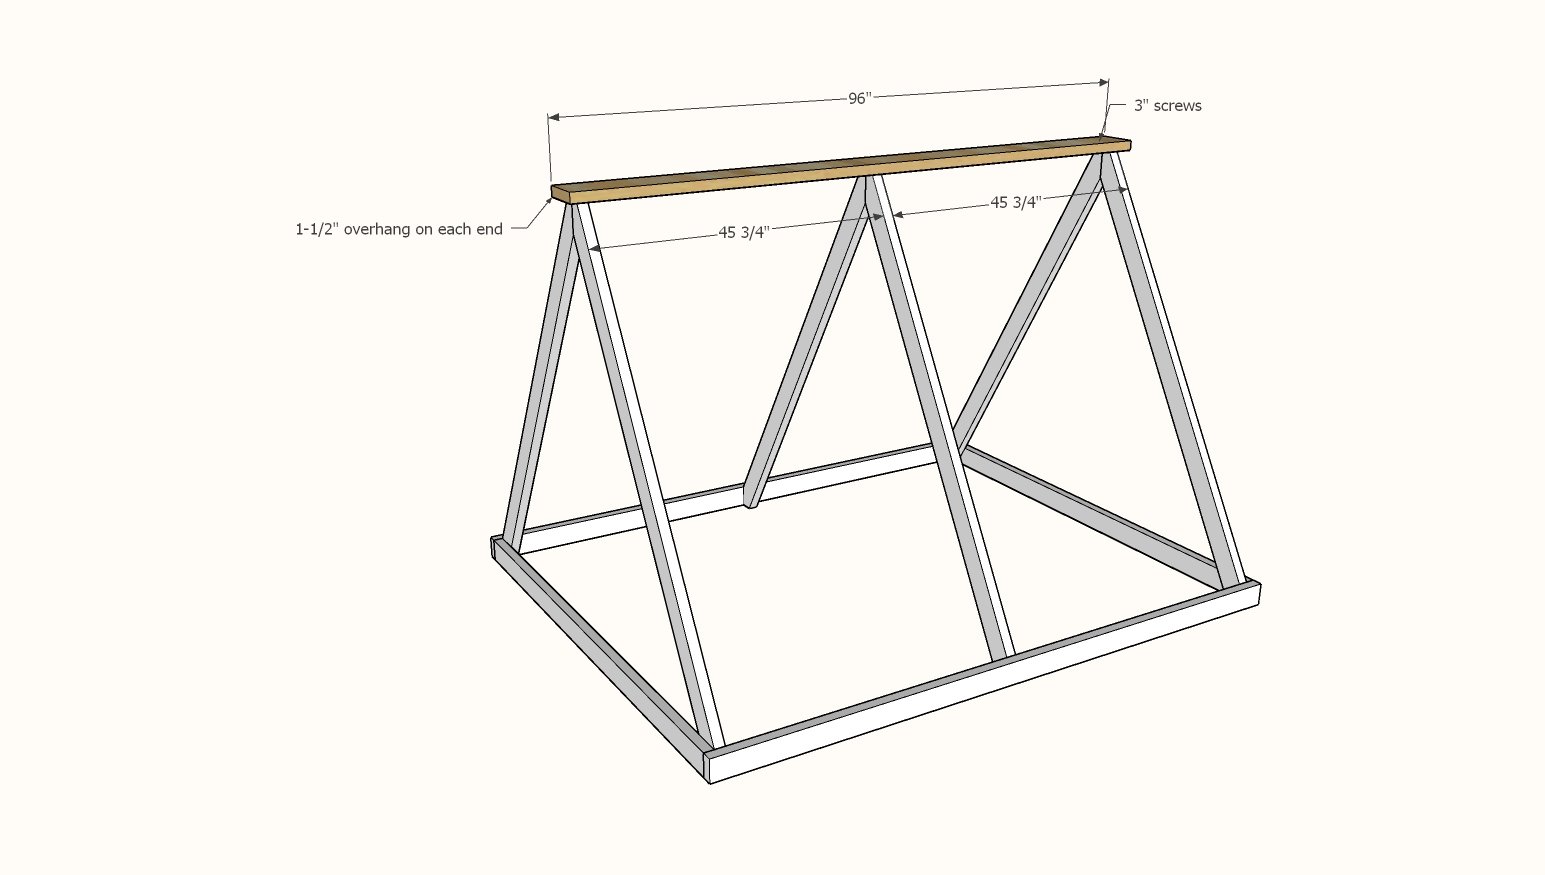
Attach the 2x6 on top of the a frame wall boards to create the ridge with 3" screws.
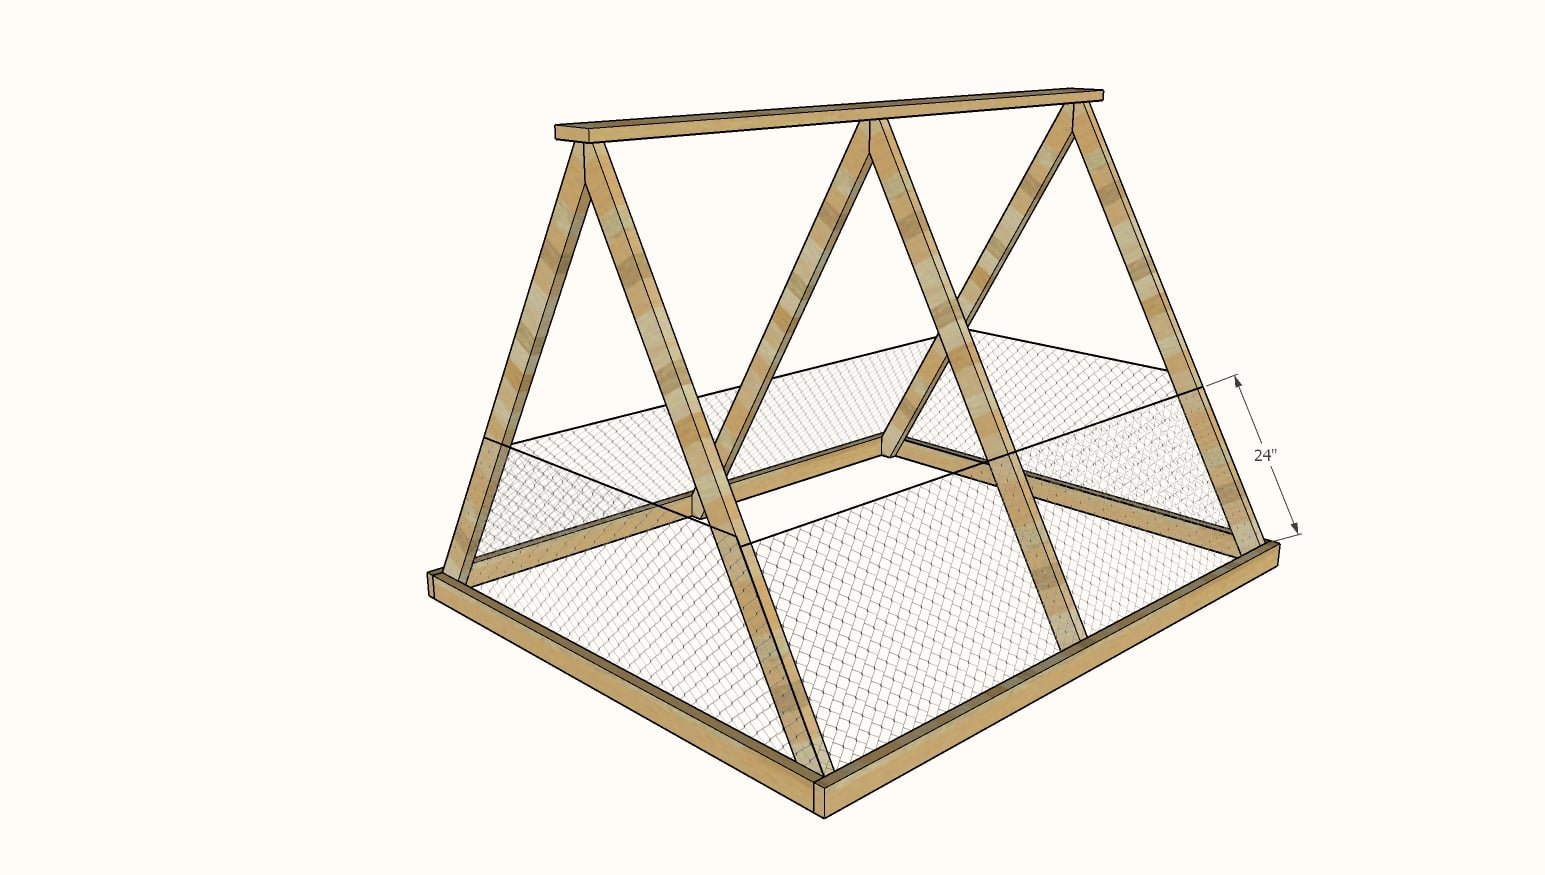
Now is a good time to add the chicken wire.
Attach with staples all the way around the base.
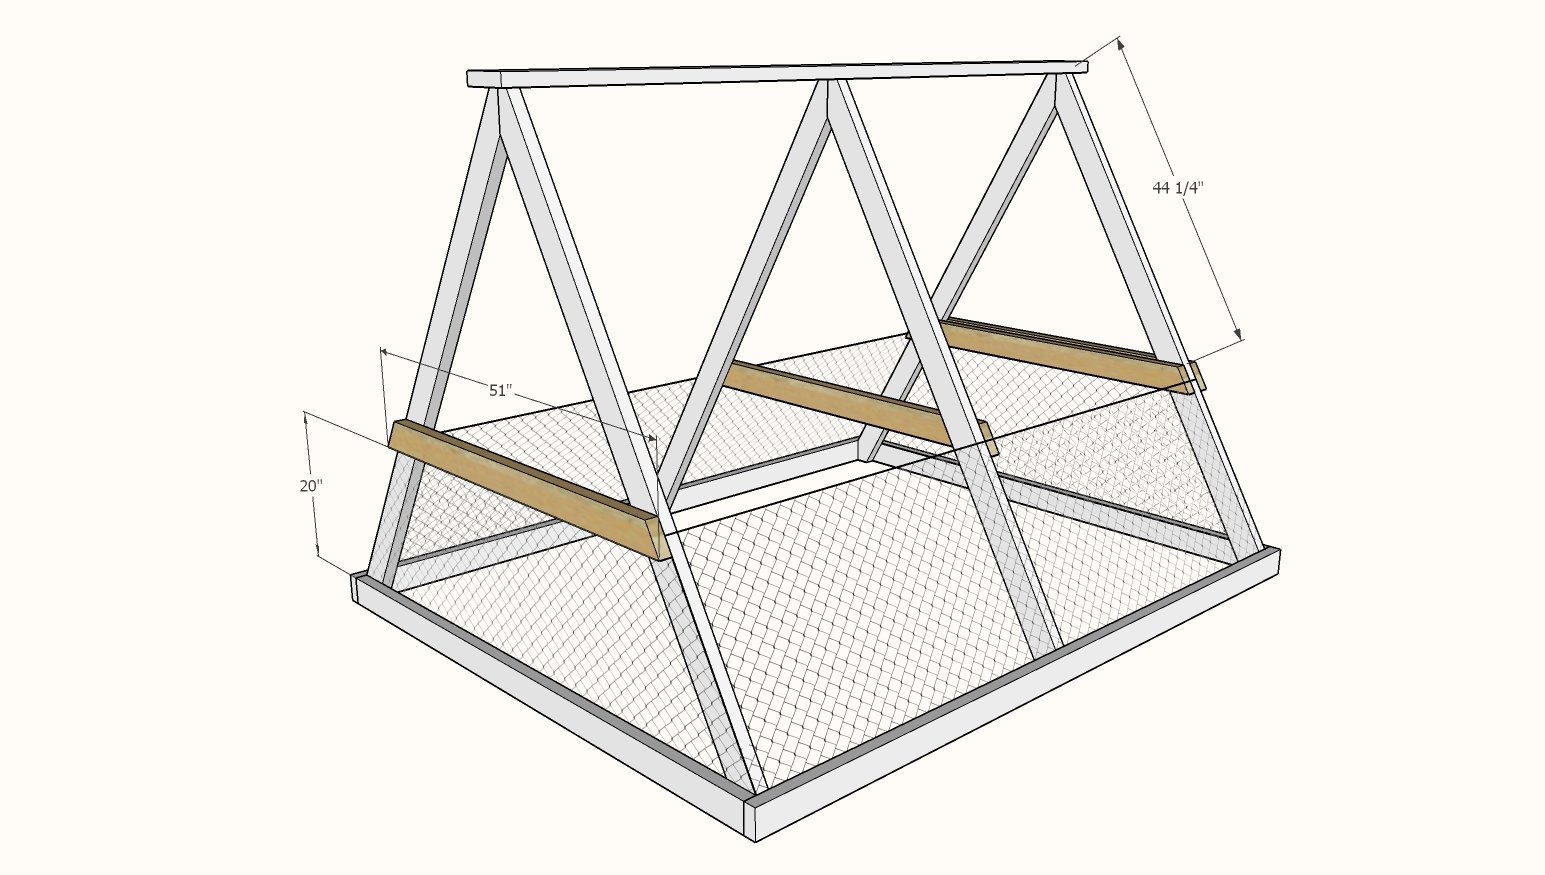
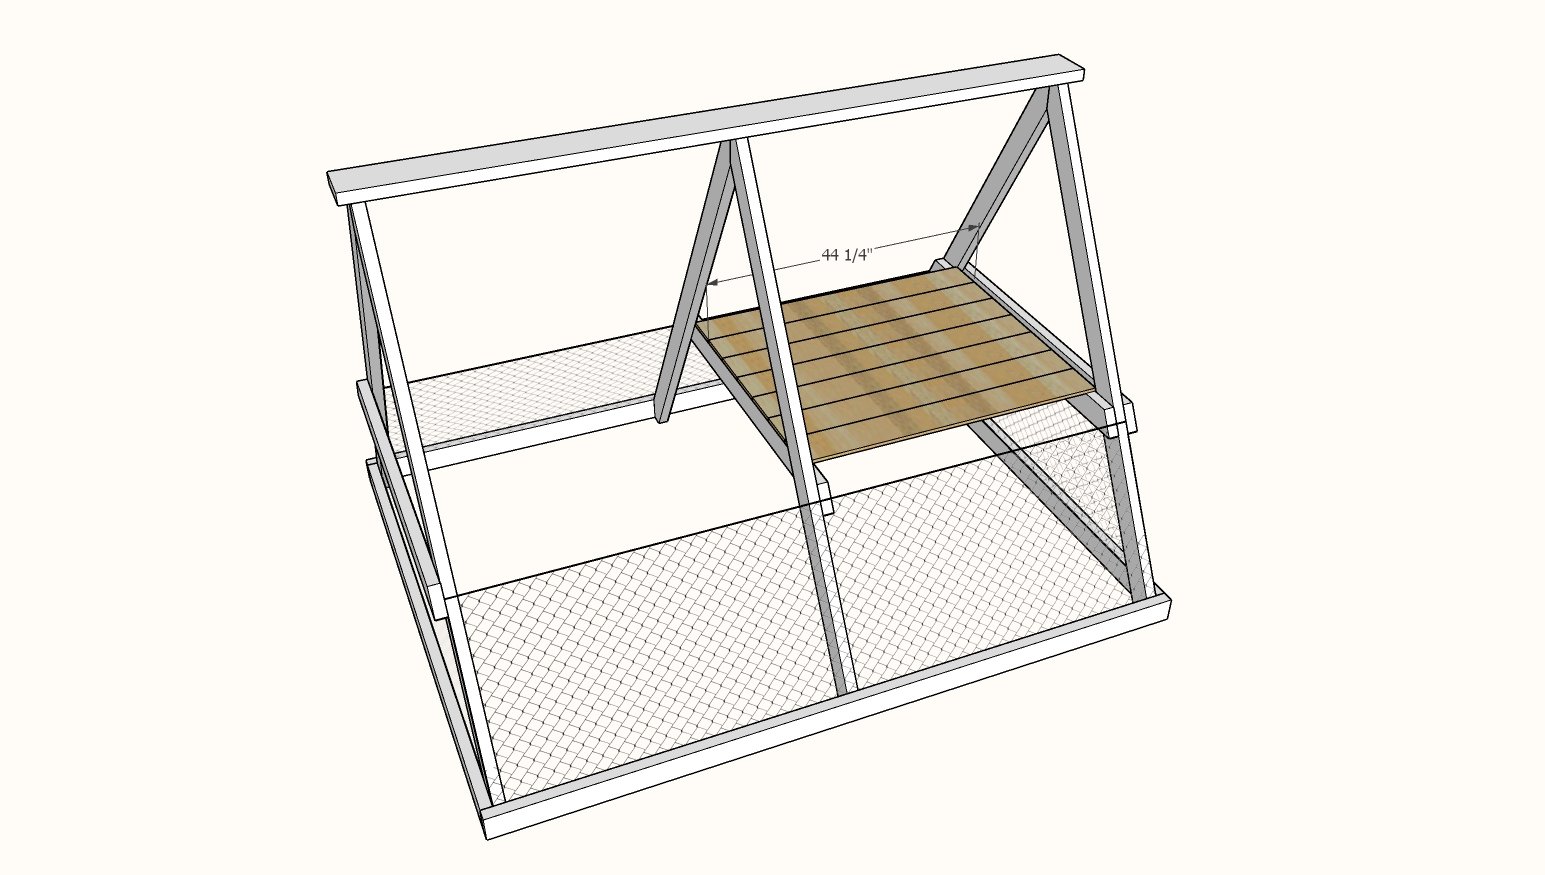
Mark the a frame wall boards down from the top edge 44-1/4".
Attach with 3" screws the built in floor joist to the a frame wall boards. Notice there are two on the end that will have the nesting box (it's hard to see in the diagram, all the way at the back of the coop).
Step 7
Place the cedar fence pickets at 44" inside the coop. Screw down with 1" screws - one per end - don't go crazy here, you want these boards to be removeable if needed for cleaning. Another option is to use scrap 2x4s inside the floor joists, parallel to the floor joist, right along side, and attach the cedar fence pickets to the scrap pieces but NOT the floor joists. Then you can remove the entire floor.
Step 8
Attach the T1-11 siding under the ridge with the 1" screws, about four screws per joist.
Step 9
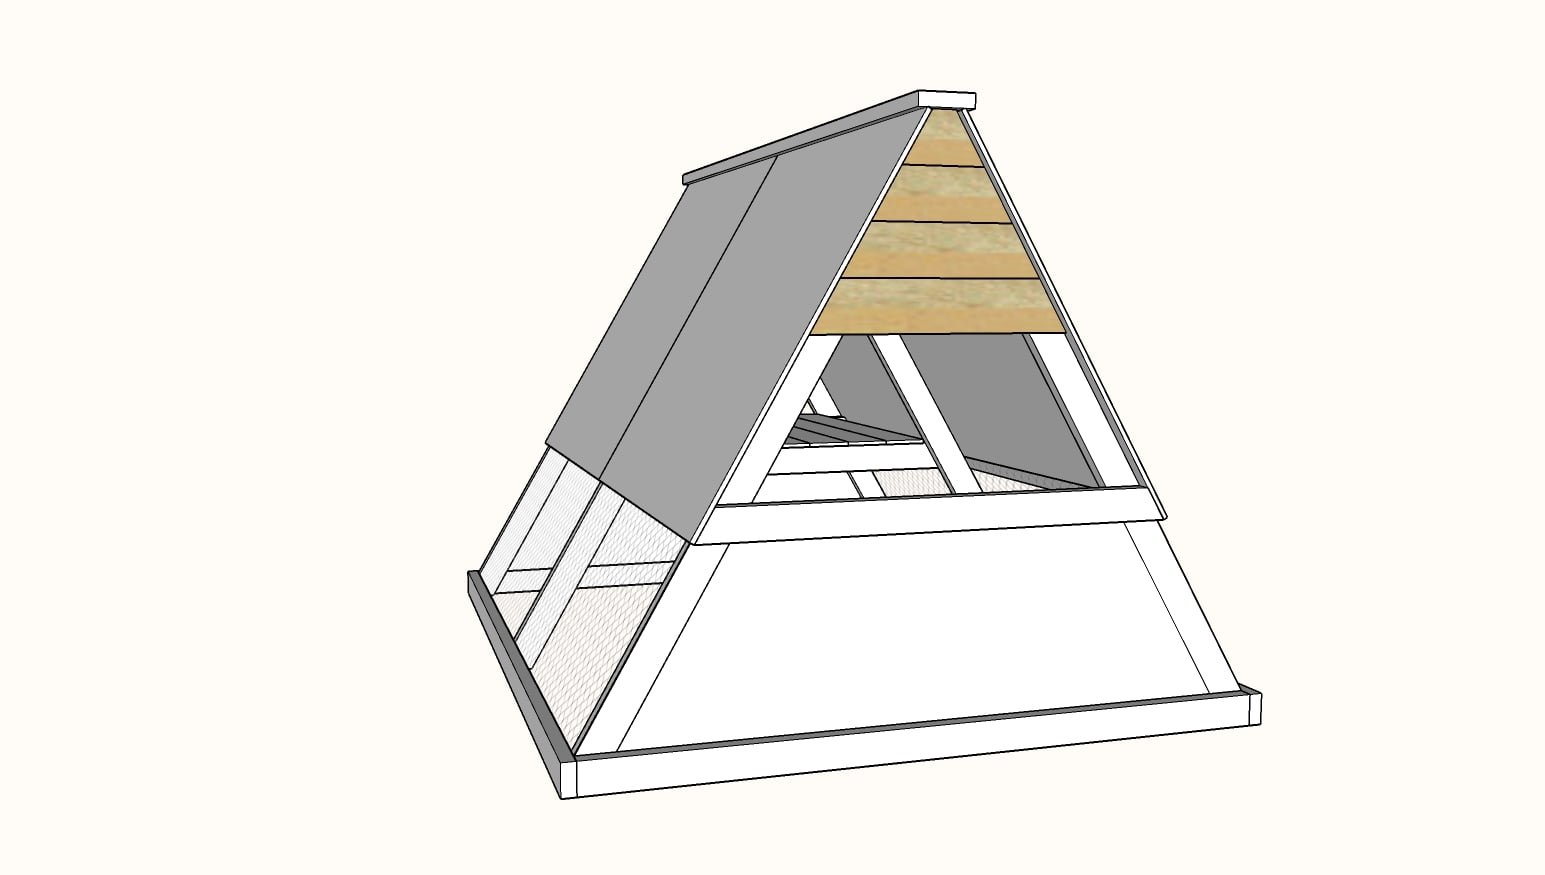
Start at the top and measure and cut the gable boards from cedar fence pickets. The cut angle is 30 degrees. Attach with either nails or the 1" screws.
Step 10
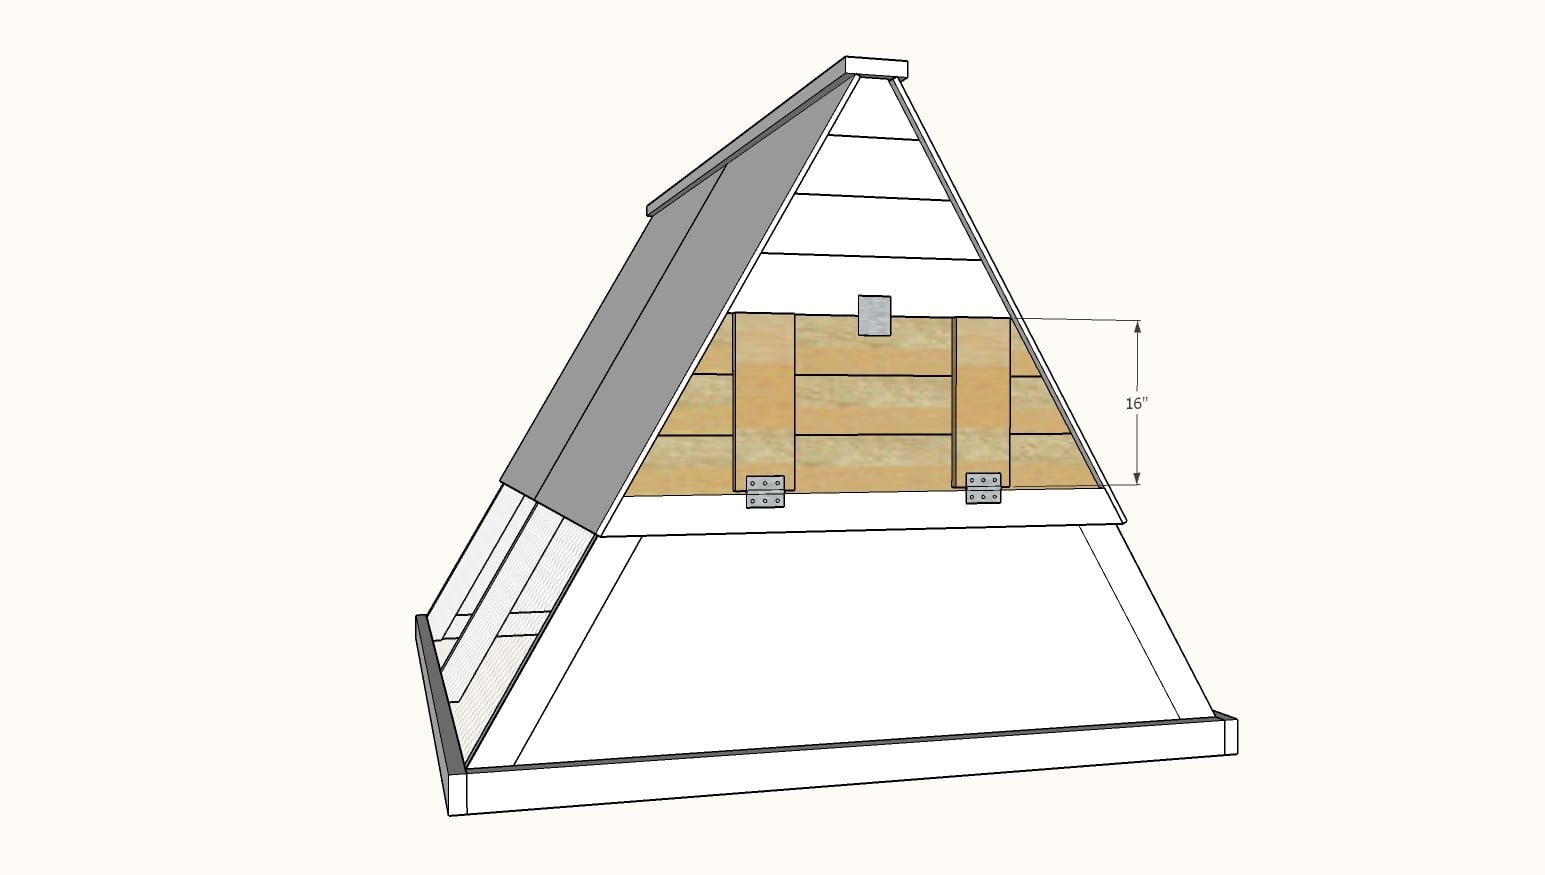
Cut the remaining cedar fence picket pieces to cover the ends but don't attach. Cut these a little smaller, so there is a gap on the ends so it is easy to open and close. Cut four cedar fence pickets to 16" long. Attach on top of the angled fence pickets to create the door. Hinge in the opening with hinges. Install the latch to secure.
Finishing
Sand all surfaces, starting with a medium grit and finishing with fine. Wipe off the dust, fill any holes or gaps with wood filler, and sand smooth once dry. Apply primer if you're painting, then finish with your choice of paint or stain and seal with a durable clear topcoat. For outdoor projects, use exterior-rated primer, paint or stain, and sealer so the piece stands up to the weather.
Source (temporary): https://www.ana-white.com/woodworking-projects/updated-frame-chicken-coop-plans