Upholstered Toybox Ottoman
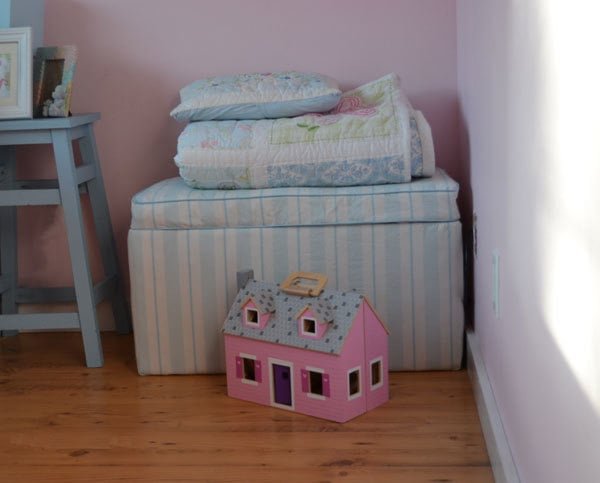
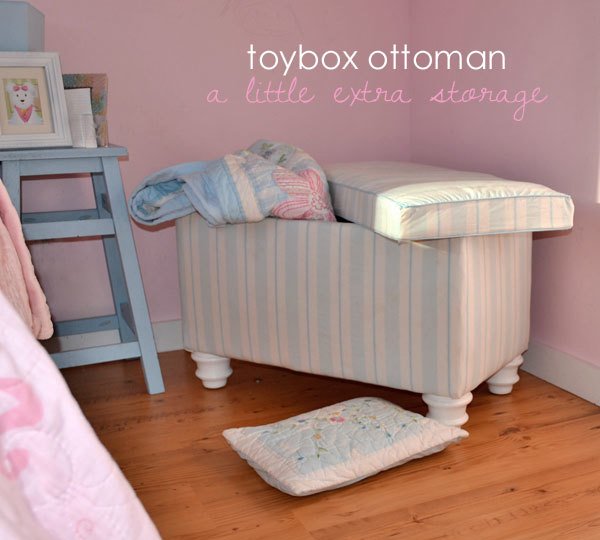
Toybox by day, cozy reading spot by night. This toybox ottoman features a lift off lid and a large storage compartment. Use caster wheels to create a moving seating surface and toybox in one.
Specifications
| Project type | Bench |
|---|---|
| Room | Storage Solutions |
| Style | Children's and Kid's Room Furniture and Toy Plans |
| Difficulty | Beginner Projects |
| Estimated cost | $20 - $50 |
Dimensions
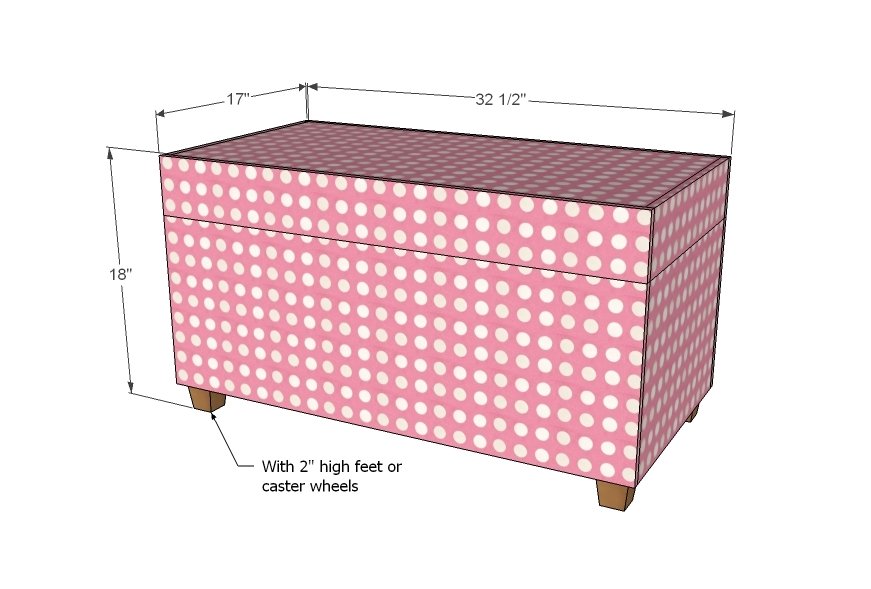
Use the size-specific shopping and cut lists below.
Shopping List
1 - 1x12 @ 8 feet long
1/4 Sheet - 1/2" plywood
3 Yards Fabric - For beginners, choose an abstract pattern
2 Yards Upholstery Batting
1 - 3" thick foam piece, 16" x 32"
4 - legs or caster feet
1/2" staples
spray adhesive
Cut List
2 - 1x12 @ 32"
2 - 1x12 @ 14 1/2"
2 - 1/2" Plywood @ 32" x 16"
Tools
- measuring tape
- square
- pencil
- safety glasses
- hearing protection
- drill
- circular saw
- staple gun
- countersink drill bit
Step-by-step Instructions
Step 1
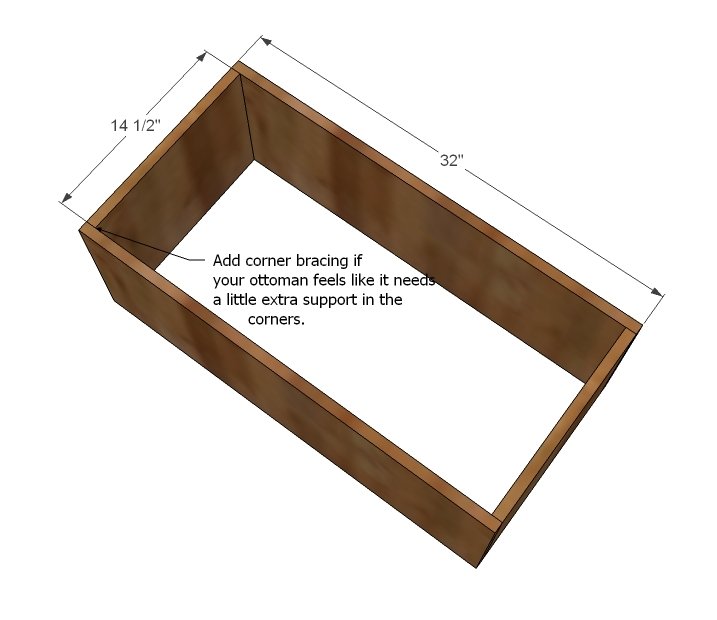
The first step is to build a simple box out of the 1x12 boards. You can use either the 2" screws or 1 1/4" pocket hole screws and glue.
Step 2
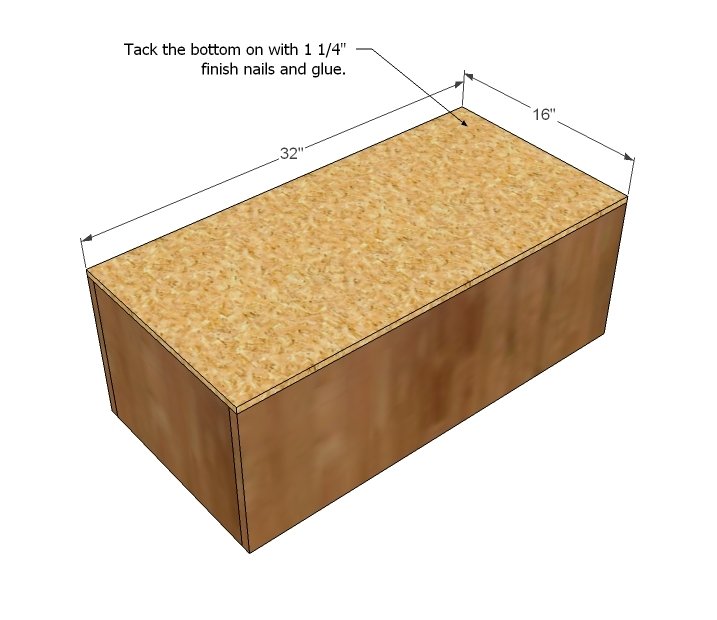
Now tack one of the pieces of plywood to the bottom with the 1 1/4" finish nails and glue. You may wish to paint and seal the inside of the toybox at this point.
Step 3
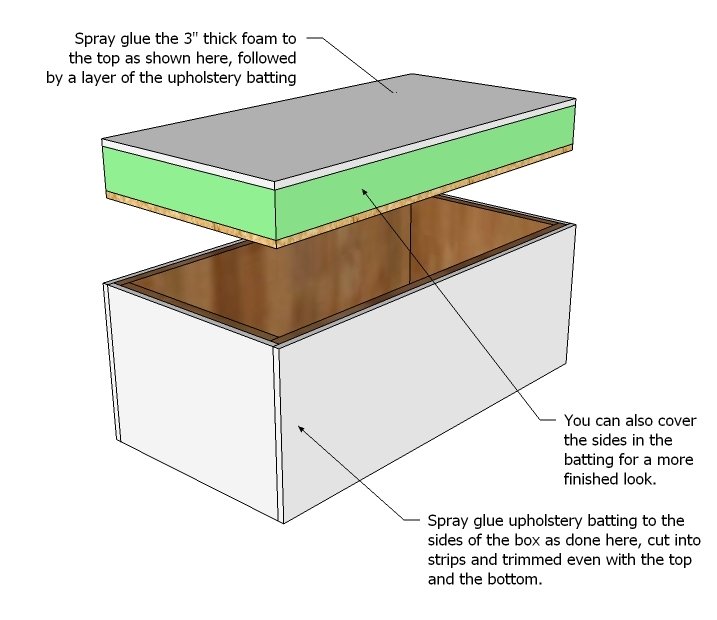
Foam time. Spray foam the remaining piece of plywood with the 3" thick foam piece to the plywood as shown above. Then spray glue the batting to the box and to lid as shown above, neatly trimming edges. You can bring the batting on the box around the inside and staple in place to create some cushion to keep little fingers from getting pinched if you wish.
Step 4
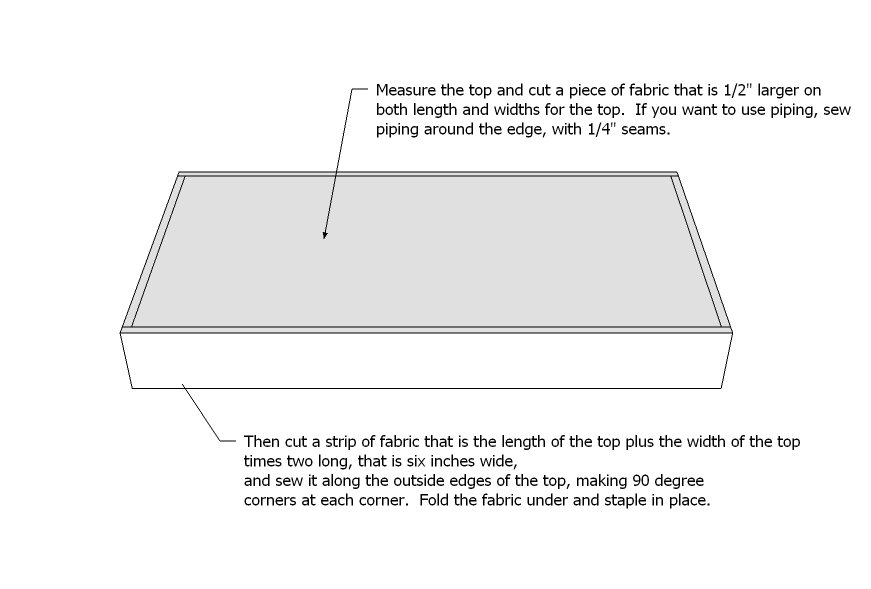
You can also cover the sides of the top with batting too so that it matches the box. Just spray glue in place and trim the excess off with a knife or sharp scissors. Now take a measurement of the top, width and height. Add half inch to each measurement, and cut a square of fabric out to this size. If you want, you can take a second and sew piping along the edges of the top piece. Next, cut a length of fabric out that is 6" wide x the total length around the top (width + length x 2) and sew the length to the top piece, to make up the sides. For those of you who do not like to sew, you could alternatively cut a piece of fabric that is 6" wider and 6" longer than the top measurement, and simply staple it over the top, neatly folding corners, as done by Fresh Home magazine. I just really liked the custom fit piping look.
Step 5
Finishing
Sand all surfaces, starting with a medium grit and finishing with fine. Wipe off the dust, fill any holes or gaps with wood filler, and sand smooth once dry. Apply primer if you're painting, then finish with your choice of paint or stain and seal with a durable clear topcoat. For outdoor projects, use exterior-rated primer, paint or stain, and sealer so the piece stands up to the weather.
Source (temporary): https://www.ana-white.com/woodworking-projects/upholstered-toybox-ottoman