Vegetable Bins
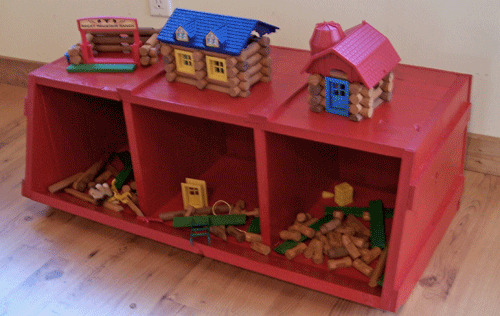
Simple vegetable bins that can store all your child's needs. A lip on the front keeps items in the bins.
Specifications
| Project type | Bookshelf and Bookcase Plans |
|---|---|
| Room | Kids and Toys |
| Style | Children's and Kid's Room Furniture and Toy Plans |
| Difficulty | Intermediate |
| Estimated cost | $20 - $50 |
Shopping List
5 – 1×4, 8′ length
1 1/4″ Self Tapping Pocket Hole Screws
2” nails
1 1/4″ nails
Wood Glue
Wood Filler
Sandpaper
Paint
Cut List
6 – 1×4 @ 31 1/2″ (Top and Bottom Panel Boards)
6 – 1×4 @ 12″ (Side Panel Boards)
6 – 1×4 @ 10 1/2″ (Divider Panel Boards)
2 – 1×4 @ 12″ (Lip Sides)
1 – 1×4 @ 31 1/2″ (Lip)
Tools
- measuring tape
- square
- pencil
- safety glasses
- hearing protection
- kreg-jig
- circular saw
- nailer
- sander
Step-by-step Instructions
Step 1: Build the Box
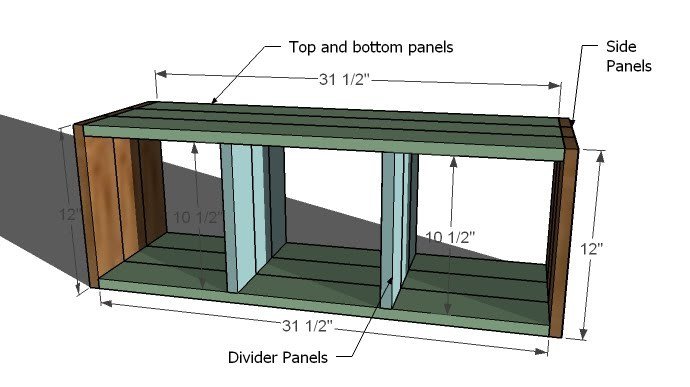
To get the planked look, first join the 1×4 boards to create the panels shown above. You will have two sides, two dividers, and a top and bottom panel. As you join your boards, pay attention to the grain of the board (look at the end of the board) and join the boards together with your Kreg Jig™ is such a manner that the grains are alternating spiraling up and spiraling down. This will keep your panels from warping to one side or the other. You can skip this step by simply building the box out of 1×12 boards instead of 1×4 boards as done here.
Step 2
And while you can definitely use the Kreg Jig™ to build the box, it’s not necessary because the bottom sits on the ground and the top sits on the sides – there is minimal weight or strain on the nailed joints. So I nailed the box together using glue and 2″ nails, leaving 10″ between the sides and the dividers.
Step 3: Back
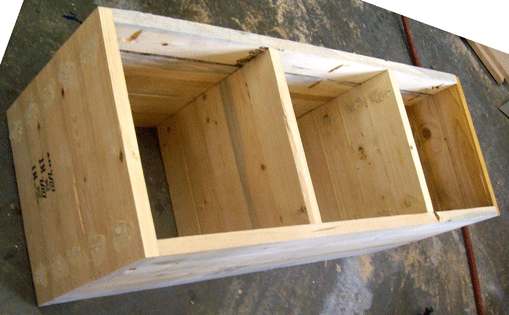
Take a square of your project then attach the back with 1 1/4″ nails and glue. Don’t forget to nail to the dividers too!
Step 4: Front Lip
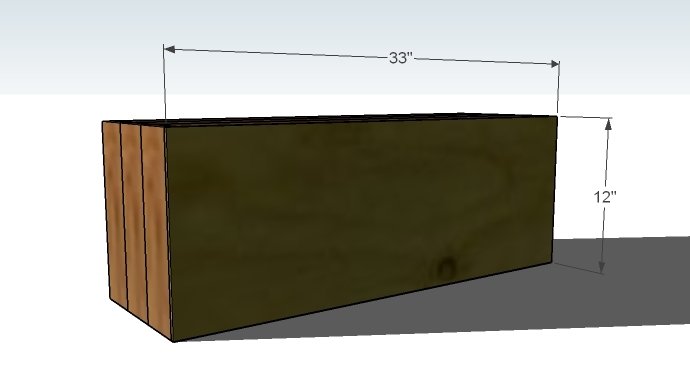
Begin by cutting the sides of the front lip from 1×4 boards. Simply cut two 1x4s @ 12″, then mark 10″ and 2″, as shown above, draw a diagonal, clamp the boards to you work surface, and cut into the shape above. The lip is a 1×4 @ 31 1/2″. Use glue.
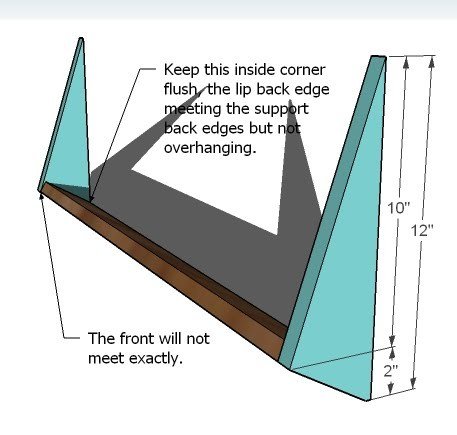
Step 5
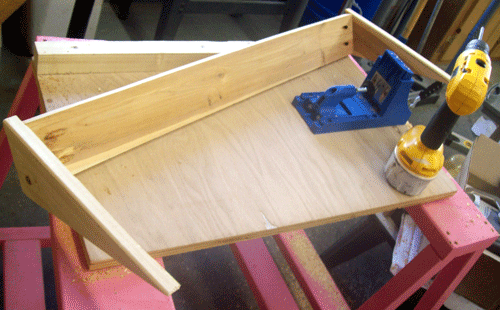
Step 6
One other note, I did notice that this lip was not as pronounced as you may want it to be for holding items like legos or even lincoln logs (smaller items). It is perfect for larger items, like balls, large blocks, dolls, and even stuffed animals. You can easily adjust for a steeper lip by using a 1×6 instead of a 1×4 for the lip and tracing the 1×6 edge on to the lip sides and cutting your lip sides to fit the 1×6.
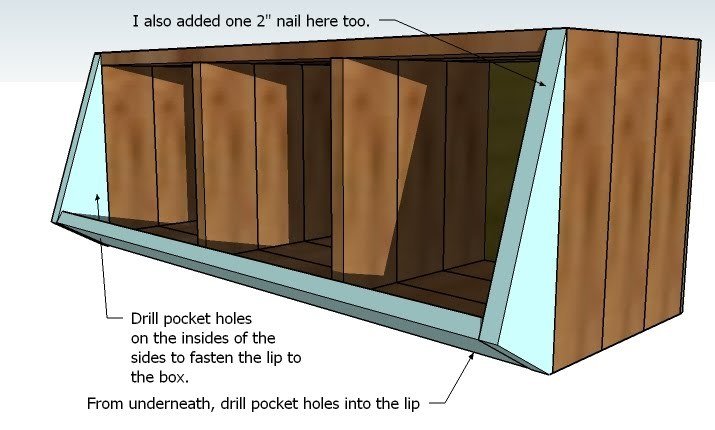
Attaching the Lip
Attach the lip as shown above in the diagram. From underneath, drill a few pocket holes and attach the bottom edge of the li
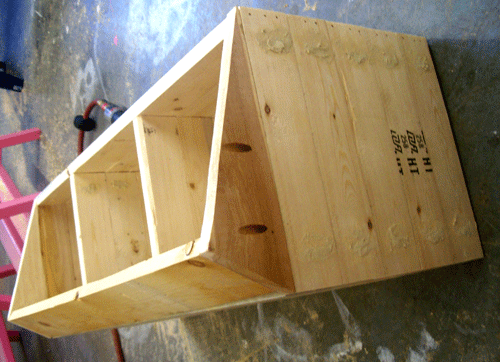
Finishing
Sand all surfaces, starting with a medium grit and finishing with fine. Wipe off the dust, fill any holes or gaps with wood filler, and sand smooth once dry. Apply primer if you're painting, then finish with your choice of paint or stain and seal with a durable clear topcoat. For outdoor projects, use exterior-rated primer, paint or stain, and sealer so the piece stands up to the weather.
Source (temporary): https://www.ana-white.com/woodworking-projects/vegetable-bins