Vegetable Rack with Slide Out Trays
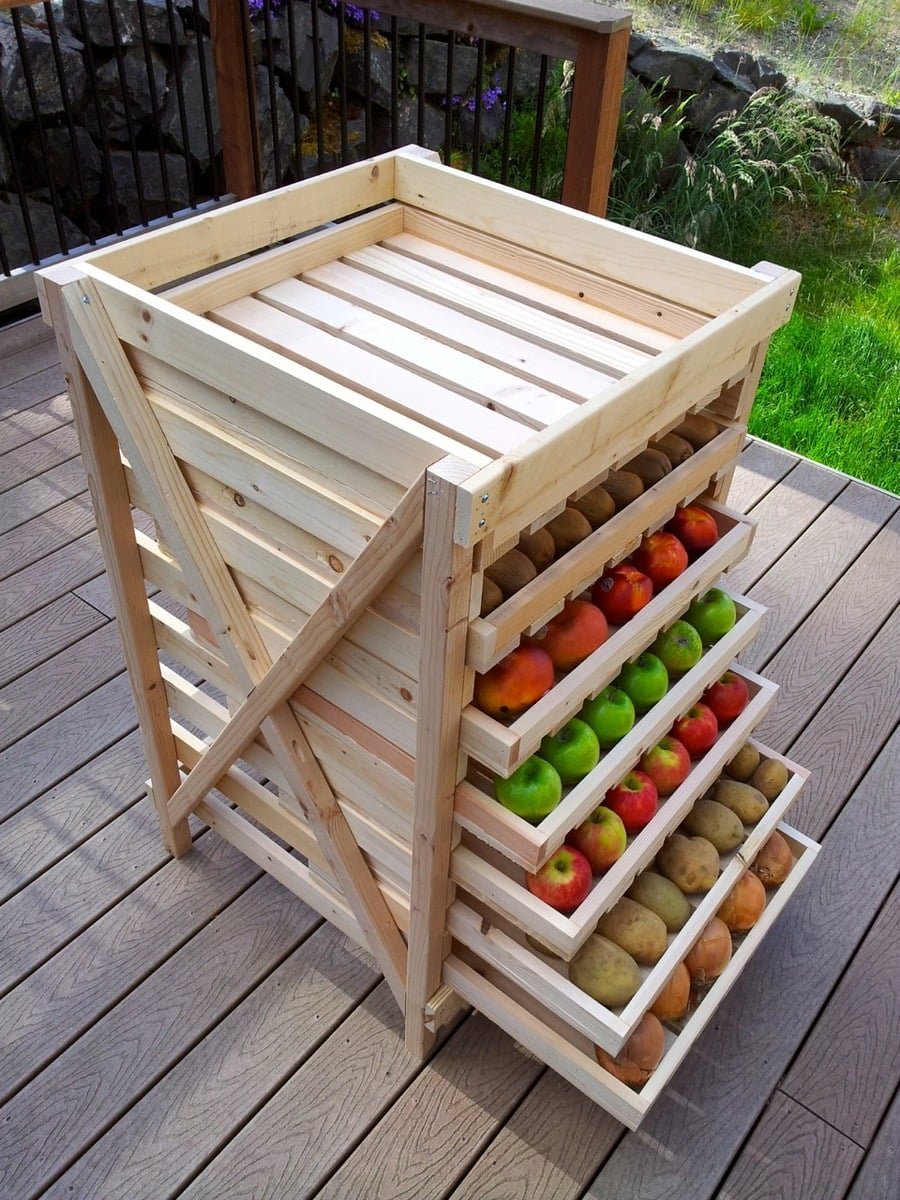
Build a vegetable rack that can be used for produce storage or as a drying rack! with full diagrams from
Specifications
| Project type | Crate Plans and Projects Made with Crates |
|---|---|
| Room | kitchen |
| Style | Cottage Style Furniture Plans |
| Difficulty | Intermediate |
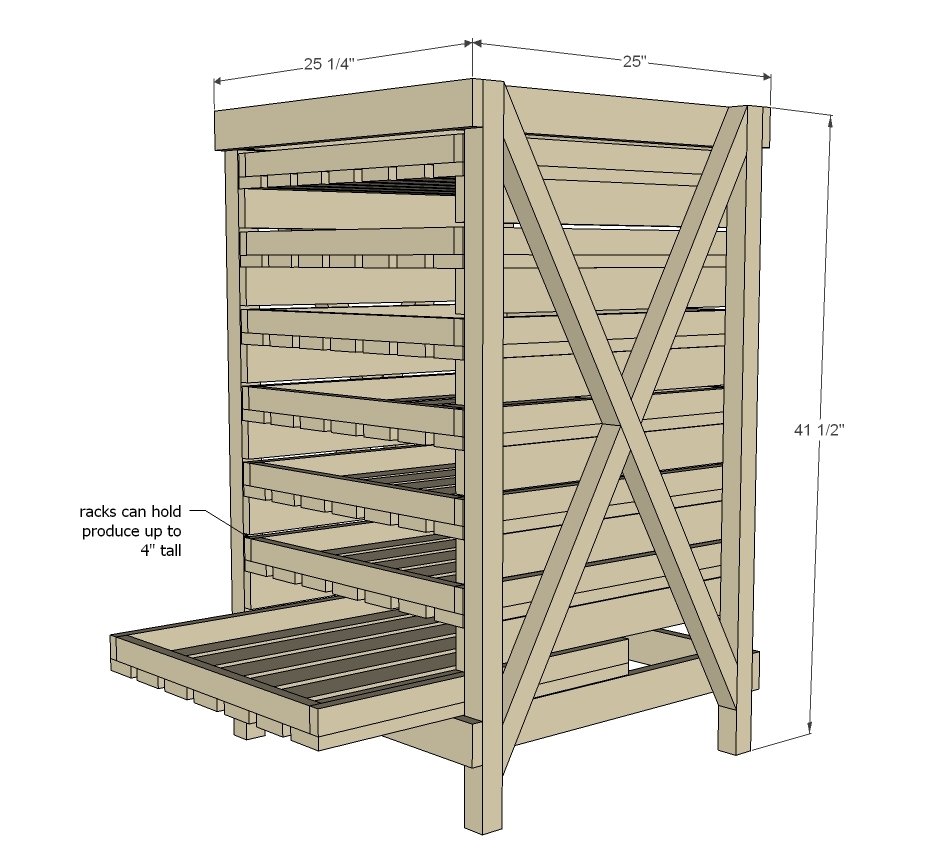
Dimensions
Use the size-specific shopping and cut lists below.
Shopping List
- 4 – 2x2 @ 8 feet long
- 17 – 1x3 @ 8 feet long
- 7 – 1x2 @ 8 feet long
- 1 ¼” and 2” brad nails
- 2” self tapping screws
- Recommend also 2 ½” PH screws
Cut List
FRAME
- 4 – 2x2 @ 41 ½” (legs)
- 16 – 1x3 @ 23 ½” (side drawer glides)
- 2 – 2x2 @ 41” (LP to SP, both ends cut at 60 degrees off square, ends parallel)
- 4 – 2x2 @ 20 ½” (longest points, one end cut at 60 degrees off square, other at 30 degrees off square, ends are cut in same direction but not parallel)
- 4 – 1x3 @ 25 ¼” (front/back supports)
DRAWERS
- 14 – 1x2 @ 23 ½”
- 14 – 1x2 @ 20 ½”
- 49 – 1x3 @ 23 ½”
Tools
- measuring tape
- square
- pencil
- safety glasses
- hearing protection
- drill
- circular saw
- nailer
- sander
Step-by-step Instructions
Step 1
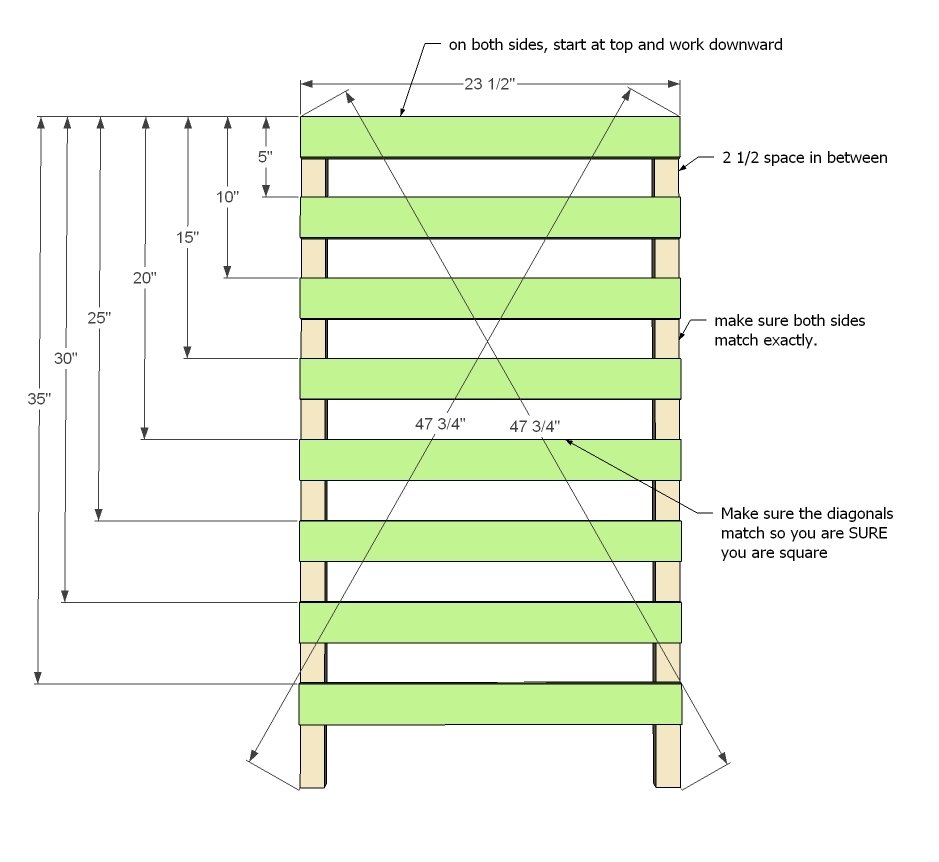
It is very important to make sure that the ends are built identical and square. The side rails will actually serve as drawer guides, so you will want to make sure the guides are attached square too. I recommend first taking all of your 2x2 legs and marking all of them at the same time with the side rail locations. Then you can attach. You can attach the siderails with 2” brad nails and glue.
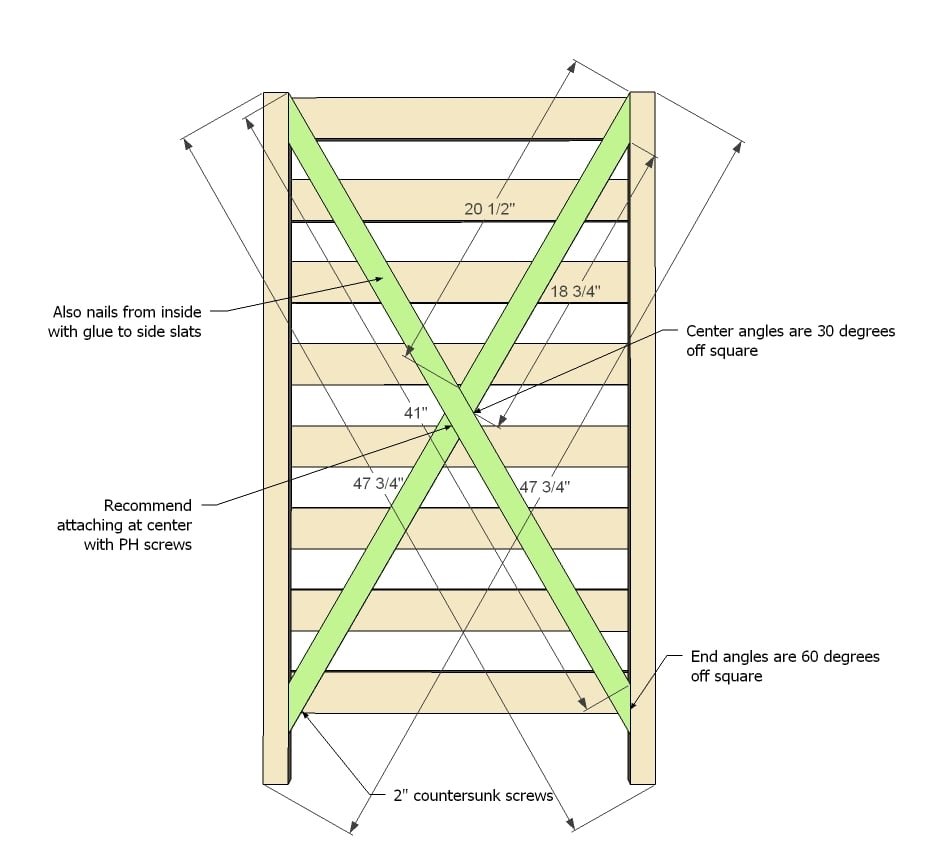
The X braces will add strength to the project and keep it square.
The X braces can be scribed by tracing the angles before and then cutting on your traced lines. Both braces are NOT required, you can use just one. Attach from the inside with 1-1/4" brad nails and glue.
Step 3
Once both legs are done, all you have to do is add the front/back supports.
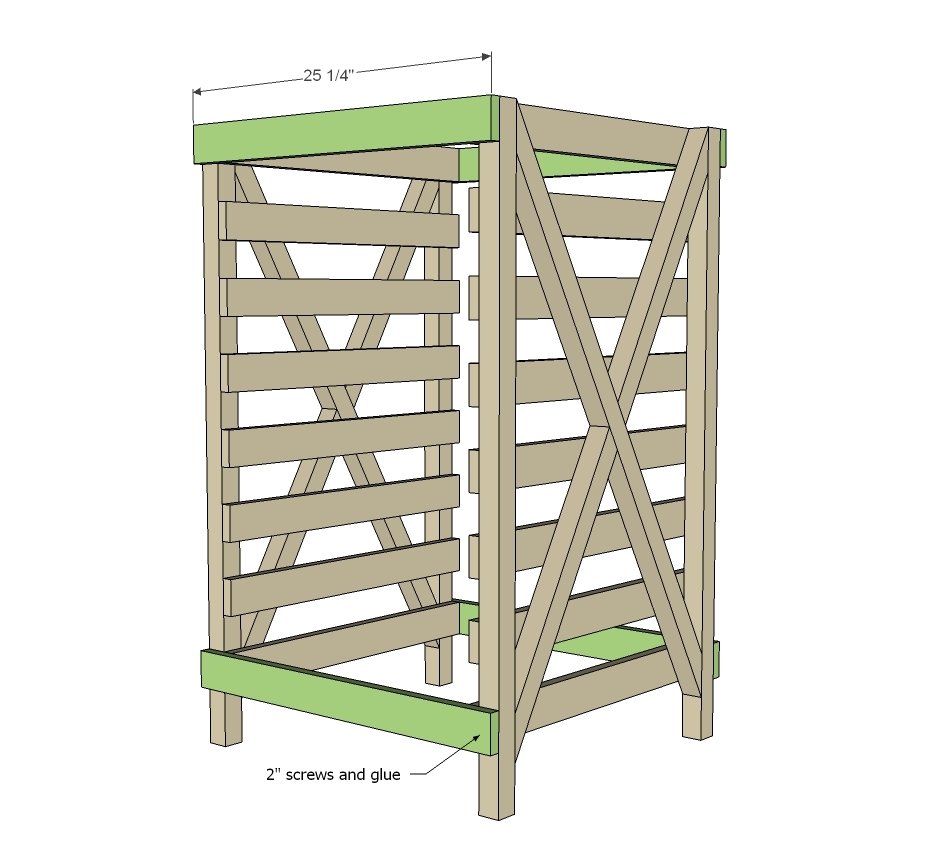
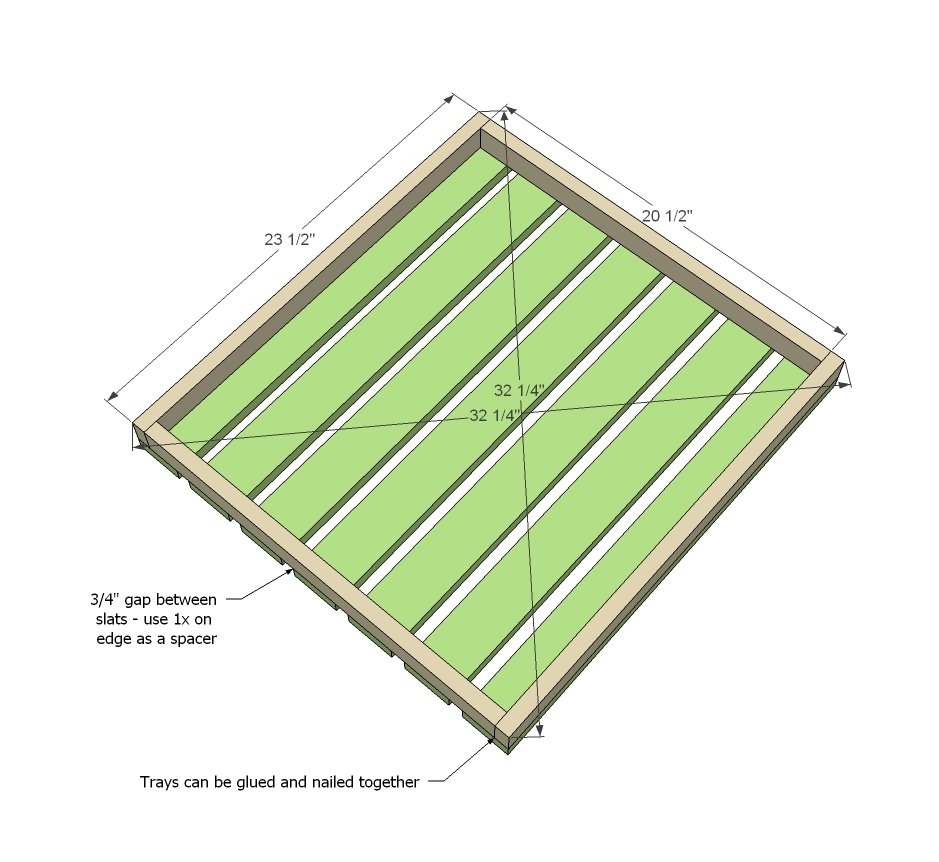
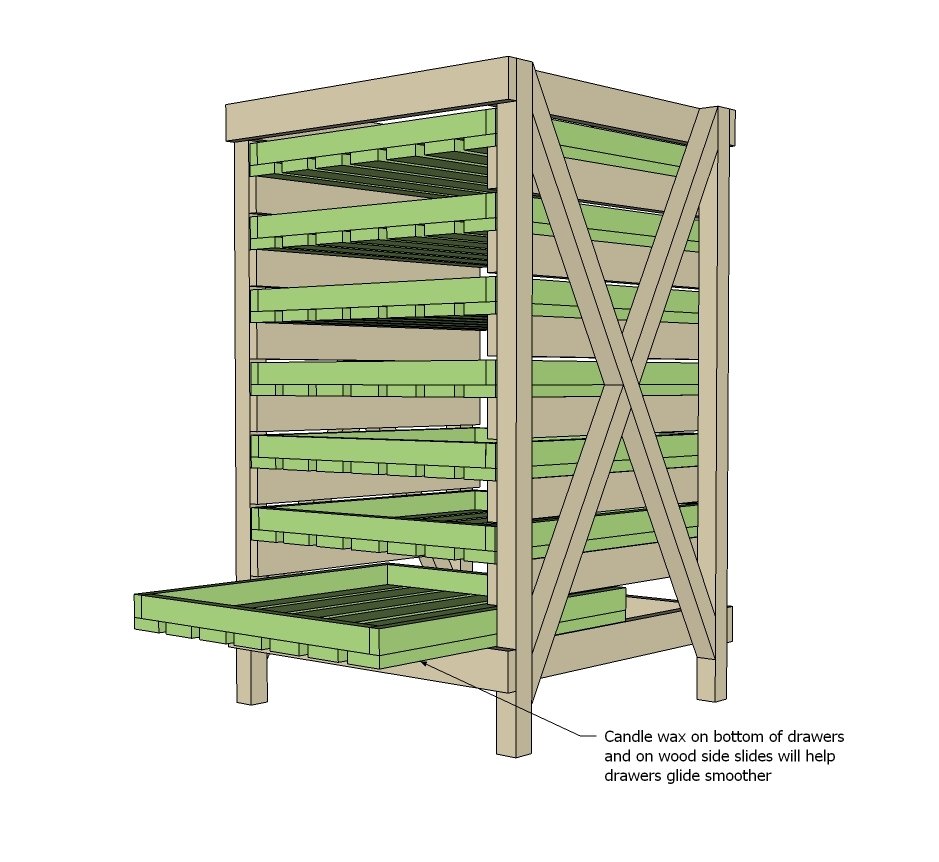
And then build trays. Trays must be built square to slide right.
TIP: Build one tray first and make sure it slide right. Then build remaining trays.
Step 5
Step 6
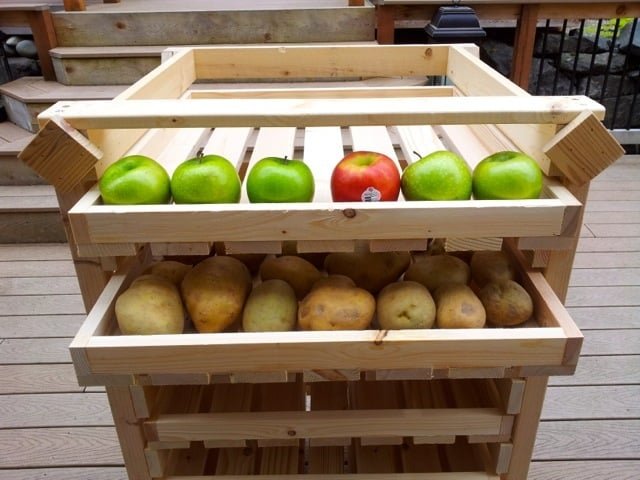
Serena felt like the original instructions made the top shelf too tight for accessing produce, so we modified to place the front support on top. She blocked the front just for decorative purposes. This makes the top shelf much larger.
Finishing
Sand all surfaces, starting with a medium grit and finishing with fine. Wipe off the dust, fill any holes or gaps with wood filler, and sand smooth once dry. Apply primer if you're painting, then finish with your choice of paint or stain and seal with a durable clear topcoat. For outdoor projects, use exterior-rated primer, paint or stain, and sealer so the piece stands up to the weather.
Source (temporary): https://www.ana-white.com/woodworking-projects/vegetable-rack-slide-out-trays