Versatile Shop cart/ workbench with inserts
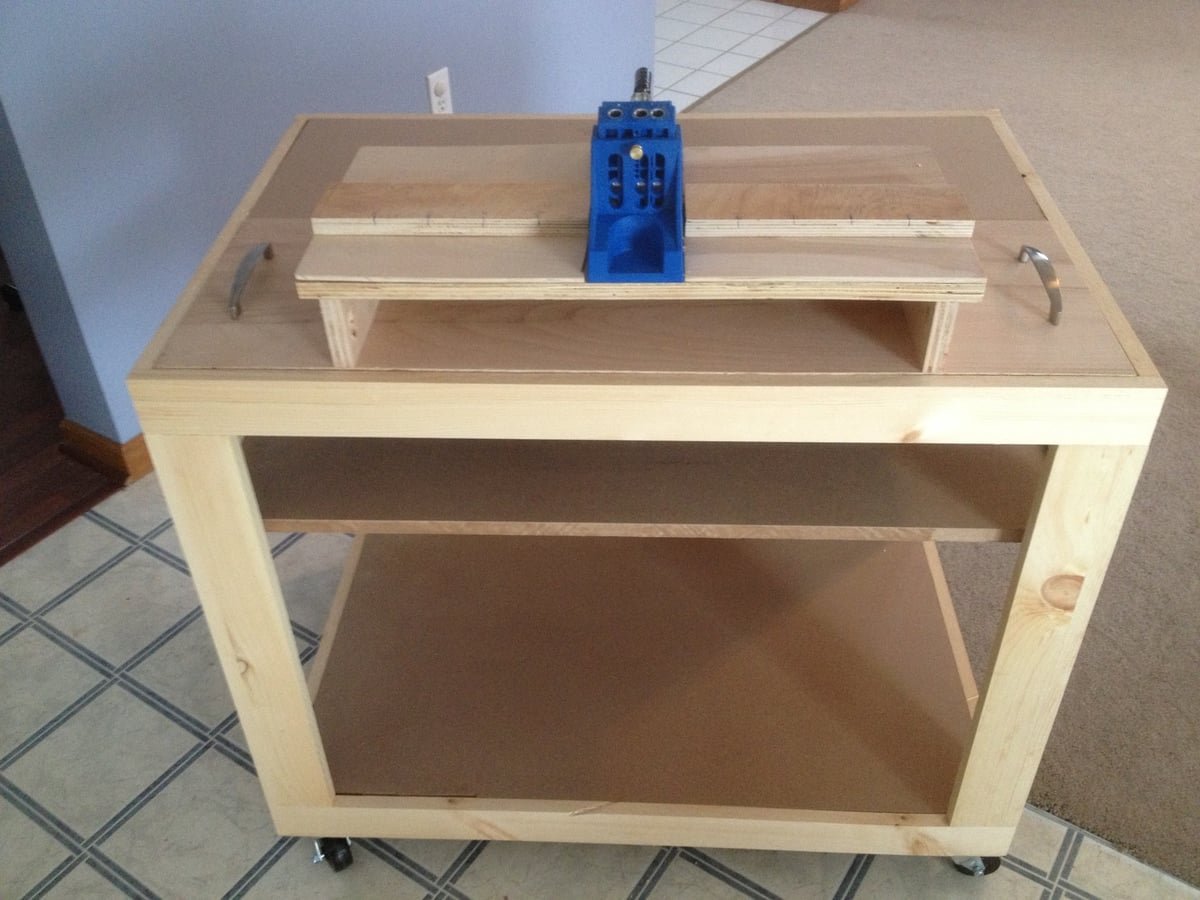
Versatile Shop Cart with inserts for miter saw and kreg jig...or just a workbench top
Specifications
| Project type | Workbench Plans |
|---|---|
| Room | Craftroom |
| Style | Modern Style Furniture Plans |
| Difficulty | Beginner Projects |
| Estimated cost | $100-$150 |
Dimensions
Use the size-specific shopping and cut lists below.
Shopping List
- MDF or Plywood 3/4" - 2 sheets
- Plywood - 1/4" 2' x 4'
- 3 - 1 x 3 x 8
- 4 - 1 x 4 x 8
- 1 - 1 x 2 x 8
- 1-1/4" kreg screws
Cut List
MDF or Plywood 3/4"
- (2) 36 x 24
- (1) 36 x 23 3/4 plywood
1/4" Plywood - 36 x 23
3/4 Pine
- (4) 1 x 4 x 37.7
- (4) 1 x 4 x 24
- (8) 1 x 3 x 21
- (2) 1 x 3 x 19
- (2) 1 x 2 x 23 3/4
Tools
- measuring tape
- pencil
- safety glasses
- kreg-jig
- drill
- circular saw
- compound miter saw
Step-by-step Instructions
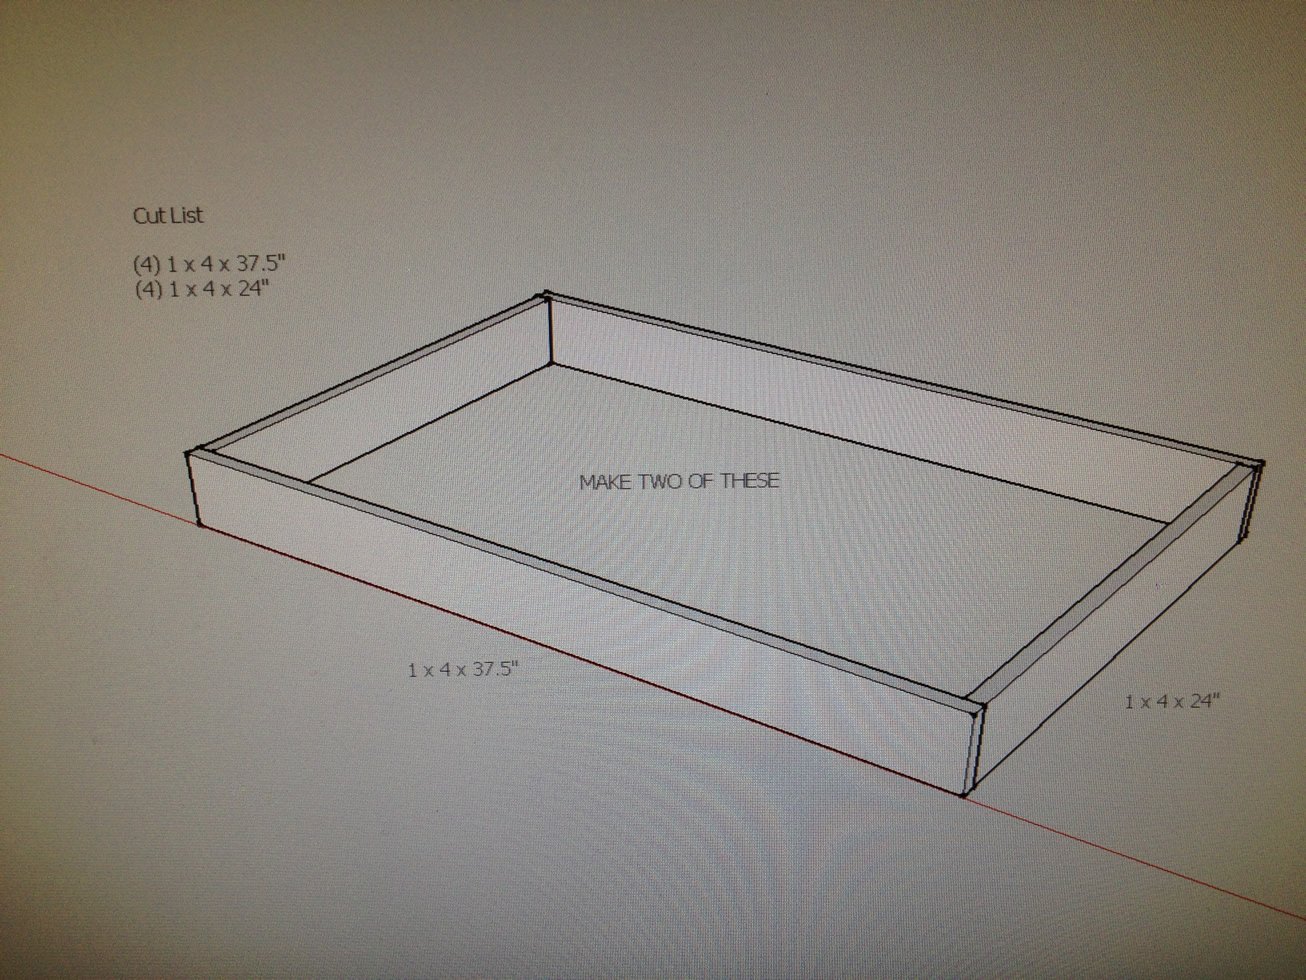
Create the base by using (2) 1 x 4 x 37.5" pieces and (2) 1 x 4 x 24" pieces
drill pocket holes on both ends of each 1 x 4 x 24" piece to attach to the end pieces...the 24" pieces go inside the 37.5:"ones
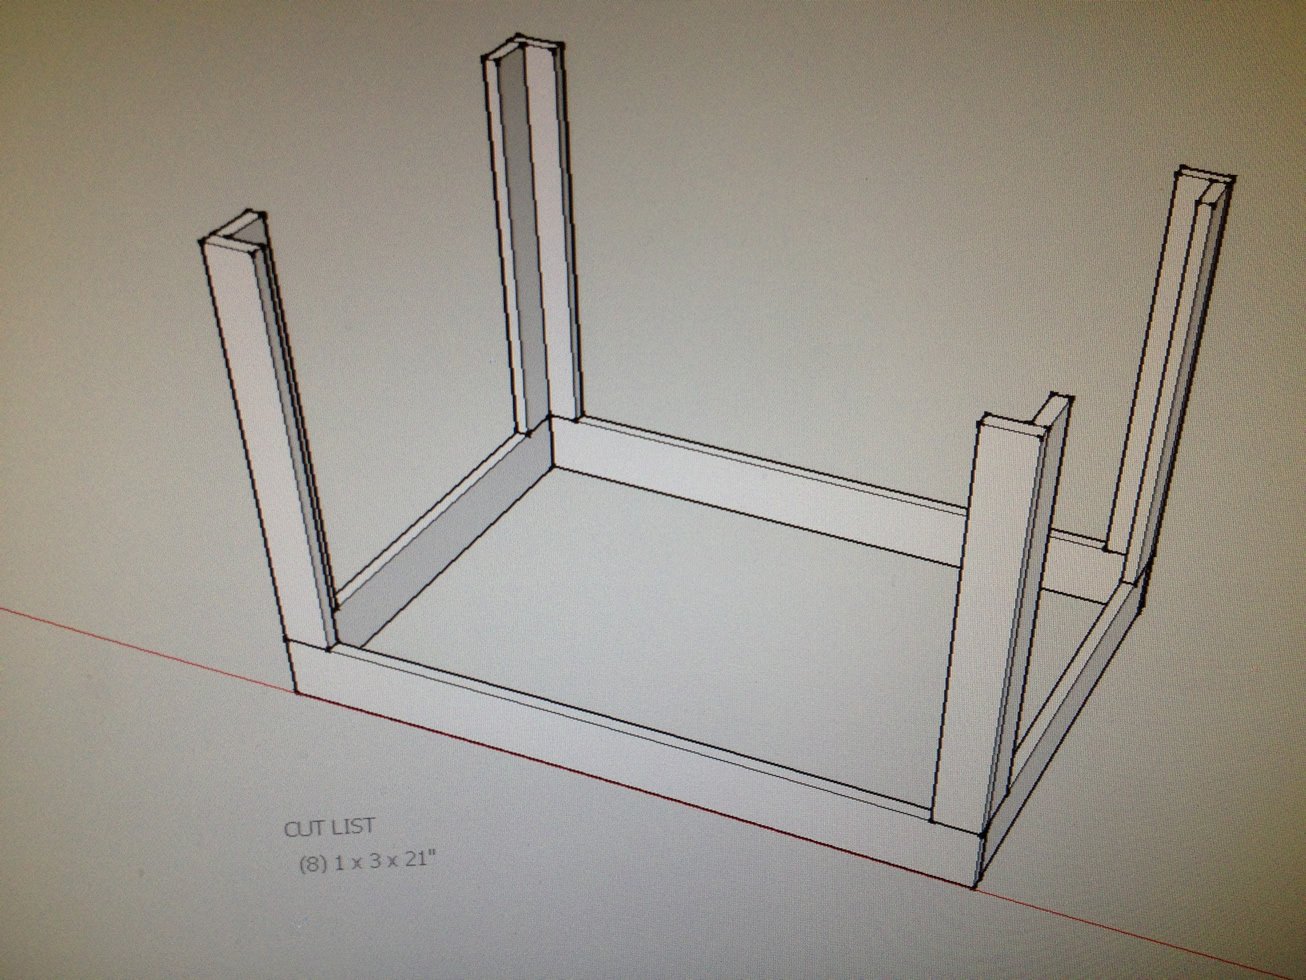
using the (8) 1 x 3 x 21" pieces, attach two together to form a leg...do this to make four legs
drill pocket hols to attach them and also pocket holes on each end to attach to the base and the top in the next step
Step 3
Same as step one, just this goes on the top of the legs you just made
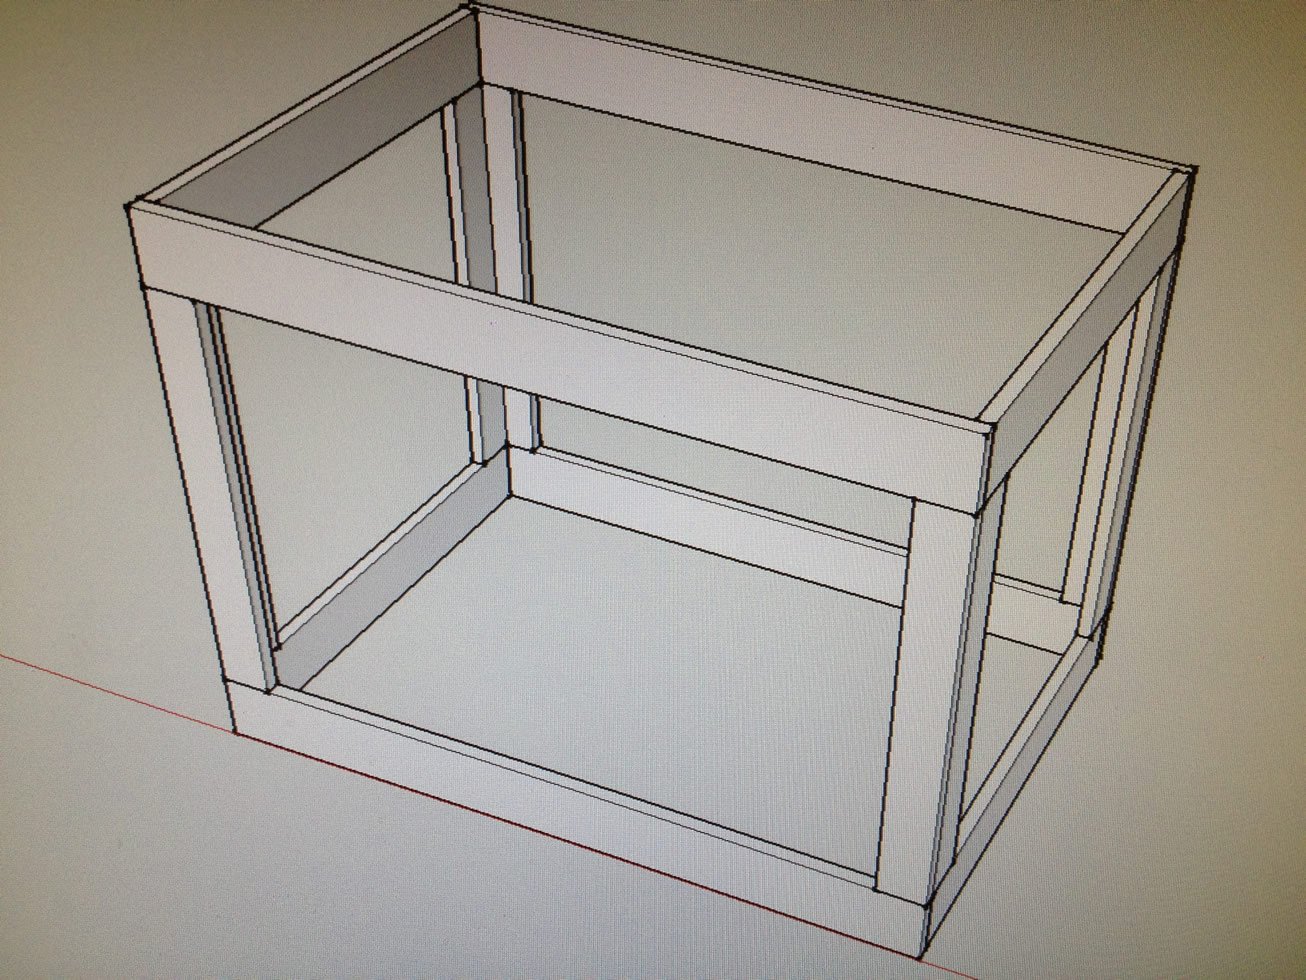
Step 4
Insert the top MDF or Plywood 3/4 " piece. Inset this down 3/4 of an inch to leave room for all the inserts you can make drill pocket holes all the way around the mdf or plywood piece to attach. easy way for a little help is to attach two 1 x 2 pieces 1.5" down for support while you are putting the mdf sheet in place
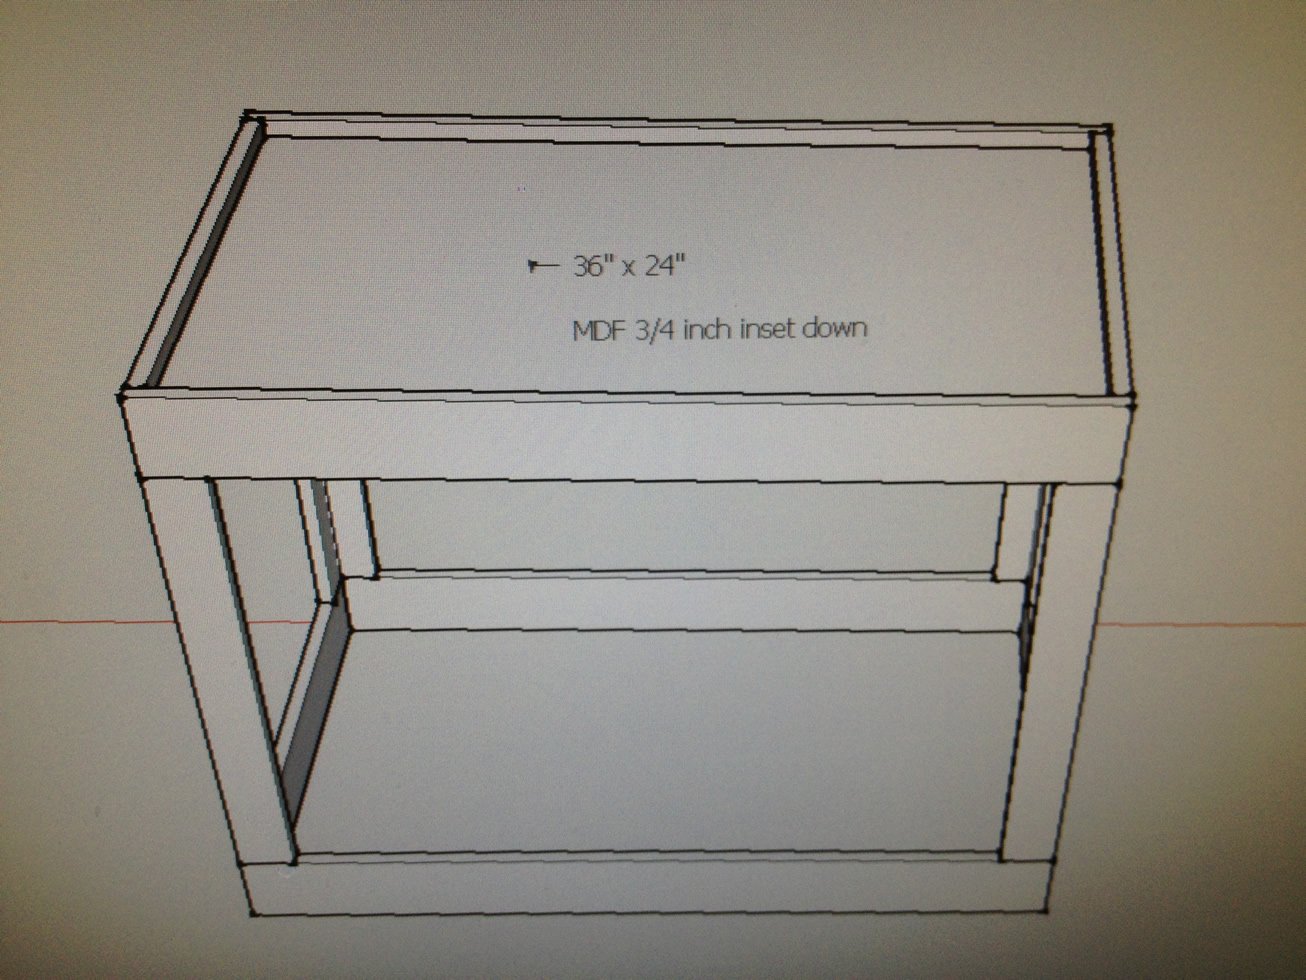
Step 5
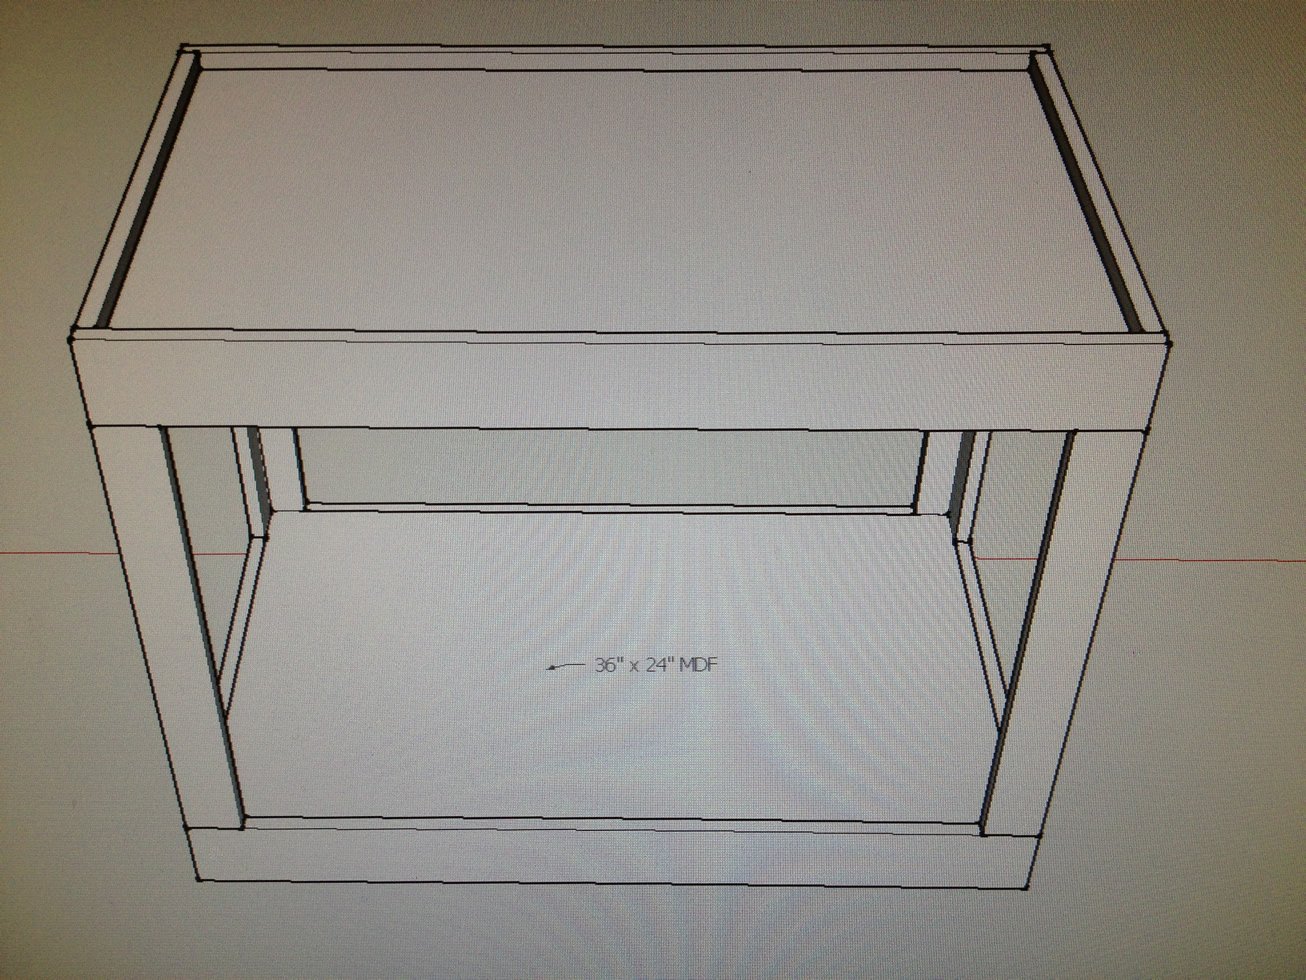
Step 6
attach the back 1/4" plywood piece using a brad nailer, small screws, or small nails

Step 7
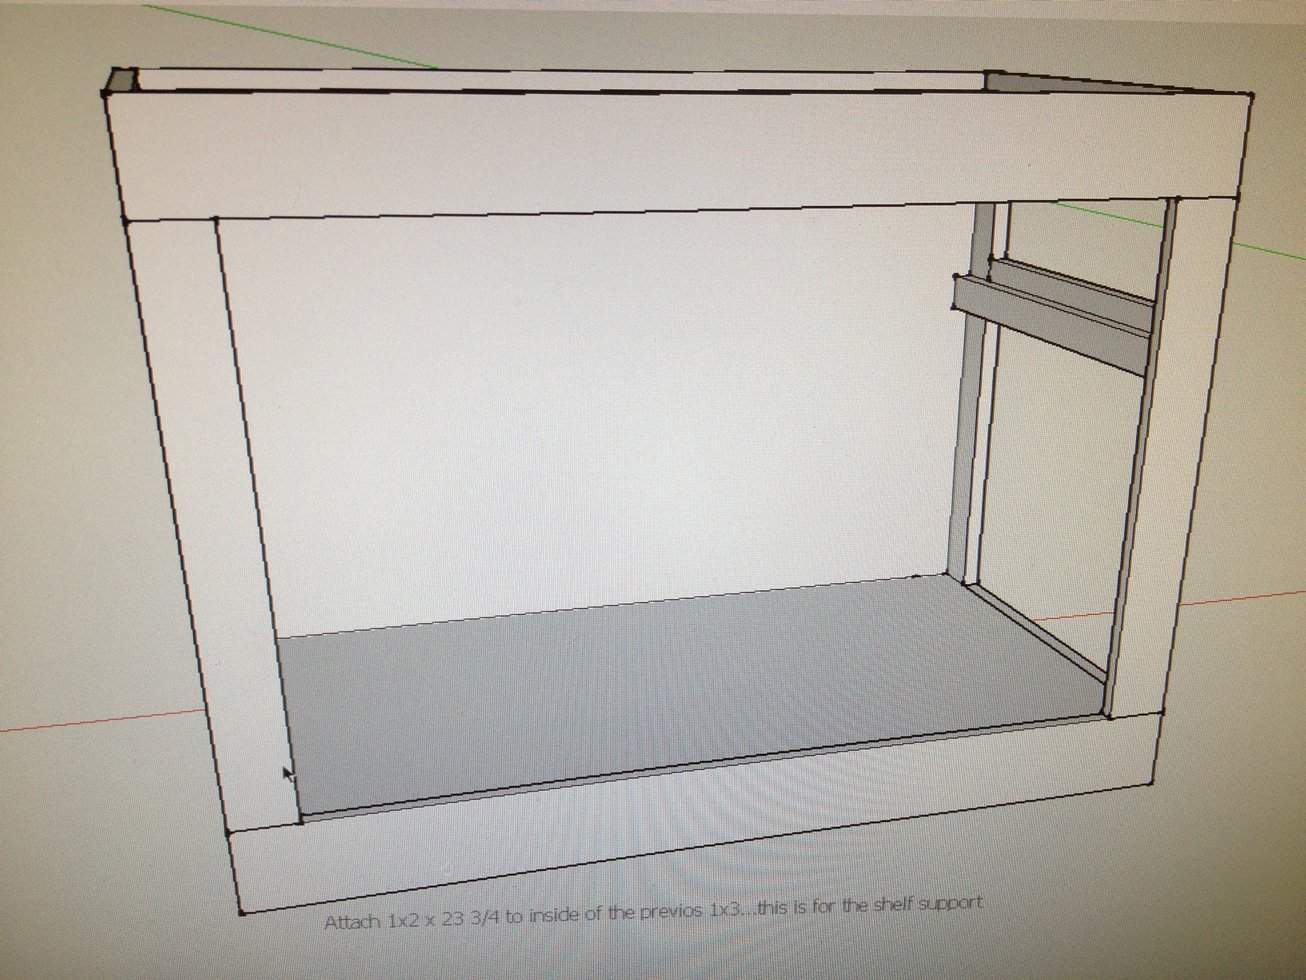
add side supports 1 x 3 x 19" on each side. measure 17 1/2 inches up from the bottom as your starting point
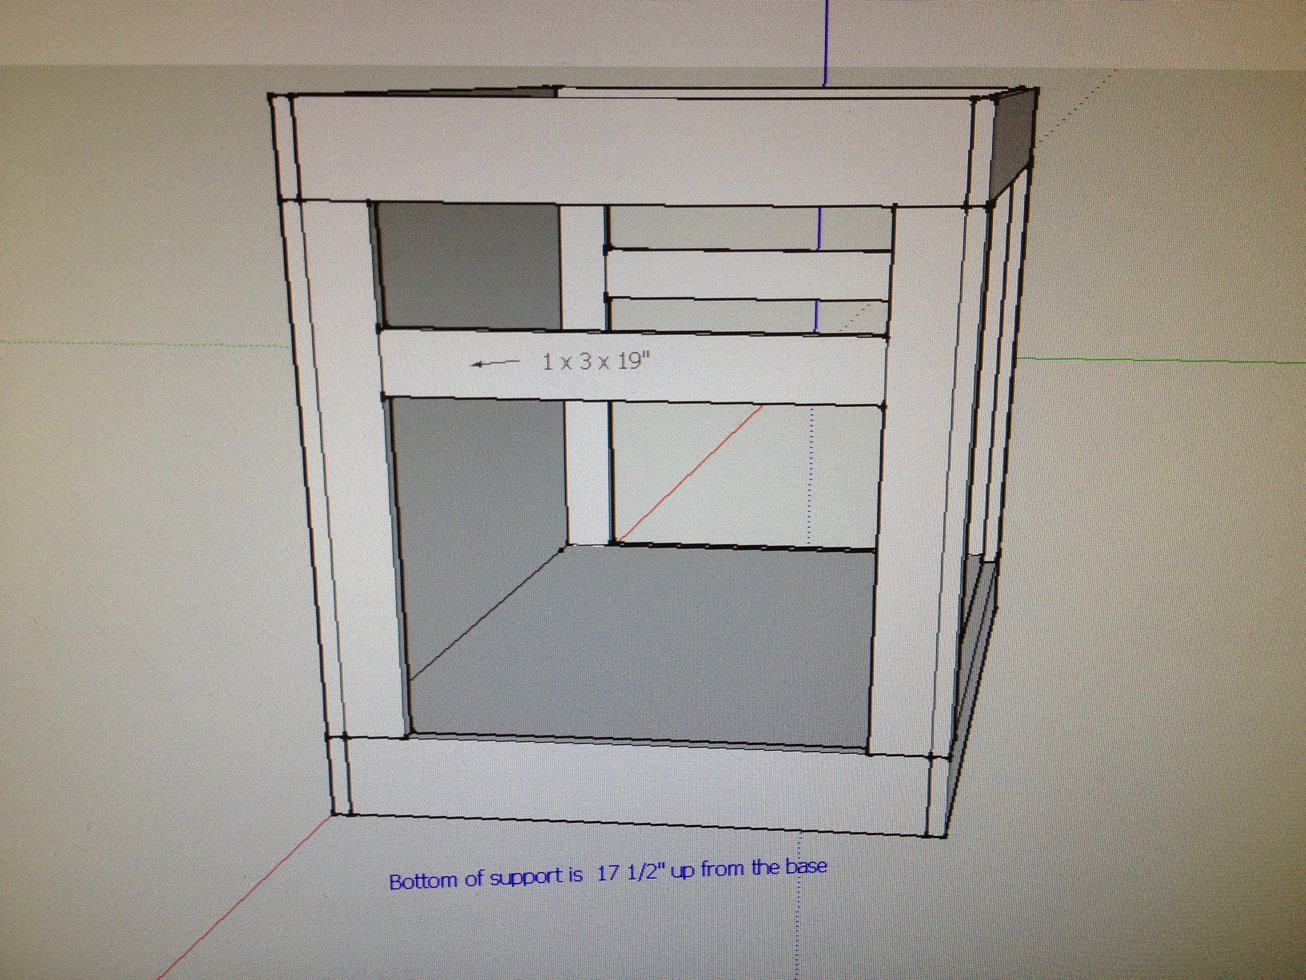
on the inside of those supports add a 1 x 2 x 23 3/4 piece.
this will be your shelf support
Step 9
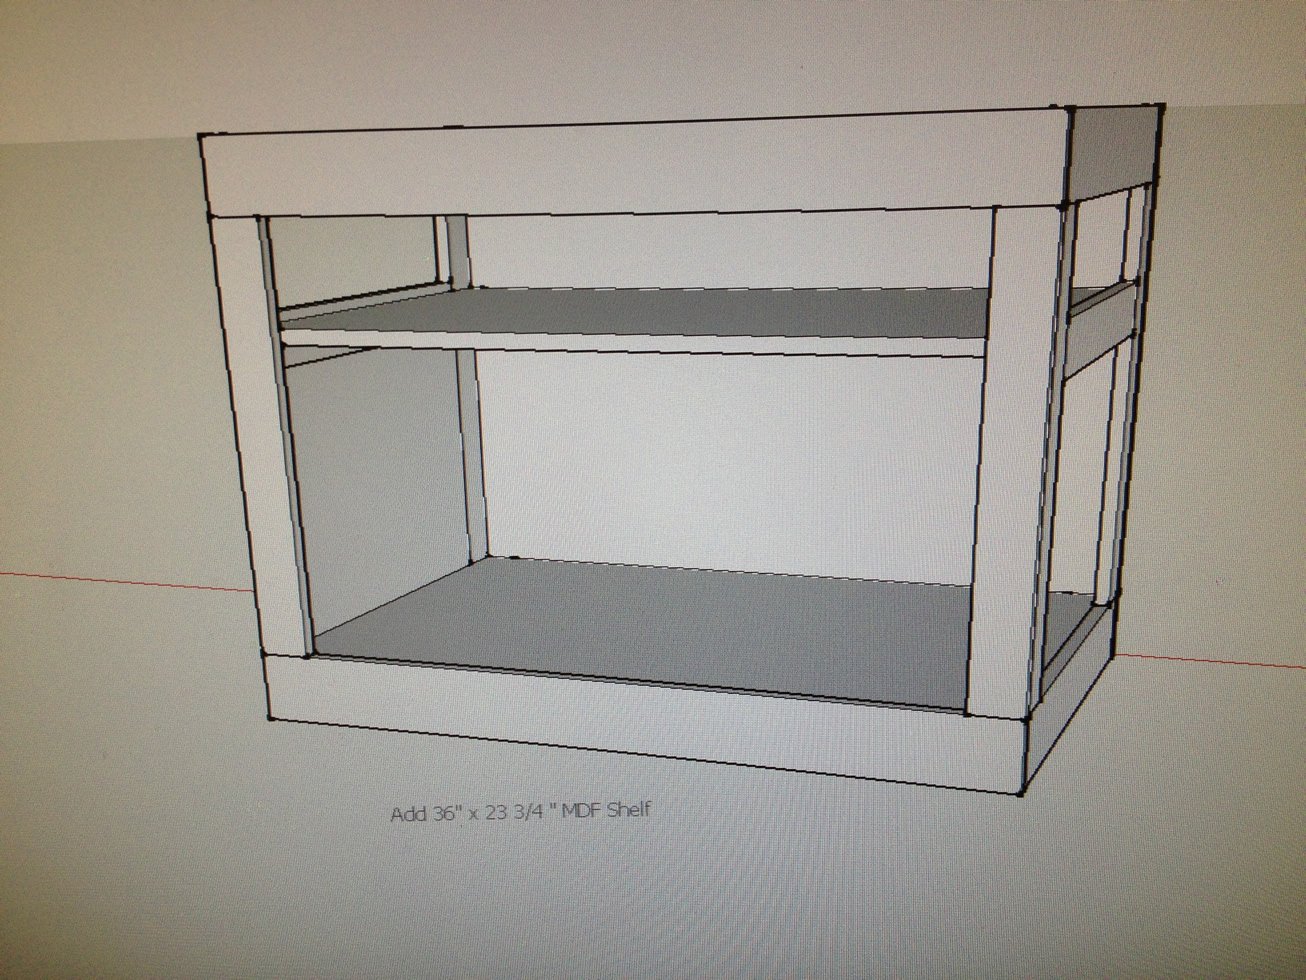
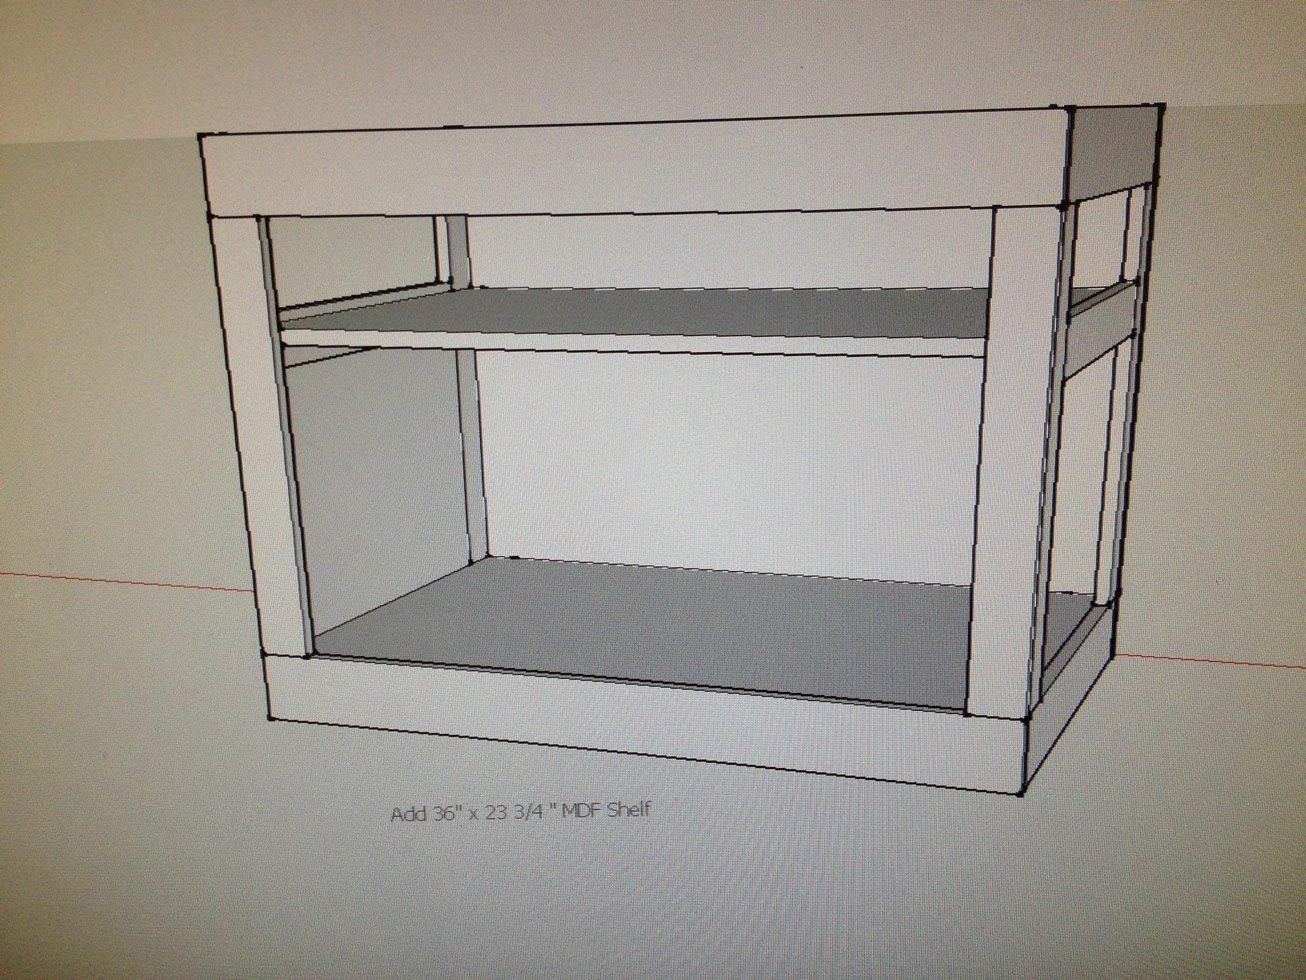
add the 36 x 23 3/4" mdf or plywood piece for the shelf...drill pocket holes on the sides of the mdf or plywood to attach it to the side supports
Step 10
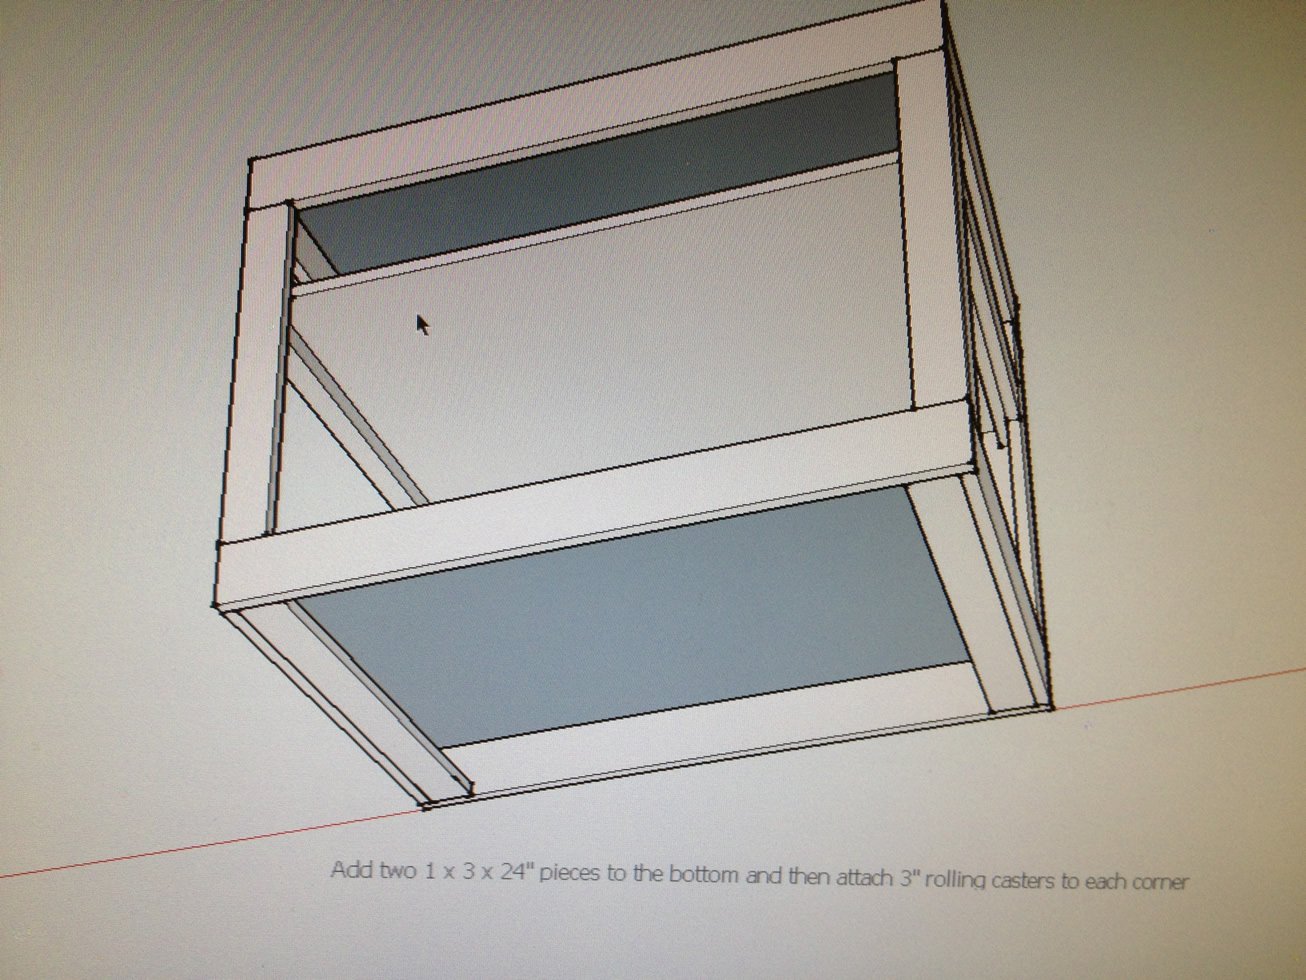
at the bottom add 2 1 x 3 x 24 piece for the casters to attach too...(the casters will attache in three spots without this piece, so it may not be necessary, but i like the added support
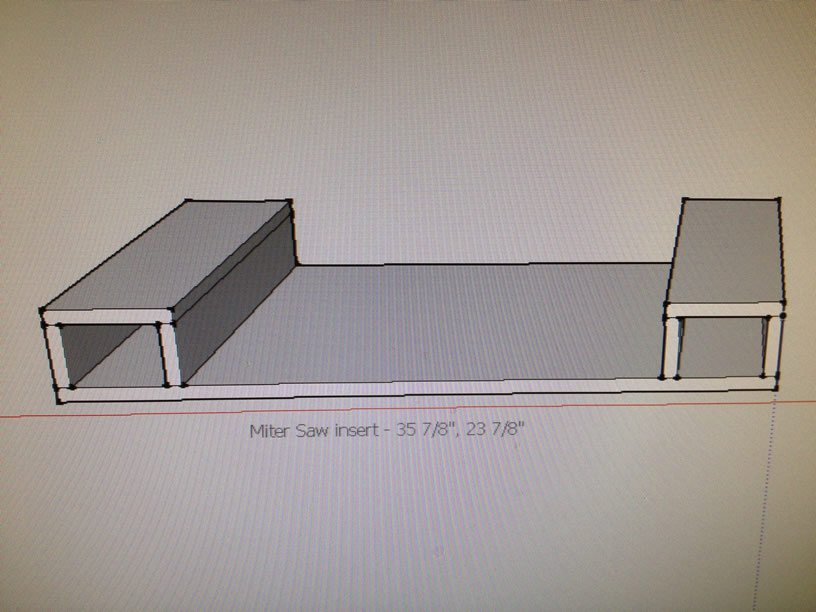
Here is the miter saw insert I made - LOVE THIS!!!!!!!!!!!
insert is 35 7/8" x 23 7/8" i made the top pieces as high as my miter saw surface for extra board support turns out those are nice and handy storage spots for smaller cut pieces to use later
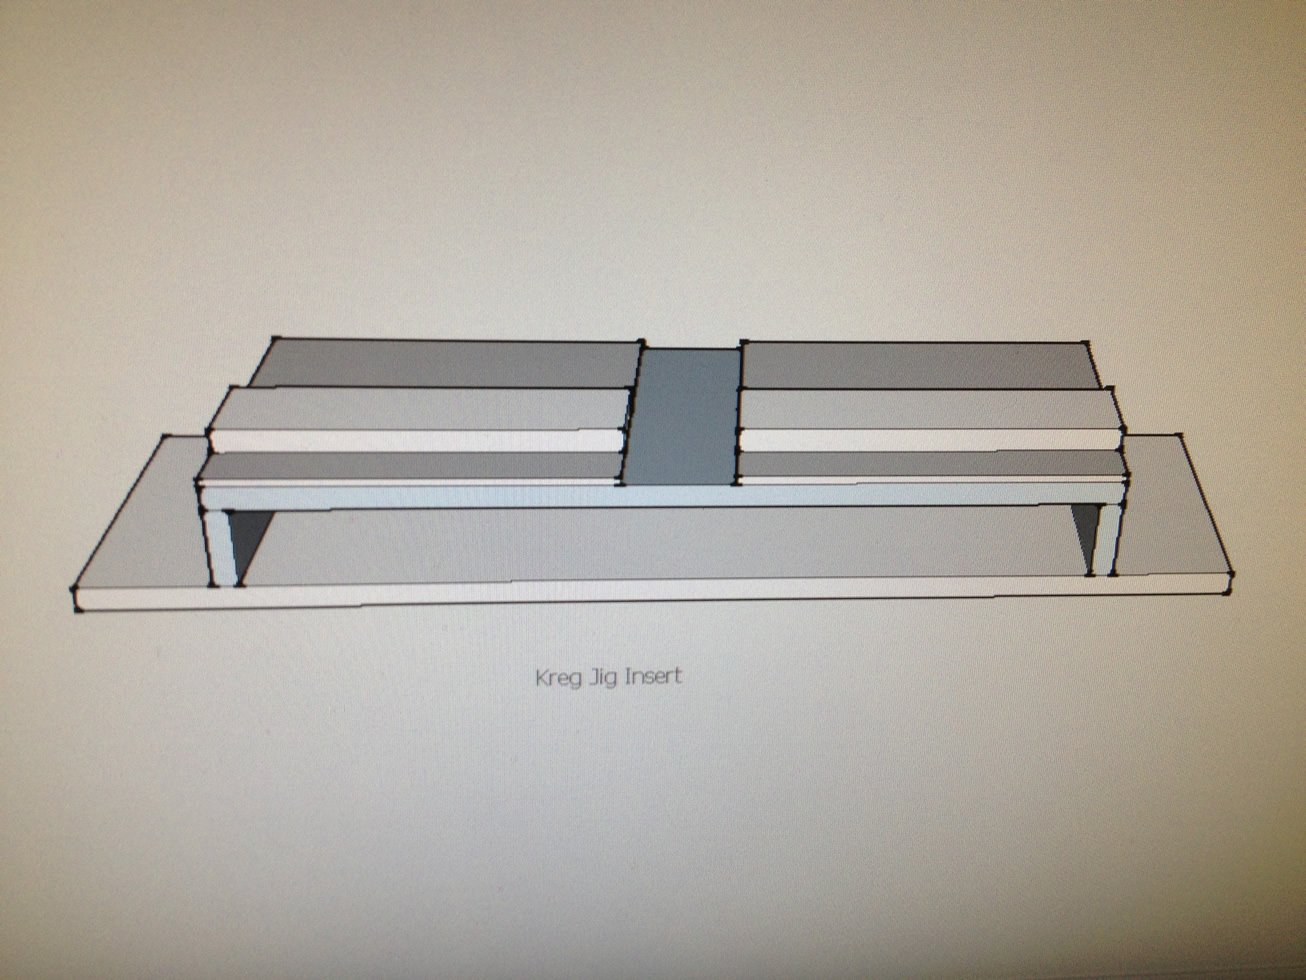
Kreg jig insert I made
this insert is 12 x 35 7/8 i placed the jig in the middle on the top and made the pieces 1 inch high on each side (same height as board height on jig....nice for longer boards i also placed handles on the outside top sides of this for easy carrying
Finishing
Sand all surfaces, starting with a medium grit and finishing with fine. Wipe off the dust, fill any holes or gaps with wood filler, and sand smooth once dry. Apply primer if you're painting, then finish with your choice of paint or stain and seal with a durable clear topcoat. For outdoor projects, use exterior-rated primer, paint or stain, and sealer so the piece stands up to the weather.
Source (temporary): https://www.ana-white.com/woodworking-projects/versatile-shop-cart-workbench-inserts