Vintage Drawer Bench
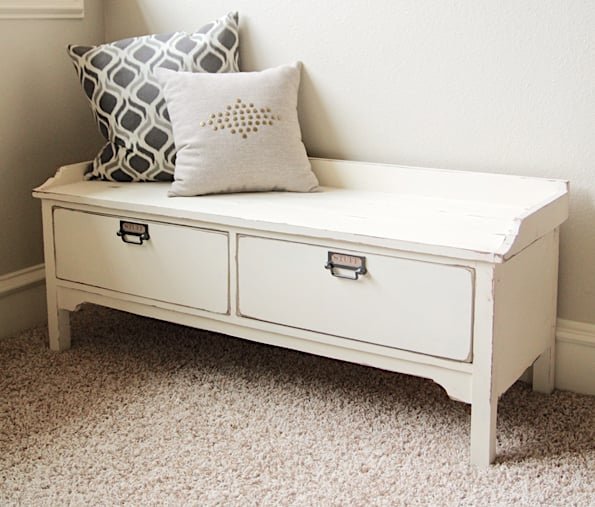
This beautiful vintage style drawer bench is made out of pine whitewood boards. It features two drawers and a nice, wide seat top. Pair with a pretty shelf or hooks to create a functional and charming entryway. from
Specifications
| Project type | Bench |
|---|---|
| Room | Storage Solutions |
| Style | Farmhouse Furniture |
| Difficulty | Advanced |
| Estimated cost | $150 - $200 |
Dimensions
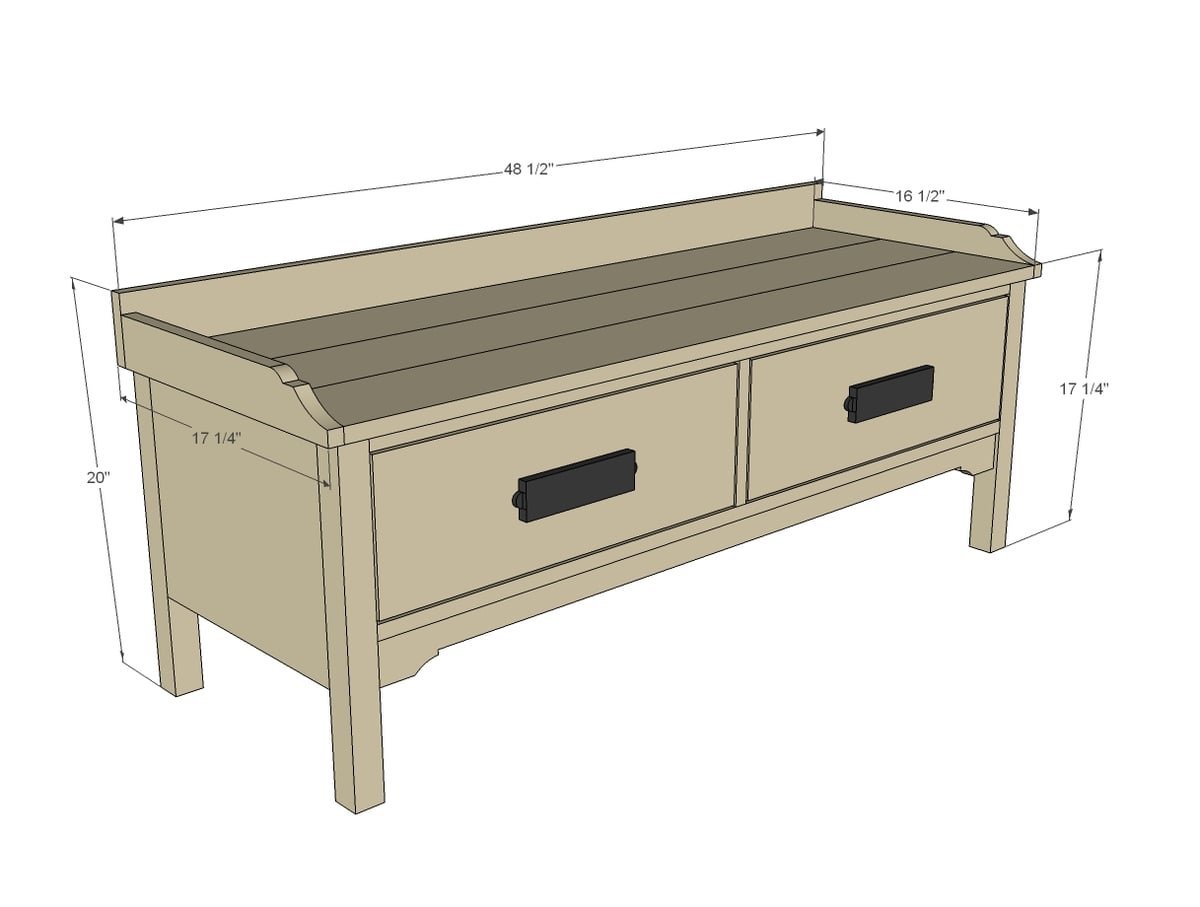
Use the size-specific shopping and cut lists below.
Shopping List
- 1 - 2x2 @ 6 feet long
- 1 - 1x12 @ 6 feet long
- 1 - 1x2 @ 6 feet long
- 2 - 1x3 @ 10 feet long
- 3 - 1x6 @ 8 feet long
- 1 - 1x4 @ 6 feet long
- 1 - 1x8 @ 4 feet long
- 2'x4' sheet of 1/4” plywood for drawer bottoms
- 2 sets of 15” drawer slides (euro bottom corner mounts) - can be 14" drawer slides
- 2 knobs or handles
Cut List
FRAME
- 4 - 2x2 @ 16-1/2” (legs)
- 2 - 1x12 @ 13-3/4” (sides)
- 1 - 1x12 @ 44” (back)
- 2 - 1x2 @ 44” (front trim)
- 1 - 1x2 @ 7-1/2” (front center trim)
- 1 - 1x3 @ 44” (front base trim)
- 1 - 1x3 @ 14 1/2” (center drawer cleat)
- 2 - 1x3 @ 13 3/4” (side drawer cleats)
DRAWER
- 4 - 1x6 @ 15”
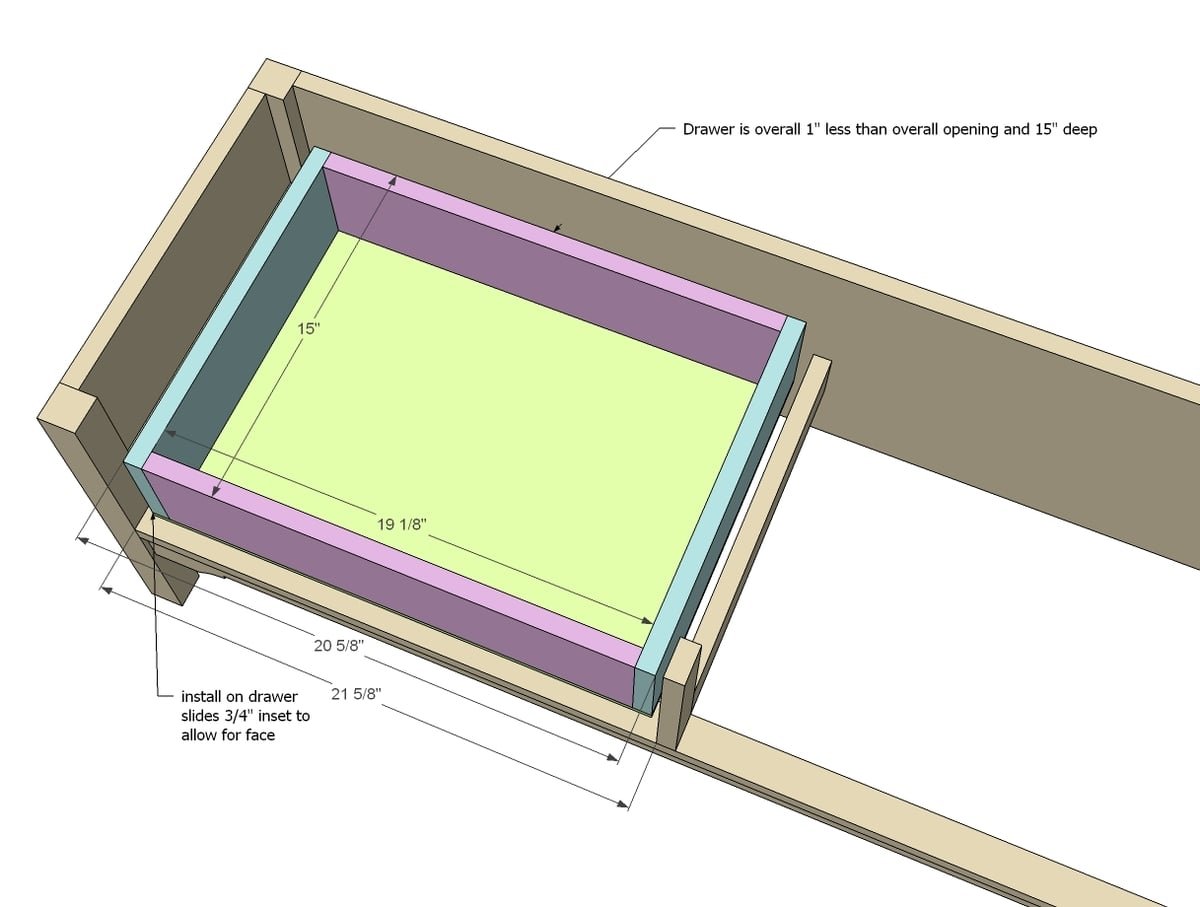
- 4 - 1x6 @ 19-1/8” (cut to fit!)
- 2 - 1/4” plywood @ 20 5/8” x 15” (cut to fit!)
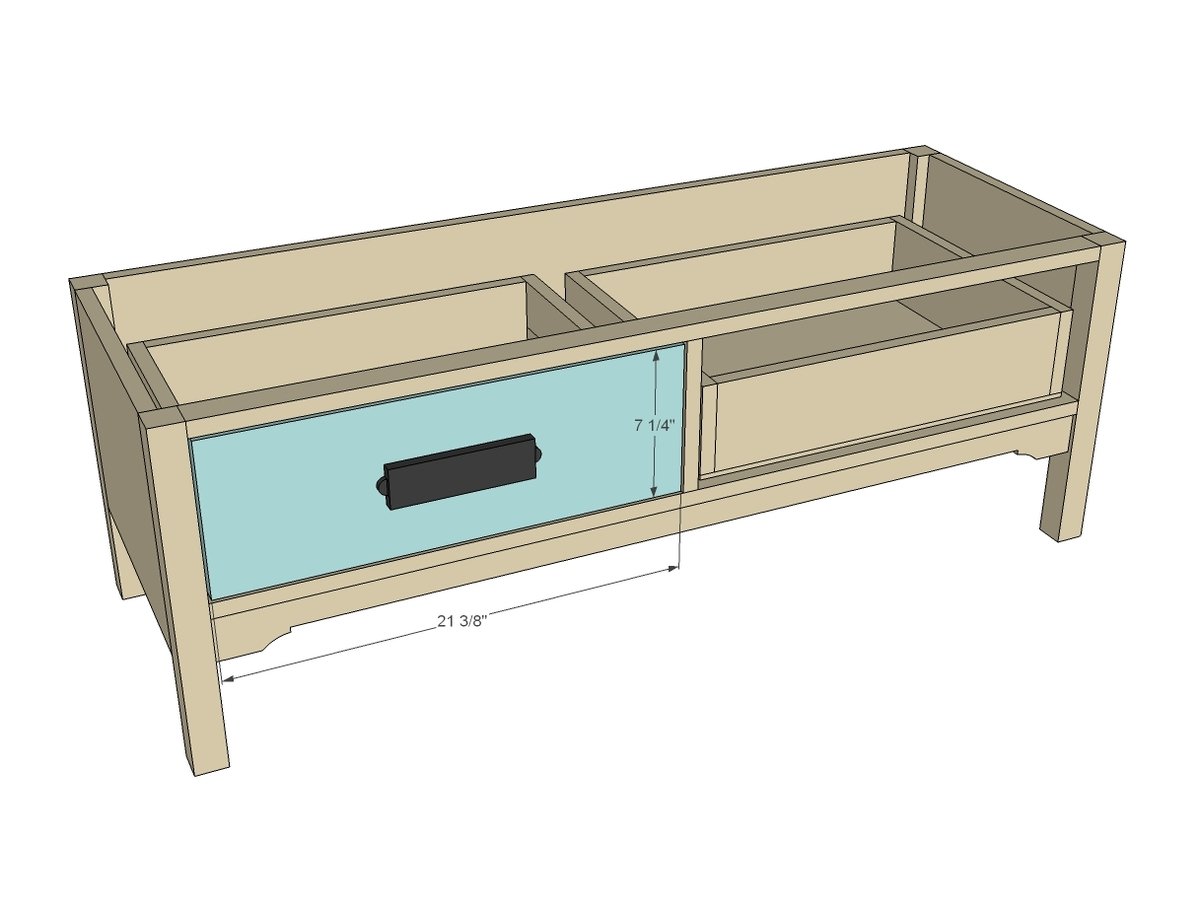
- 2 - 1x8 @ 21 3/8” (cut to fit!)
TOP
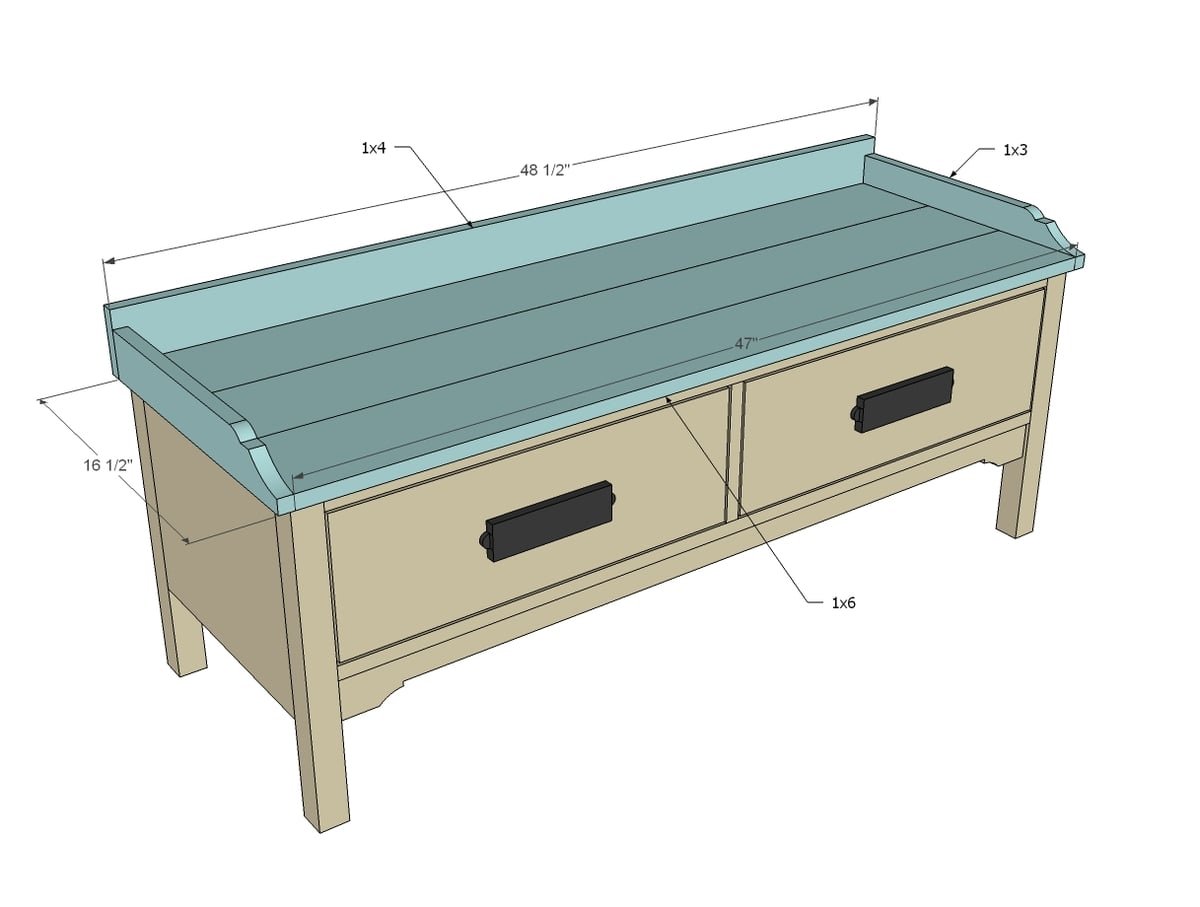
- 3 - 1x6 @ 47”
- 2 - 1x3 @ 16 1/2”
- 1 - 1x4 @ 48 1/2”
Tools
- measuring tape
- square
- pencil
- safety glasses
- hearing protection
- kreg-jig
- drill
- circular saw
- jigsaw
- compound miter saw
- nailer
- sander
Step-by-step Instructions
Step 1
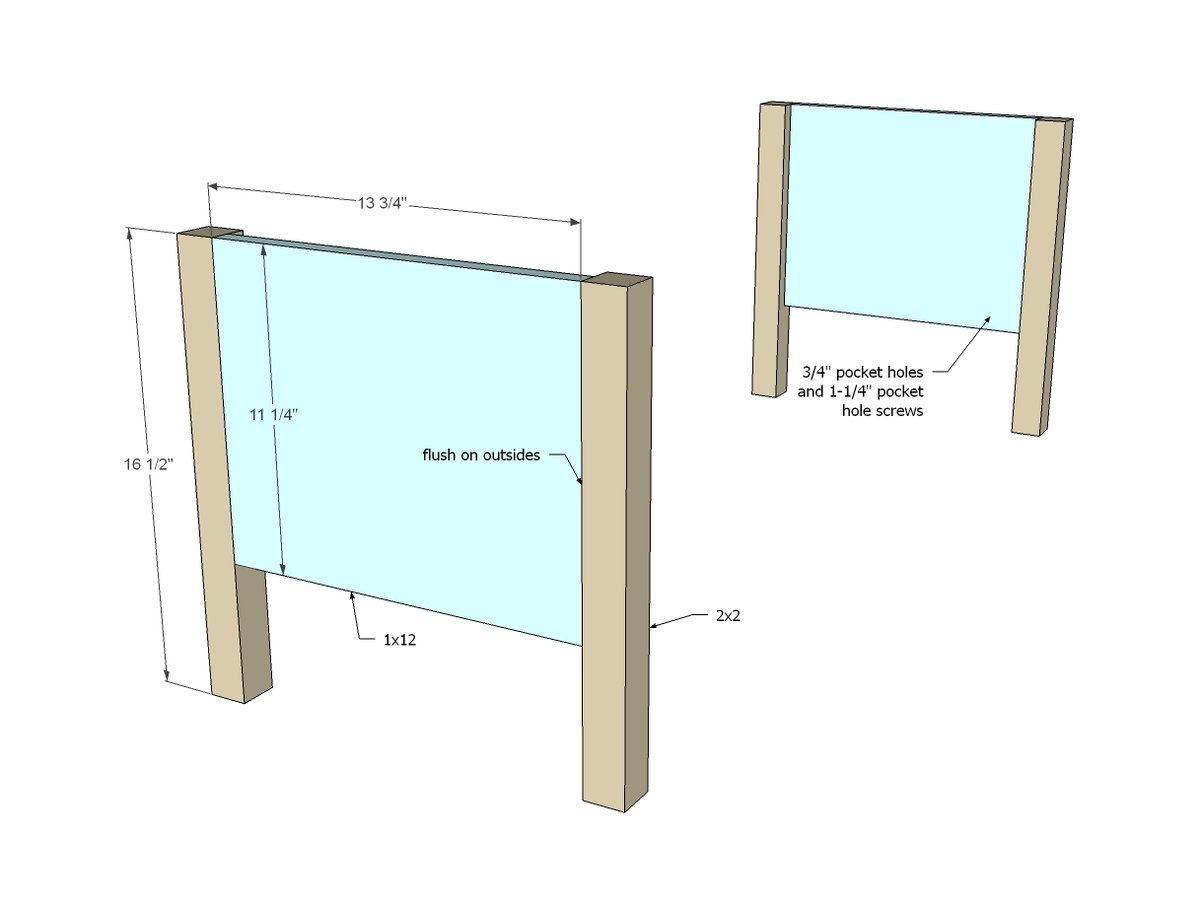
Start by building the two sides. Note that the 1x12 boards are expected to be 11-1/4" wide - measure yours and confirm - if not, adjust plans as necessary. NOTE: You may wish to drill 3/4" pocket holes facing upward on the 1x12s for attaching the bench top in later steps.
Step 2
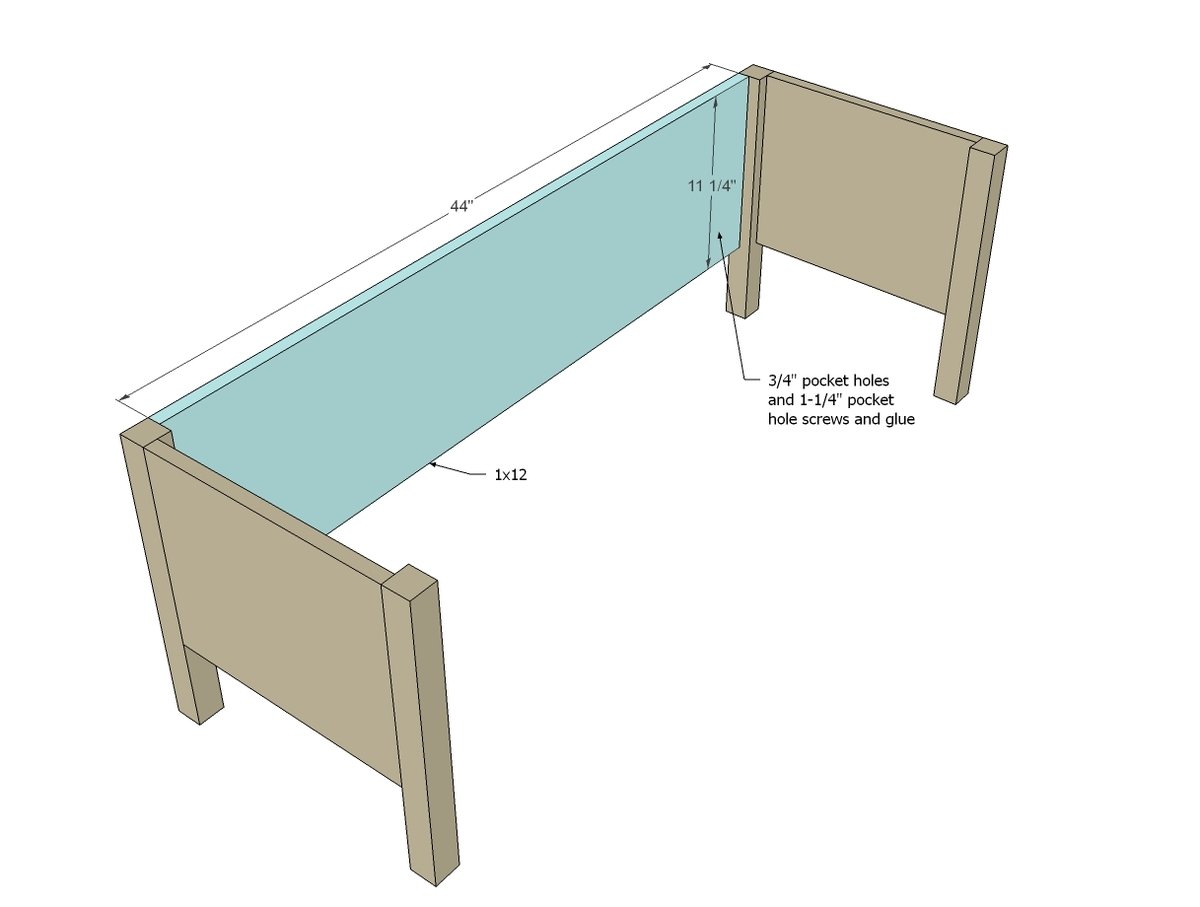
Add the back to the bench, same as you did the side panels. NOTE: You may wish to drill 3/4" pocket holes facing upward on the 1x12s for attaching the bench top in later steps.
Step 3
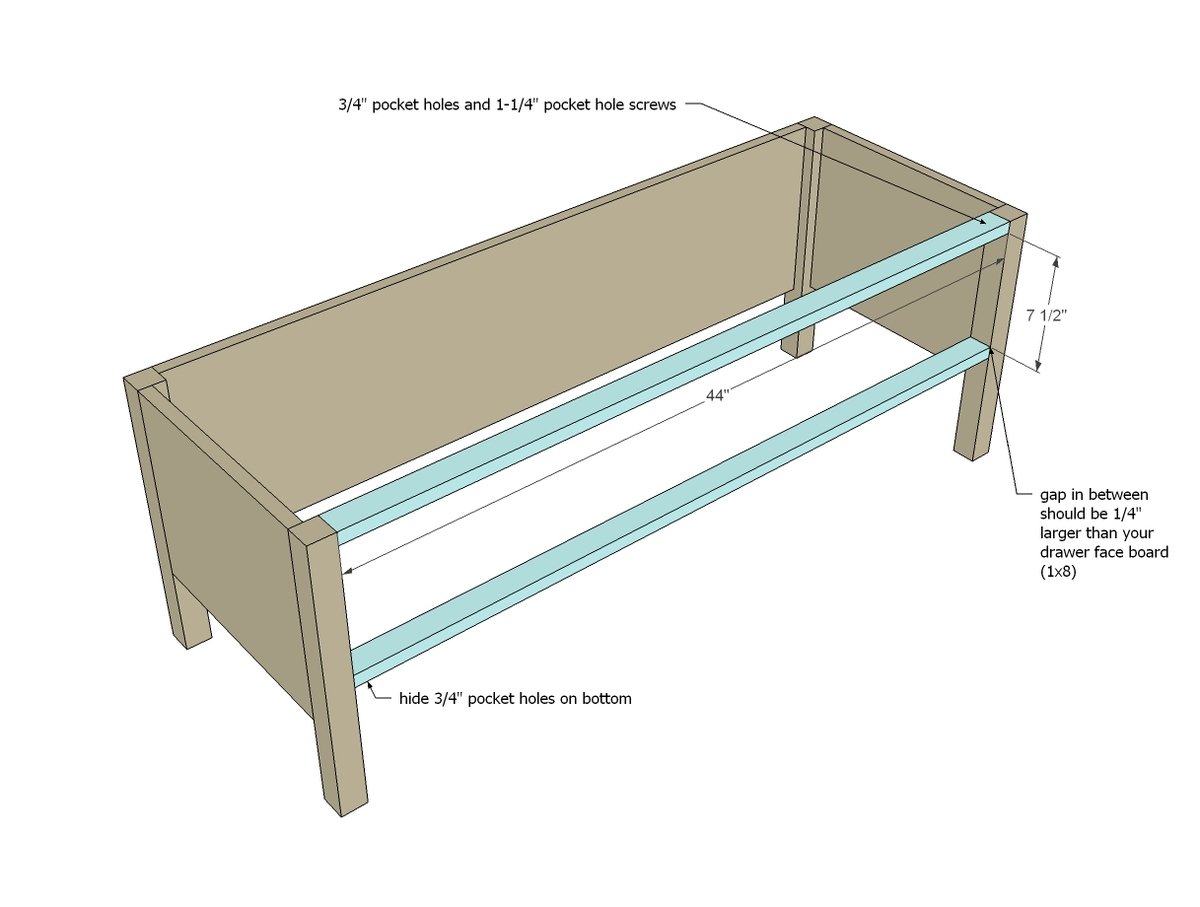
Attach the two 1x2 front trim pieces to the bench legs. Note that the drawer faces (1x8s) are expected to be 7-1/4" wide - measure and confirm - the spacing between these 1x2s should be 1/4" more in with than your 1x8 drawer faces.
Step 4
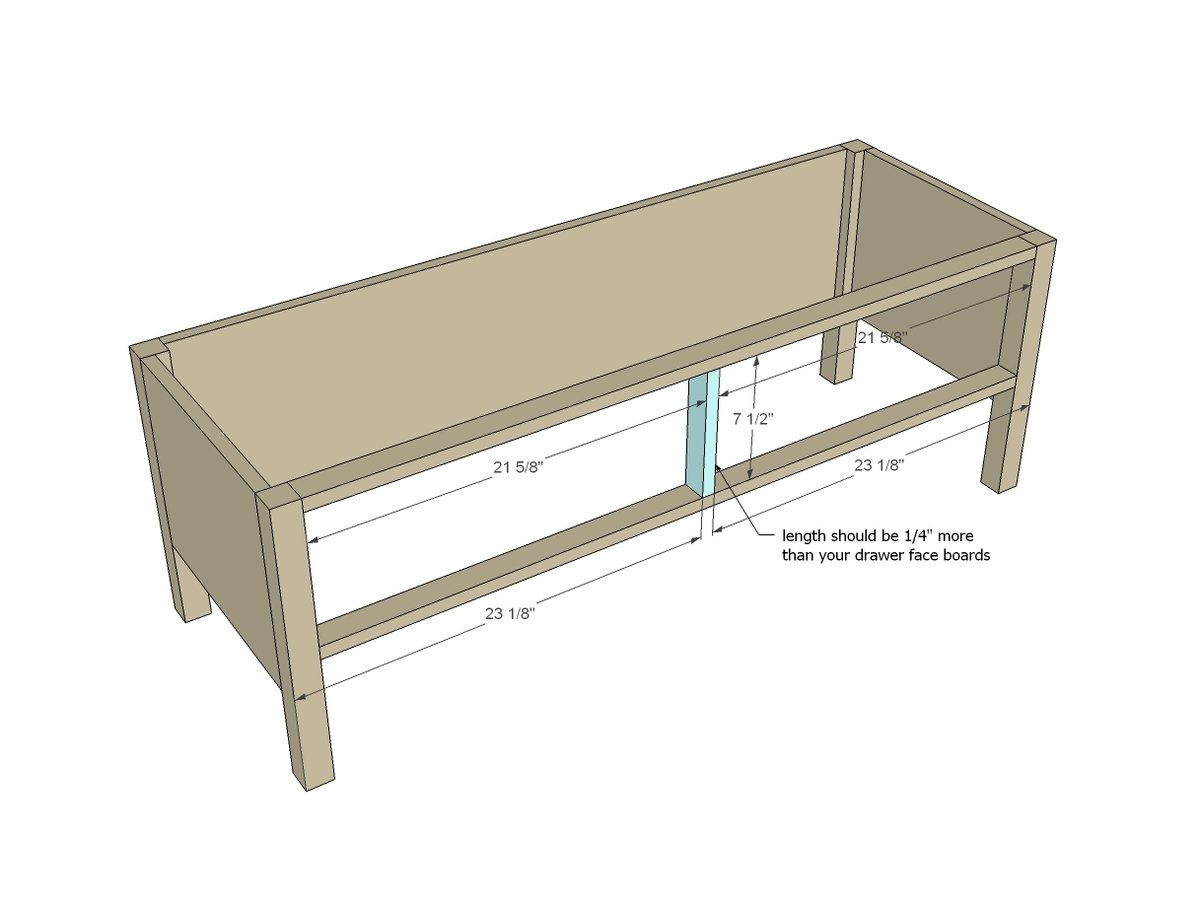
Add the center divider between the drawers.
Step 5
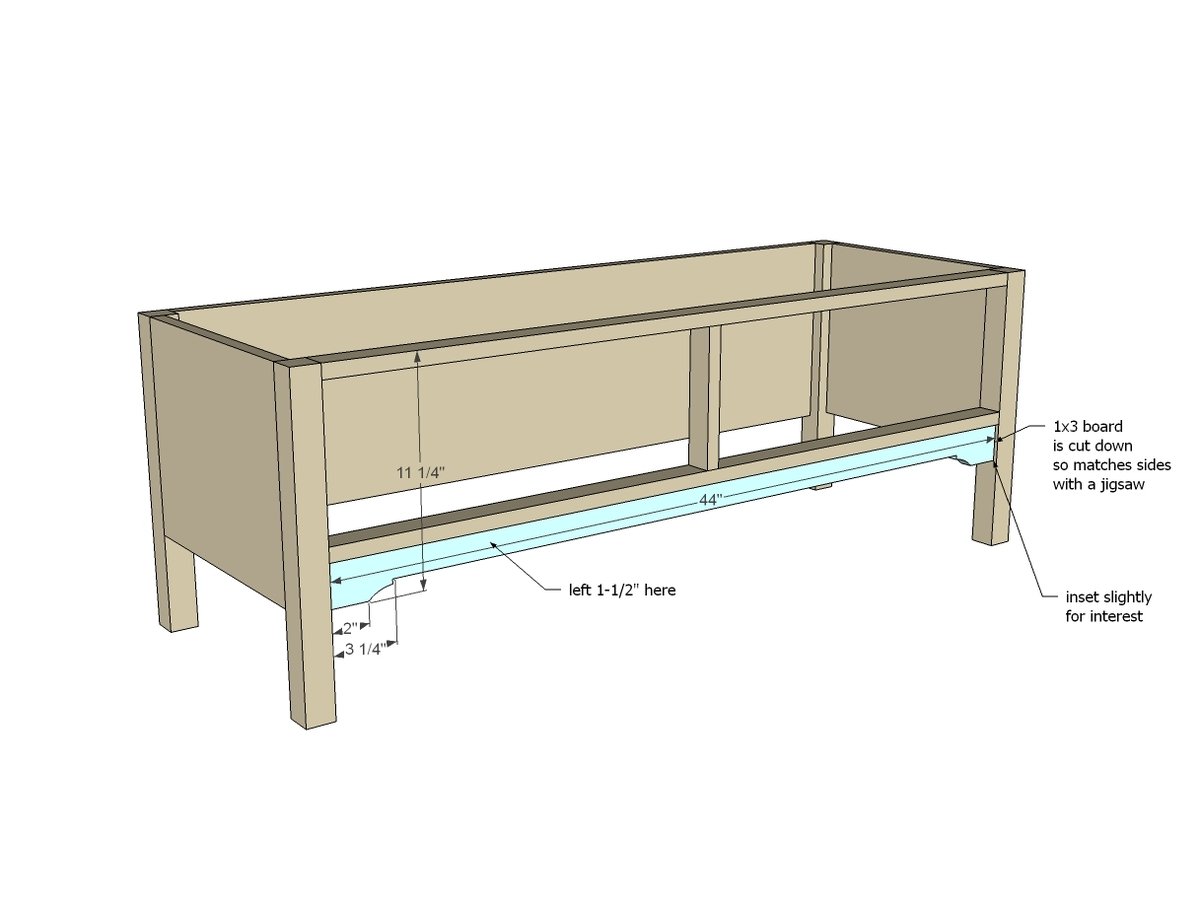
Attach the bottom trim piece with glue and nails.
Step 6
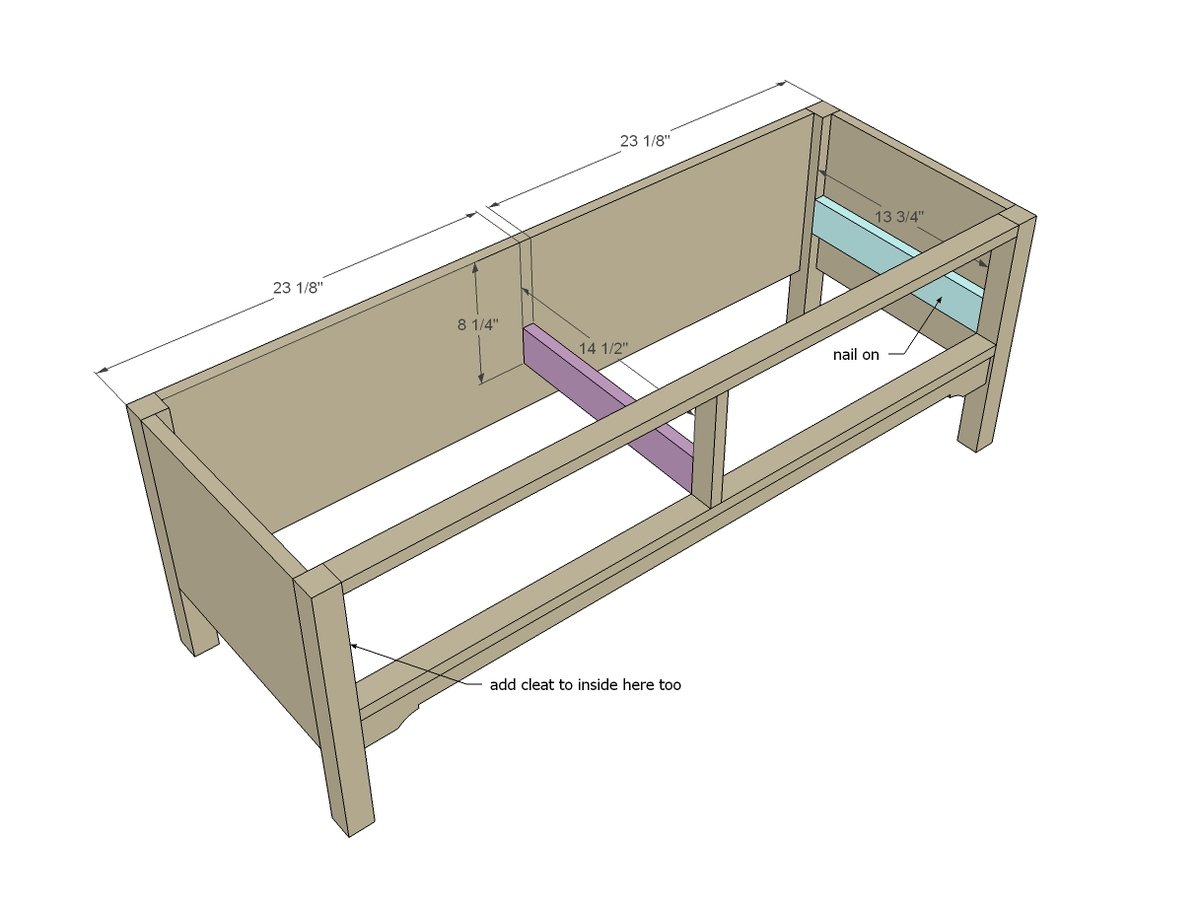
These cleats are for attaching drawer slides. Use pocket holes for attaching center cleat and 1-1/4" finish nails for attaching side cleats. NOTE: you can also add a 5th leg to the center under the center cleat if you find it necessary for heavier loads.
Step 7
Drawers should always be build to the dimensions of the opening and also the drawer slides you are using. Make sure you install the drawer inset 3/4" to allow for the drawer face (next step).
Step 8
The drawer face can be nailed on from outside or screwed on (1-1/4" fastners) from inside. It may be easier to attach your knob or handle before attaching the face to the drawer. Leave an 1/8" gap around all sides of the drawer face.
Step 9
For the bench top, use 3/4" pocket holes to attach the 1x6s together. Then add the end pieces, and finally the back piece. Attach to top of bench by either using pocket holes drilled facing upward in the 1x12 sides and back, or through the top.
Finishing
Sand all surfaces, starting with a medium grit and finishing with fine. Wipe off the dust, fill any holes or gaps with wood filler, and sand smooth once dry. Apply primer if you're painting, then finish with your choice of paint or stain and seal with a durable clear topcoat. For outdoor projects, use exterior-rated primer, paint or stain, and sealer so the piece stands up to the weather.
Source (temporary): https://www.ana-white.com/woodworking-projects/vintage-drawer-bench