Vintage Look Wall Shelf
Beautiful vintage look wall shelf holds items and has room for hooks for added storage. Perfect addition in bathrooms, kitchens, outdoors and more! You can build this project with simple lumber and basic tools. from
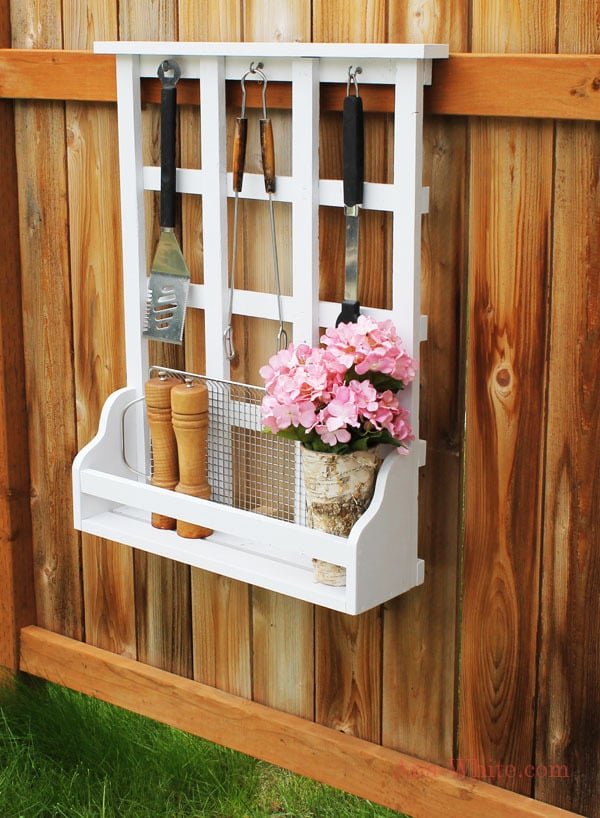
Specifications
| Project type | shelves |
|---|---|
| Room | Outdoor |
| Style | Cottage Style Furniture Plans |
| Difficulty | Beginner Projects |
| Estimated cost | Under $20 |
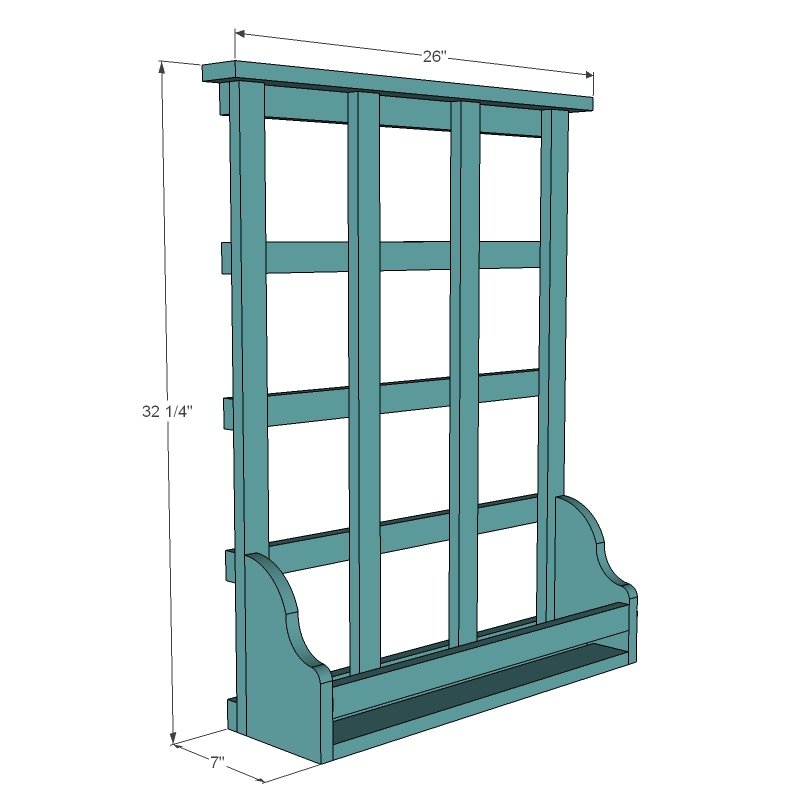
Dimensions
Use the size-specific shopping and cut lists below.
Shopping List
- 1 - 1 x 3 x 8'
- 3 - 1 x 2 x 8'
- 2 small corbels (5-1/2" x 7" preferred) or 1x6 boards can be cut as I did
- 3 hooks
- staples
- screws
- wood glue
Cut List
- 5 - 1 x 2 @ 24"
- 4 - 1 x 2 @ 31 1/2"
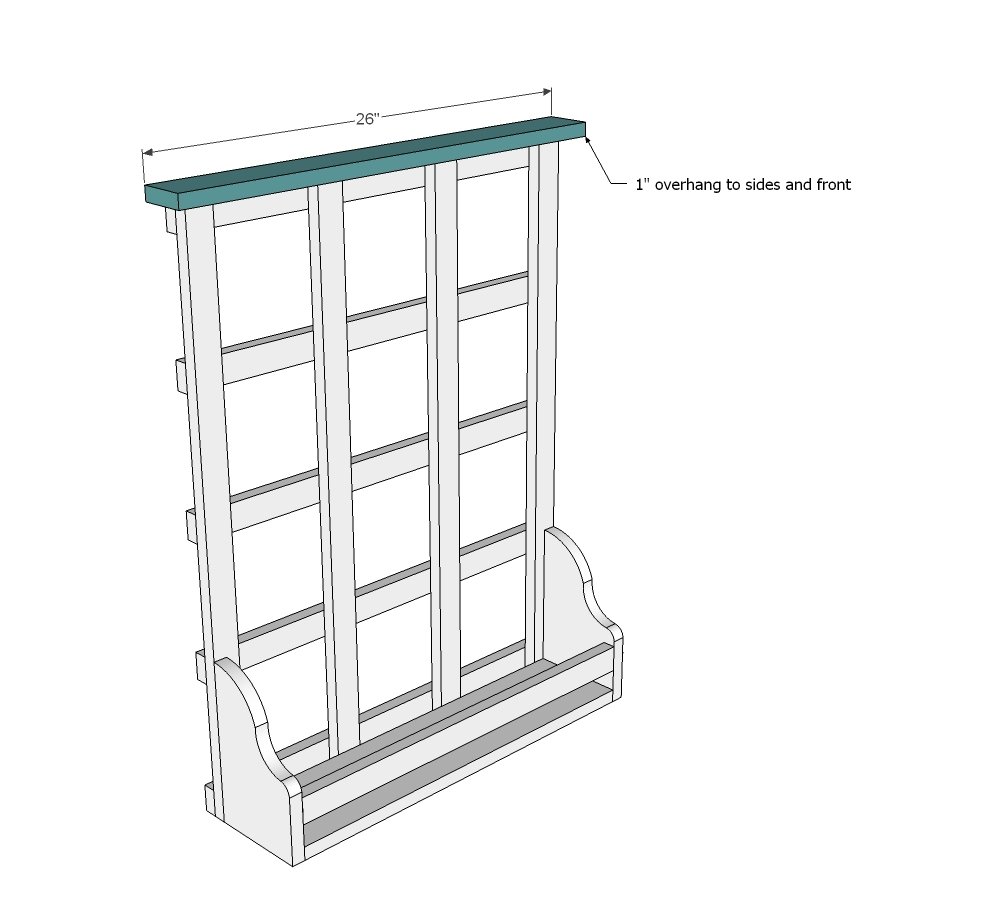
- 1 - 1 x 3 @ 26"
- 2 - 1 x 3 @ 22 1/2"
- 1 - 1 x 2 @ 22 1/2"
- Optional DIY Corbels are cut from 1x6s
Tools
- measuring tape
- pencil
- safety glasses
- hearing protection
- drill
- jigsaw
- compound miter saw
- sander
- staple gun
- countersink drill bit
Step-by-step Instructions
Step 1
Start with outside uprights, measure and place horizontal boards, attach with glue and staples. Flip project over and place 2 front vertical boards with glue and staples.
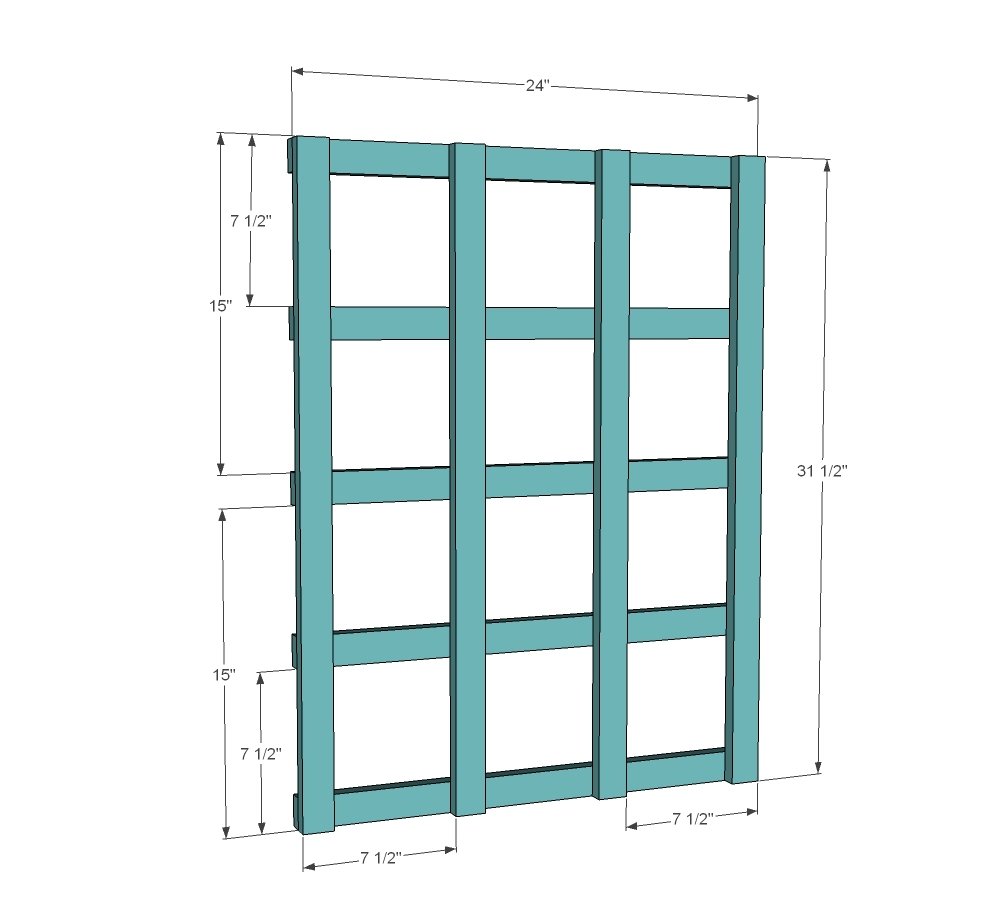
Step 2
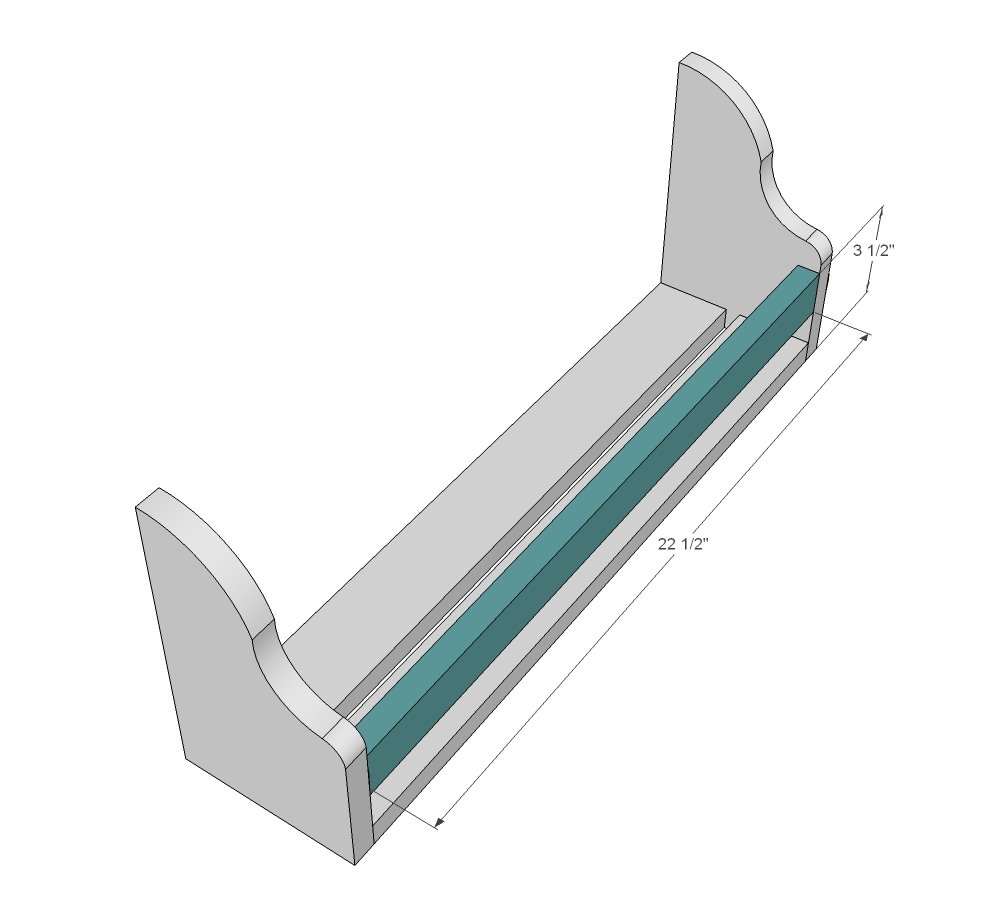
Attach corbels to 1 x 3's with glue and screws. Clamp and pre-drill for each side, keep 1 x 3's flush to outside edges.
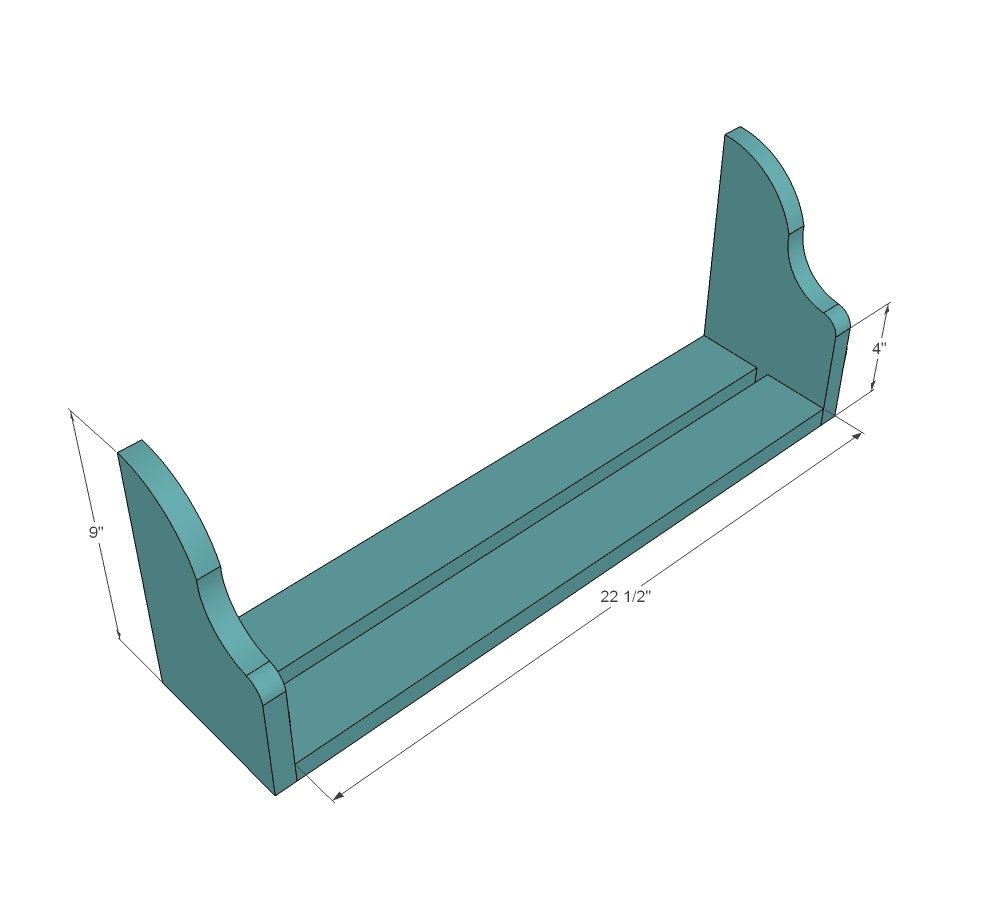
Step 3
Add front 1 x 2 by pre-drilling, gluing and screwing from side.
Step 4
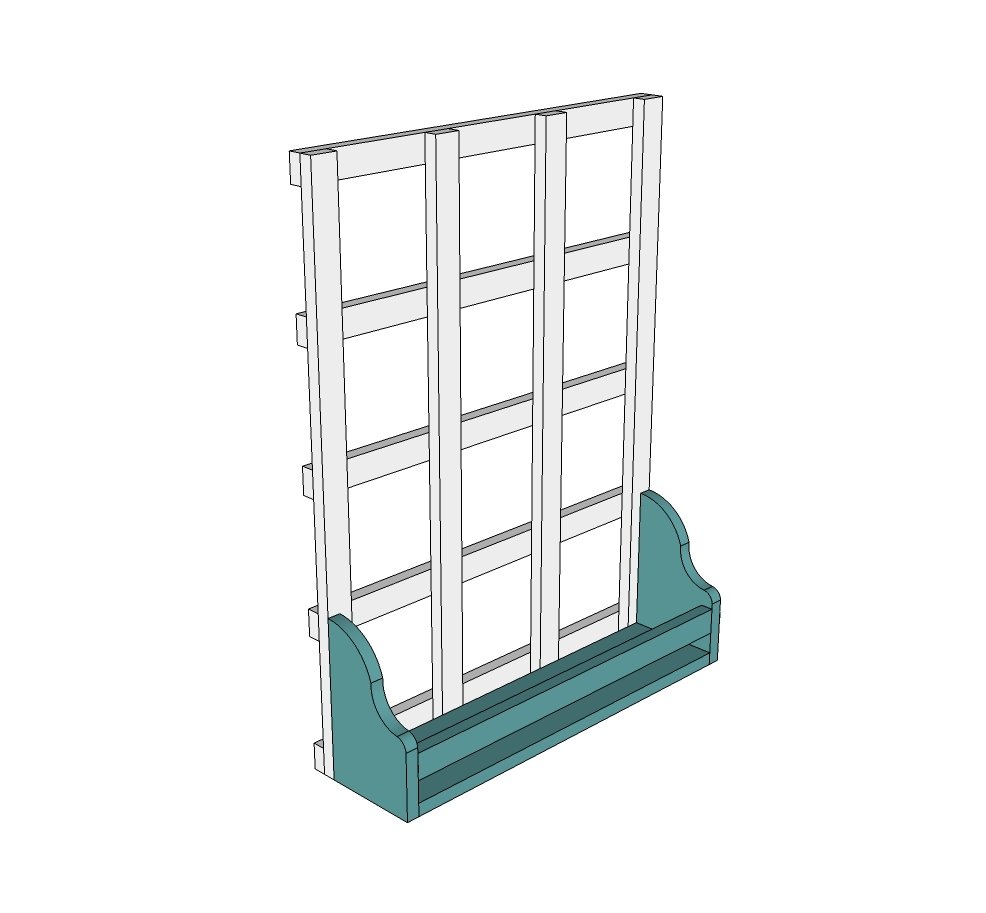
Flip lattice part on top of shelf and attach with glue and screws from back.
Step 5
Finishing
Sand all surfaces, starting with a medium grit and finishing with fine. Wipe off the dust, fill any holes or gaps with wood filler, and sand smooth once dry. Apply primer if you're painting, then finish with your choice of paint or stain and seal with a durable clear topcoat. For outdoor projects, use exterior-rated primer, paint or stain, and sealer so the piece stands up to the weather.
Source (temporary): https://www.ana-white.com/woodworking-projects/vintage-look-wall-shelf