Vintage Pew Bench
Build a vintage style bench. This beautiful bench is a one of a kind beauty, and features a drawer with a seat. from
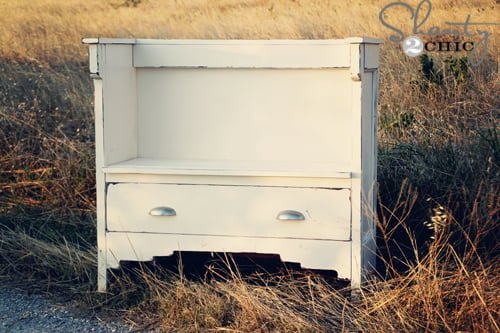
Specifications
| Project type | Bench |
|---|---|
| Room | Entryway and Mudroom |
| Style | Farmhouse Furniture |
| Difficulty | Advanced |
Dimensions
Use the size-specific shopping and cut lists below.
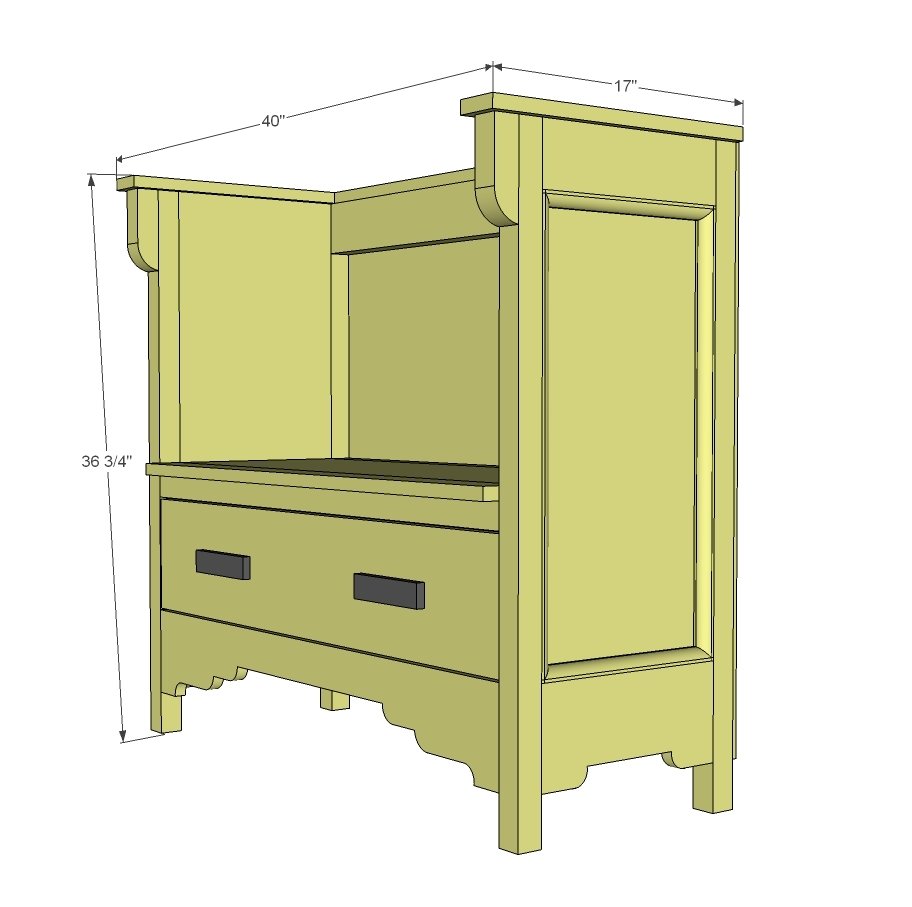
Shopping List
- 1 – 1x12 @ 10 feet long
- 1 – 1x4 @ 2 feet long
- 1 - 1x2 @ 8 feet long
- 2 – 1x6 @ 8 feet long (could get away with 1 at 6 feet long)
- 3 – 2x2 @ 8 feet long
- 1 – 1x3 @ 4 feet long
- 1 – 2x4 @ 8 feet or stud length
- 1 – 1x8 @ 3 feet long
- 1 – ¼” plywood – will need full sheet
- 1 – 8 foot sticks quarter round
- 1 ¼” and 2 ½” pocket hole screws
- 1 ¼” and 2” brad nails
- Wood glue
- Drawer hardware
Cut List
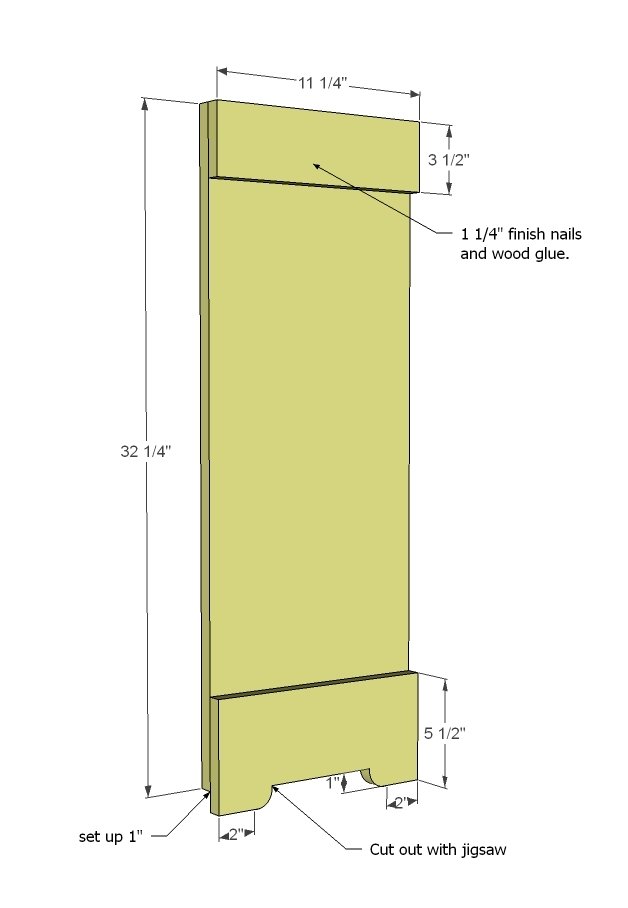
- 2 – 1x12 @ 32 ¼”
- 2 – 1x4 @ 11 ¼”
- 2 – 1x6 @ 11 ¼”
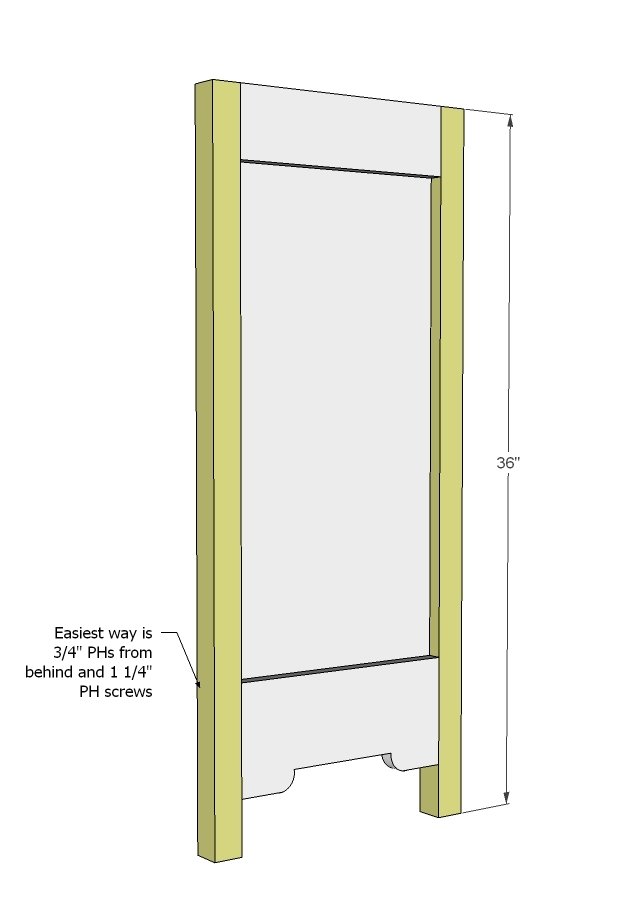
- 4 – 2x2 @ 36”
- 2 – 2x2 @ 5 ¼”
- 2 – 1x3 @ 16 ¼”
- 1 – 1x2 @ 35” (back top)
- 2 – 2x4 @ 36” (back supports)
- 2 – 2x2 @ 36” (back bottom and front support)
- 1 – 1x6 @ 36” (front apron)
- 2 – 1x2 @ 12” (wood drawer slides)
- 1 – 1x2 @ 36”
- 1 – 1x12 @ 36”
- 1 – 1x3 @ 36”
- ¼” plywood @ 33 ¼” x 39”
DRAWER – no guides, fits snug. Test fit.
- 2 – 1x6 @ 11 ½”
- 2 – 1x6 @ 34 1/4”
- 1 – ¼” plywood @ 35 3/4” x 11 1/2”
- 1 – 1x8 @ 35 ¾”
Tools
- measuring tape
- square
- pencil
- safety glasses
- hearing protection
- kreg-jig
- drill
- circular saw
- jigsaw
- nailer
- sander
- countersink drill bit
Step-by-step Instructions
Step 1
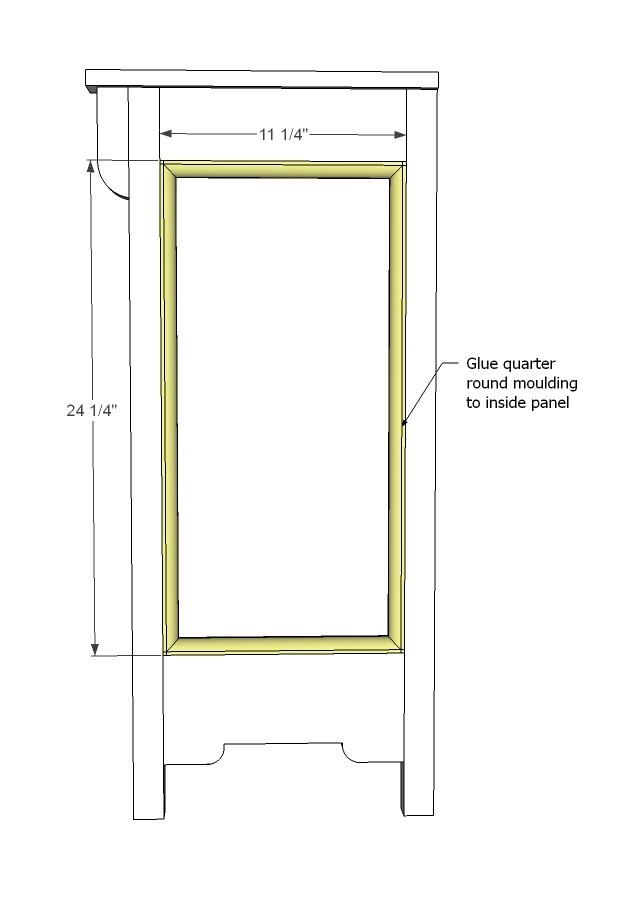
First build the two ends. You'll want to drill 3/4" PHs on both sides of the inside panels so you can attach the legs in the next step.
Step 2
Then attach the 2x2 legs with 1 1/4" PHs through the holes you drilled in step 1. Remember, you are making two leg sets.
Step 3
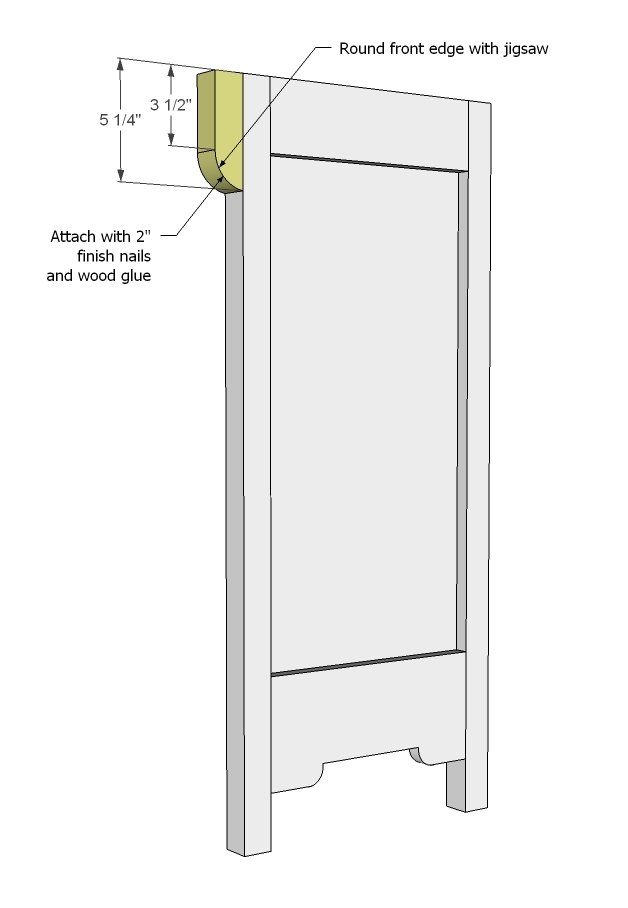
Now add the front decorative piece. Remember that you need to make two ends in mirror.
Step 4
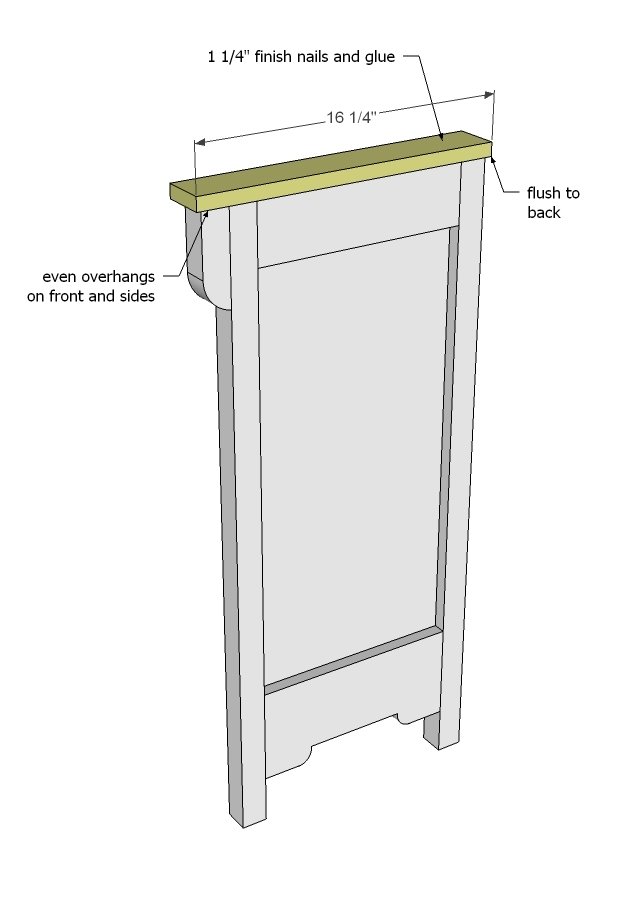
And then the top. Don't forget - the two ends are made in mirror.
Step 5
Step 6
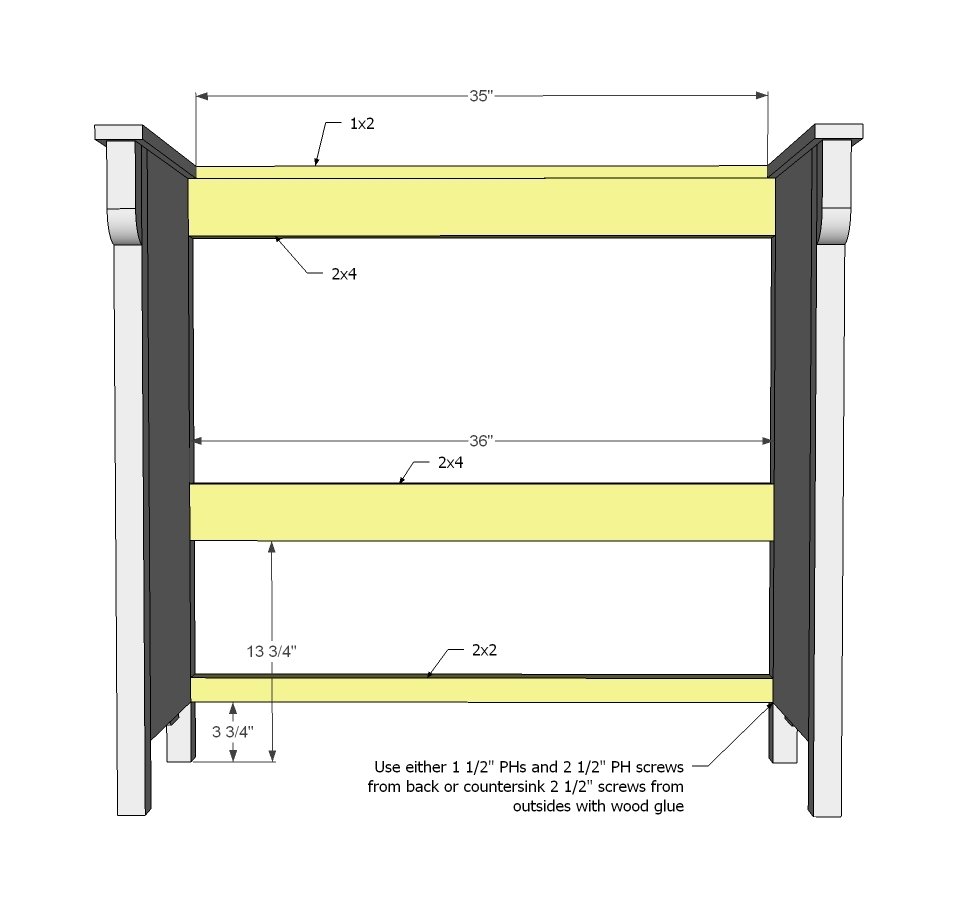
Now we are going to join the two ends together to start making the bench. I suggest PHs from the back side.
Step 7
And then the front.
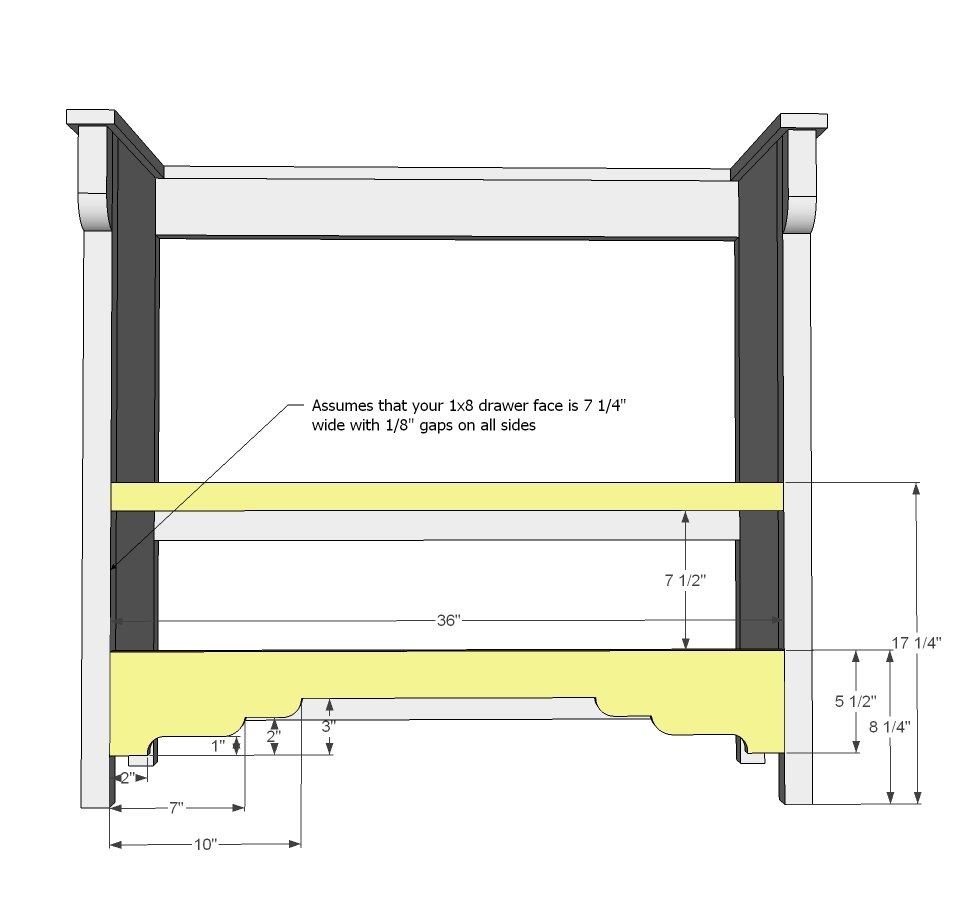
Step 8
Now the drawer slides.
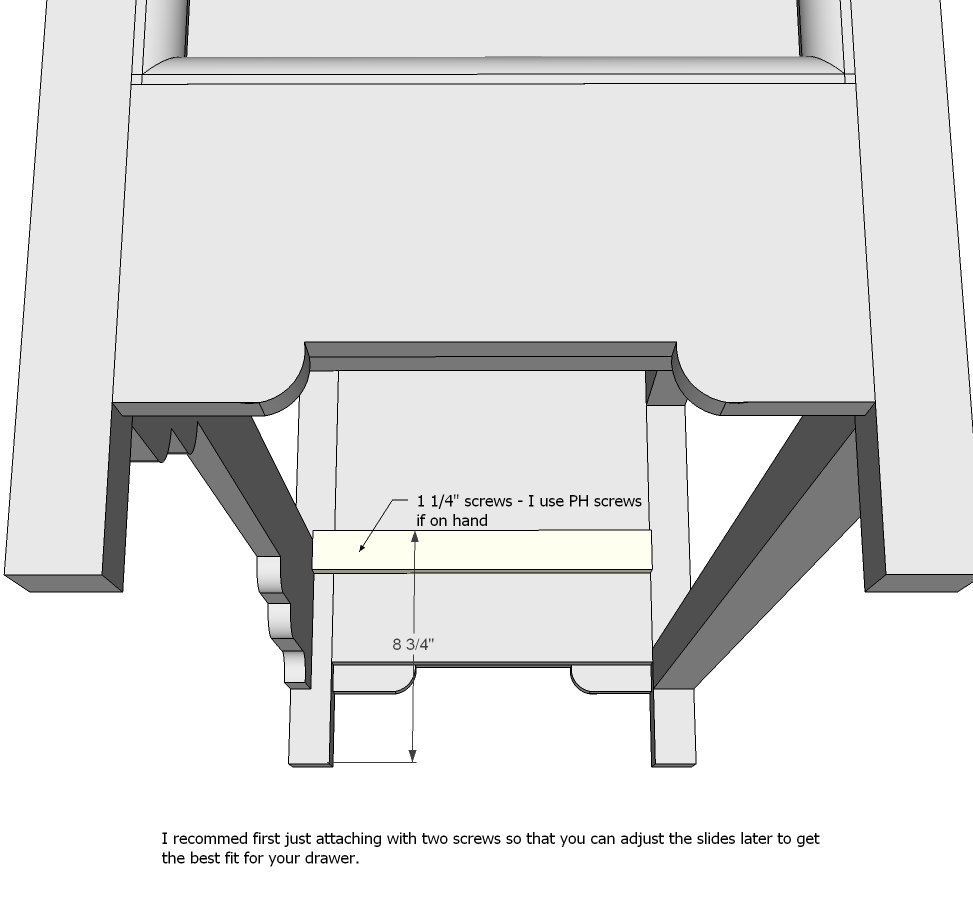
Step 9
Now build the drawer to fit your opening. I gave a little space for the drawer to slide.
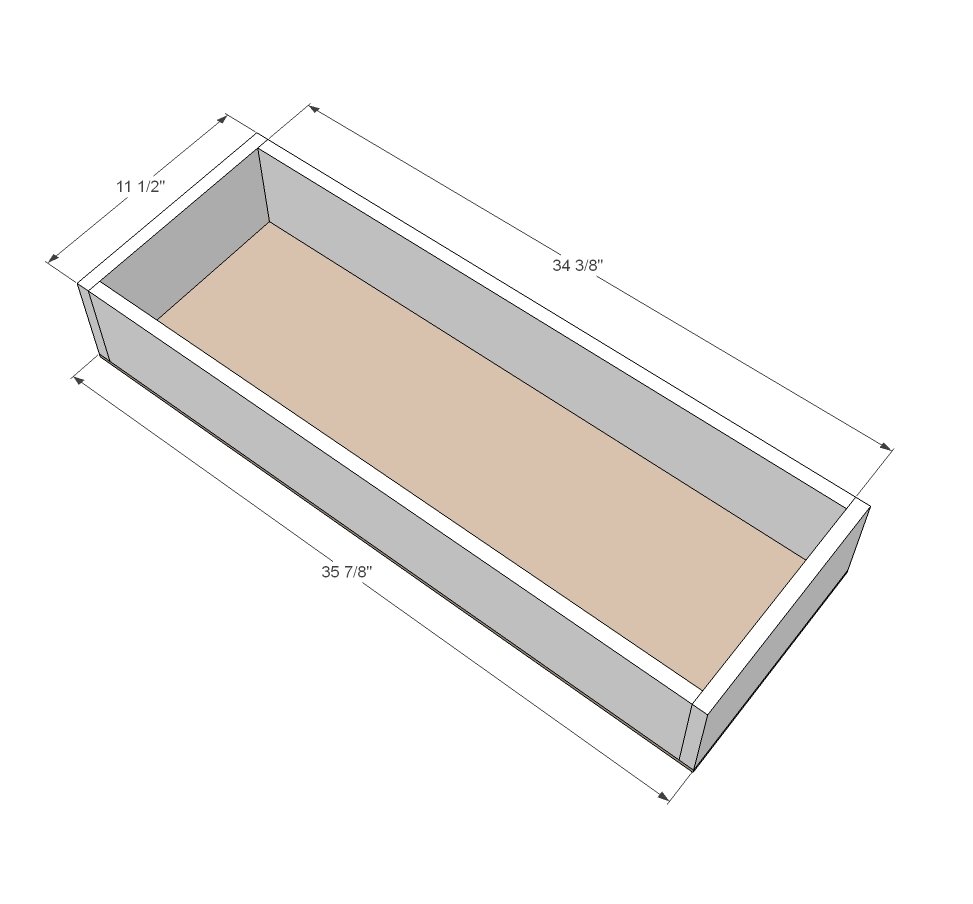
Step 10
And then the drawer face finishes it all off. Make sure you leave an even gap around the drawer face.
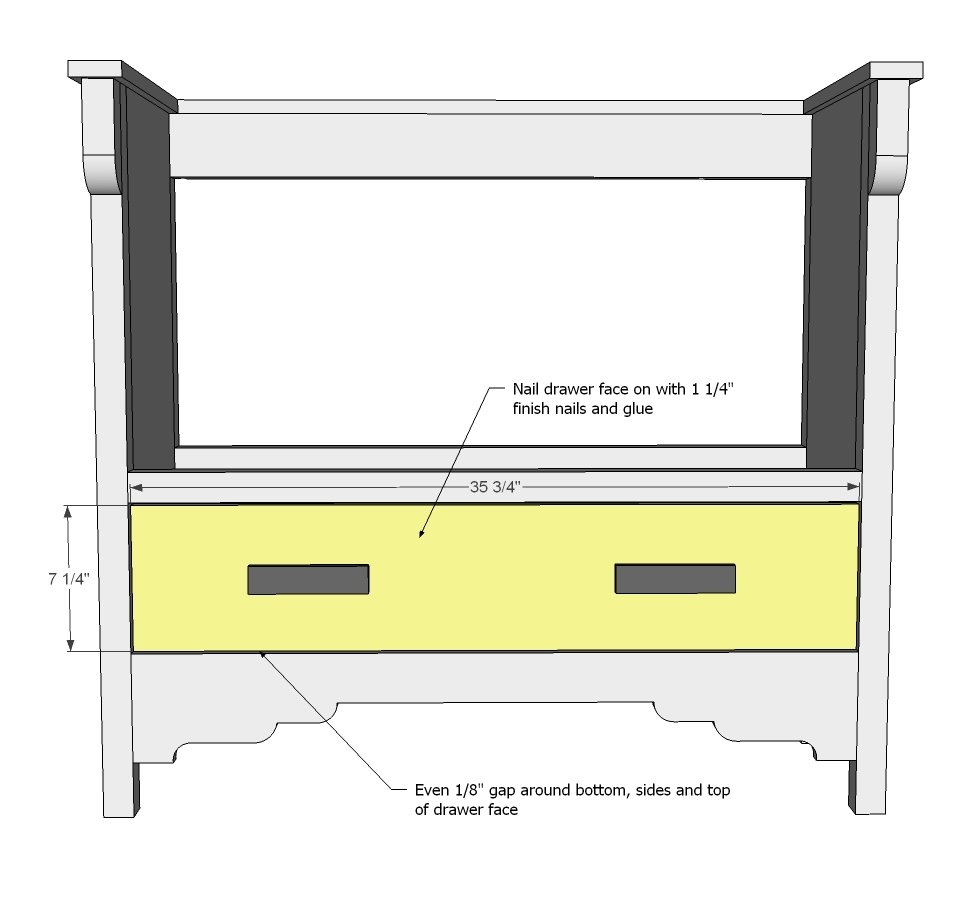
Step 11
Build seat first with ¾” PHs and 1 ¼” PH screws and attach to bench.
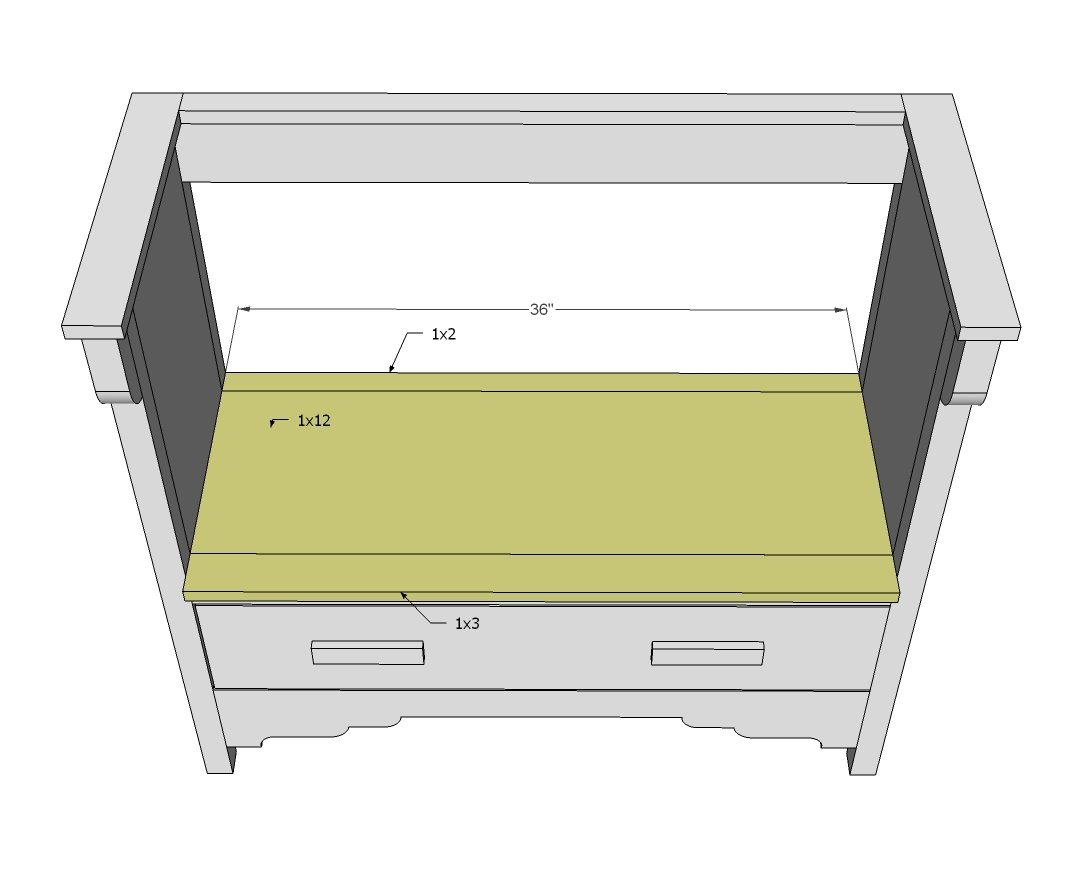
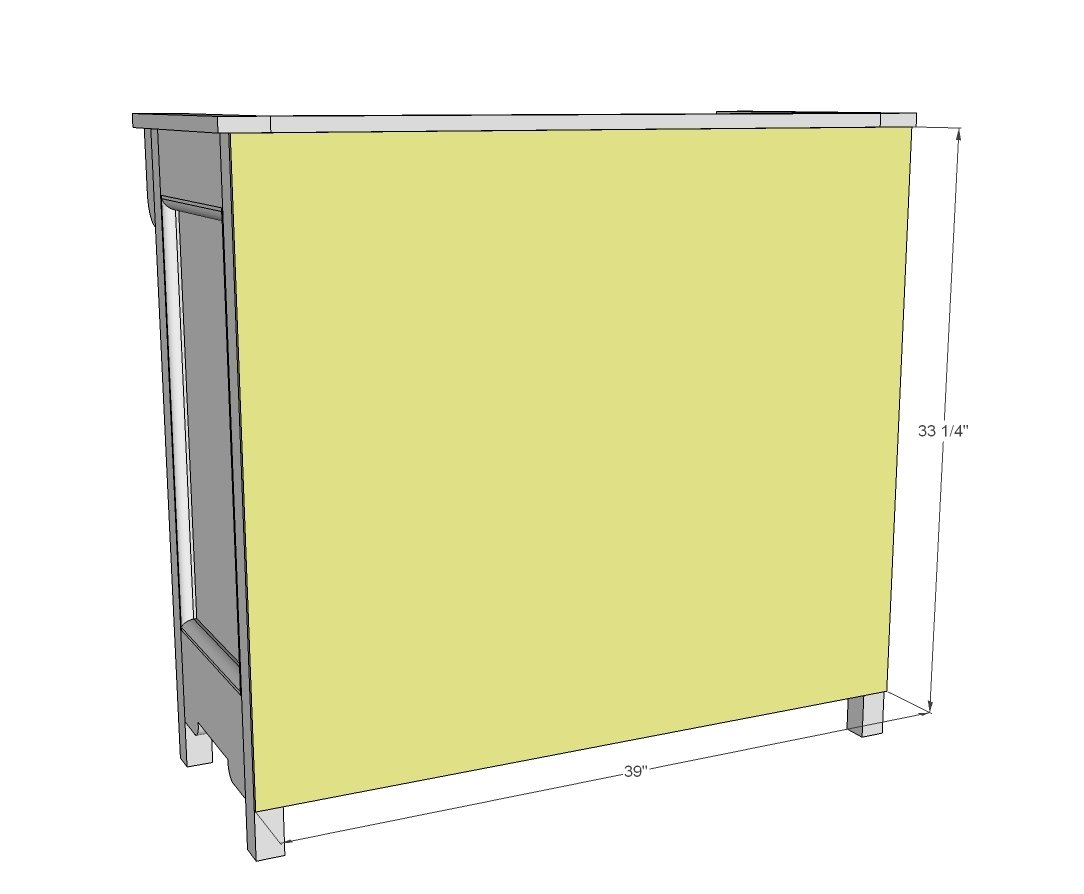
And then attach the back.
You can also add quarter round to the inside back as well.
Finishing
Sand all surfaces, starting with a medium grit and finishing with fine. Wipe off the dust, fill any holes or gaps with wood filler, and sand smooth once dry. Apply primer if you're painting, then finish with your choice of paint or stain and seal with a durable clear topcoat. For outdoor projects, use exterior-rated primer, paint or stain, and sealer so the piece stands up to the weather.
Source (temporary): https://www.ana-white.com/woodworking-projects/vintage-pew-bench