Vintage Shelf with Hooks
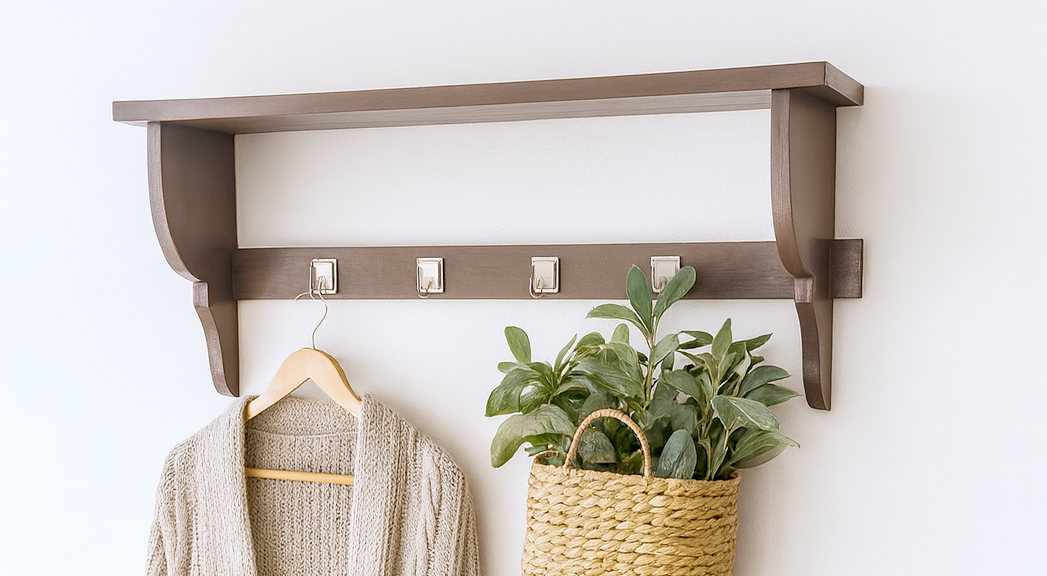
for Vintage Wall Shelf with Hooks Bring timeless farmhouse charm into your home with this Vintage Wall Shelf —a beautiful, functional piece designed with both style and simplicity in mind. make it easy to build your own shelf with hooks, perfect for adding character and organization to your entryway, hallway, mudroom, or kitchen. Whether you're hanging coats, sweaters, baskets, or seasonal greenery, this shelf adds warmth and practicality to any space. With classic corbel brackets and clean lines, it fits seamlessly into modern, rustic, or vintage-inspired homes. 🪚 Build Features: • Beginner-friendly design — straightforward cuts and easy assembly • Built-in functionality — includes a top shelf and sturdy hook rail • Classic farmhouse look — decorative side brackets for vintage charm • Compact size — ideal for small wall spaces or busy drop zones • Customizable — finish it with paint or stain to match your decor 📏 Approximate Dimensions: 24″ to 36″ wide × 10″ tall × 7″ deep (Fully scalable based on your needs) 🛠 Materials & Tools: • 1×8 or 1×6 board • 1×4 board (for hook rail) • Brackets (can be store-bought or DIY) • Coat hooks, screws, wood glue, paint or stain This is a quick and satisfying weekend project that adds both personality and purpose to your home. Hang it above a bench, by your door, or in a cozy corner—you’ll love the look and everyday function.
Specifications
| Project type | shelves |
|---|---|
| Room | Kids and Toys |
| Style | Children's and Kid's Room Furniture and Toy Plans |
| Difficulty | Starter Projects |
| Estimated cost | Under $20 |
Dimensions
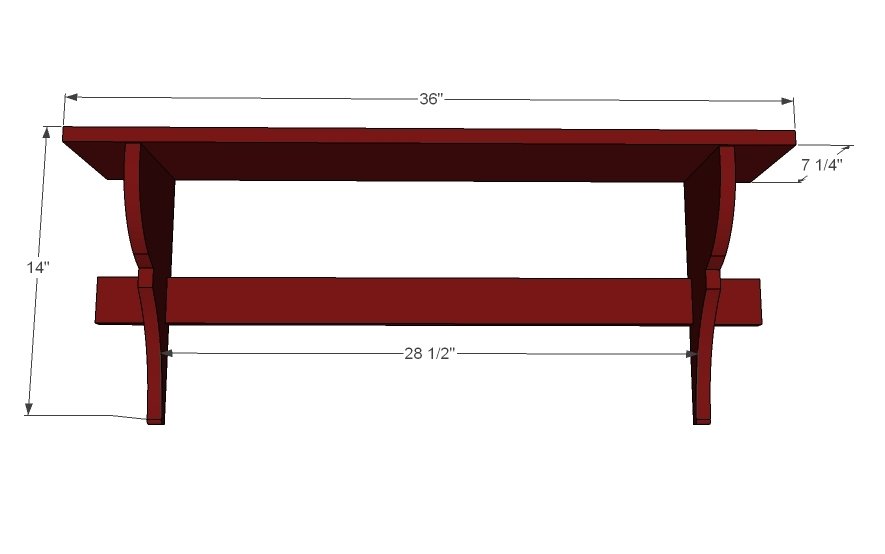
Use the size-specific shopping and cut lists below.
Shopping List
- 1 - 1x8 @ 6 feet long
- 1 - 1x3 @ 3 feet long
- 3 hooks
- For fasteners, can use 1-1/4" brad nails or 2" self tapping star bit screws
Cut List
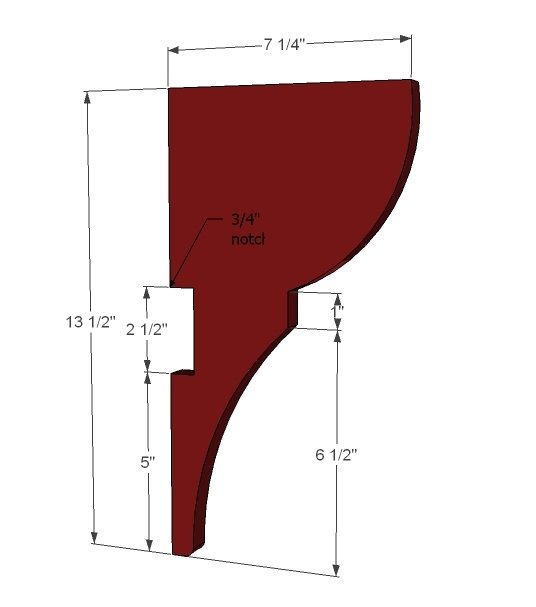
- 2 - 1x8 @ 13 1/2"
- 1 - 1x8 @ 36"
- 1 - 1x3 @ 36"
Tools
- measuring tape
- square
- pencil
- safety glasses
- drill
- jigsaw
- sander
Step-by-step Instructions
Step 1
Cut the supports out with a jigsaw. Just go slow, take your time and cut one at a time. When you are happy with the first, use it as a pattern to cut the second. Sand the cut edges until smooth.
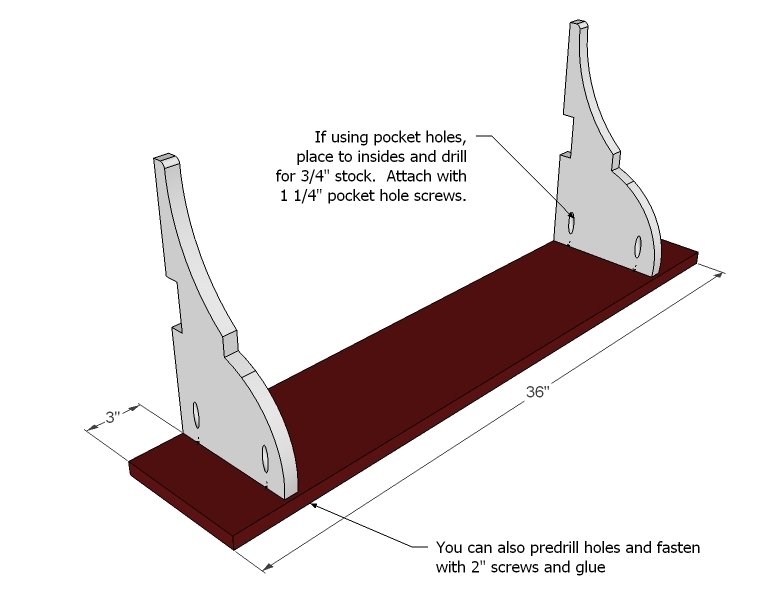
Mark the underside of the top shelf 3" in from each end.
Attach with either 1-1/4" brad nails and glue, 2" self tapping star bit screws, or you can use pocket holes as illustrated in the diagram.
Step 3
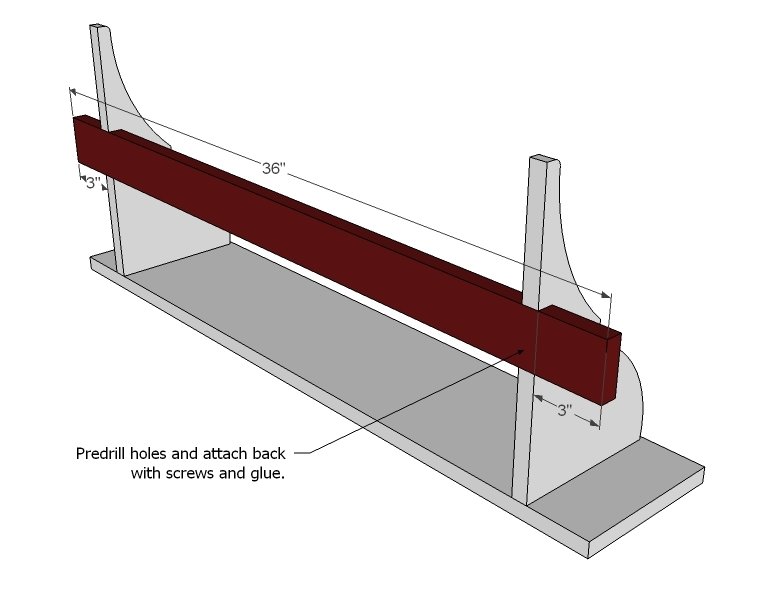
Attach back board in the notched area. Can use 1-1/4" brad nails and glue, or the 2" self tapping star bit screws.
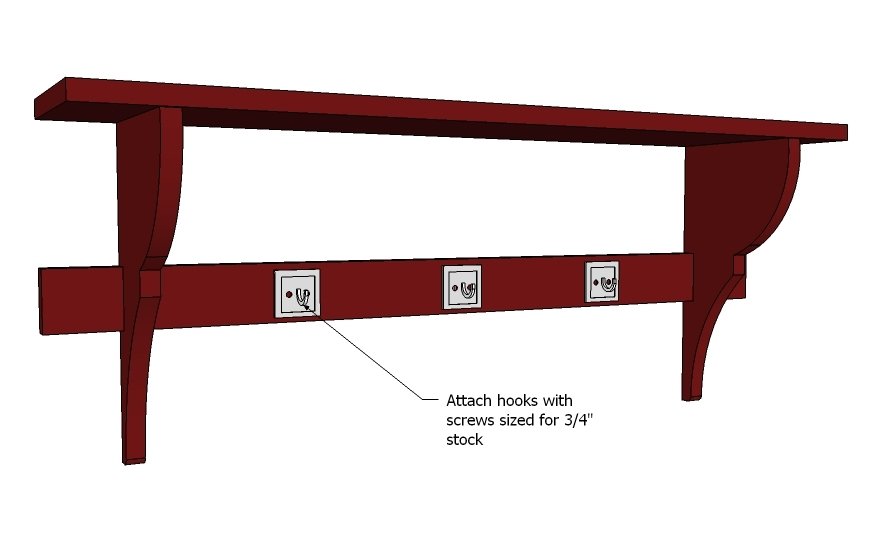
Attach hooks to the lower 1x3 with included hooks.
TIP: I hung my shelf by simply screwing through the back supports and then hid the screws with the hooks.
Finishing
Sand all surfaces, starting with a medium grit and finishing with fine. Wipe off the dust, fill any holes or gaps with wood filler, and sand smooth once dry. Apply primer if you're painting, then finish with your choice of paint or stain and seal with a durable clear topcoat. For outdoor projects, use exterior-rated primer, paint or stain, and sealer so the piece stands up to the weather.
Source (temporary): https://www.ana-white.com/woodworking-projects/vintage-shelf-hooks