Vintage Storage Dining Table
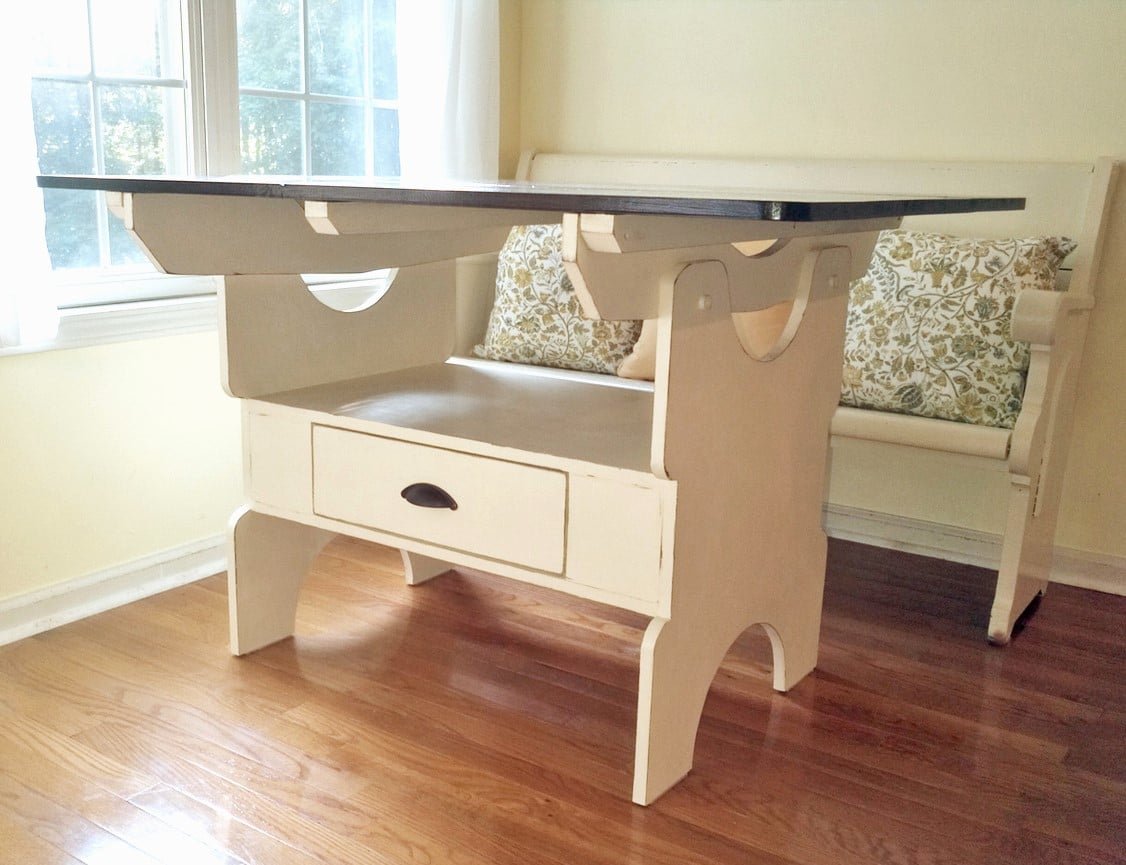
How to build a vintage style storage dining table. Free woodworking
Specifications
| Project type | Dining Table Plans |
|---|---|
| Room | dining room |
| Style | Cottage Style Furniture Plans |
| Difficulty | Intermediate |
| Estimated cost | $50 - $100 |
Dimensions
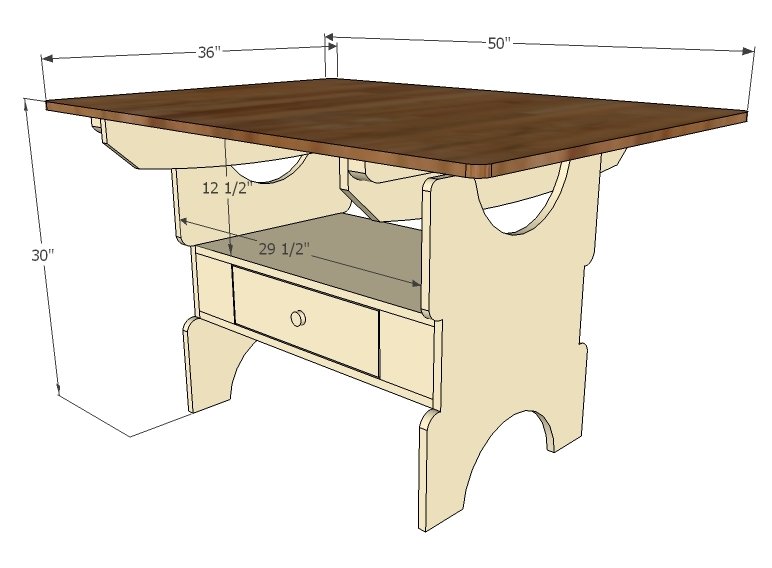
Use the size-specific shopping and cut lists below.
Shopping List
- 1 - sheet 3/4" plywood ripped into strips 19", 22" and 5 1/2", all 8 feet long
- 1 - 1x2 @ 4 feet long
- 1 - 2x2 @ 6 feet long
- 1 - 1x4 @ 6 feet long
- 50 x 36 tabletop
- 2 - knobs or handles
Cut List
- 2 - 3/4" plywood @ 19" x 29 1/2"
- 4 - 1x6 @ 5 3/4"
- 2 - 1x2 @ 17 1/2"
- 2 - 3/4" plywood @ 22" x 27"
- 2 - 1x6 @ 36"
- 2 - 2x2 @ 36"
- 1 - Tabletop 50" x 36" (planked or you can use plywood trimmed or edge banded)
- 2 - 1x4 @ 17 1/2"
- 2 - 1x4 @ 16 3/4"
- 1 - 1/4" or 3/4" plywood @ 17 1/2" x 18 1/4"
- 2 - 1x6 @ 18 1/4"
Tools
- measuring tape
- square
- pencil
- safety glasses
- hearing protection
- drill
- circular saw
- jigsaw
- sander
- countersink drill bit
Step-by-step Instructions
Step 1
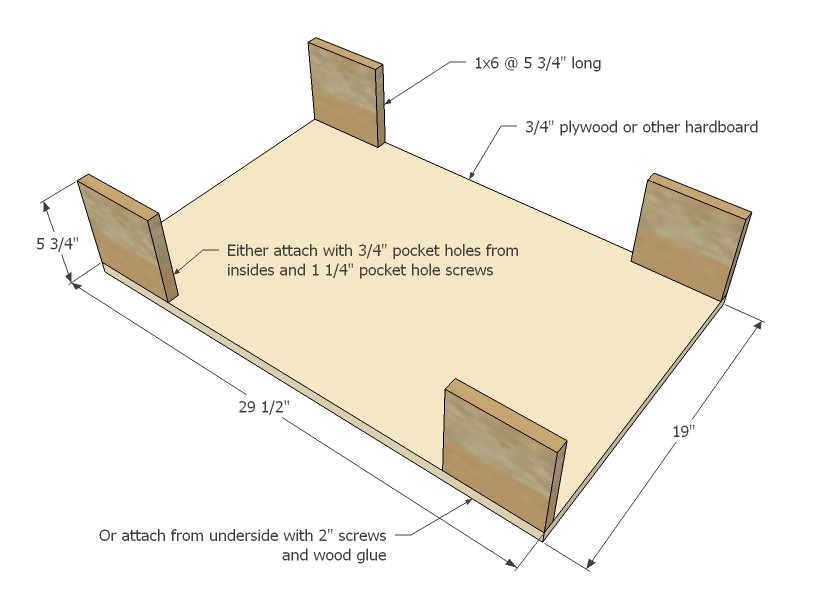
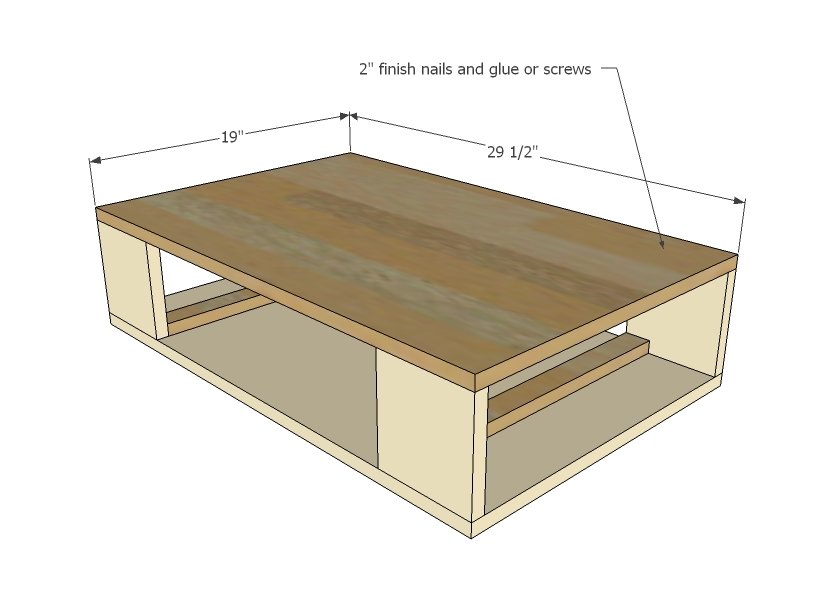
You can use either 3/4" pocket holes and 1 1/4" pocket hole screws and glue or 2" screws to attach. Keep outside edges flush and square. TIP: If you are using pocket holes, go through the entire plan and mark all pocket hole locations and get drilling before any assembly.
Step 2
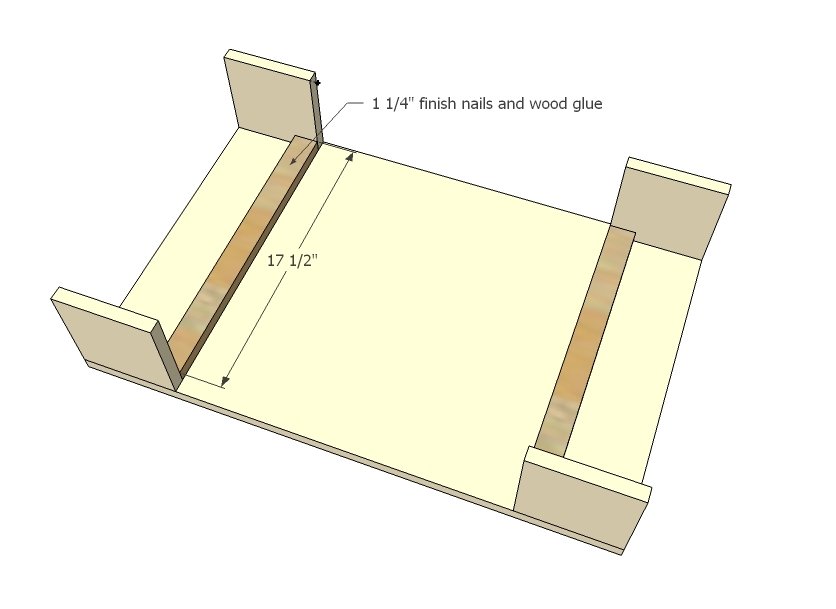
Next, add the drawer guides. Take a second to ensure the drawer area is square, as you will only have a 1/4" of total play around the drawer.
Step 3
Attach top of storage box to sides.
Step 4
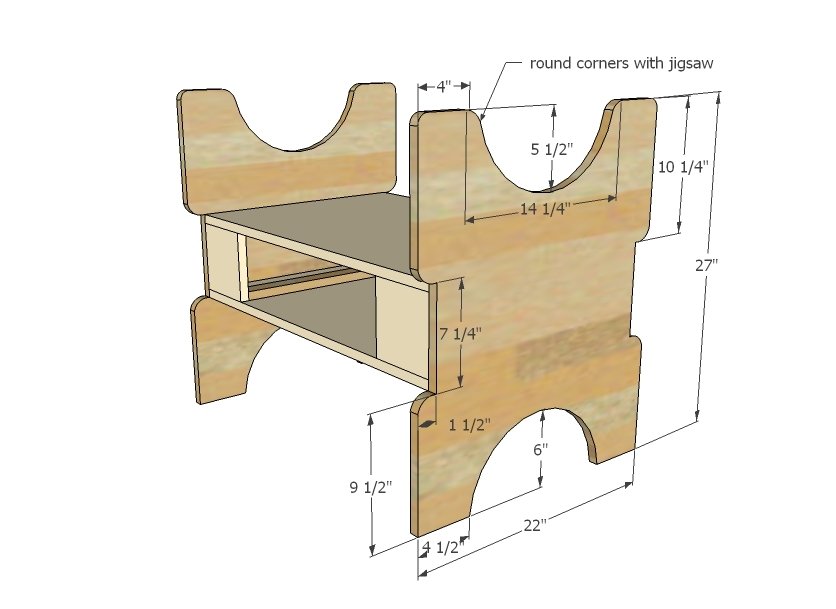
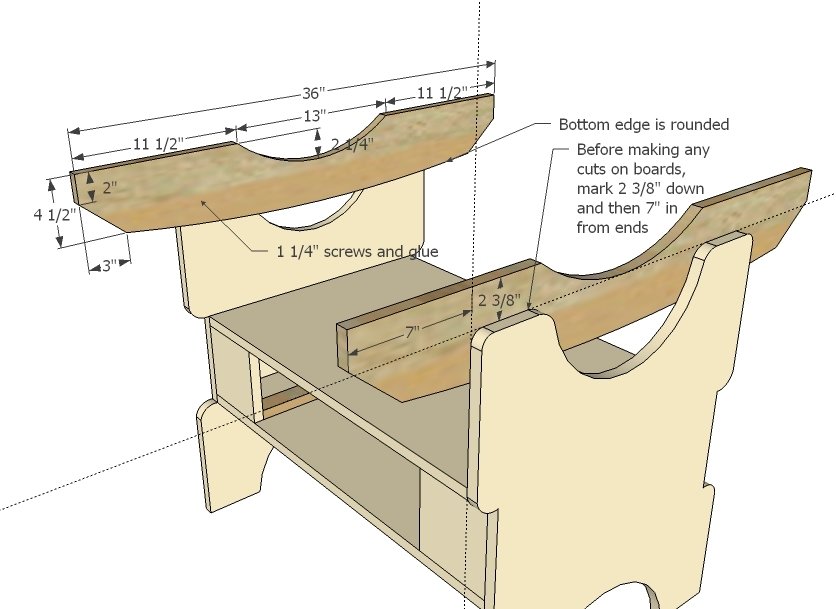
Take your time drawing carefully out your end patterns. The ends do not have to match my suggestions, but they do have to match each other. Once you have one cut, use it as a pattern to cut the other. Clamp the two cut ends together and sand all rough edges until the two match. Then attach to the center storage area with screws and glue.
Step 5
Step 6
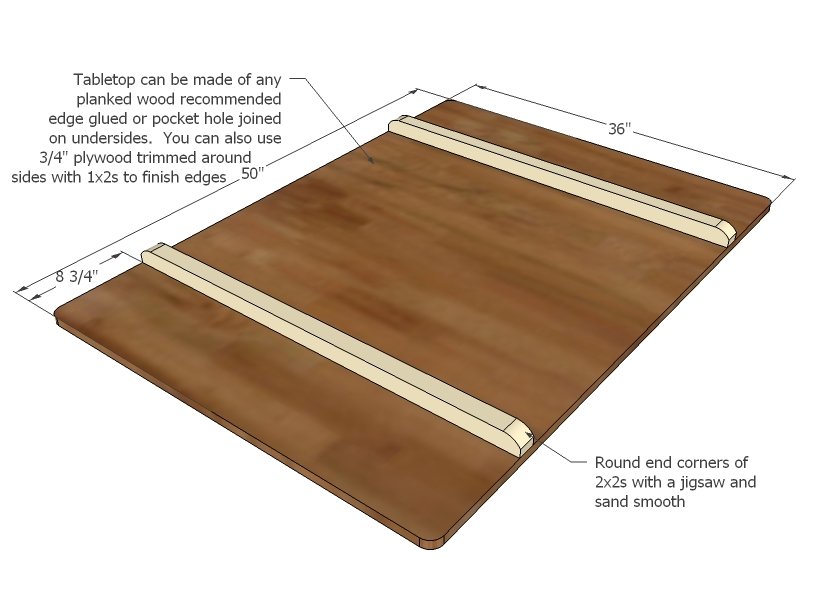
You can make your tabletop from just about anything. The best solution is joining hardwood boards together on the underside with 3/4" pocket holes and 1 1/4" pocket hole screws. Another option is to use 1/2 sheet of hardwood plywood, cut to 47" x 33". Then attach edge to edge 1x2 frame around all sides to create a sturdy and decorative wood edge to the tabletop. Would be beautiful in Purebond Plywood for sure! Round edges of 2x2s to smooth and attach to underside of table as noted in diagram.
Step 7
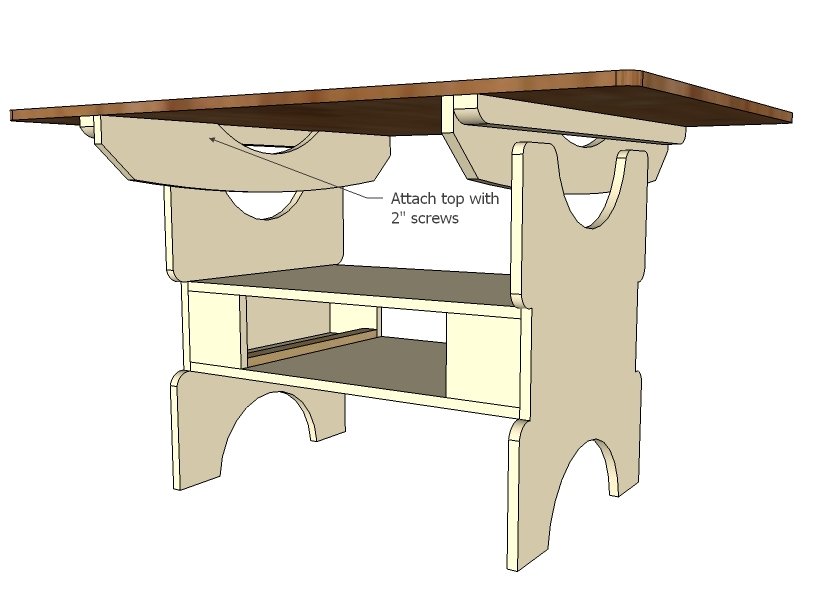
Now the tabletop should just fit right over the base. Attach through sides into the 2x2 supports with 2" screws.
Step 8
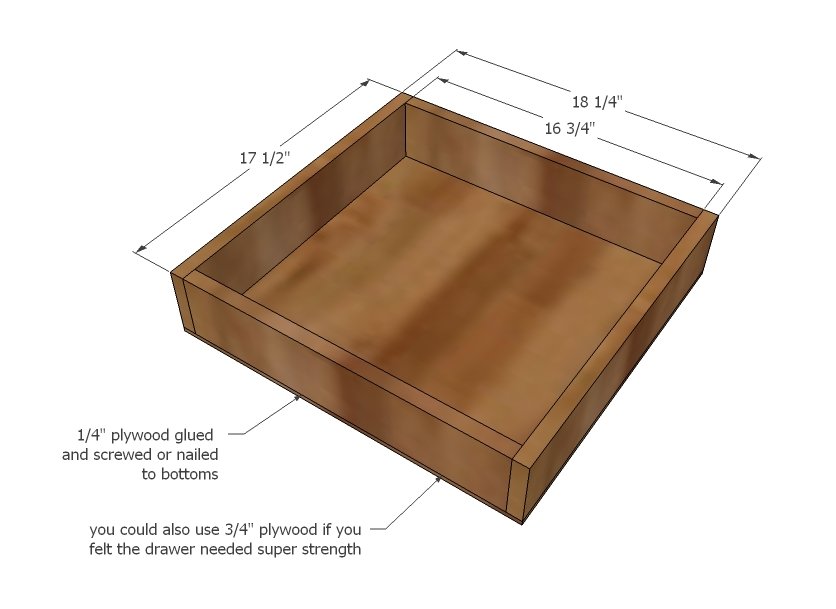
For this drawer, I just went the simplest possible route, figuring the drawer is not high use and wanted to keep it simple. This drawer is just a 1x4 box with plywood on the bottom.
Step 9
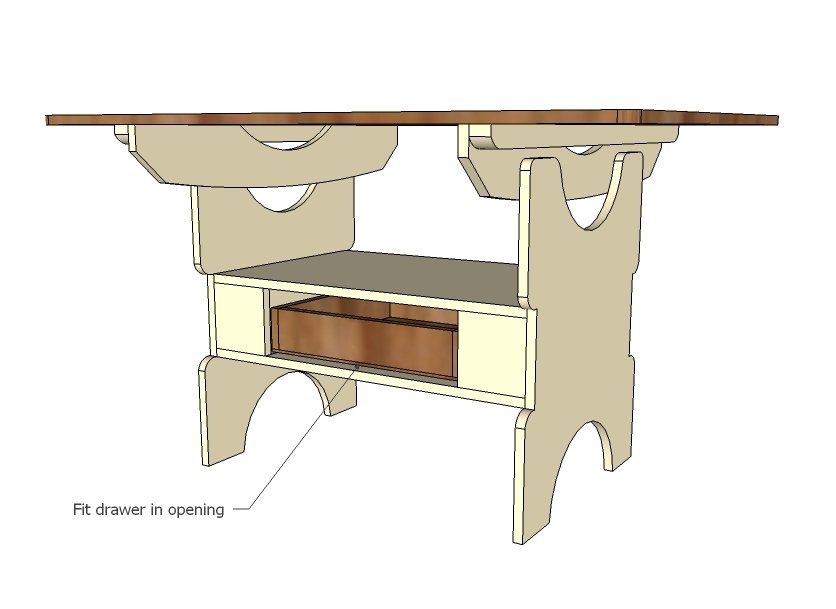
Make sure the drawer fits in the opening. I like to rub the drawer bottoms with candle wax to make for a smoother slide.
Step 10
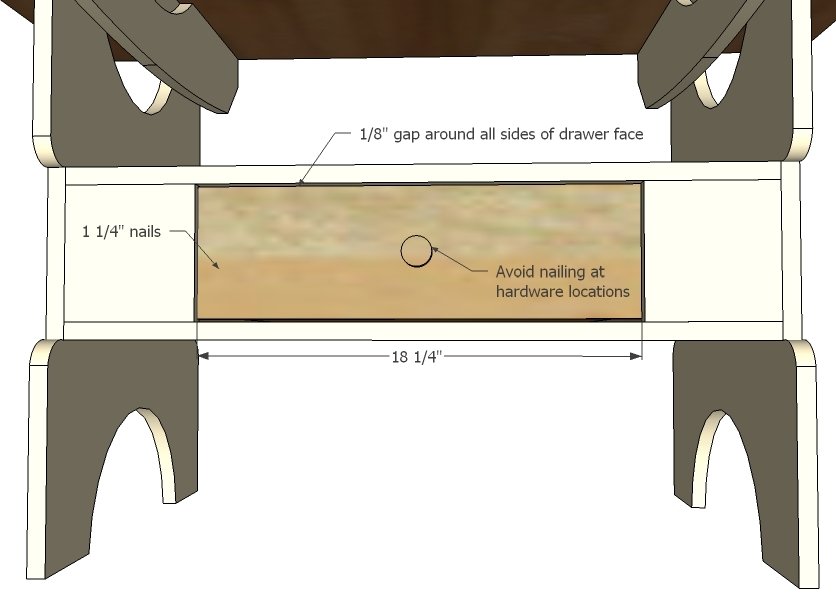
And then just position the drawer faces over the drawer boxes, shimming so there is an even 1/8" gap all the way around, and attach with 1 1/4" finish nails. Then also attach from inside with 1 1/4" screws. TIP: Attach hardware first to drawer face so you don't have to drill through a second layer of 1xs to access the hardware screw - depending on your type/style of hardware.
Finishing
Sand all surfaces, starting with a medium grit and finishing with fine. Wipe off the dust, fill any holes or gaps with wood filler, and sand smooth once dry. Apply primer if you're painting, then finish with your choice of paint or stain and seal with a durable clear topcoat. For outdoor projects, use exterior-rated primer, paint or stain, and sealer so the piece stands up to the weather.
Source (temporary): https://www.ana-white.com/woodworking-projects/vintage-storage-dining-table