Vintage Toddler Bed
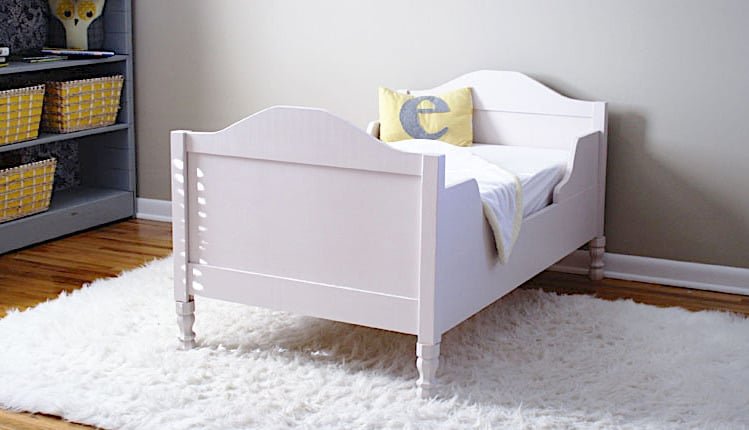
to build a beautiful toddler bed from
Specifications
| Project type | Beds and Bed Frames |
|---|---|
| Room | Bedroom |
| Style | Children's and Kid's Room Furniture and Toy Plans |
| Difficulty | Advanced |
Dimensions
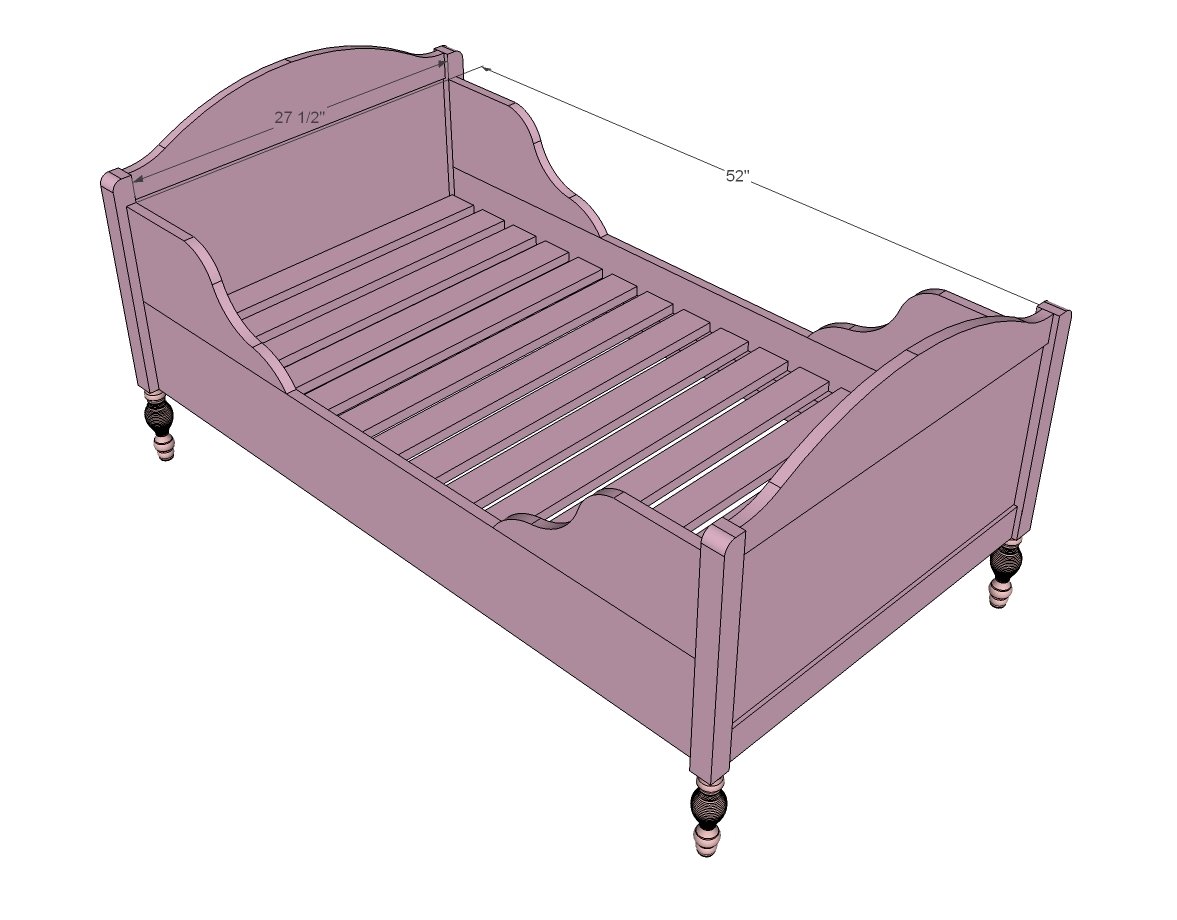
Use the size-specific shopping and cut lists below.
Shopping List
- 6 - 1x3 @ 8 feet long
- 1 - 1x6 @ 5 feet long
- 1 - 1/4” plywood or beadboard for panels at least @ 25 1/4” x 27 1/2”
- 2 - 2x2 @ 8 feet long
- 2 - 1x8 @ 8 feet long
- 4 - 6” turned sofa feet with metal bracket (optional)
Cut List
- 2 - 1x3 @ 28”
- 2 - 1x6 @ 28”
- 2 - 1/4” plywood @ 12-1/2” x 27 1/2”
- 4 - 2x2 @ 22-1/2" (or 16-1/2” if using sofa legs for base)
- 2 - 1x8 @ 51”
- 4 - 1x8 @ 16”
- 2 - 2x2 @ 52 1/4”
- 15 - 1x3 @ 27 1/2”
Tools
- measuring tape
- square
- pencil
- safety glasses
- hearing protection
- kreg-jig
- drill
- jigsaw
- table saw
- sander
- countersink drill bit
Step-by-step Instructions
Step 1
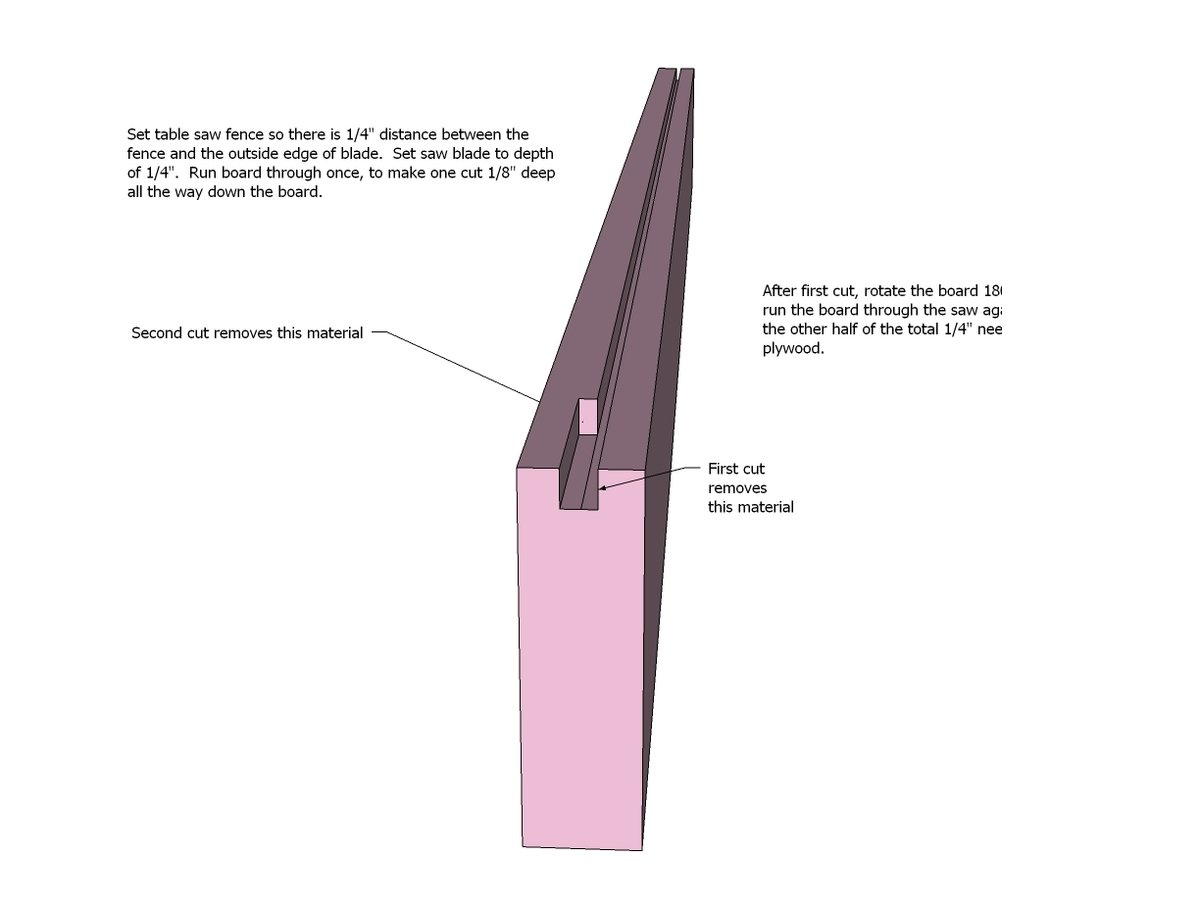
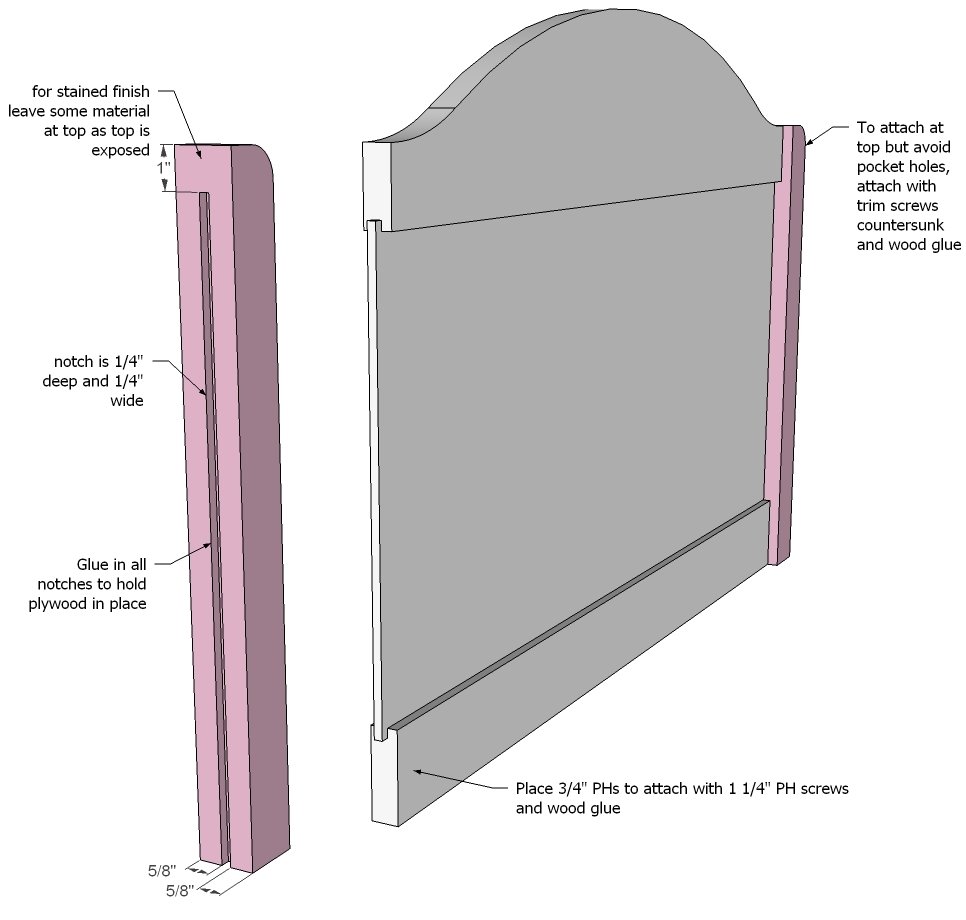
Since most saw blades are only 1/8” thick, you’ll need to make two cuts side by side to notch out for the panel in this headboard. Set your saw fence 1/4” from the outside of the blade and run the board through once. Flip and run through again, this time right next to the first cut. Make sure your plywood fits in the groove.
Step 2
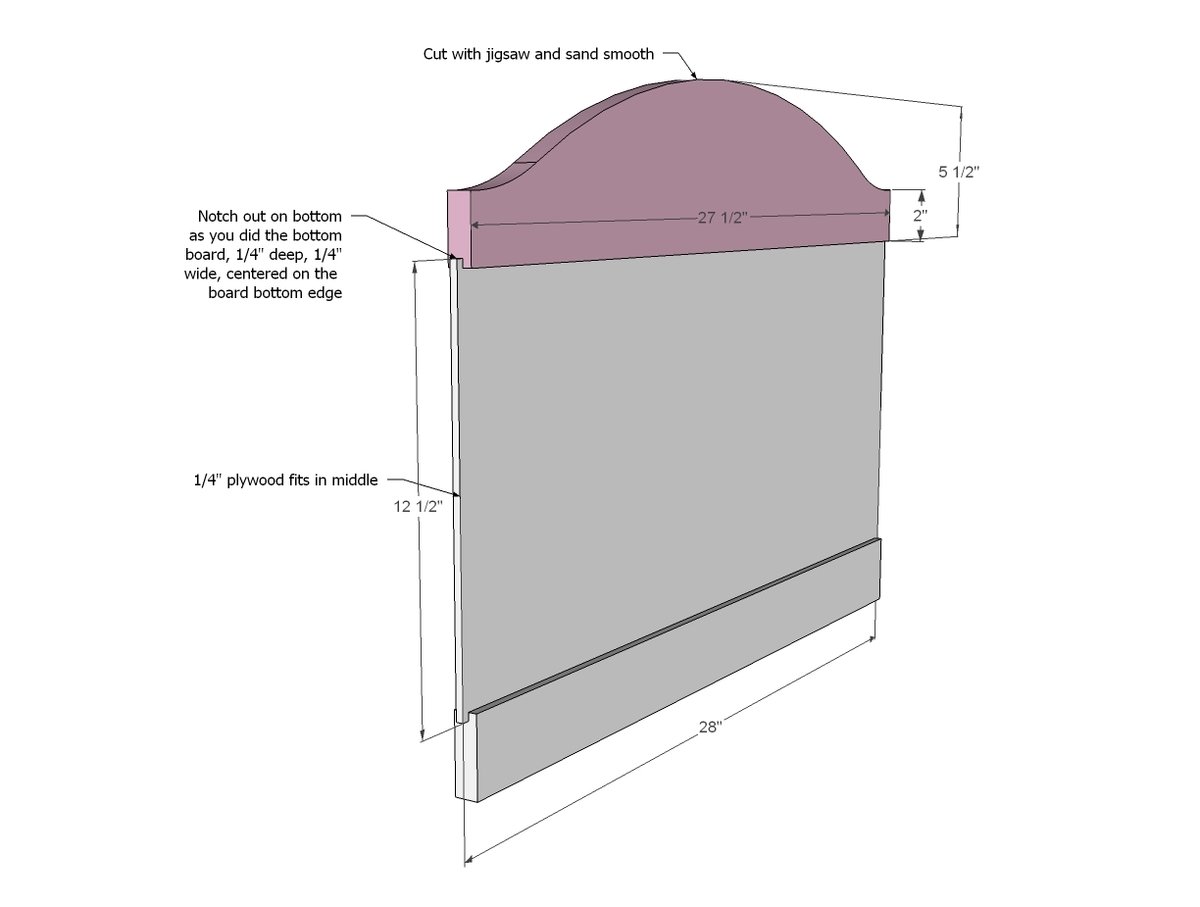
Do the same for the top header board. Then use a jigsaw to cut arch shape out of top and sand smooth.
Step 3
Notch the legs as well, but for a stained finish, you’ll want to leave the top portion of the legs. For a painted finish, you can notch all the way through. Assemble the headboards with glue and screws. Not shown - legs extend past by 6"
Step 4
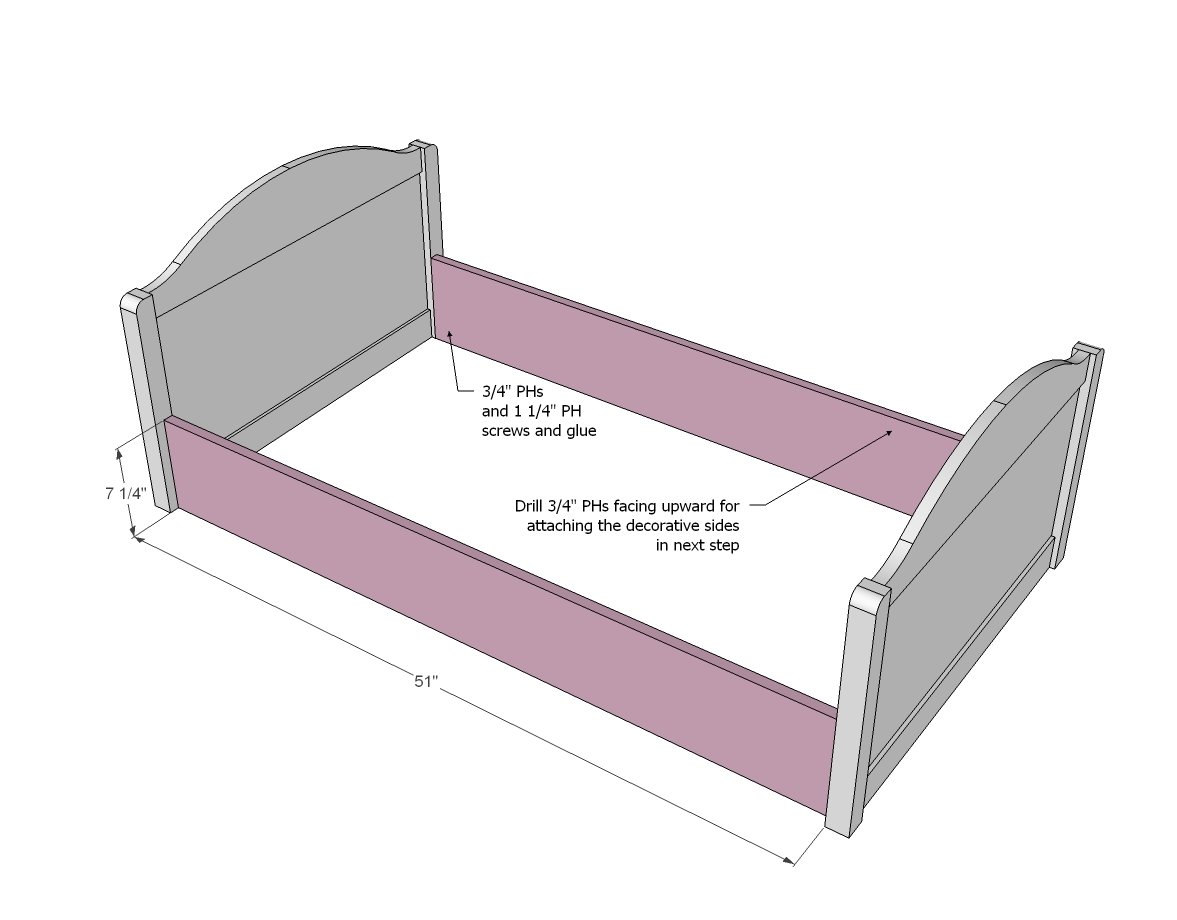
Now add the two siderails. Since these will be covered by a mattress, go ahead and attach with pocket holes. Also drill two pocket holes facing upward to attach the decorative upper side rails (next step). You can actually attach the lower to upper siderails in this step as well. Glue the joint.
Step 5
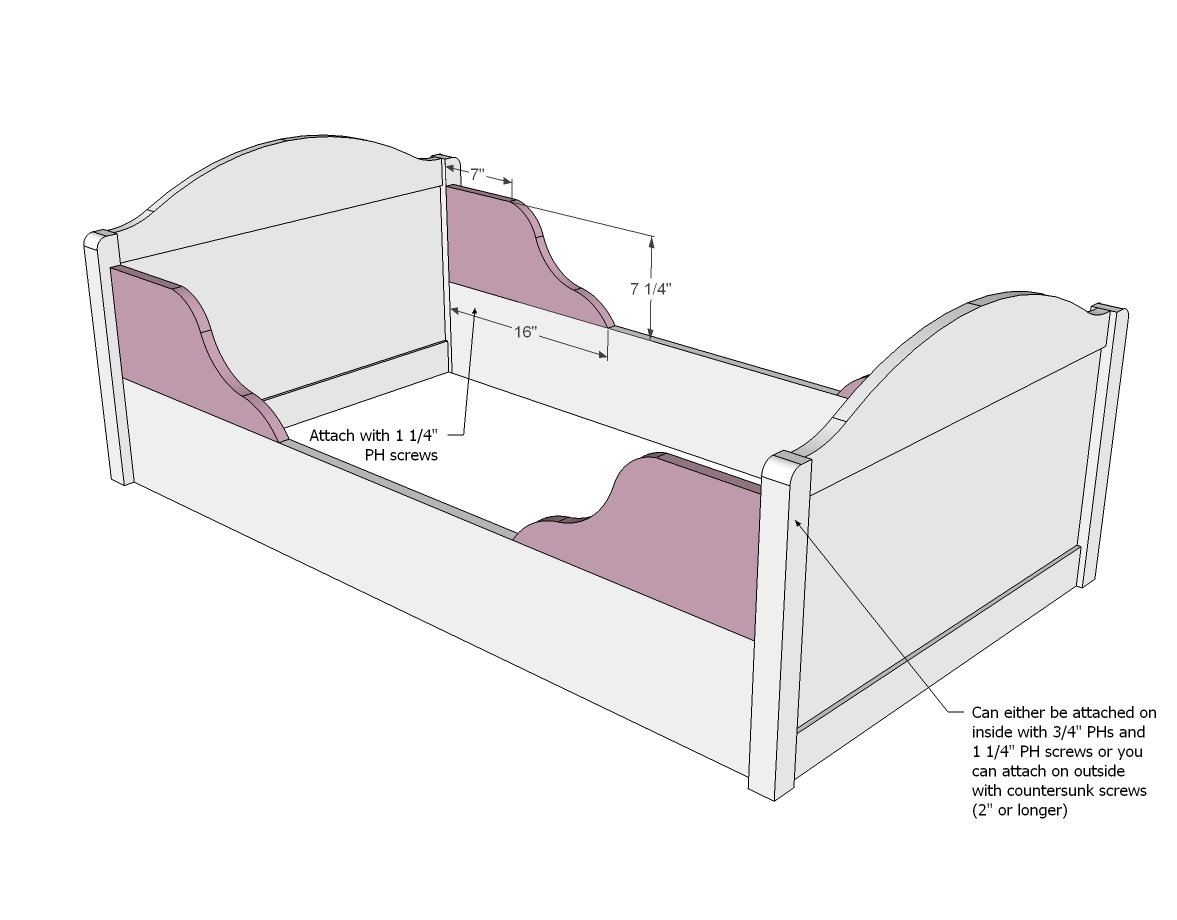
The best way to attach side rails is with pocket holes - but you can also screw from outsides into the ends of the 1x8s.
Step 6
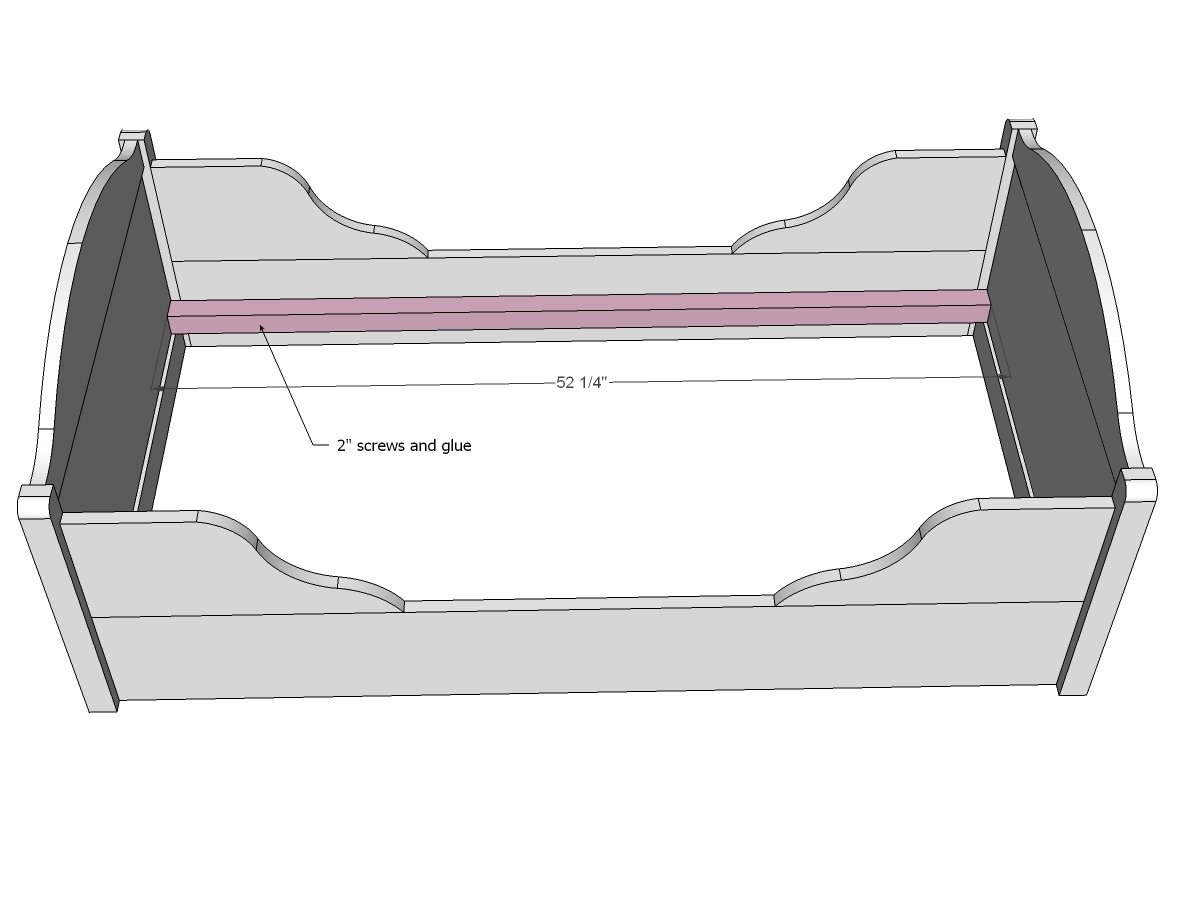
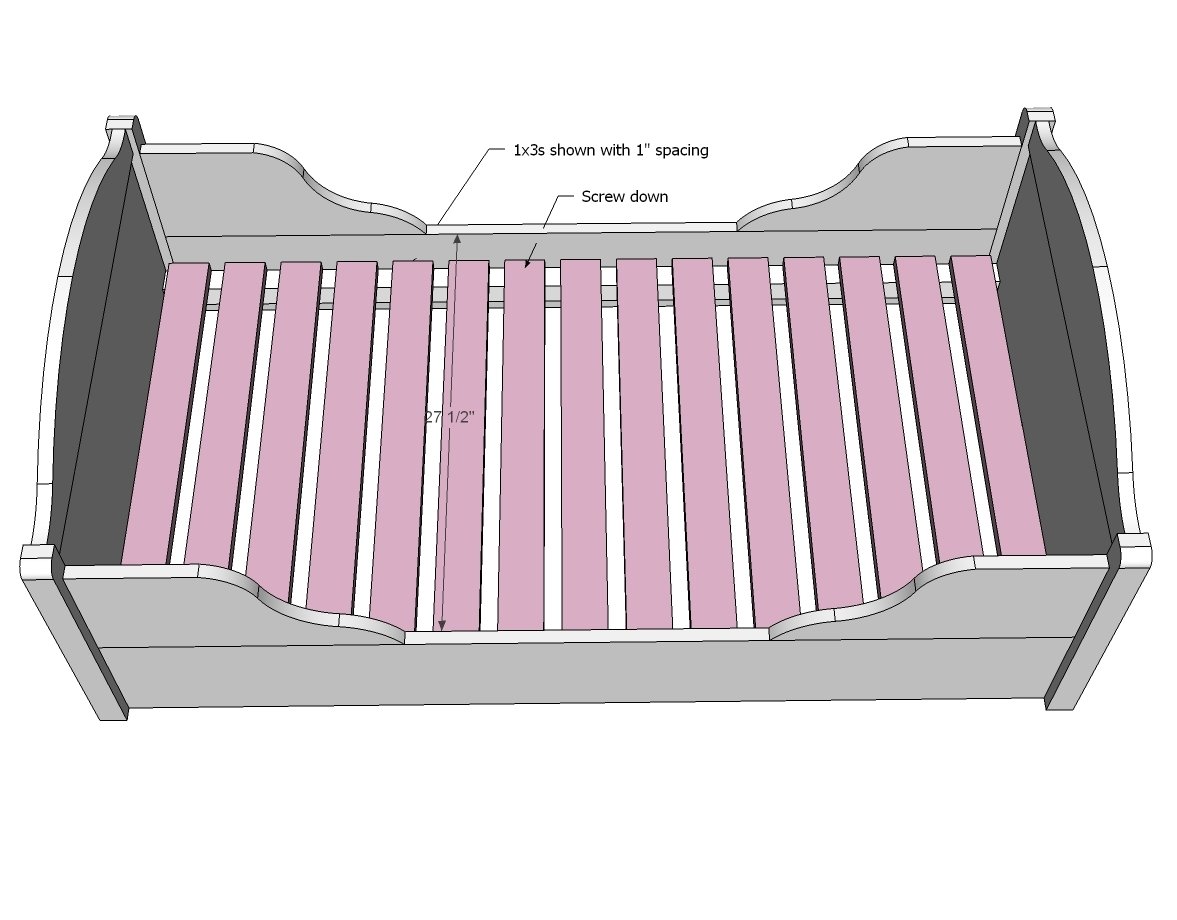
These are to support the mattress slats. I have them resting on the 1x3s in the headboards, but you can place at any height.
Step 7
I recommend mattress slats pretty close together (shown 1” spacing) because crib mattresses are so flimsy. This one’s your call here - standard spacing is between 2 and 3”. You could also use 3/4” plywood as a base.
Step 8
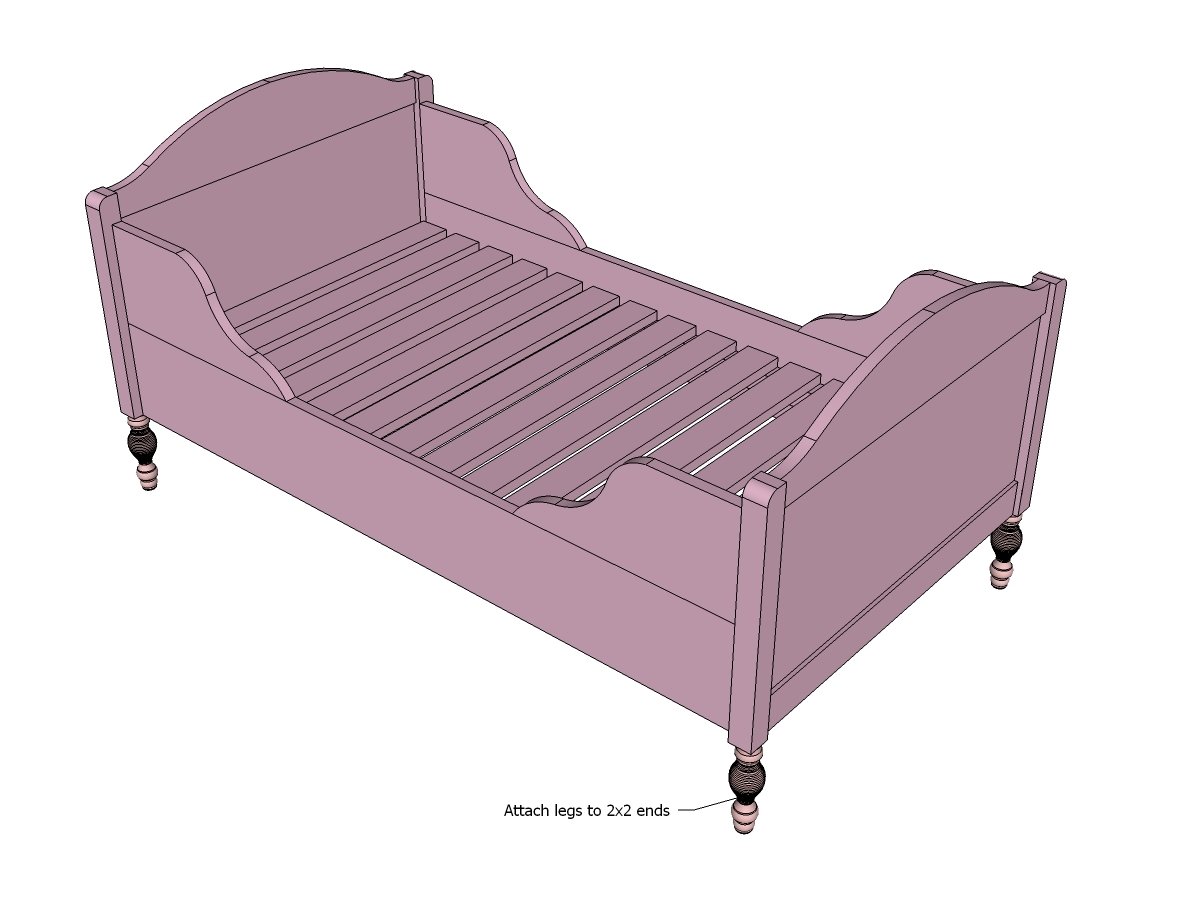
Attach legs using metal brackets or with the 2x2 extended 6" longer as legs.
Finishing
Sand all surfaces, starting with a medium grit and finishing with fine. Wipe off the dust, fill any holes or gaps with wood filler, and sand smooth once dry. Apply primer if you're painting, then finish with your choice of paint or stain and seal with a durable clear topcoat. For outdoor projects, use exterior-rated primer, paint or stain, and sealer so the piece stands up to the weather.
Source (temporary): https://www.ana-white.com/woodworking-projects/vintage-toddler-bed