Vintage X-Back Step Stool and End Table
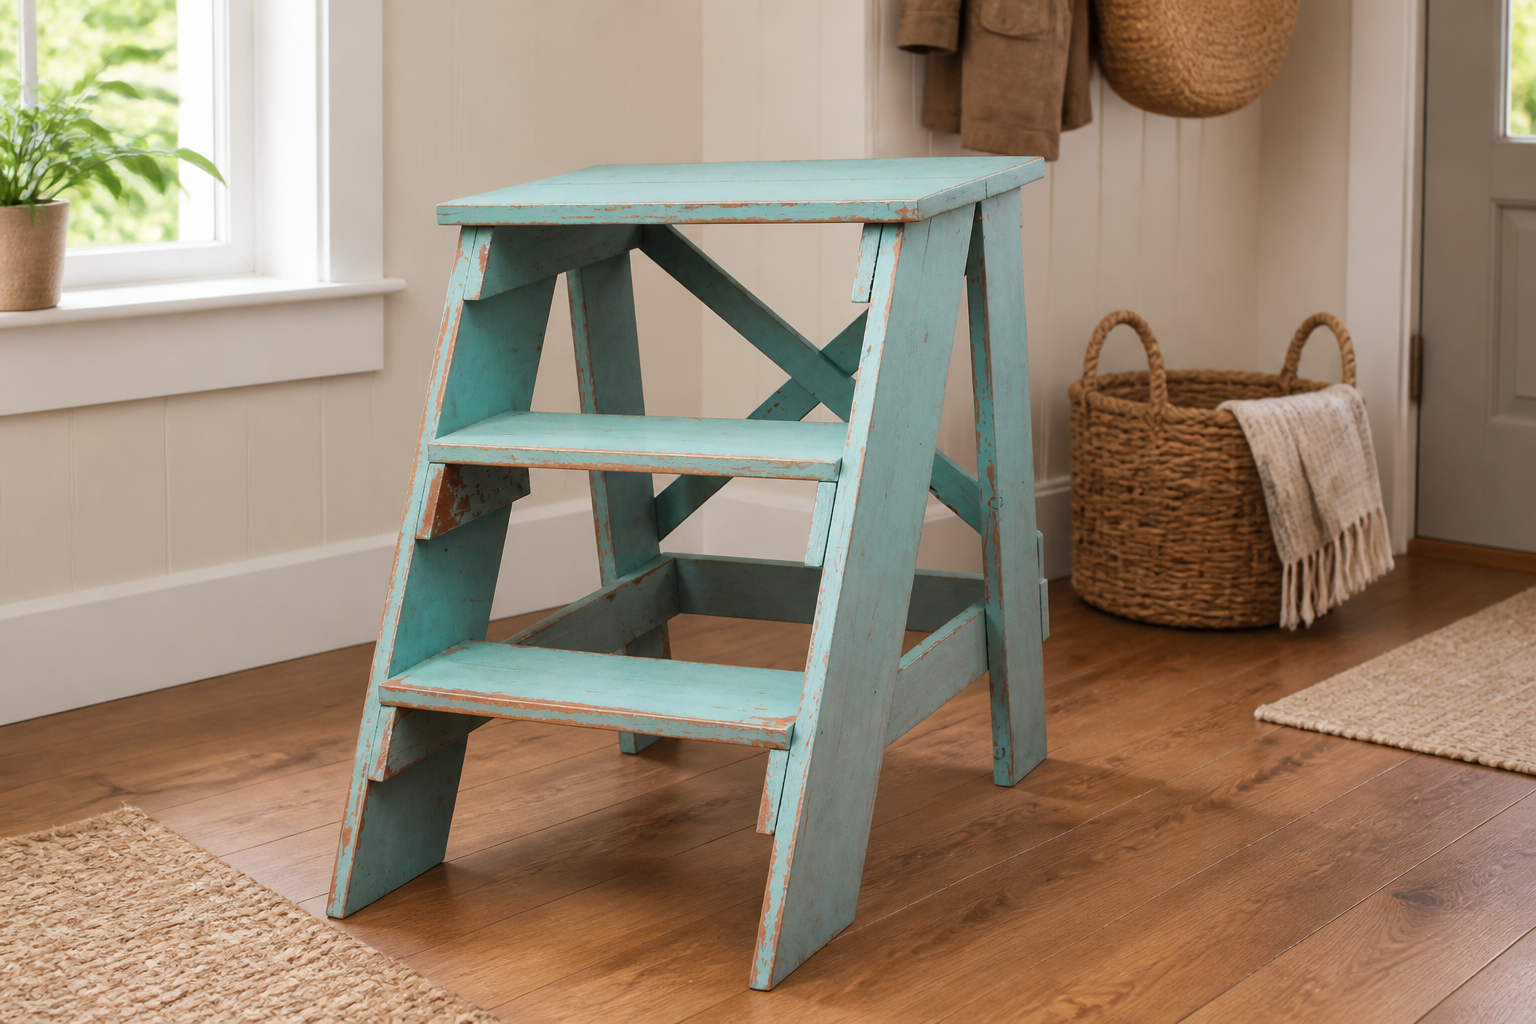
Build a charming vintage-inspired wooden step stool that doubles as a rustic end table. The two sturdy steps, decorative X-back and compact design make it a practical addition to a kitchen, entryway or living room. Use the to build your own and customize it with paint, stain or a distressed finish.
Specifications
| Project type | Side and End Table Plans |
|---|---|
| Room | Entryway and Mudroom |
| Style | Farmhouse Furniture |
| Difficulty | Intermediate |
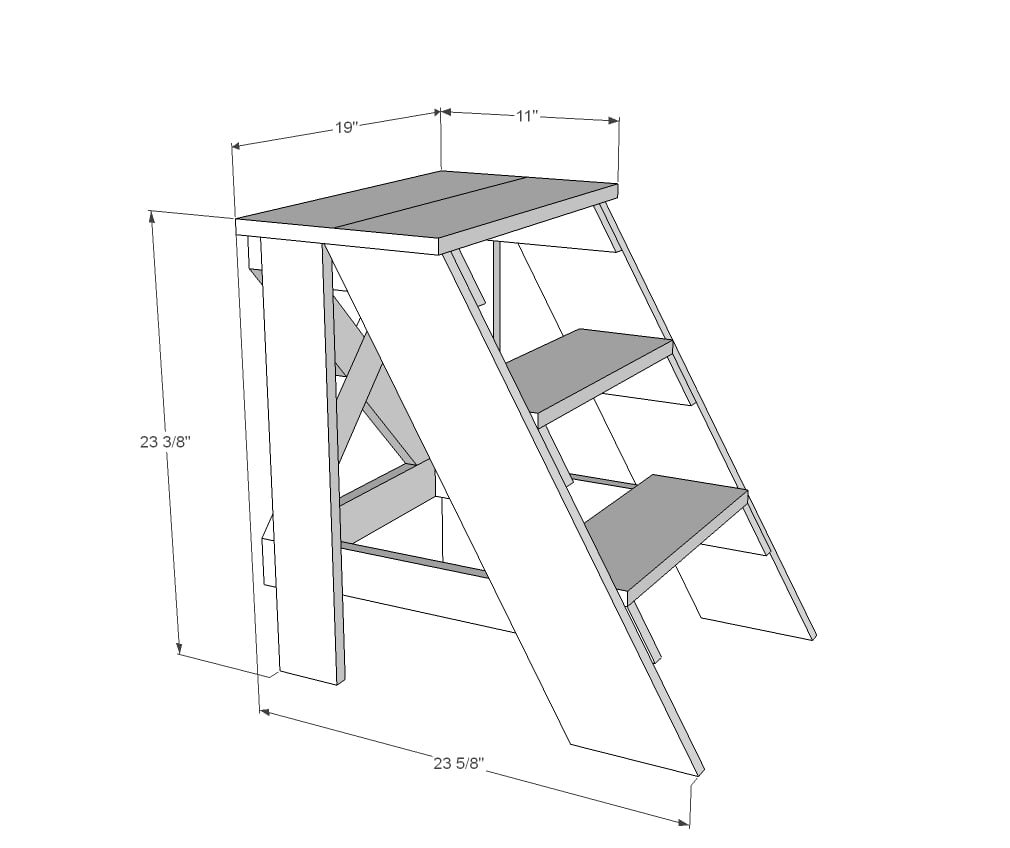
Dimensions
Use the size-specific shopping and cut lists below.
Shopping List
- 12 feet of 1x6 boards
- 2 1x3 boards, 8 feet long
- wood lathe for back cross bracing
- I used 1 1/4" and 2" finish nails to construct with glue but you can also use screws or pocket hole screws
Cut List
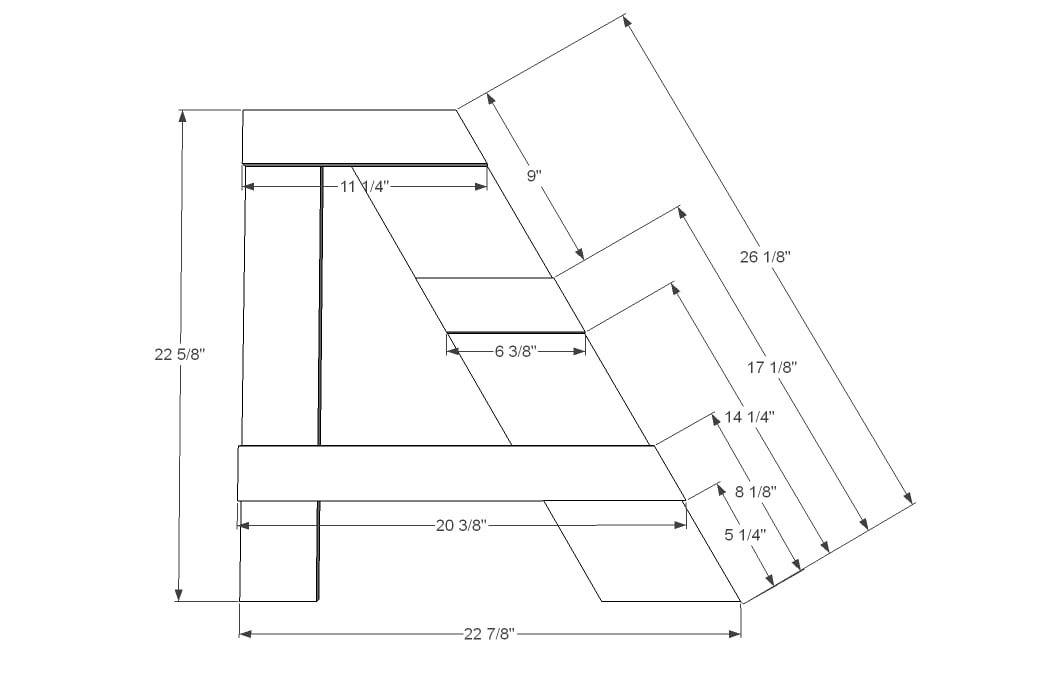
- 2 - 1x3 @ 11 1/4" (long point measurement, one end cut at 30 degrees off square) - top step support
- 2 - 1x3 @ 20 3/8" (long point measurement, one end cut at 30 degrees off square) - bottom step support
- 2 - 1x3 @ 6 3/8" (long point to short point, both ends cut parallel at 30 degrees off square) - middle step support
- 2 - 1x6 @ 26 1/8" (long point to short point, both ends cut parallel at 30 degrees off square) - front legs
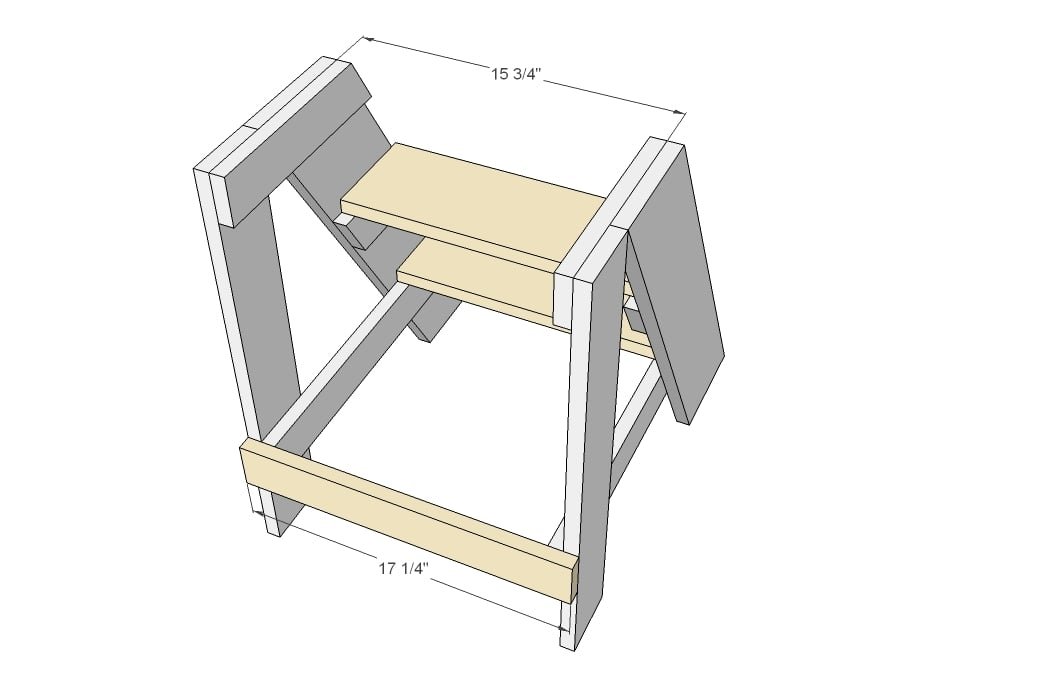
- 2 - 1x6 @ 15 3/4" - steps
- 1 - 1x3 @ 17 1/4" - top back support
- 2 - 1x6 @ 19" - top
- 2 – 1x3 @ 22⅝″ — back legs
Tools
- measuring tape
- square
- pencil
- safety glasses
- hearing protection
- compound miter saw
- nailer
- sander
Step-by-step Instructions
Step 1
This part is actually a little tricky - getting everything lined up just right. Just take your time and don't forget that the two sides need to be made in mirror so the cleats are on the insides. I used 1 1/4" finish nails and glue to attach.
Step 2
Once you get the two sides done, everything else is a breeze. If you are nailing, use glue and nail from multiple directions.
Step 3
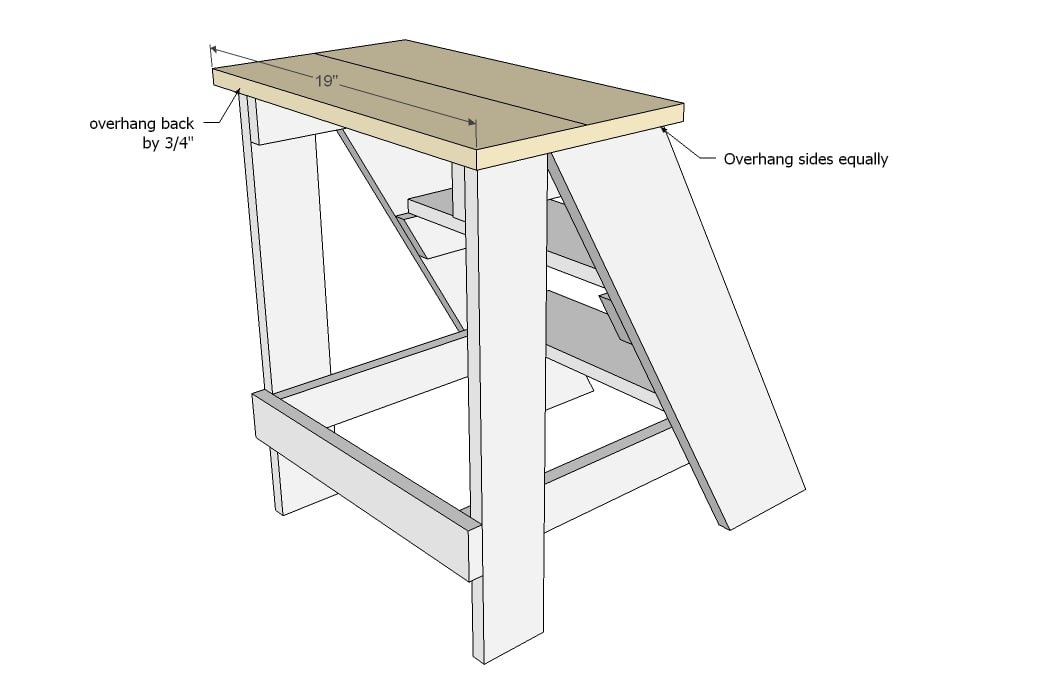
Attach top.
Step 4
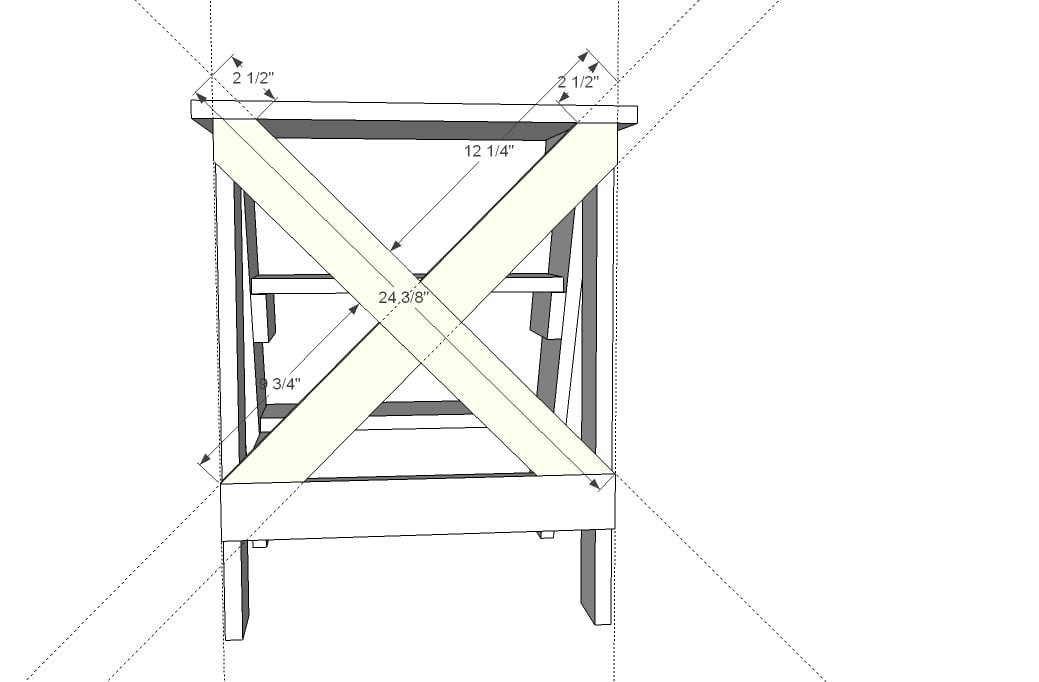
I ended up using scrap lathe strips for the x but if you had 1x3s, you can also do this. The X back actually adds a ton of strength to the back, so glue and screw or nail.
Finishing
Sand all surfaces, starting with a medium grit and finishing with fine. Wipe off the dust, fill any holes or gaps with wood filler, and sand smooth once dry. Apply primer if you're painting, then finish with your choice of paint or stain and seal with a durable clear topcoat. For outdoor projects, use exterior-rated primer, paint or stain, and sealer so the piece stands up to the weather.
Source (temporary): https://www.ana-white.com/woodworking-projects/vintage-x-back-step-stool-and-end-table-free-diy-plans