Wall Corner Pie Cut Kitchen Cabinet
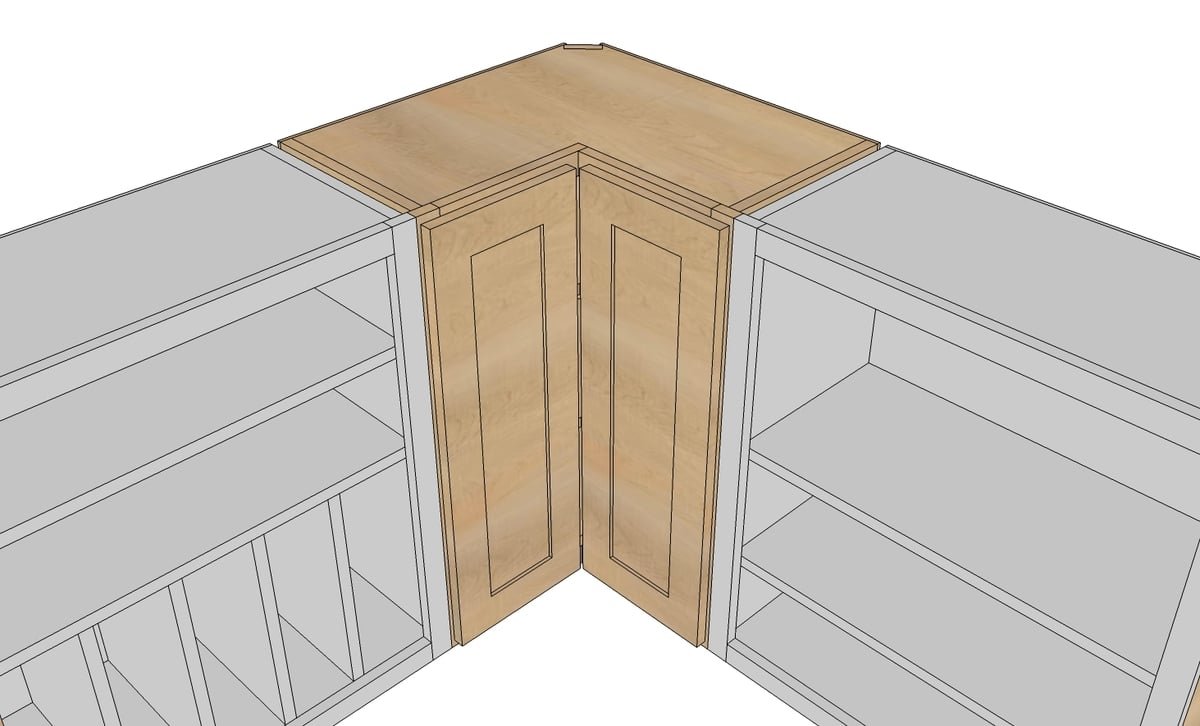
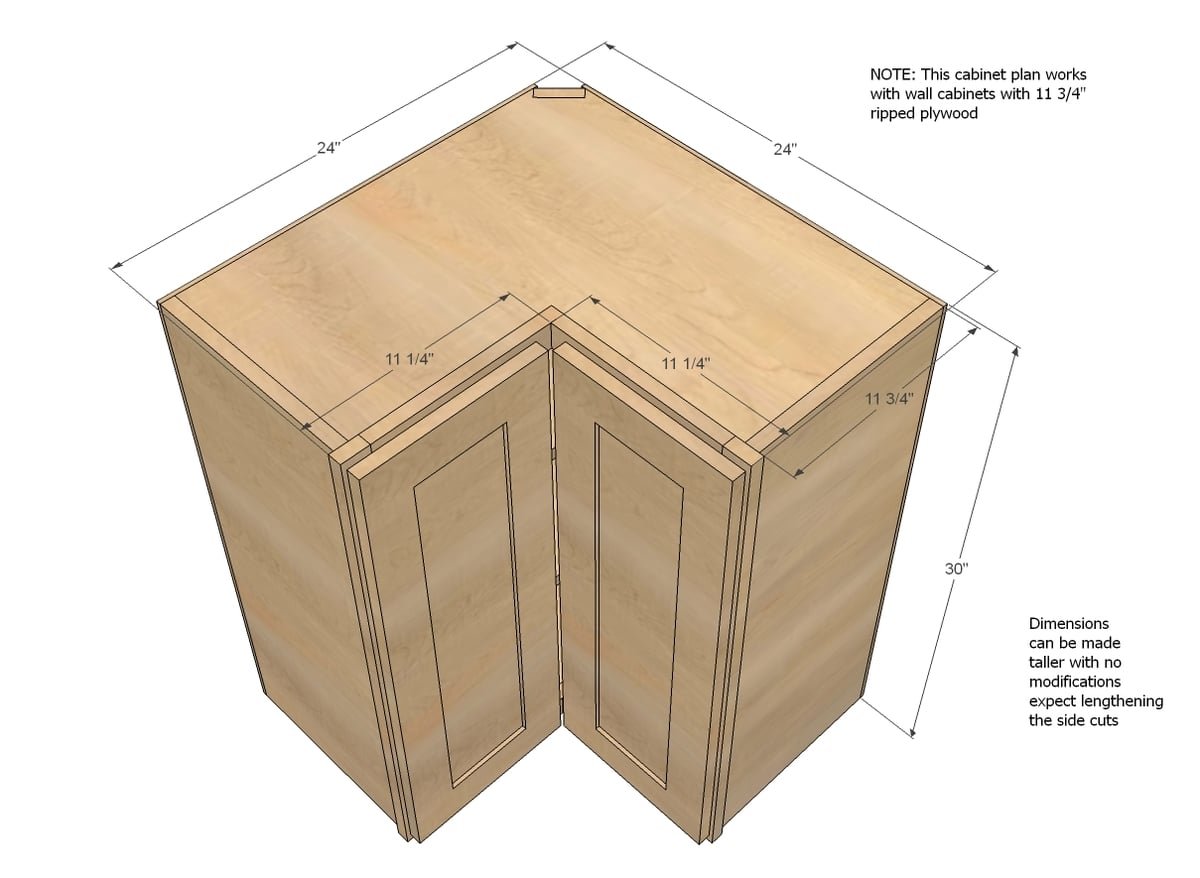
to build a wall cabinet pie cut corner with double folding doors. This style gives better access to the corner countertop space and is easier to build than the angled door cabinet. from
Specifications
| Project type | Kitchen Cabinet Plan, Accessories and Serving |
|---|---|
| Room | kitchen |
| Style | Farmhouse Furniture |
| Difficulty | Intermediate |
Dimensions
Use the size-specific shopping and cut lists below.
Shopping List
1 sheet 3/4" plywood ripped into 1 strip 22 3/4" wide x 8 feet long AND 1 strip 11 3/4" wide x 8 feet long (might as well rip the remaining strip 11 3/4" wide and use it for more wall cabinets)
1/2 sheet 1/4" plywood for backs
2 - 1x2 @ 8 feet long in matching hardwood species
1 - 1x3 @ 30" in matching hardwood species
2 - 1 1/4" overlay face frame concealed euro style hinges*
2 - pie cut hinges for attaching doors together*
Screws for hanging cabinet wall and attaching face frames to neighboring cabinets
Doors or materials to make doors as shown in plan
*see comments
Cut List
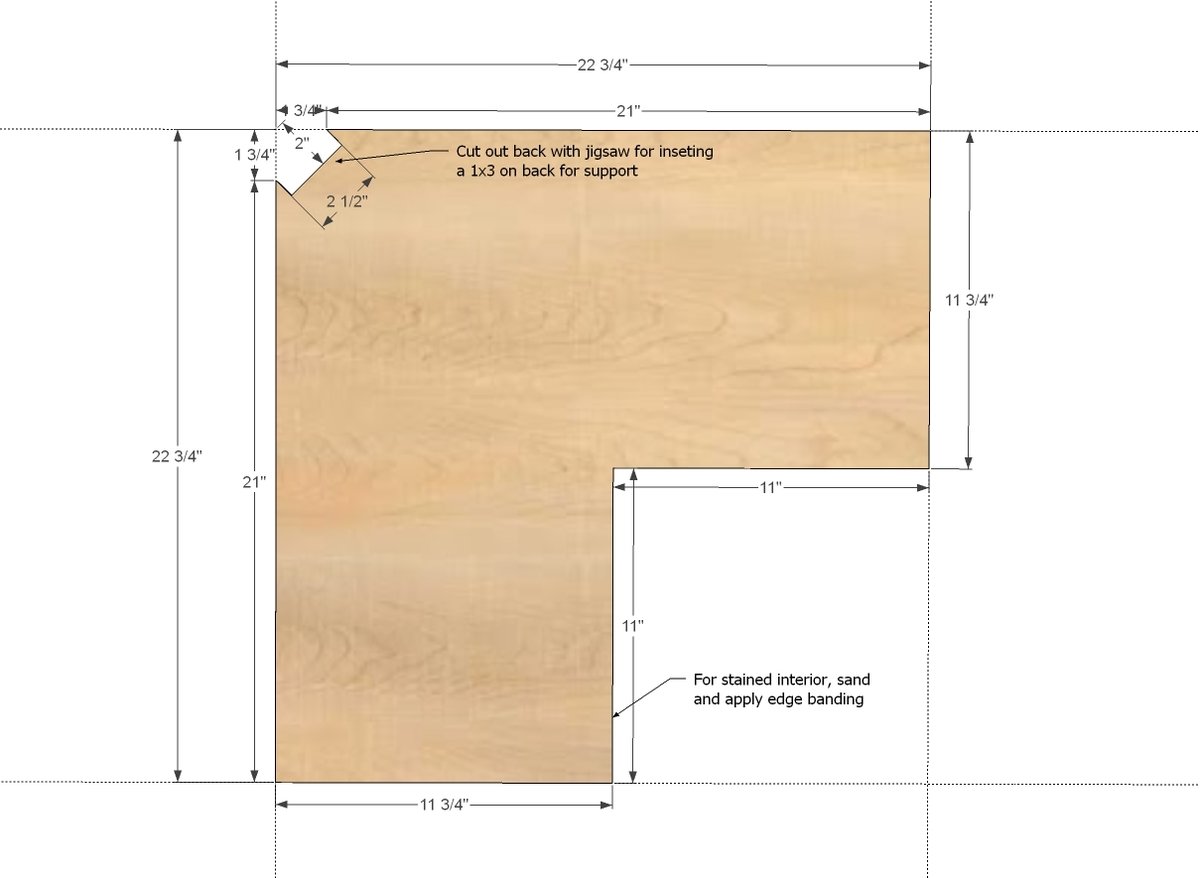
4 - 3/4" plywood 22 3/4" x 22 3/4" (cut these from the ripped strip 22 3/4" wide)
2 - 3/4" plywood 11 3/4" x 30" (cut these from the ripped strip 11 3/4" wide)
1 - 1x3 @ 30"
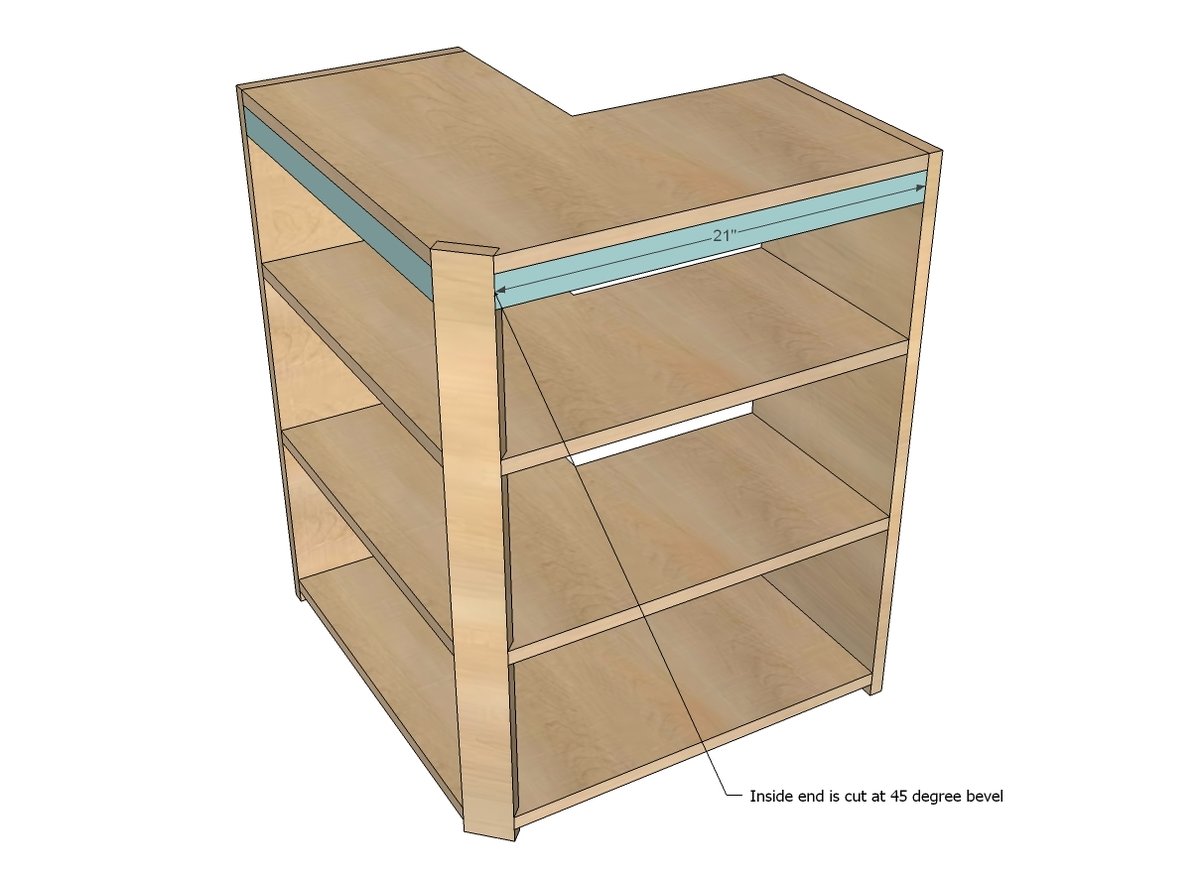
2 - 1x2 @ 21" (longest point measurement, one end is cut to 45 degree bevel - for heavier loads, consider cutting four more for placement under all fixed shelves)
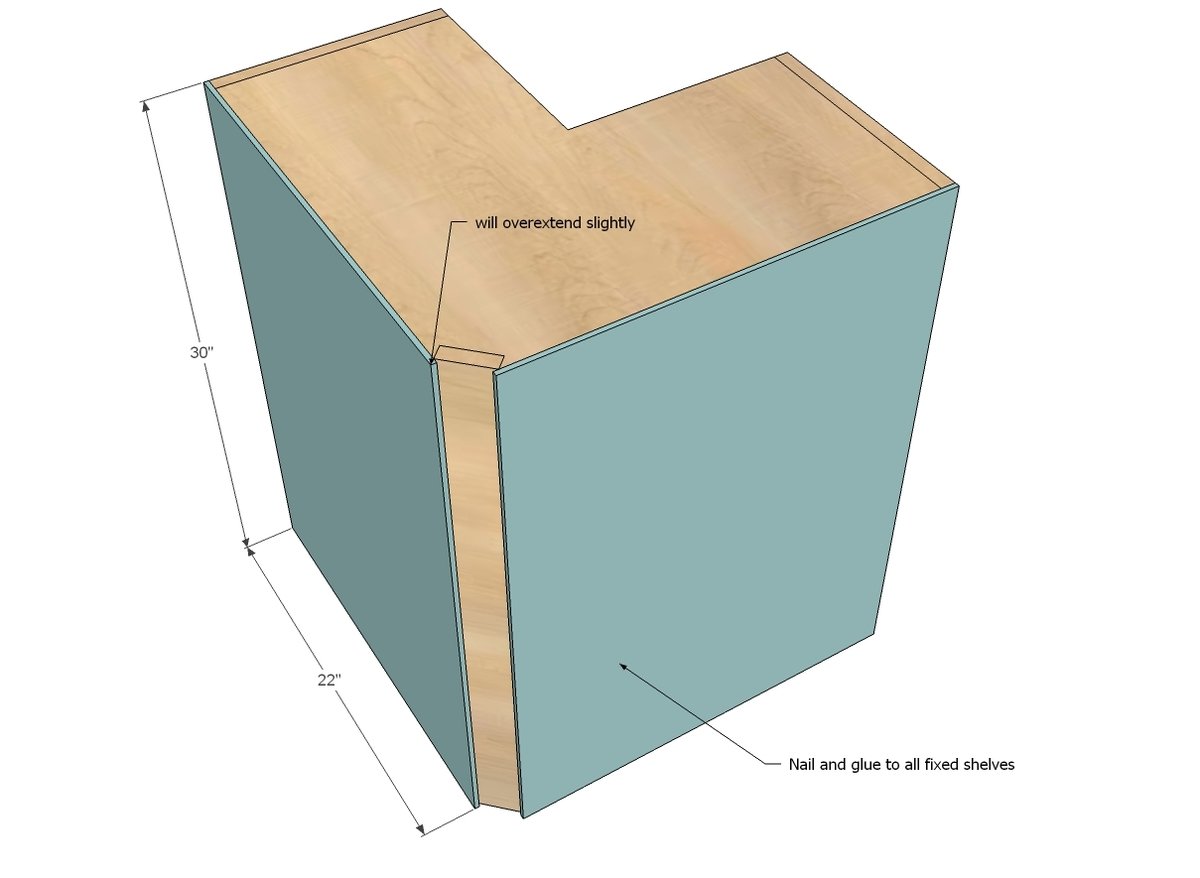
2 - 1/4" plywood @ 30" x 22" (backs)
FACE FRAME
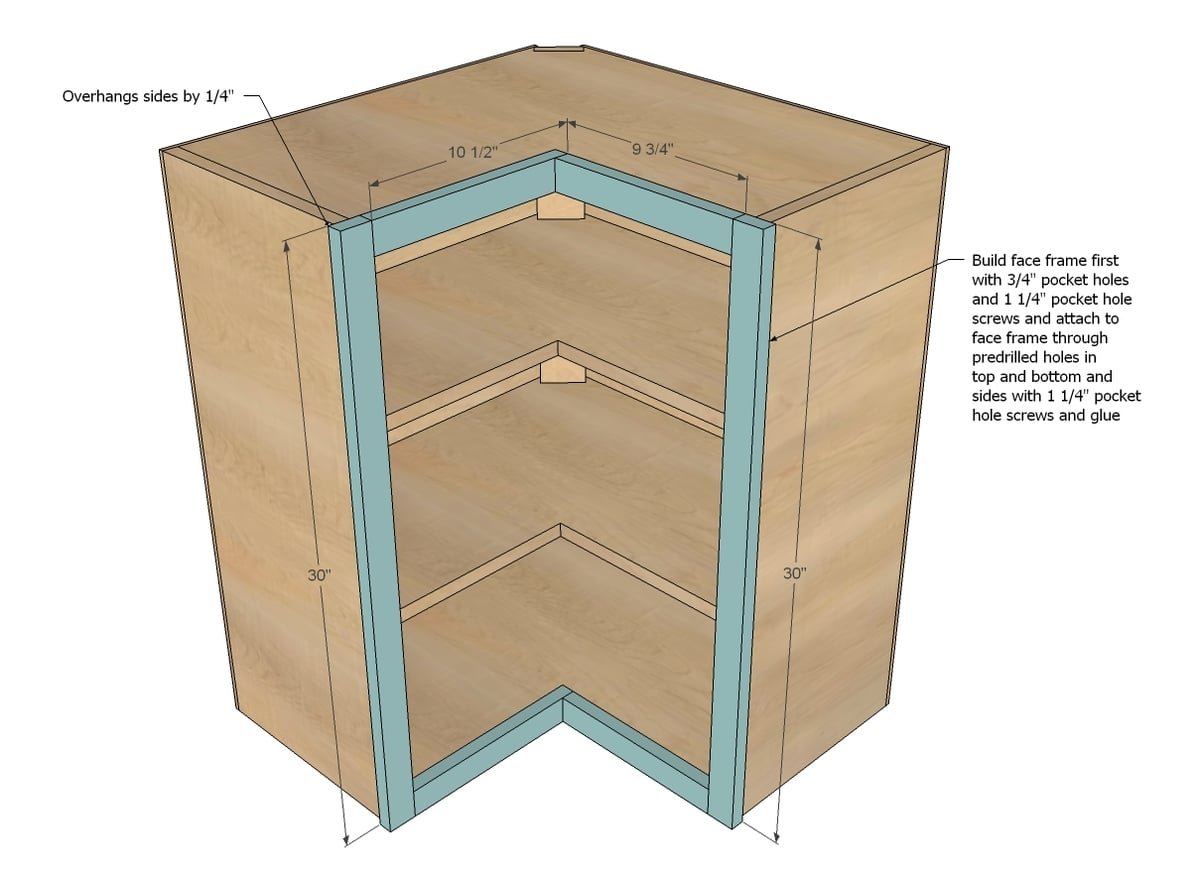
2 - 1x2 @ 30"
2 - 1x2 @ 10 1/2"
2 - 1x2 @ 9 3/4"
Tools
- measuring tape
- square
- pencil
- safety glasses
- hearing protection
- kreg-jig
- drill
- circular saw
- jigsaw
- compound miter saw
- nailer
- sander
- level
- countersink drill bit
Step-by-step Instructions
Step 1
First cut all of your shelves as shown in diagram.
Step 2
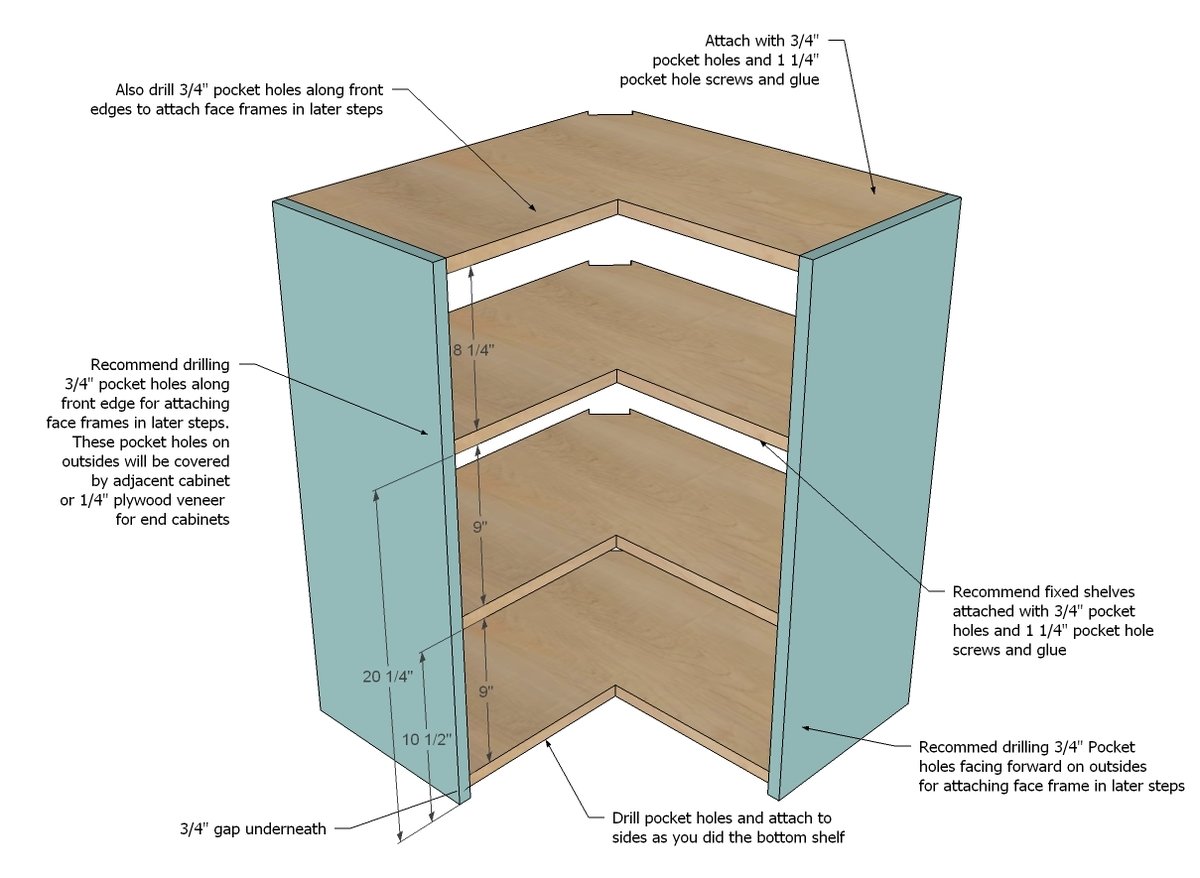
Next, drill pocket holes in all shelves and sides as shown in diagram, and then attach shelves to the sides.
Step 3
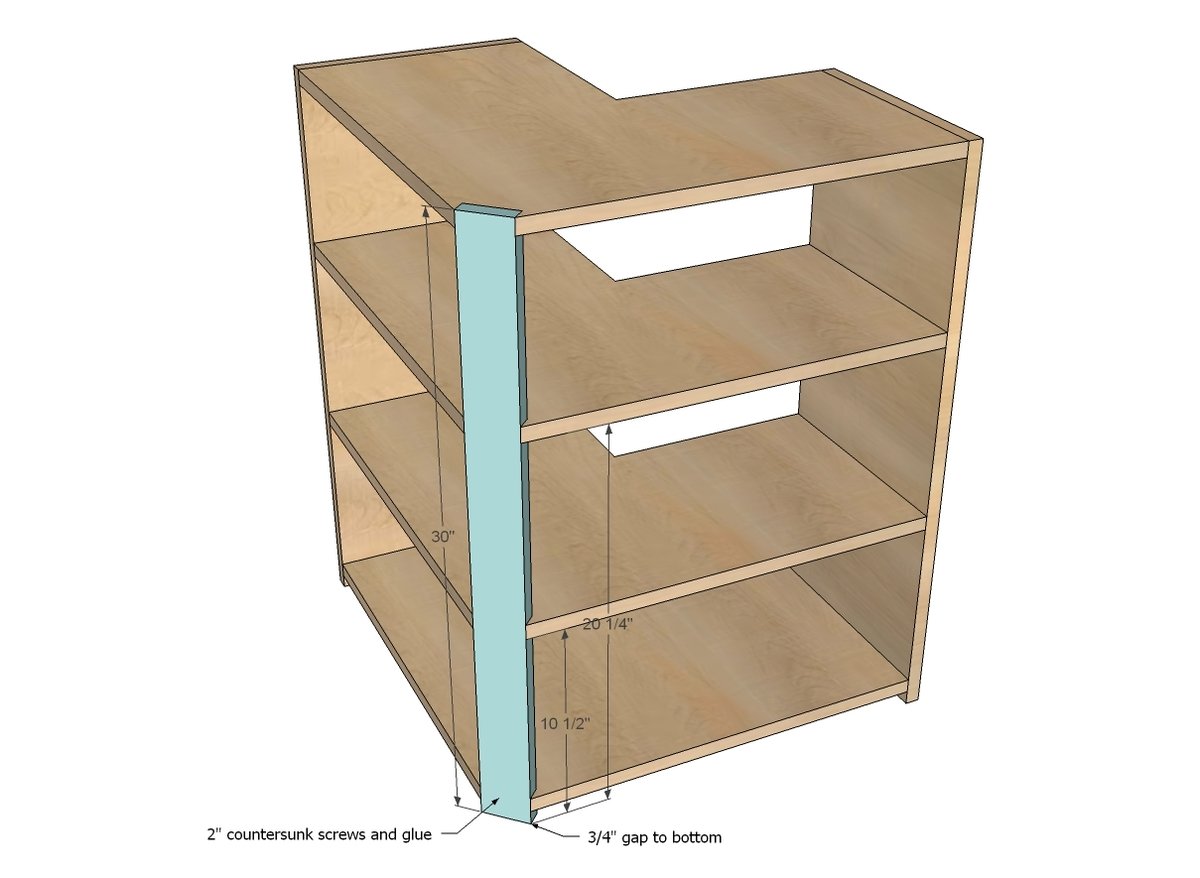
Attach back 1x3 to the back keeping shelves level. Countersink screws and use glue.
Step 4
These guys are for hanging the cabinet later on. For heavier loads, I suggest more braces under the remaining fixed shelves. Attach with glue and screws - try 3/4" pocket holes on back sides.
Step 5
Step 6
Build your face frame separately with hidden 3/4" pocket holes on back side. Then attach to carcass using the predrilled pocket holes from step 2.
Step 7
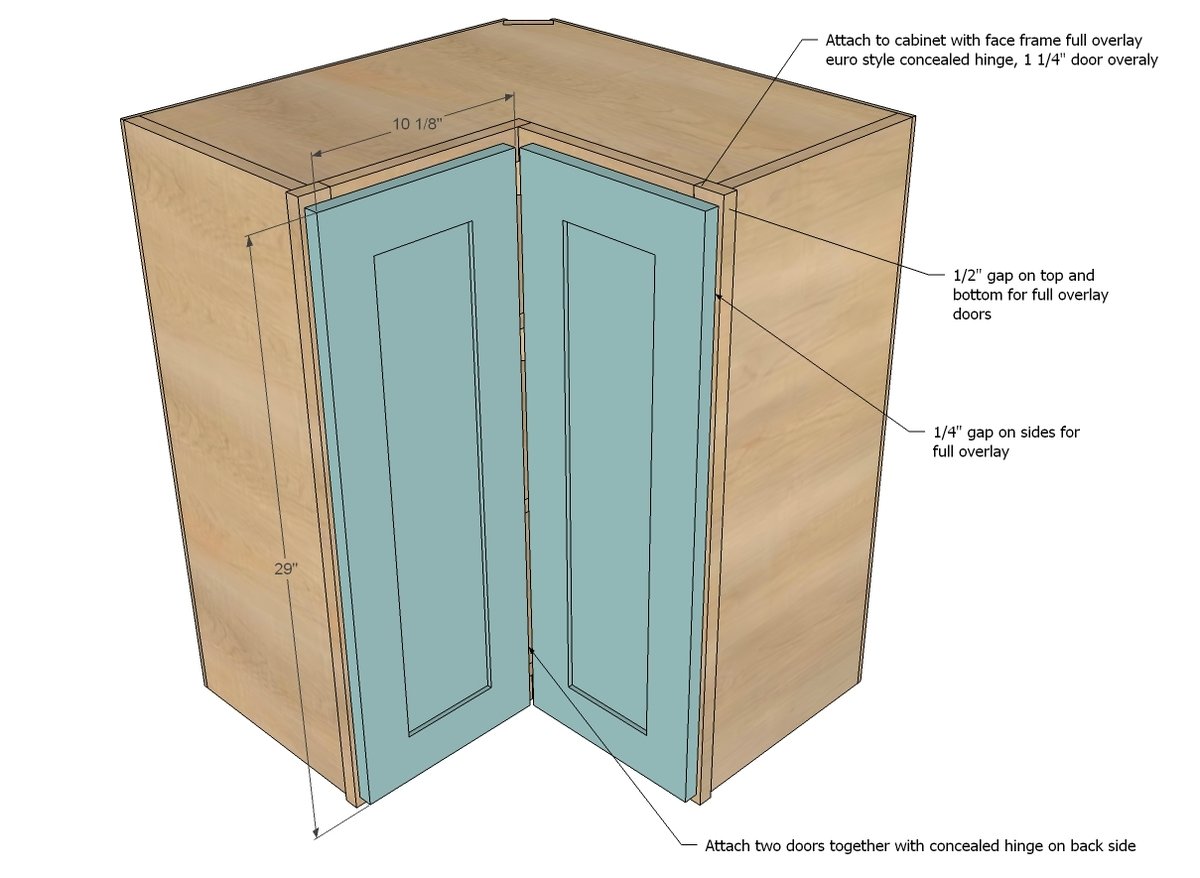
For standard full overlay doors with 1/2" reveal between doors/drawers, door size is as shown above. When you hang the doors, adjust so 1/4" of the face frame is revealed on the ends of the face frame, 1/2" on tops and bottoms.
Step 8
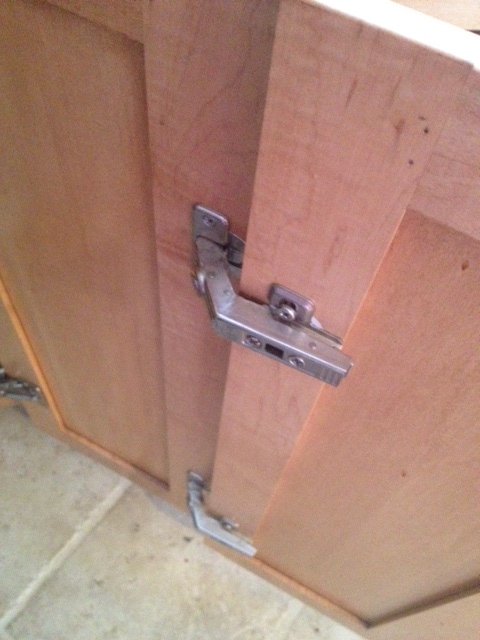
For my kitchen cabinet, these hinges were used to hinge two doors together.
Step 9
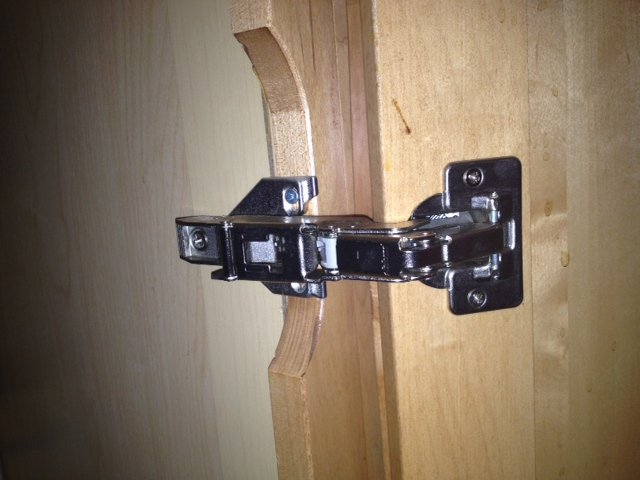
And these concealed hinges, although a 1 1/4" overlay face frame euro concealed hinge would do the trick too.
Step 10
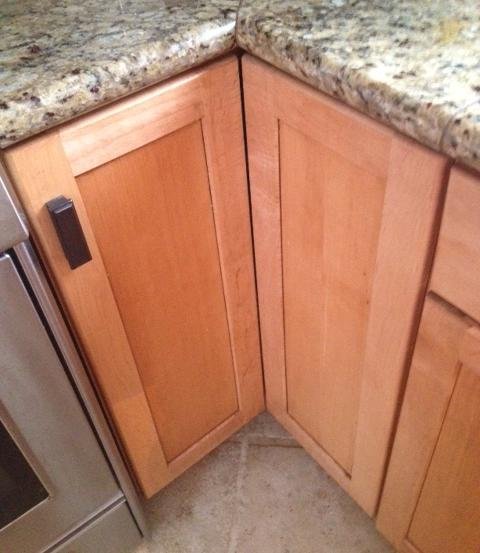
And here's my corner base cabinet, just for reference.
Finishing
Sand all surfaces, starting with a medium grit and finishing with fine. Wipe off the dust, fill any holes or gaps with wood filler, and sand smooth once dry. Apply primer if you're painting, then finish with your choice of paint or stain and seal with a durable clear topcoat. For outdoor projects, use exterior-rated primer, paint or stain, and sealer so the piece stands up to the weather.
Source (temporary): https://www.ana-white.com/woodworking-projects/wall-corner-pie-cut-kitchen-cabinet