Wall Kitchen Cabinet Basic Carcass
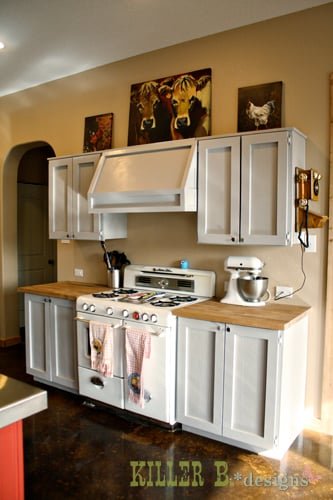
How to build your own kitchen wall cabinets. Free easy tutorial from
Specifications
| Project type | Kitchen Cabinet Plan, Accessories and Serving |
|---|---|
| Room | kitchen |
| Style | Farmhouse Furniture |
| Difficulty | Intermediate |
Dimensions
Use the size-specific shopping and cut lists below.
Shopping List
3/4" hardwood plywood ripped into strips 11 3/4" wide for cabinet carcasses (Brooke used Purebond ) **We'll call these 1x12s in this plan 1/4" plywood for backs in matching species
1x2s for face frames and supports in matching wood species
Recommend edge banding for stained cabinet shelves
1 1/4" pocket hole screws (fine threaded for hardwood)
Optional Crown moulding (if you opt for crown, you may wish to increase the size of your header to a 1x3 or 1x4 on face frames)
Cut List
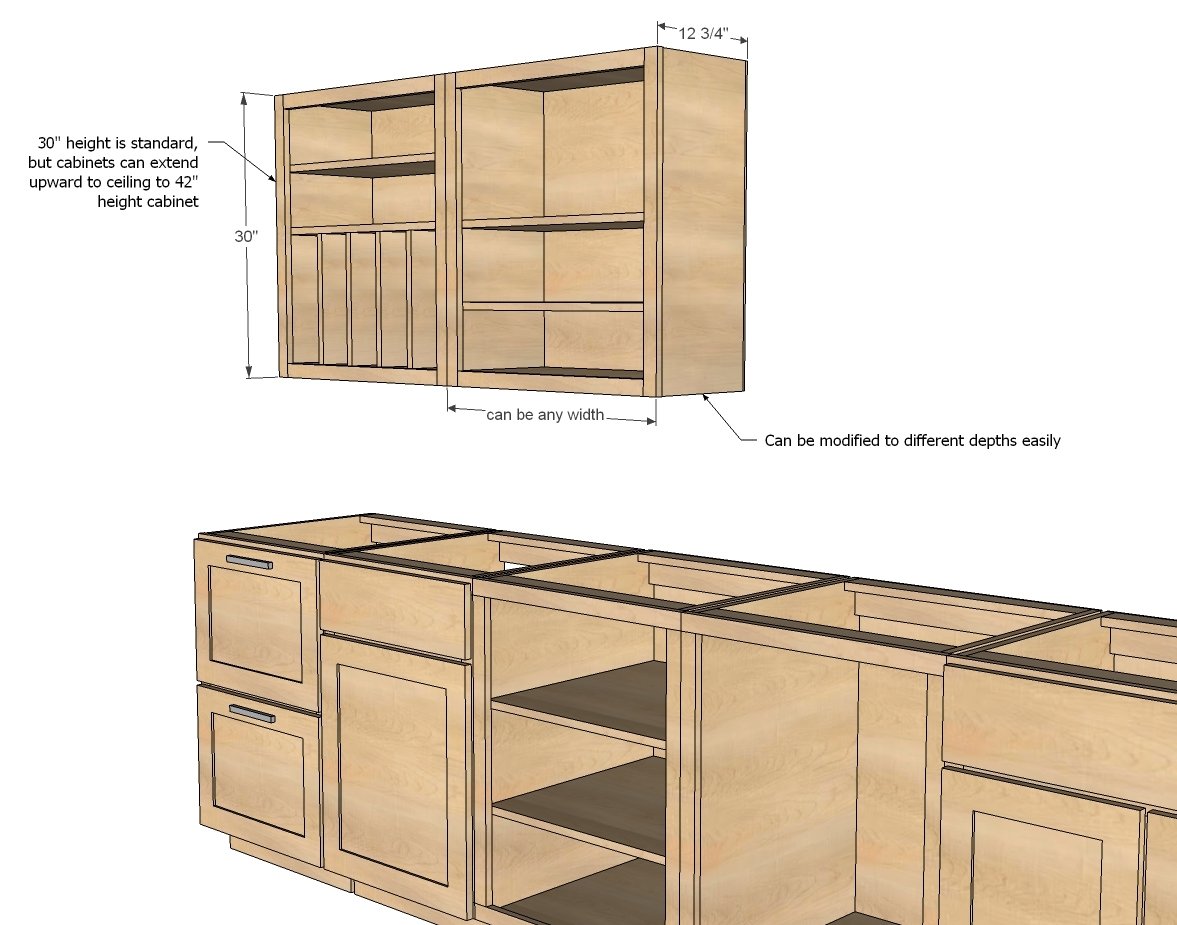
Find your overall desired cabinet width and modify this cut list to fit your dimensions. Cabinets are shown standard 30" height but can be made taller or shorter as well - just adjust side cuts.
MAIN CARCASS
SIDES: 2 - 1x12 @ 30" or height of cabinet **These are the plywood strips ripped to 11 3/4" widths. You can actually use any width, 11 3/4" just minimizes plywood scrap waste.
SHELVES: 2+ - 1x2 @ CABINET WIDTH - 2" (you'll need a top and bottom + any shelves)
TOP CLEAT: 1 - 1x2 @ CABINET WIDTH - 2"
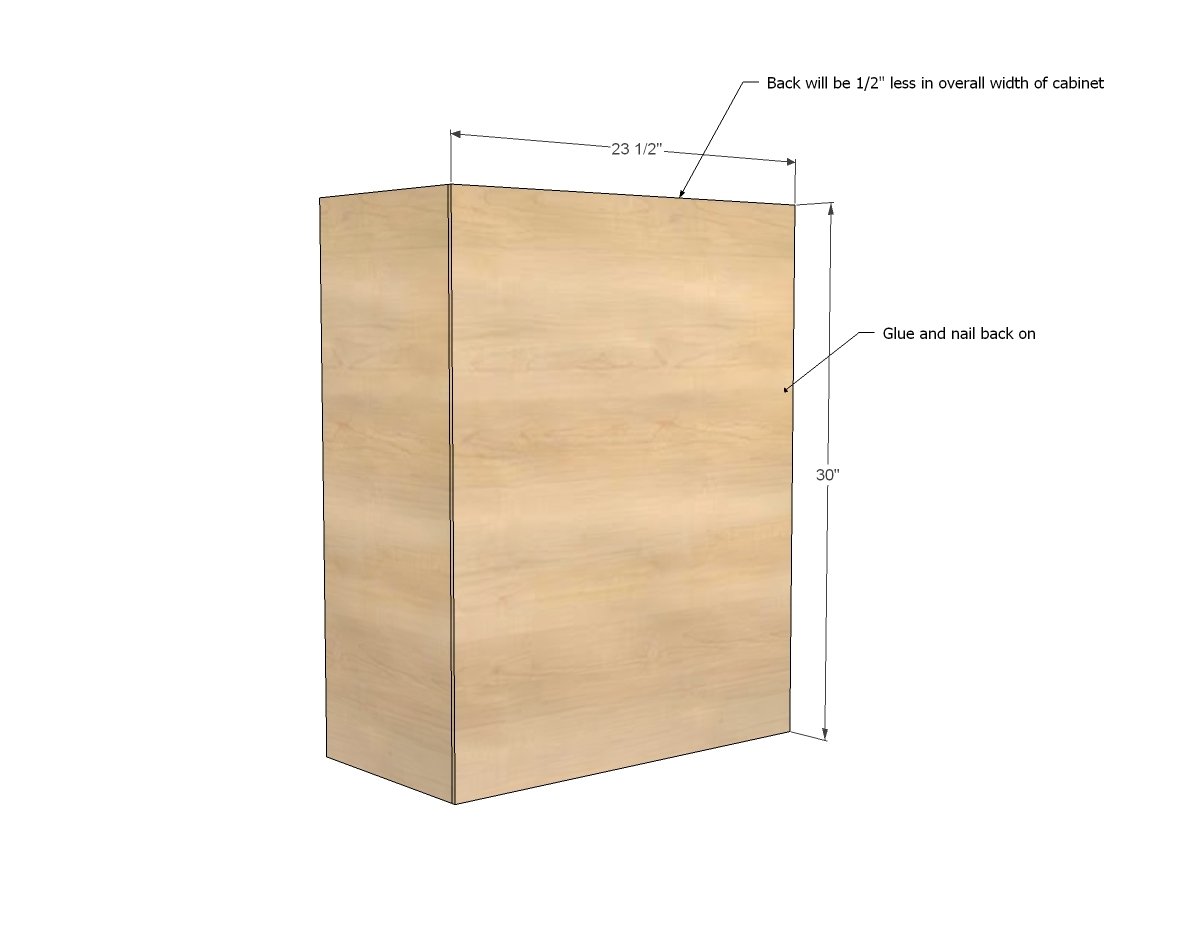
BACK: 30" x CABINET WIDTH - 1/2"
FACE FRAME
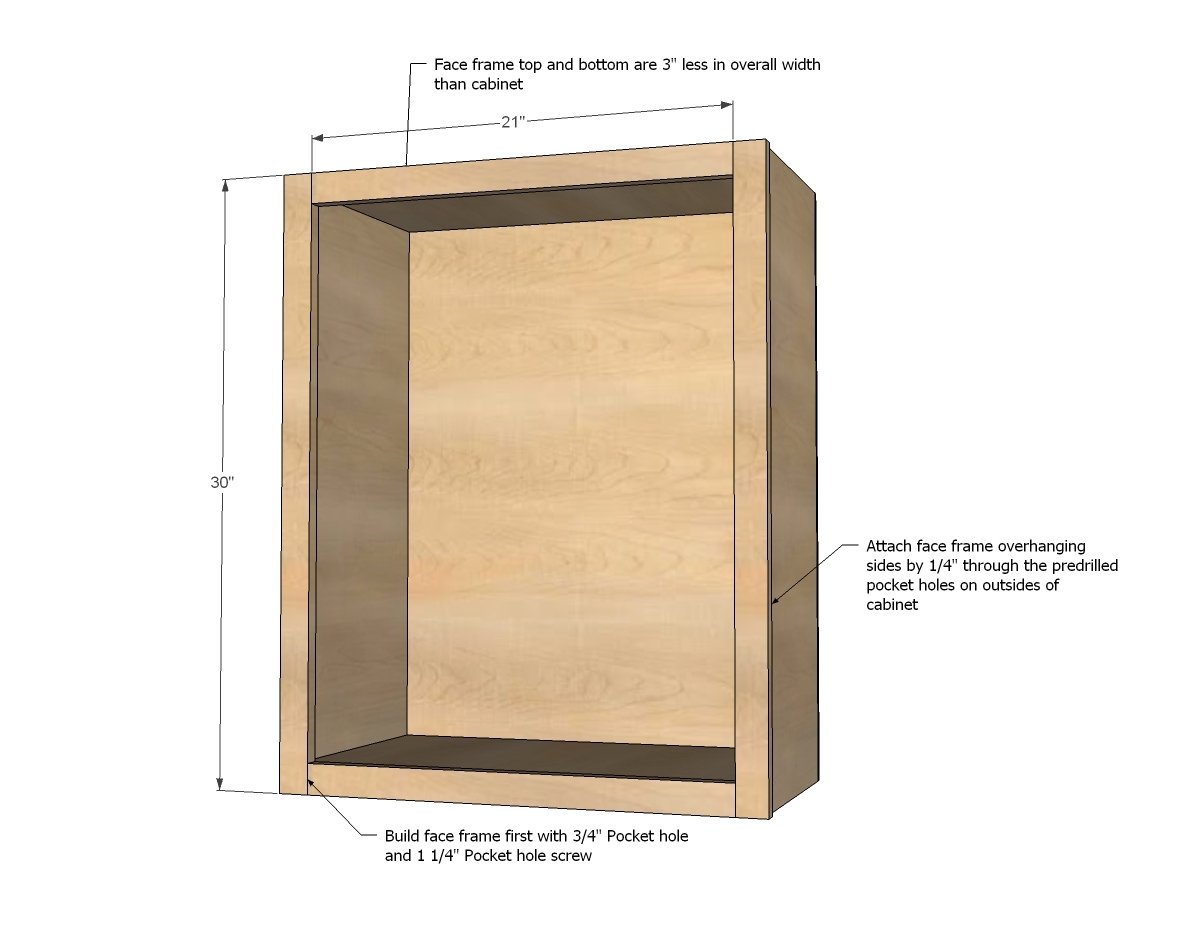
2 - 1x2 @ 30" or height of cabinet
2 - 1x2 @ CABINET WIDTH - 3"
Tools
- measuring tape
- square
- pencil
- safety glasses
- hearing protection
- kreg-jig
- drill
- circular saw
- compound miter saw
- sander
- level
Step-by-step Instructions
Step 1
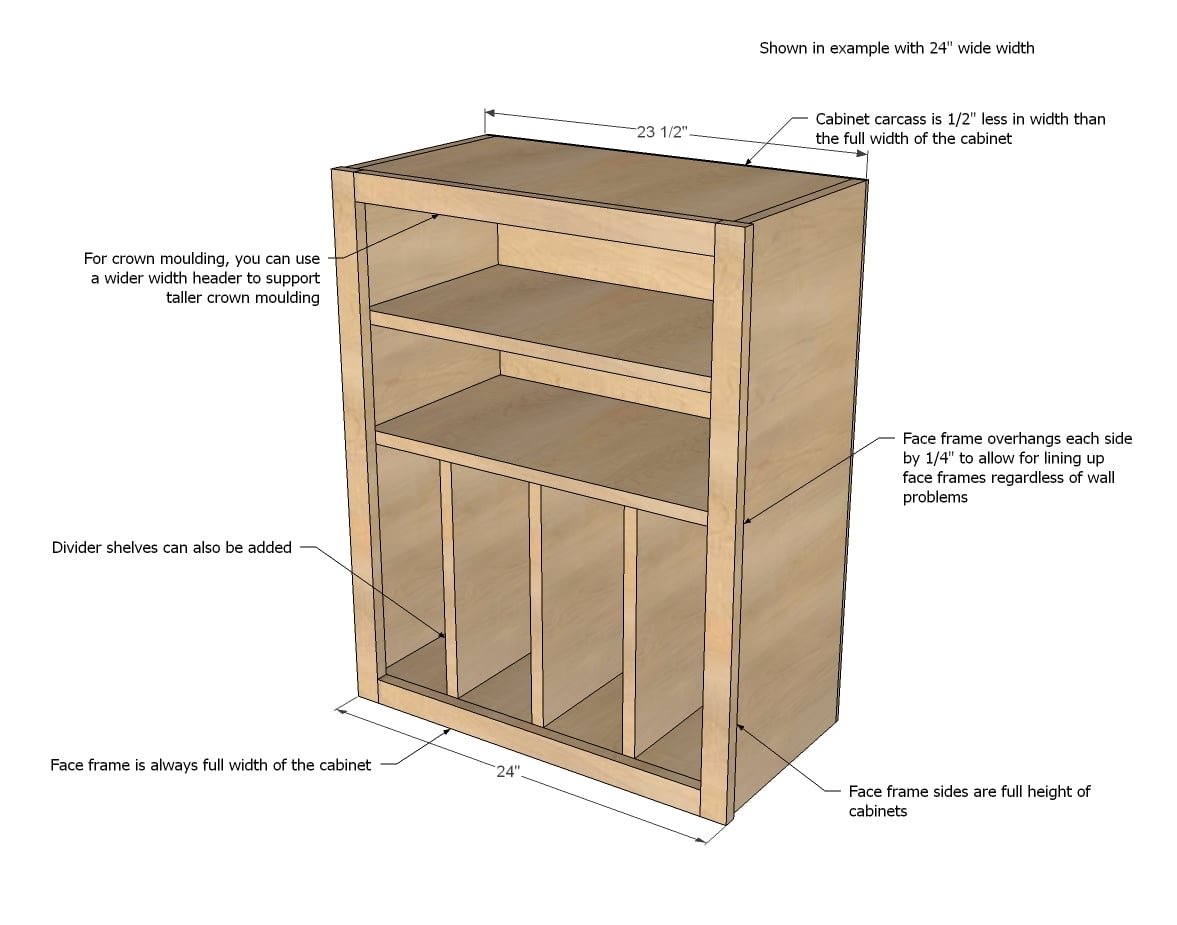
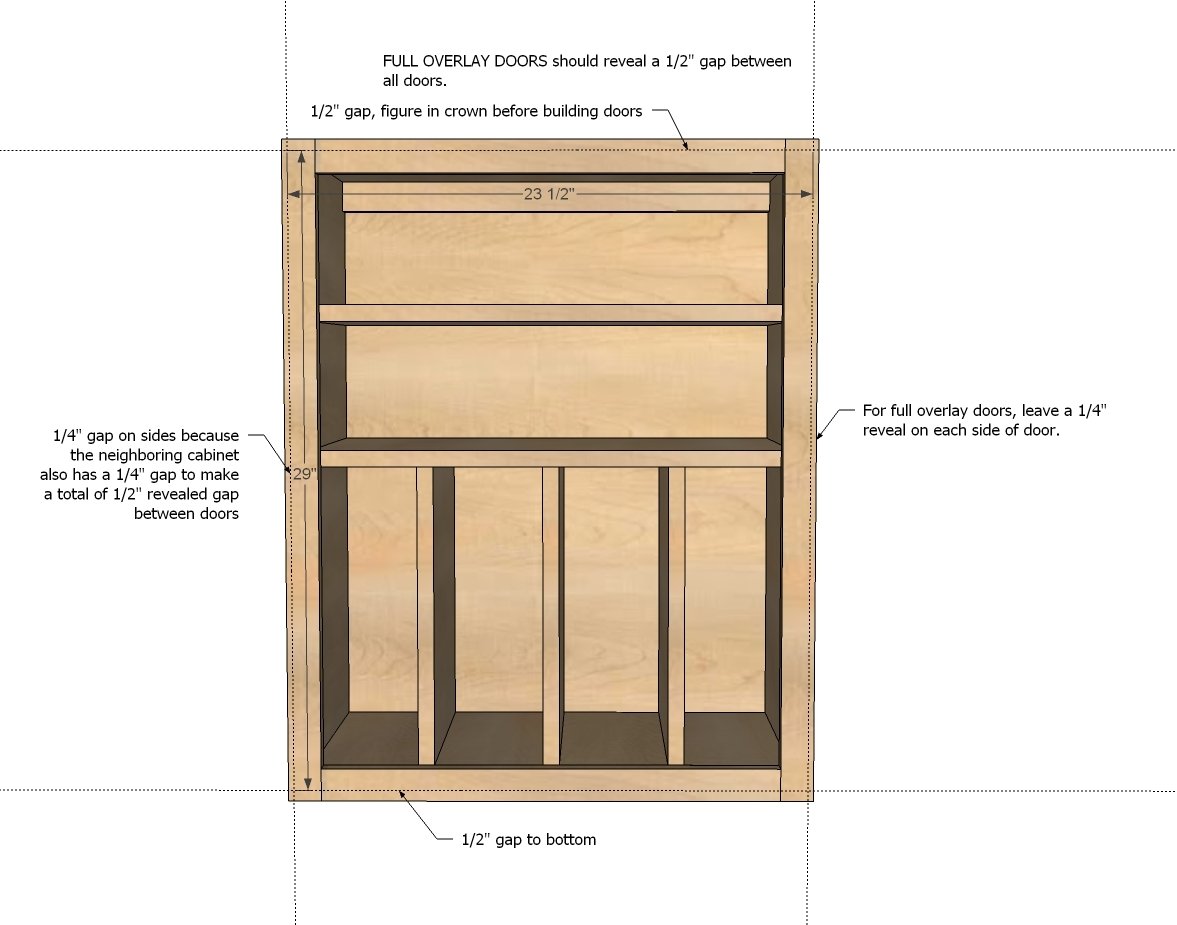
Take a second to sketch out each cabinet on graph paper and write out a cut list specific to each cabinet. Note that the face frame is the full size of the cabinet, but the carcass actually is 1/2" total less in width (1/4" on each side). This is done so you have a little wiggle room when installing the cabinets to get the face frames to line up perfectly, even if your wall is less than perfect. Before you cut out all of your cabinets, choose a smaller cabinet to start with and build it first to get the "hang" of it:)
Step 2
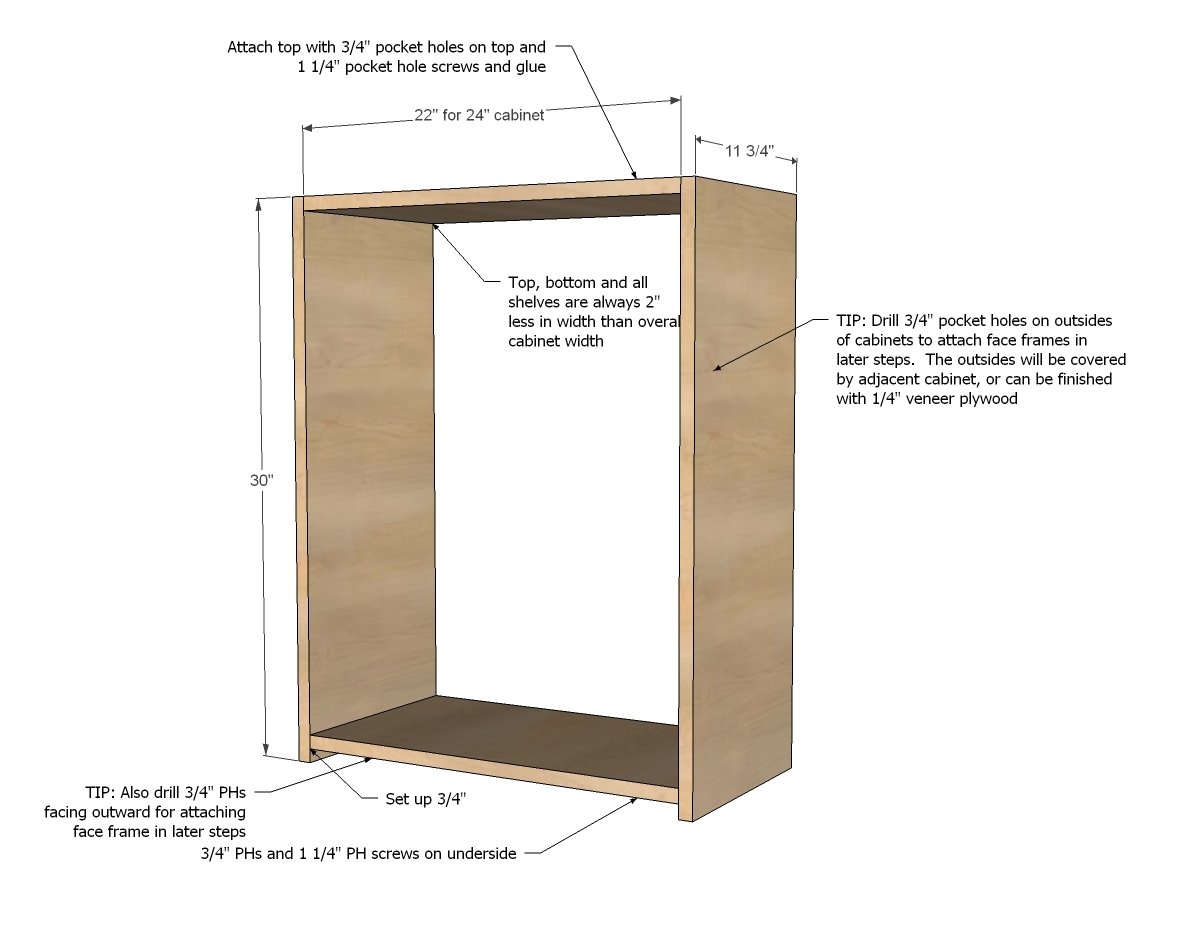
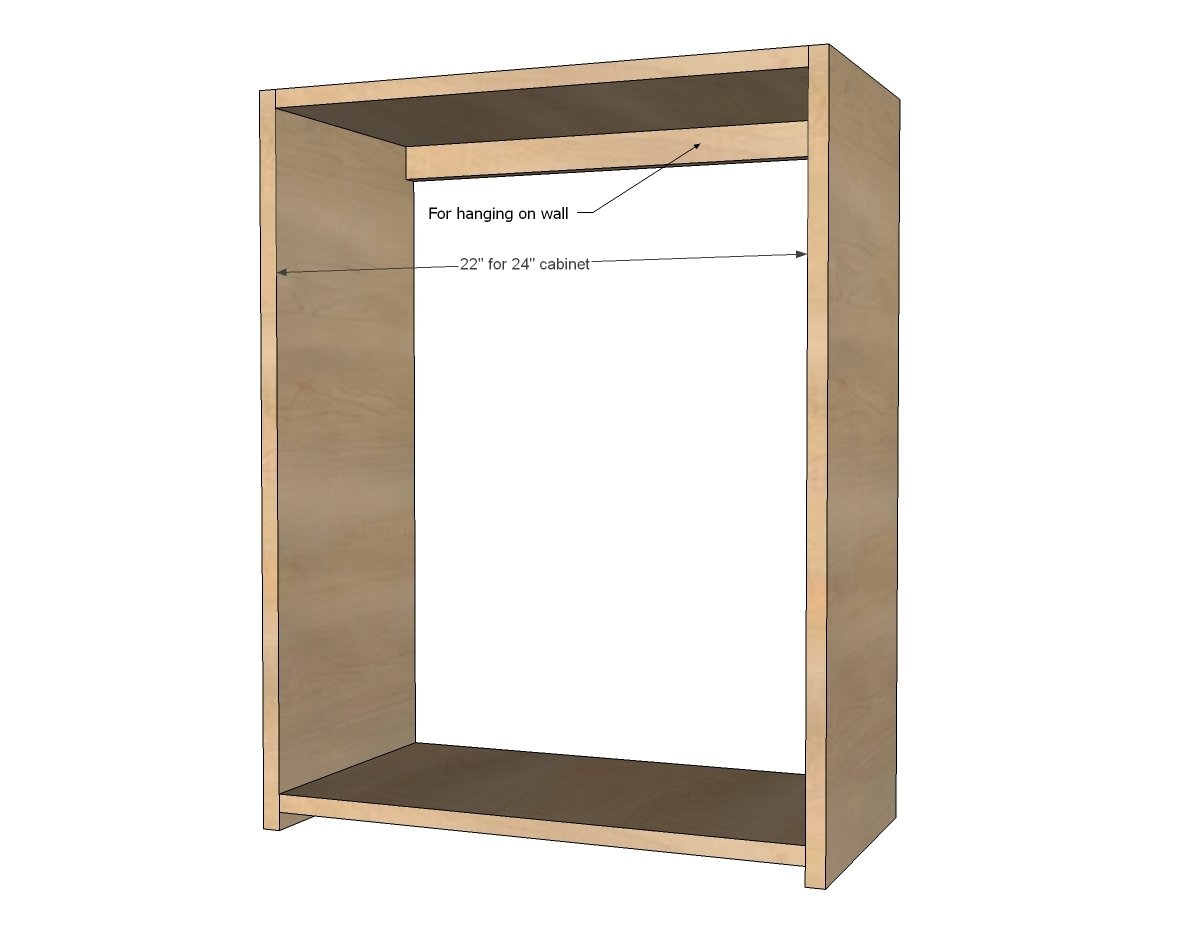
Next, build your box. I recommend drilling both pocket holes for attaching face frames and shelf pin holes for adjustable shelves at this stage or before assembly. TRICK: Place pocket holes to outsides as the adjacent cabinet will cover, and for the end cabinet, you will apply a 1/4" plywood veneer to end to finish off.
Step 3
You'll need something strong and solid to hang the cabinets on the wall. I like to add a small 1x2 cleat to top, inset, to give me something to screw the cabinet to the wall. You can add more of these under fixed shelves if desired. Easiest way to attach is 3/4" pocket holes on back side and 1 1/4" pocket hole screws.
Step 4
Square up your cabinet when you attach the back plywood. Use glue and nails - If find 1" nails to work pretty well, but this is all a matter of preference.
Step 5
Step 6
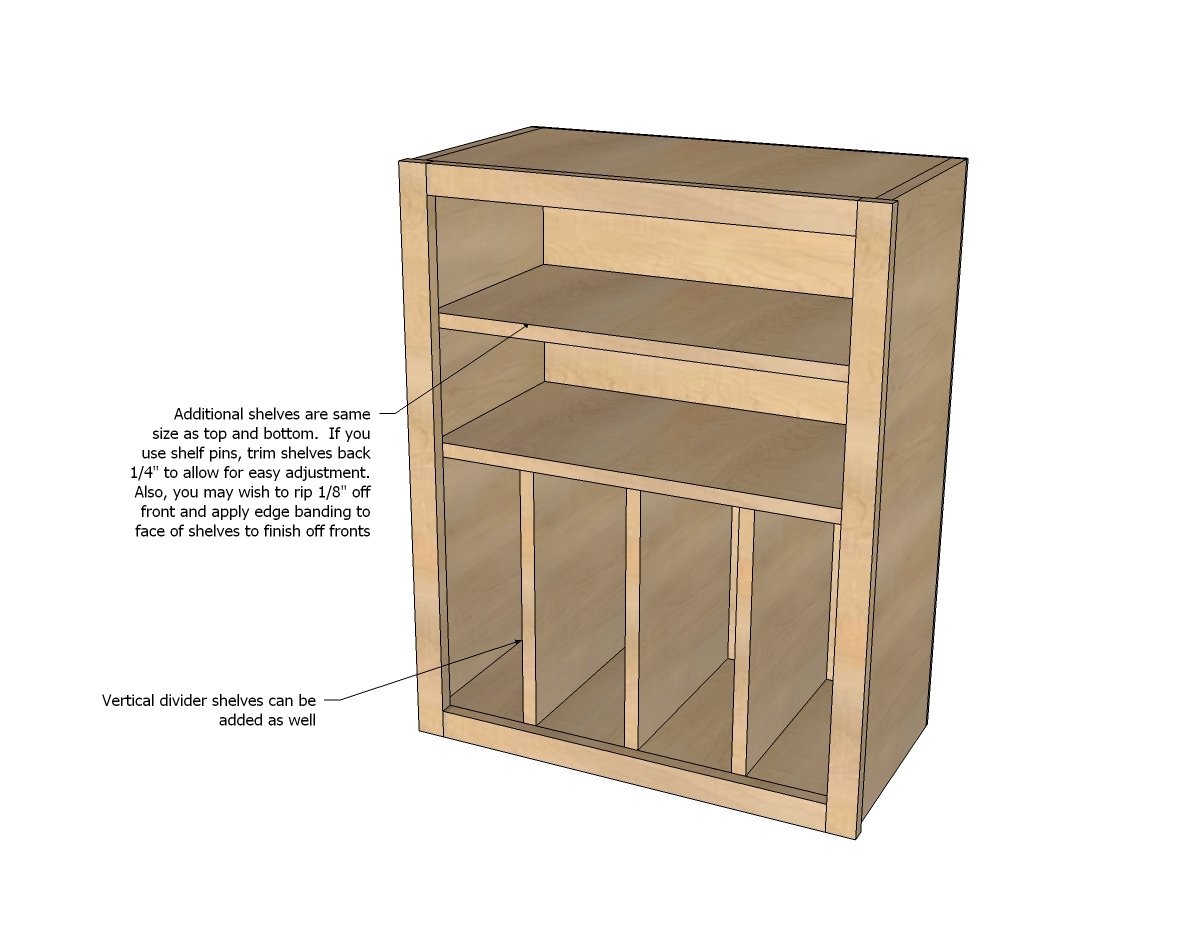
Add any shelves now. If you have fixed shelves, you can add with pocket holes. For adjustable shelves, I recommend trimming shelves down 1/4" to make them easy to place. Also, you can apply edge banding to fronts of shelves for stained finish (you may need to rip off a tiny bit of the shelf face edge or sand down to get the edge banding to fit in there).
Step 7
When you hang the wall cabinets, you just hang to a stud in the wall. This is very important. And also, it's a good idea to attach neighboring cabinets with cabinet screws.
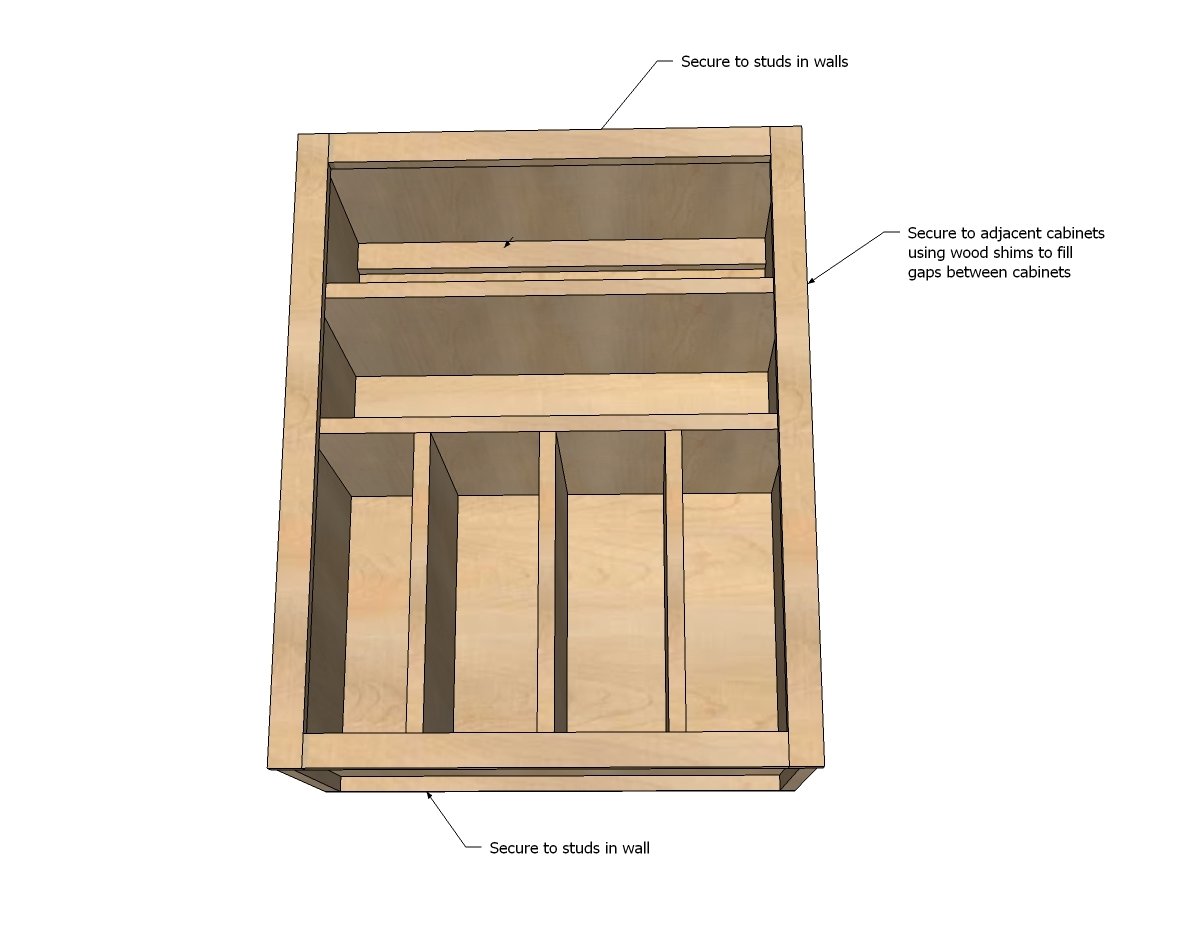
Step 8
For full overlay doors, the gaps need to be 1/2" between all doors. Use full overlay face frame euro style hinges for hanging the doors.
Finishing
Sand all surfaces, starting with a medium grit and finishing with fine. Wipe off the dust, fill any holes or gaps with wood filler, and sand smooth once dry. Apply primer if you're painting, then finish with your choice of paint or stain and seal with a durable clear topcoat. For outdoor projects, use exterior-rated primer, paint or stain, and sealer so the piece stands up to the weather.
Source (temporary): https://www.ana-white.com/woodworking-projects/wall-kitchen-cabinet-basic-carcass-plan