Wall Kitchen Corner Cabinet
to build a wall corner kitchen cabinet from
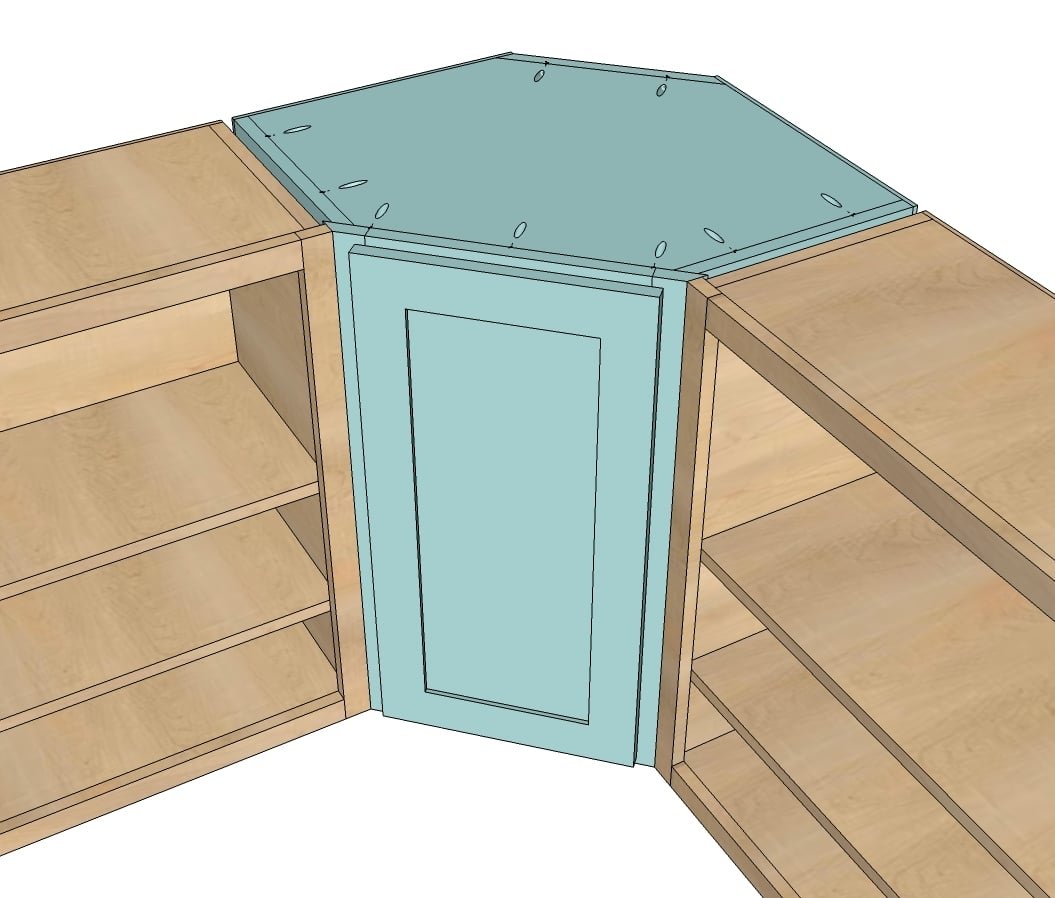
Specifications
| Project type | Kitchen Cabinet Plan, Accessories and Serving |
|---|---|
| Room | kitchen |
| Style | Farmhouse Furniture |
| Difficulty | Advanced |
Dimensions
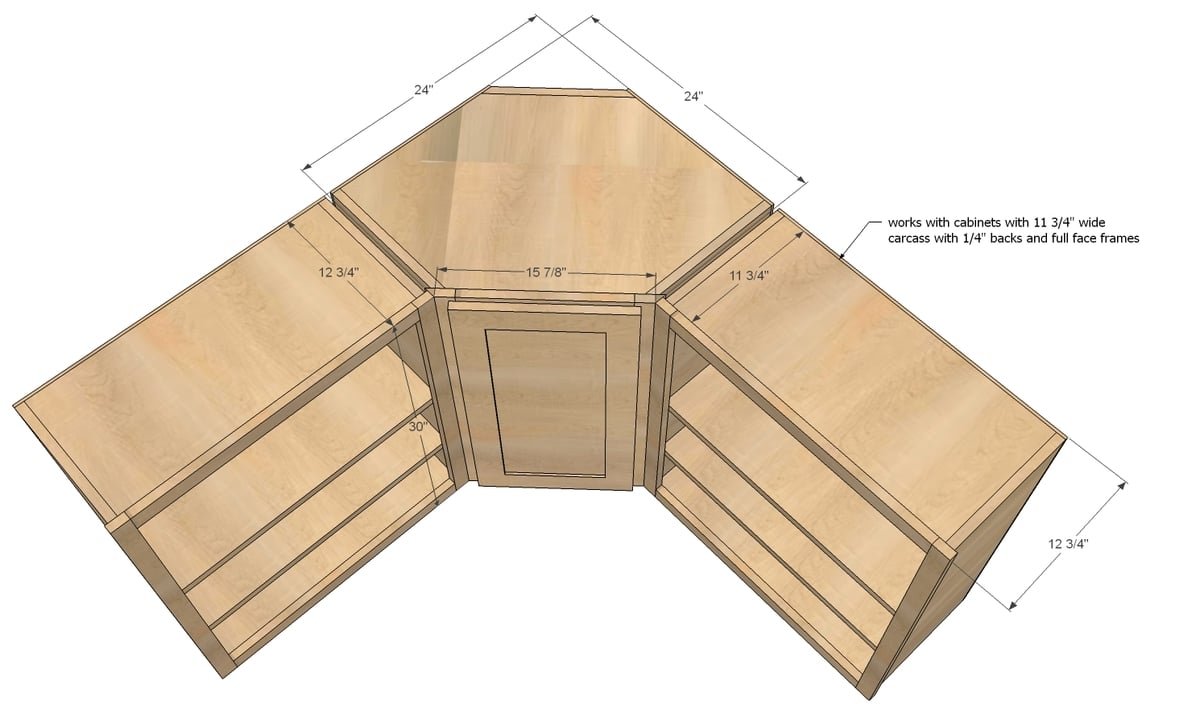
Use the size-specific shopping and cut lists below.
Shopping List
1 - sheet 3/4" hardwood cabinet grade plywood (shown in PureBond Oak)
1/2 - sheet 1/4" hardwood cabinet grade plywood for backs and door panel
8' - 1x2s in matching hardwood veneer
6' - 1x3s in matching hardwood veneers (you'll need another 8' for doors if doing doors)
Edge banding in matching veneer for finishing off shelf fronts
Shelf pins and shelf pin jig for attaching adjustable shelf
1 1/4" pocket hole screws
wood glue
1" finish nails for attaching back
1/2" Overlay Face Frame Concealed Euro Style Hinges (2) - get the ones that attach to the face frame
Cut List
CARCASS CUT LIST
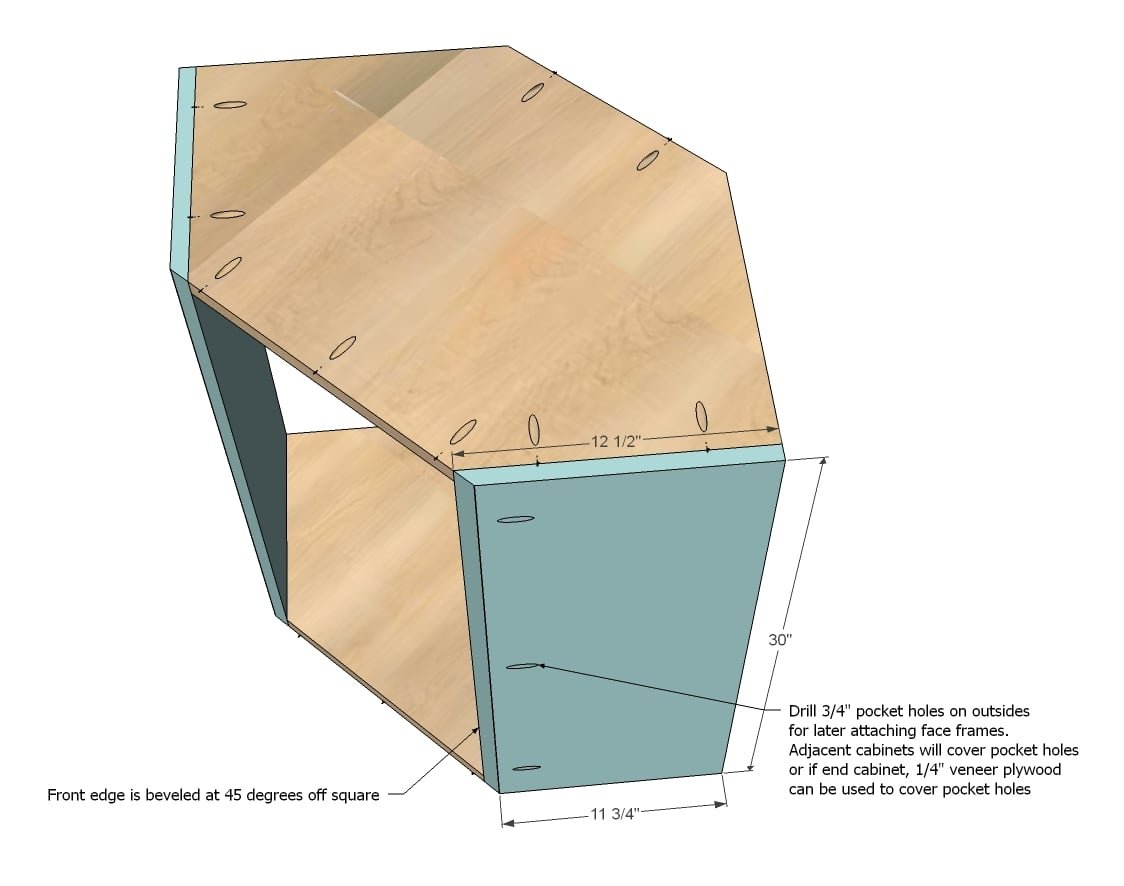
2 - 3/4" plywood @ 12 1/2" x 30" (one edge beveled at 45 degrees, widest width is 12 1/2")
2 - 3/4" plywood @ 32 1/8" x 18 3/4"
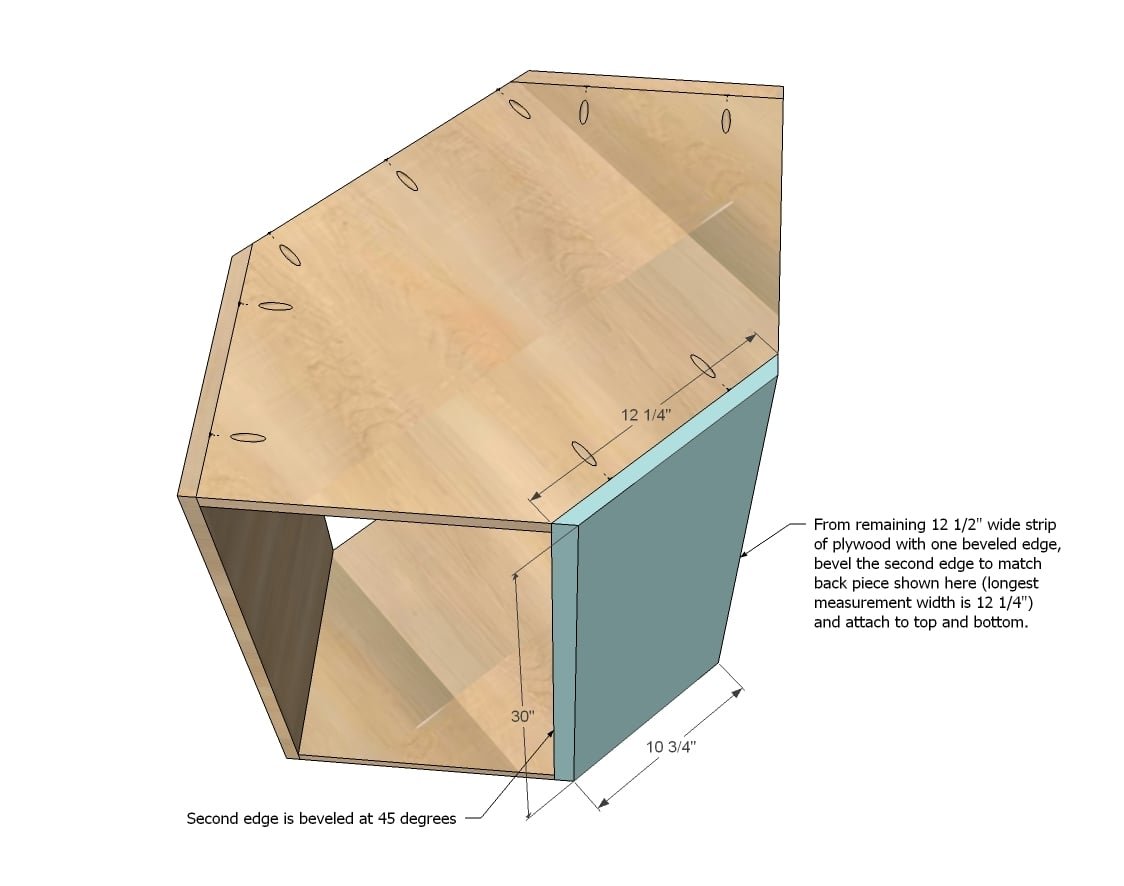
1 - 3/4" plywood @ 12 1/4" x 30" (both edges beveled at 45 degrees, widest width is 12 1/4" - cut this from 12 1/2" wide strip - see step 1)
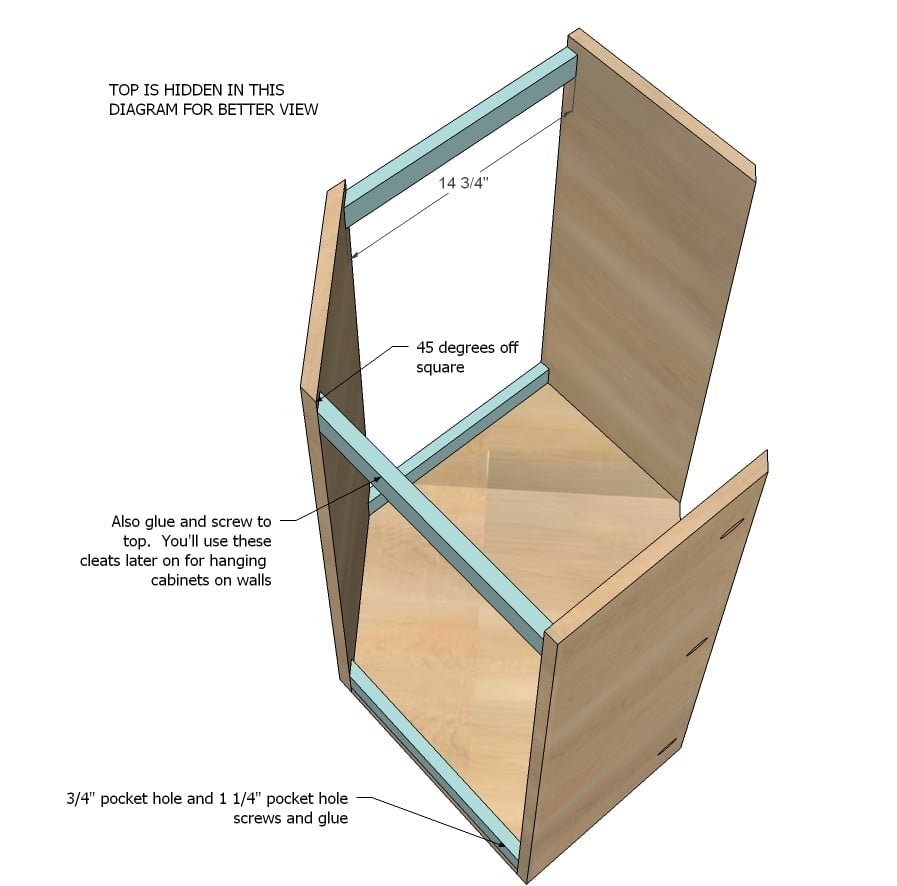
4 - 1x2 @ 14 3/4" (longest point measurement, one end cut at 45 degrees bevel)
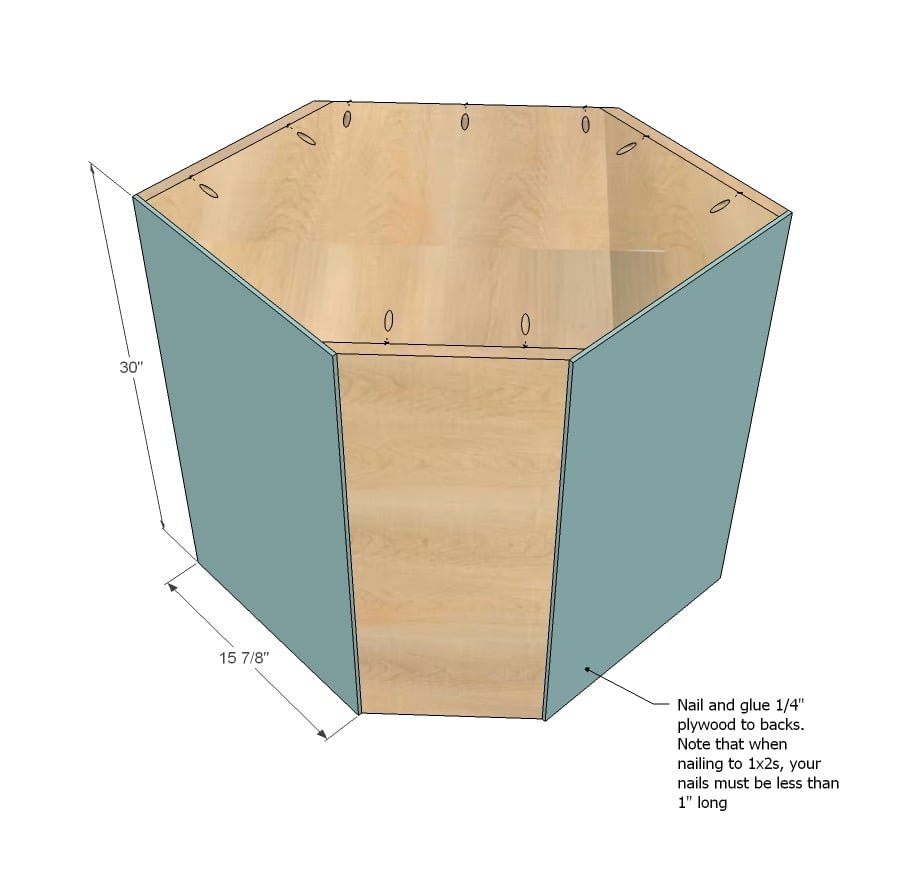
2 - 1/4" plywood @ 30" x 15 7/8"
FACE FRAME CUT LIST
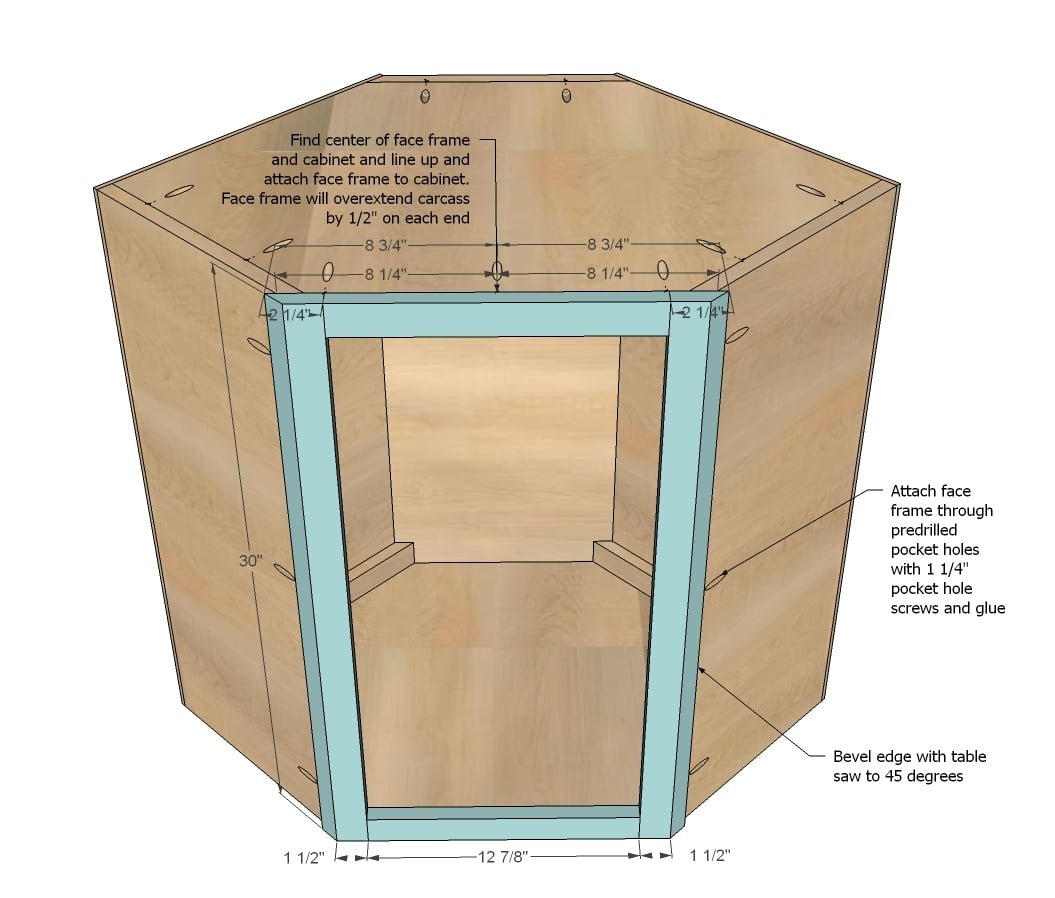
2 - 1x3 @ 30", ripped down at a 45 degree bevel to shortest side width of 1 1/2", longest side width of 2 1/4"
2 - 1x2 @ 12 7/8"
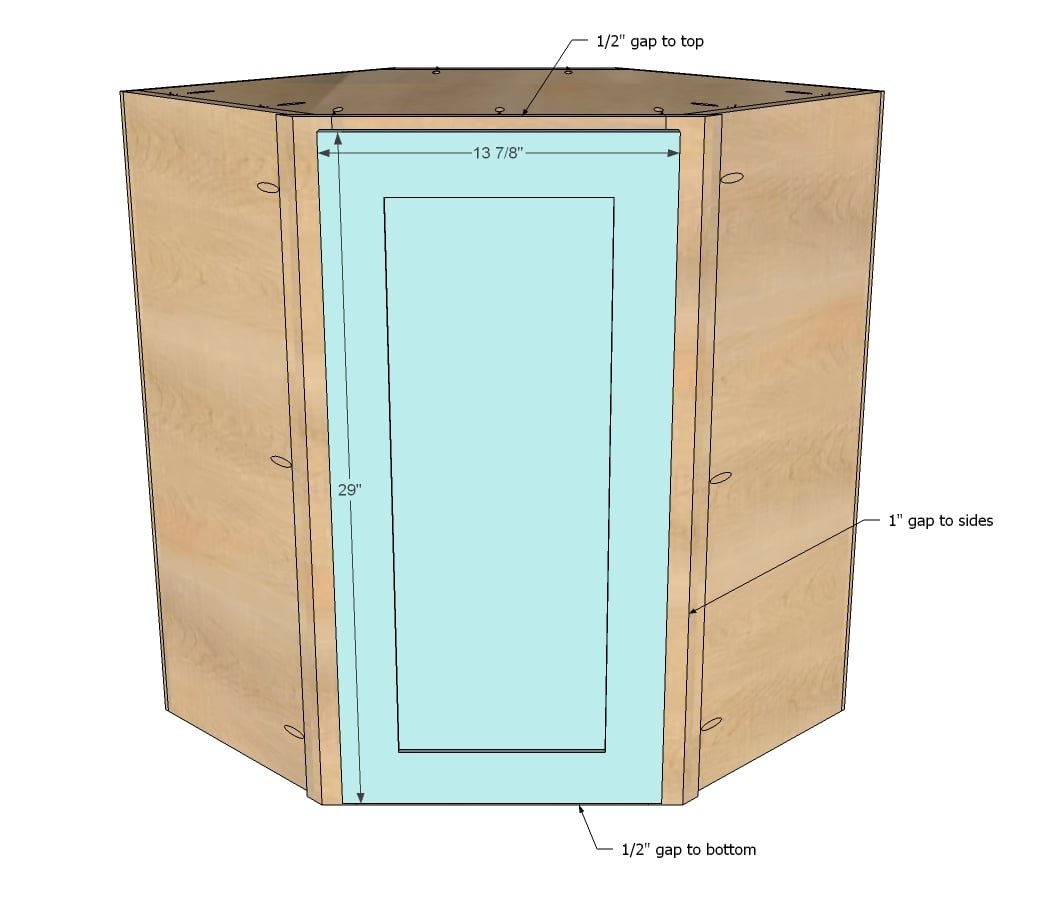
DOOR MADE TO FIT - Overall Dimensions 29" x 13 7/8" x 3/4"
Tools
- measuring tape
- square
- pencil
- safety glasses
- hearing protection
- kreg-jig
- drill
- compound miter saw
- table saw
- nailer
- sander
- level
Step-by-step Instructions
Step 1
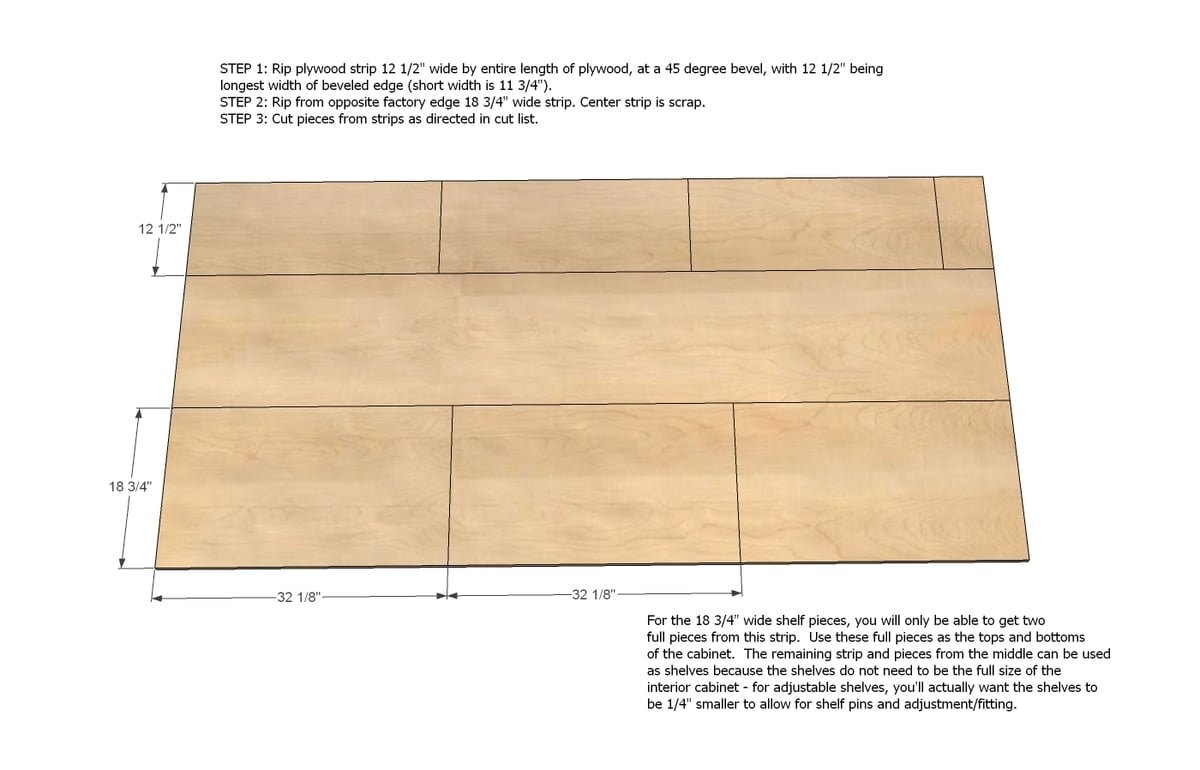
For this cabinet, I highly recommend a high quality table saw. But you could use a circular saw that cuts a beveled edge at 45 degrees off square. If you do this, you'll need to clamp a board to the plywood and follow it to get straight cuts like I do in this video. For table saw, set bevel to 45 degrees and rip plywood to a 12 1/2" width, with the 12 1/2" being the longest width on the beveled edge. I highly recommend taking a second to test cut on scrap before committing to cutting the full sheet. The short beveled edge width is 11 3/4". Once you have these cuts, you can cut the remaining strip 18 3/4" wide for the top, bottom, and shelf. The center is scrap, but you may wish to use it for additional shelves.
Step 2
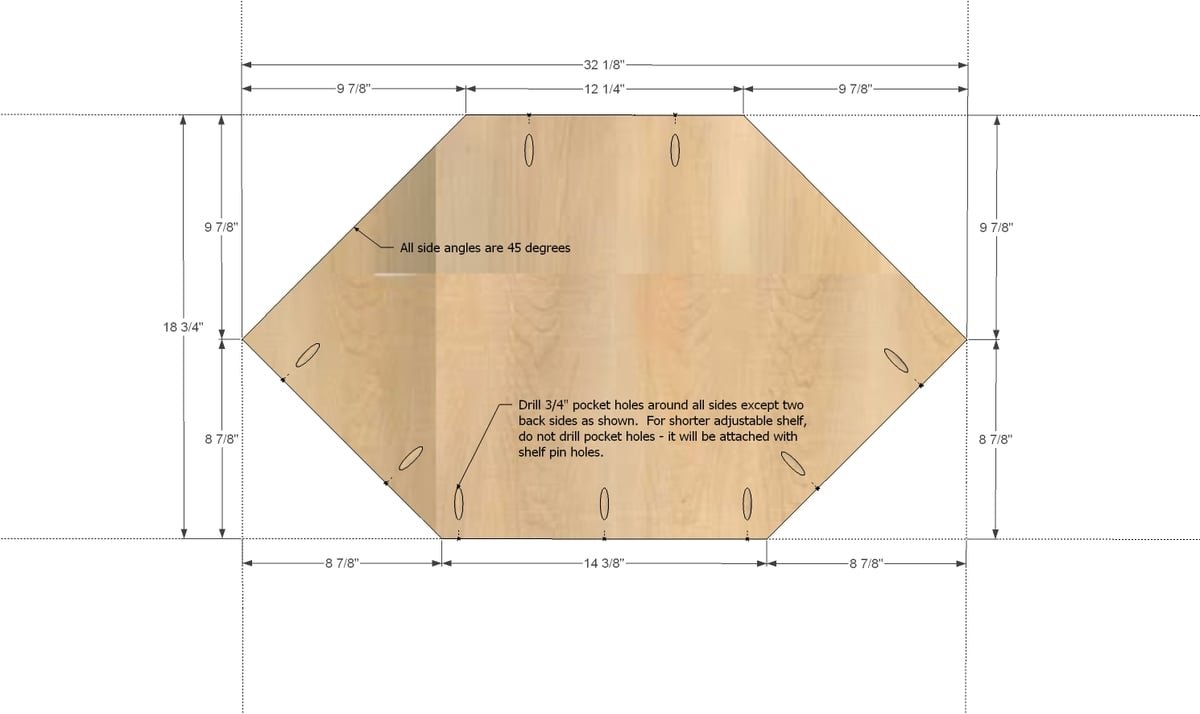
From the 18 3/4" wide strips, cut two pieces 32 1/8" long. Then from those pieces, mark as shown in this diagram, and cut out top and bottom. Use this also as a pattern to cut remaining shelf - it can be a little smaller, especially on the pointed corner ends, as it's just the shelf. For tops and bottoms, drill 3/4" pocket holes as shown in diagram.
Step 3
Next attach the sides to tops and bottoms. Drill the 3/4" pocket holes first facing forward for attaching face frames in later steps. The adjacent cabinet will cover the pocket holes, and if this is an end cabinet, you will put 1/4" plywood over the end to finish it out. For bottom shelf, place pocket holes on bottom where they will be hidden. For top shelf, place pocket holes on top where they will be hidden.
Step 4
Now add the back. You'll need to rip the back down so both edges are beveled from the plywood ripped for the sides. Then attach at top and bottom to the top and bottom of the carcass.
Step 5
Step 6
Now let's finish off the back with 1/4" plywood. Just nail and glue in place.
Next, build the face frame.
To keep the look consistent, you'll need to rip the 1x3 boards down to 1 1/2" reveal on the short side of the rip, beveling the edge at 45 degrees. Do some testing first to make sure your cuts are accurate. Then build your face frame with glue and pocket holes (3/4" and 1 1/4" screws). Attach to face of cabinet, with overhangs approximately 1/2" on each side.
Step 8
For a full overlay door, you'll need room for the door to swing open without hitting and adjacent cabinet. Build or purchase doors as shown sized above. To attach, you must use 1/2" Overlay Face Frame Concealed Euro Style hinges, at least two for 30" tall cabinets.
Step 9
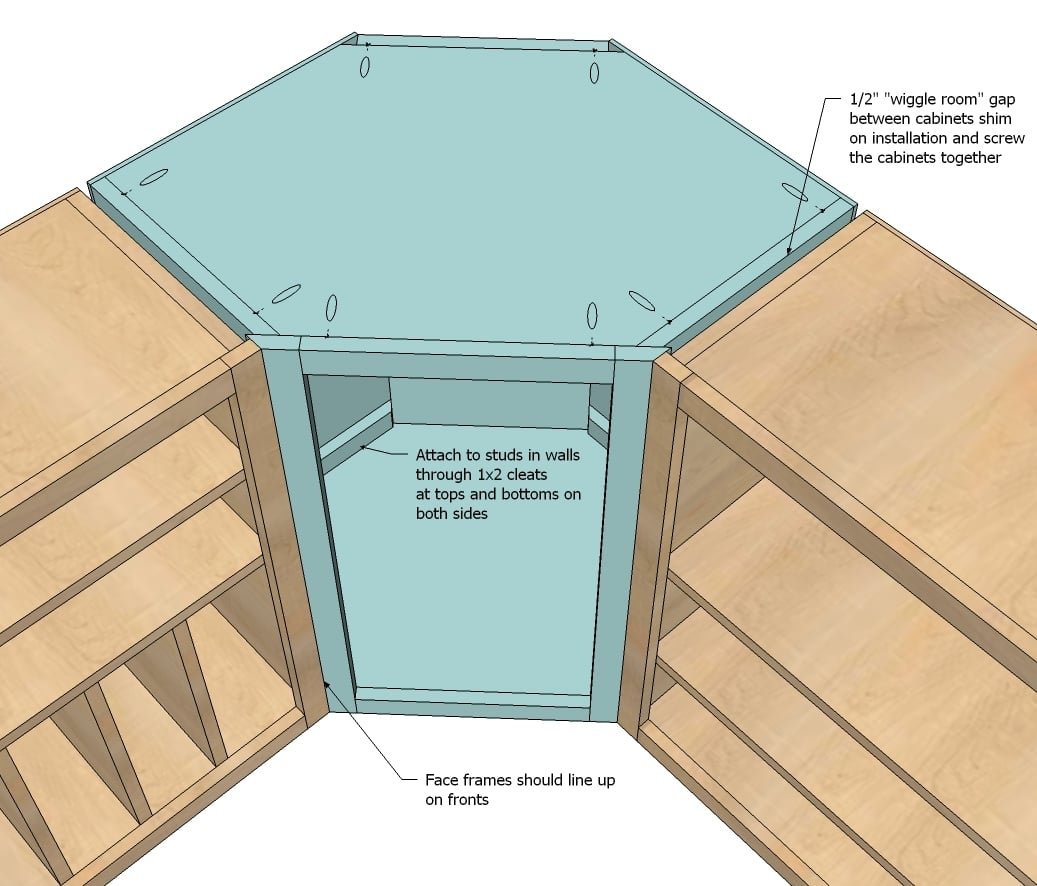
To install, you always start with the corner first and then work your way around. Corners need to be screwed to a stud in the wall and properly hung. I know these cabinets can get heavy, so make sure you have adequate support. There will be a 1/2" gap between cabinets to give you some "wiggle" room in case your walls aren't perfectly square. Just make sure the face frames line up perfectly. Shim the gap and screw cabinets together from insides. We also like to hide a few screws to connect face frame to face frame for a seamless look.
Finishing
Sand all surfaces, starting with a medium grit and finishing with fine. Wipe off the dust, fill any holes or gaps with wood filler, and sand smooth once dry. Apply primer if you're painting, then finish with your choice of paint or stain and seal with a durable clear topcoat. For outdoor projects, use exterior-rated primer, paint or stain, and sealer so the piece stands up to the weather.
Source (temporary): https://www.ana-white.com/woodworking-projects/wall-kitchen-corner-cabinet