Wall Mounted Can Organizer
This can organizer will free up so much pantry space! It fits 32 cans in less than 4" on the wall. The clear acrylic glass (in an off the shelf size) keeps cans visible so you know when you are running low, and automatically rotates older cans to the front. It's made of inexpensive 1x3s and is screwed together with a drill. It's super easy to hang too! and video walk you through the process, so even a novice DIYer can tackle this project!
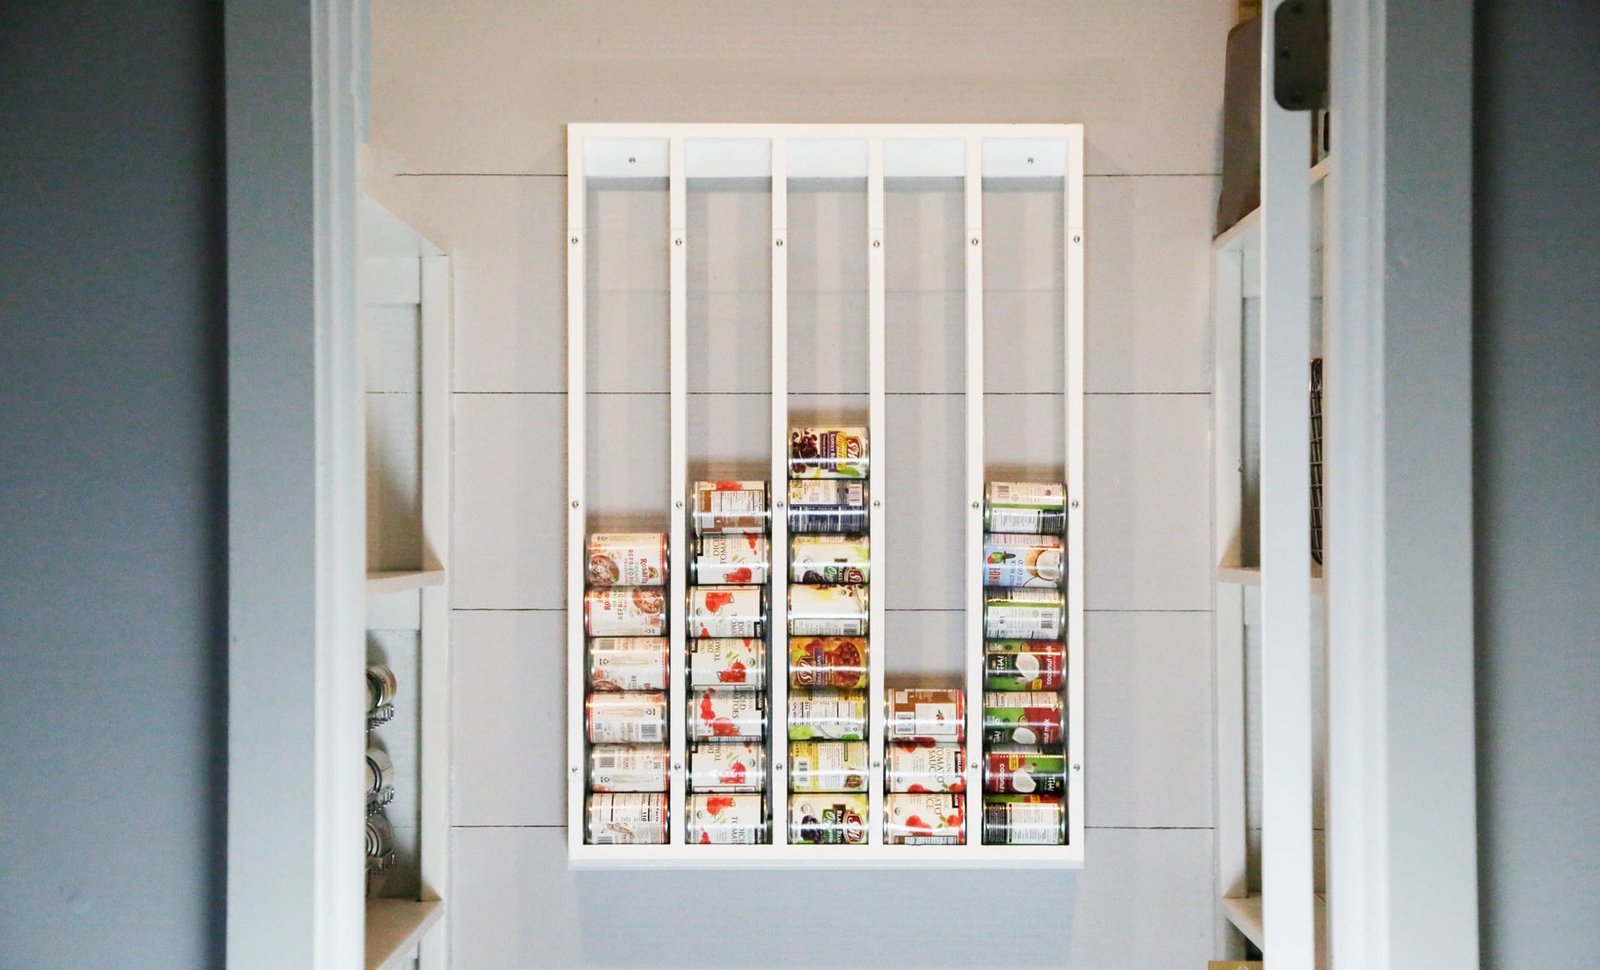
Specifications
| Project type | Kitchen Cabinet Plan, Accessories and Serving |
|---|---|
| Room | Storage Solutions |
| Difficulty | Intermediate |
| Estimated cost | Under $20 |
Dimensions
Use the size-specific shopping and cut lists below.
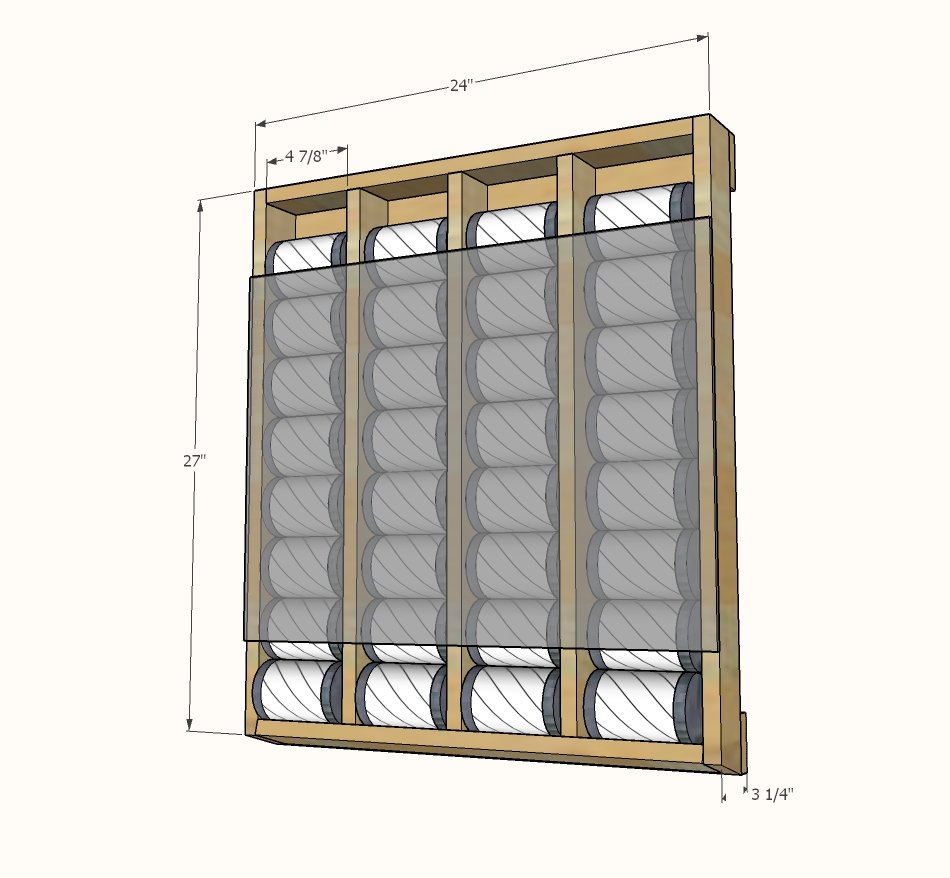
Shopping List
- 18" x 24" sheet of acrylic glass like this from Lowes or 1x2s and 1x3s can be substituted
- 3 - 1x3 @ 8 feet long
- 50 - 2" self tapping wood screws
- 15 - 1-1/4" wood screws for attaching acrylic glass to the front, make sure the back of the screw head is flat to avoid breaking the acrylic glass (can use Kreg Jig screws) - if using the acrylic glass
- Wood glue
Cut List
2 - 1x3 @ 22-1/2"
2 - 1x3 @ 27-3/4" - long point measurement, one end cut at 15 degrees off square
3 - 1x3 @ 26-1/8" - long point measurement, one end cut at 15 degrees off square
2 - 1x3 @ 24"
Tools
- measuring tape
- square
- pencil
- safety glasses
- hearing protection
- drill
- compound miter saw
- sander
- countersink drill bit
Step-by-step Instructions
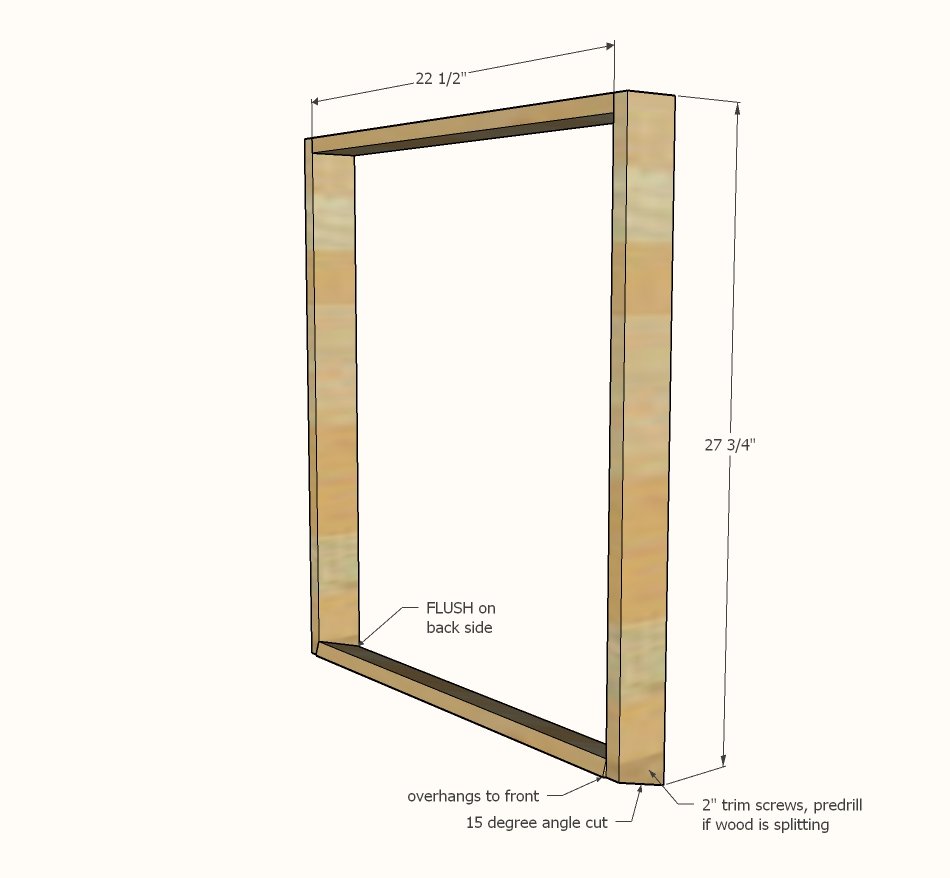
Attach sides to top and bottom pieces.
Note that the back should be completely flush, the front of the angled bottom will overhang. Use glue and 2" screws. If wood is splitting, predrill holes with a drill bit sized to match the screw shaft (not including the threads). Use the speed square to adjust the project for square before glue fully dries.
Step 2
Add the vertical dividers, two screws on top and two on bottom.
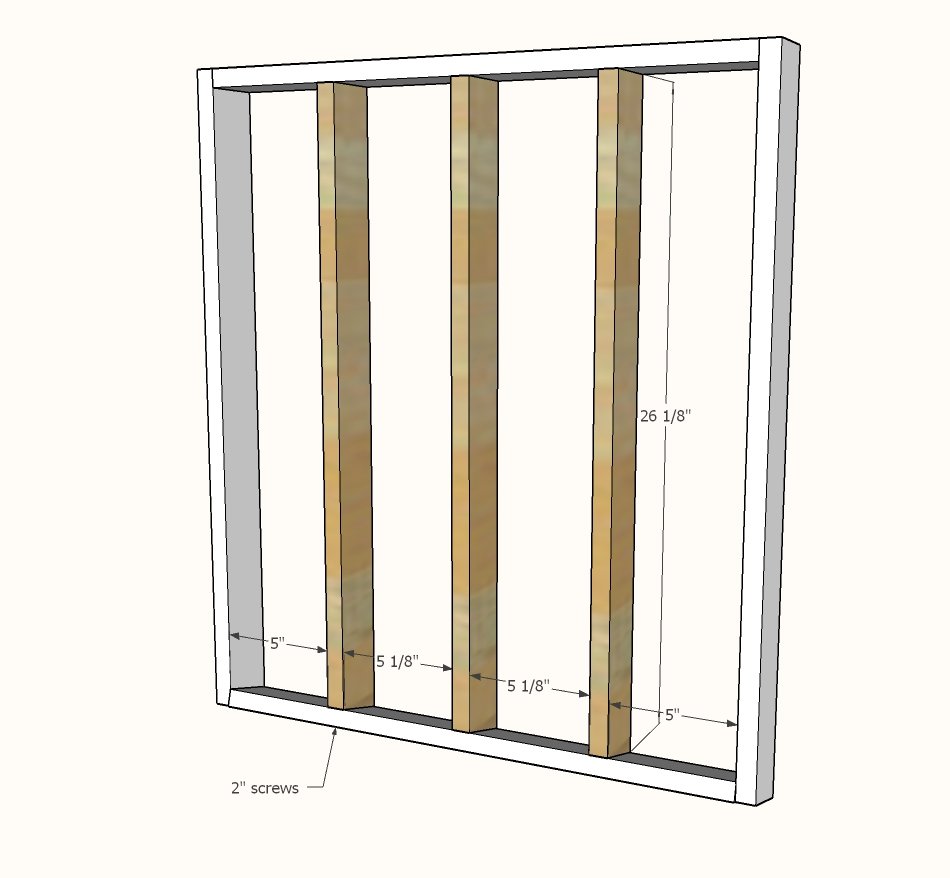
Step 3
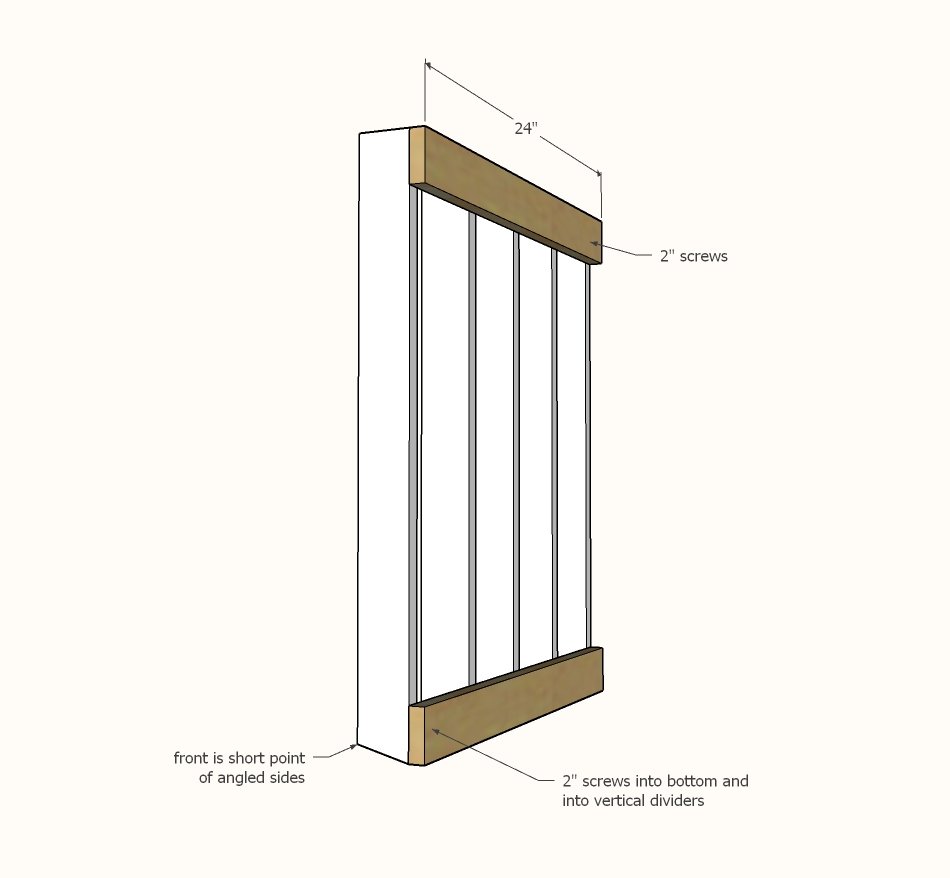
The back supports are very important to give you something to hang the canned food organizer on the wall. Apply ample glue. Attach with 2" screws. Make sure you attach with screws into the bottom angled 1x3 as this board will bear all the weight of the canned food.
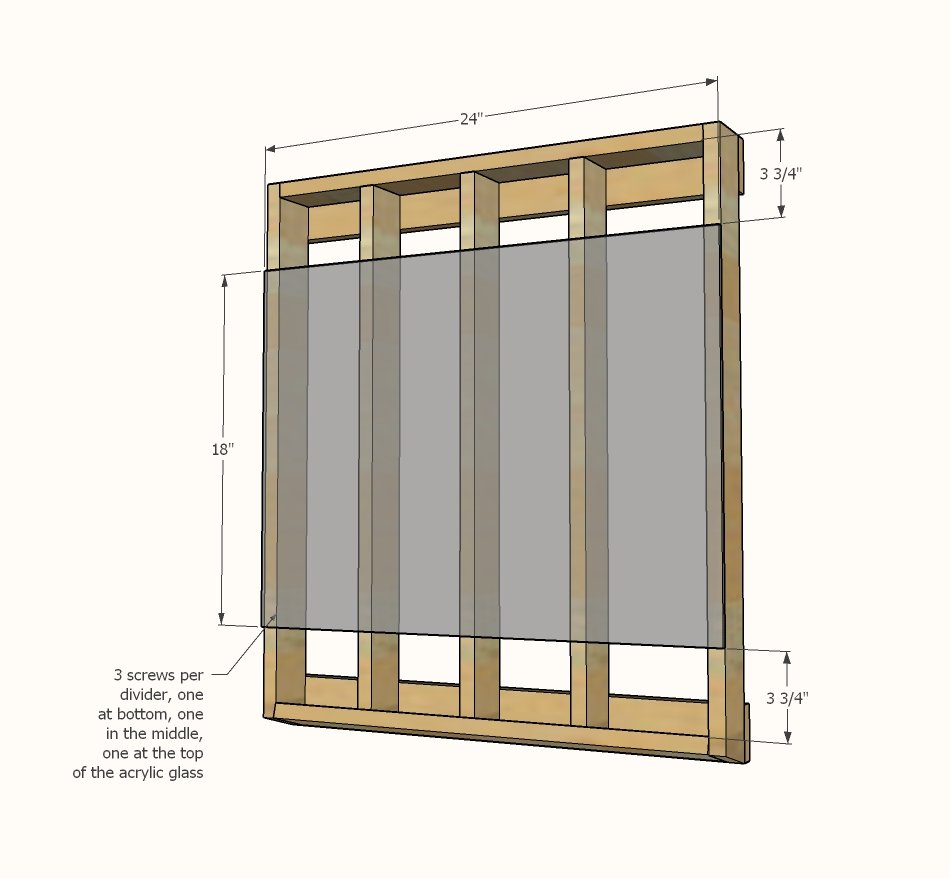
Place acrylic glass on top.
Predrill holes sized bigger than the screw (including threads) through the acrylic glass (but not fully into the wood) over every vertical divider, one at top, one at bottom, and one in the middle. Attach with the 1-1/4" screws.
Step 5
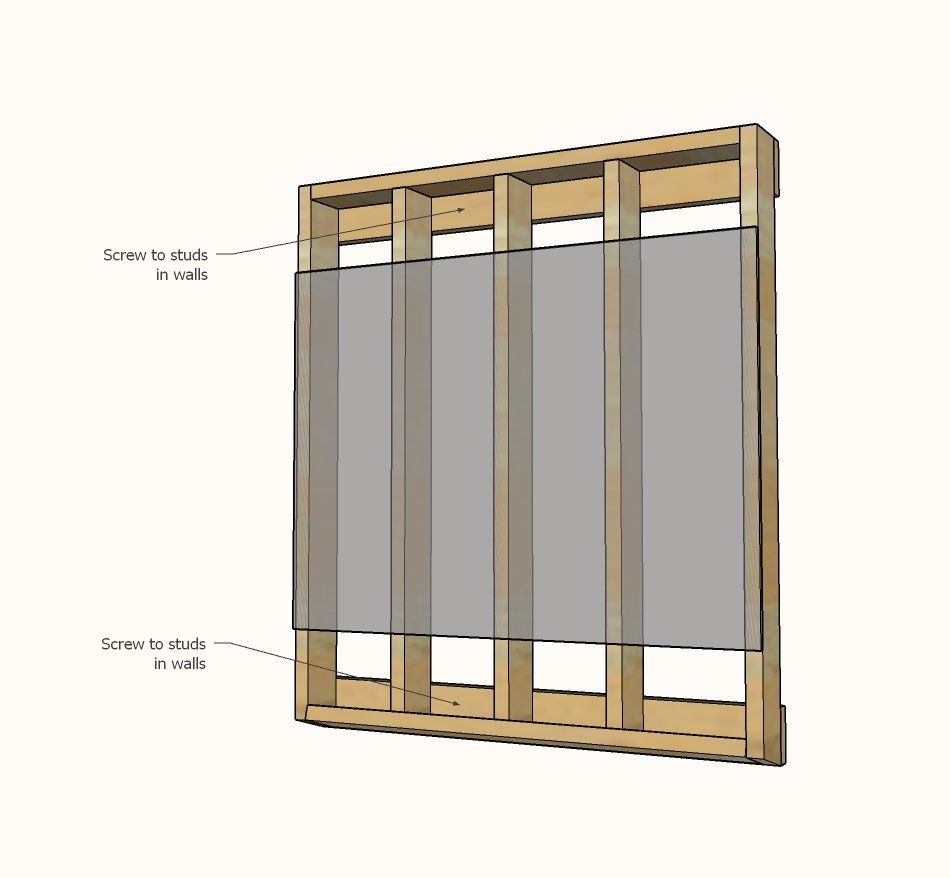
Hang the organizer to studs in the wall.
Finishing
Sand all surfaces, starting with a medium grit and finishing with fine. Wipe off the dust, fill any holes or gaps with wood filler, and sand smooth once dry. Apply primer if you're painting, then finish with your choice of paint or stain and seal with a durable clear topcoat. For outdoor projects, use exterior-rated primer, paint or stain, and sealer so the piece stands up to the weather.
Source (temporary): https://www.ana-white.com/woodworking-projects/wall-mounted-can-organizer