Wall Mounted Rifle Storage Rack
Safely store and display your firearms with this simple, space-efficient rifle rack. This rack fits most rifles and shotguns ranging from 36" to 48" in length, keeping them upright, organized, and easy to access. This is a beginner-friendly build made with straight cuts and common materials—perfect for a quick weekend project. The design keeps barrels properly spaced while providing solid support at the base. Best part? It’s fully customizable. Adjust the spacing, height, or overall width to fit your specific collection—whether you’re storing compact rifles or longer hunting guns. ✔ Holds up to 10 rifles or shotguns ✔ Fits most guns 36"–48" long ✔ Easy, beginner-friendly build ✔ Clean, safe vertical storage ✔ Customizable for your needs A practical, good-looking solution for gun storage that you can build yourself.
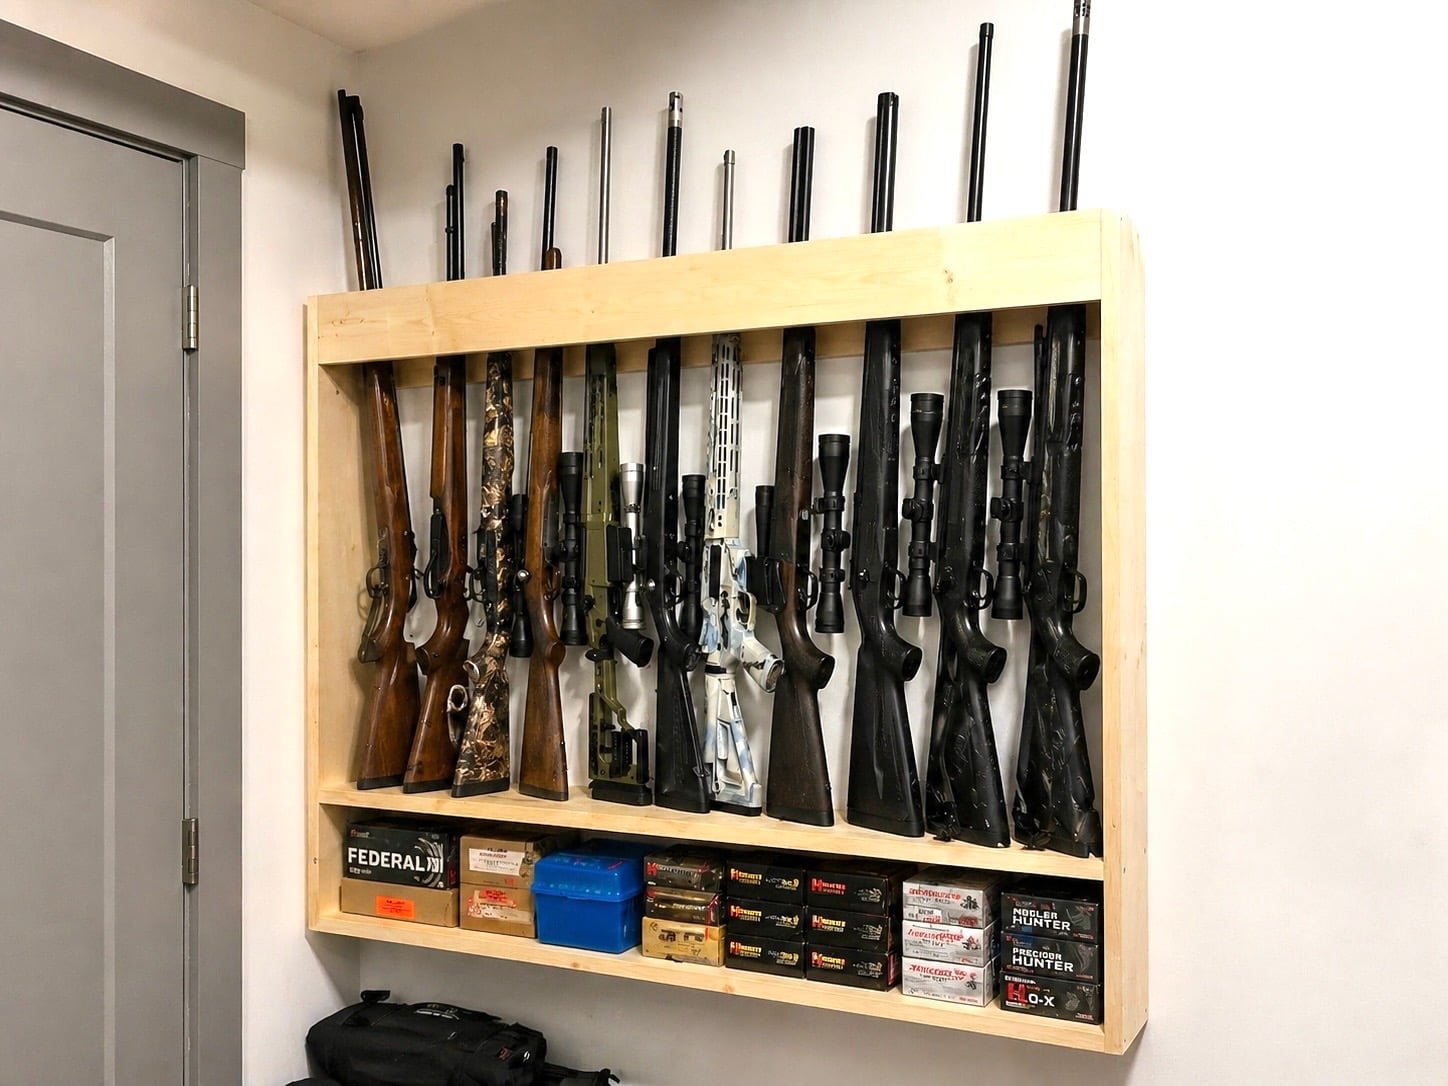
Specifications
| Project type | Workshop and Garage Plans |
|---|---|
| Room | Storage Solutions |
| Difficulty | Beginner Projects |
Dimensions
Use the size-specific shopping and cut lists below.
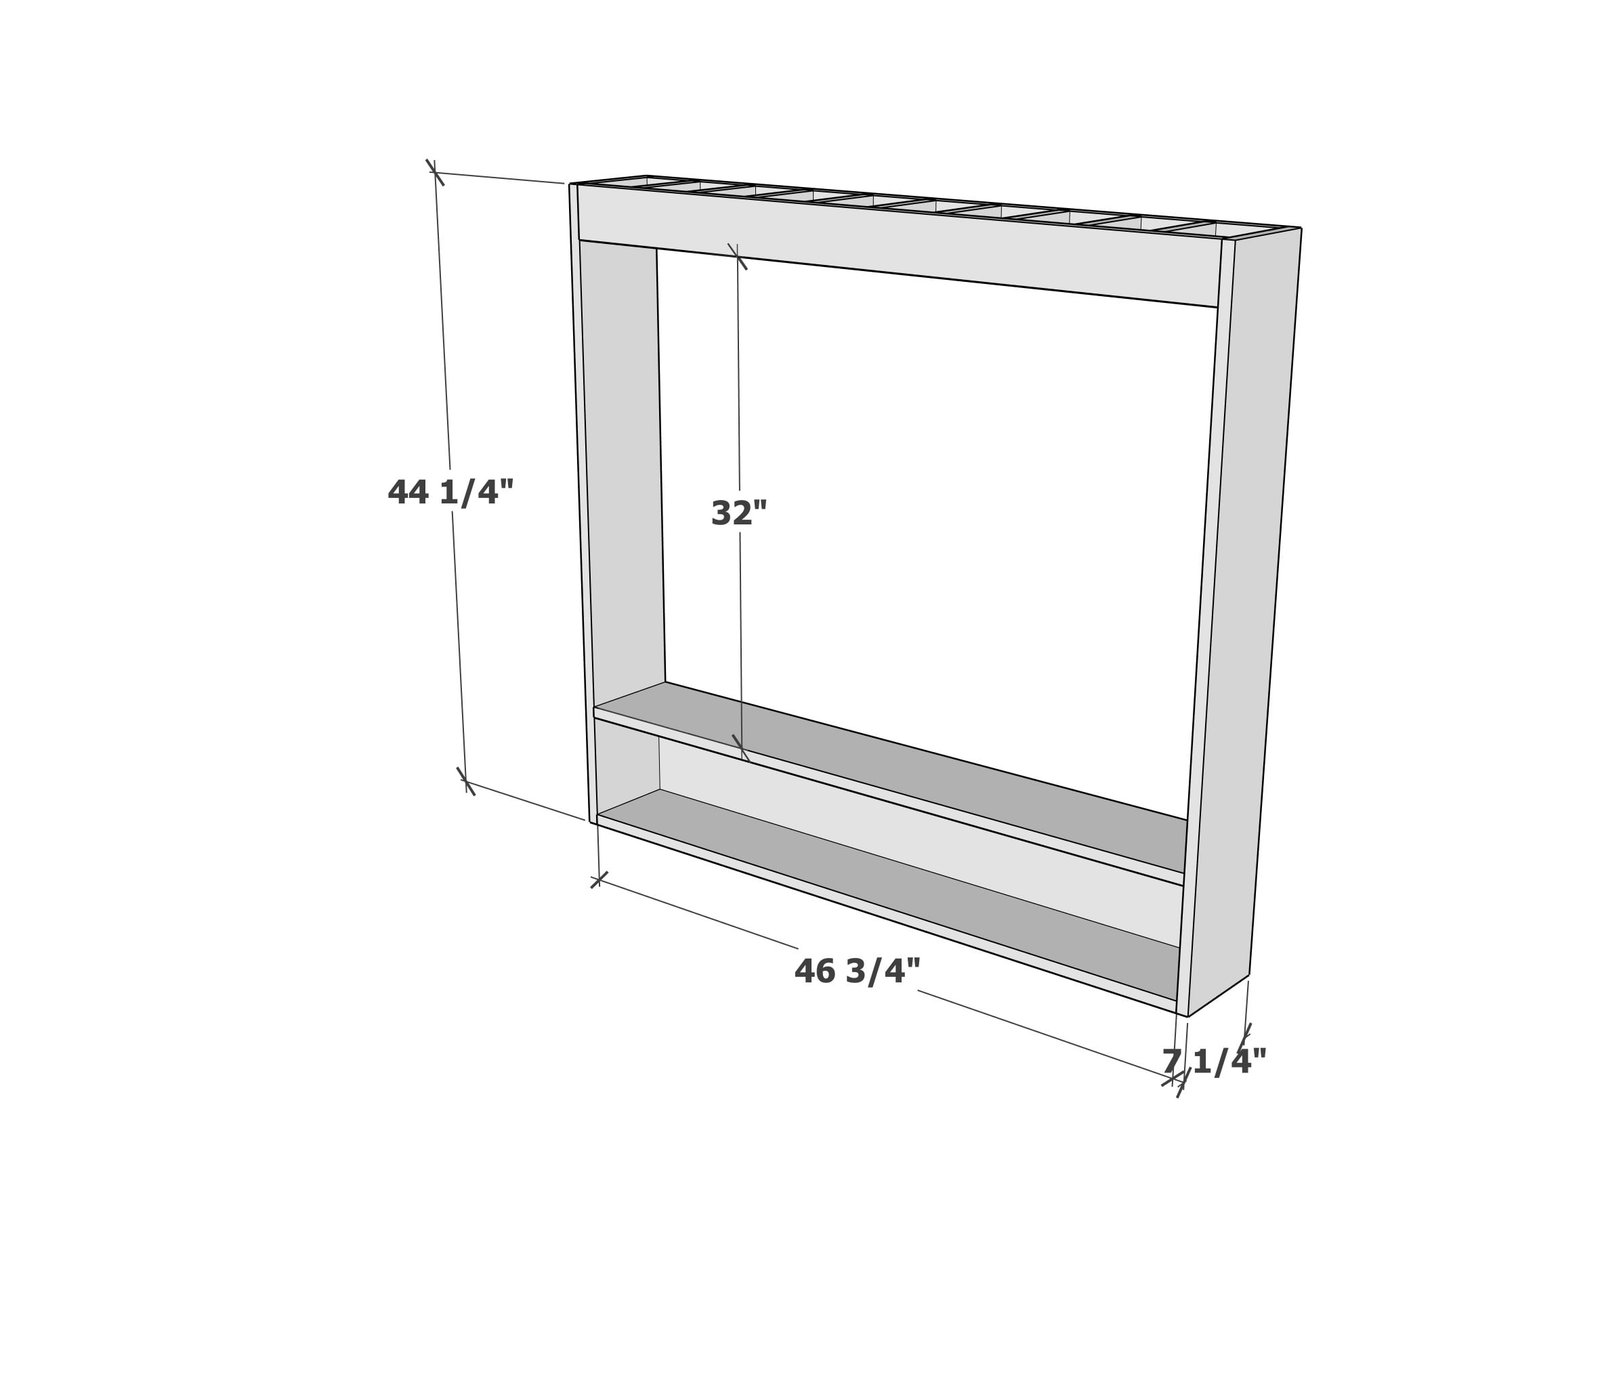
Shopping List
- 1 - 1x8 @ 12 feet long
- 1 - 1x8 @ 8 feet long
- 2 - 1x4 @ 8 feet long
- 1-1/4" pocket hole screws
- 1-1/4" brad nails
- wood glue
- 3" self tapping wood screws to hang to studs in wall (9)
Cut List
- 2 - 1x8 @ 44-1/4" - sides
- 3 - 1x8 @ 46-3/4" - bottom shelf
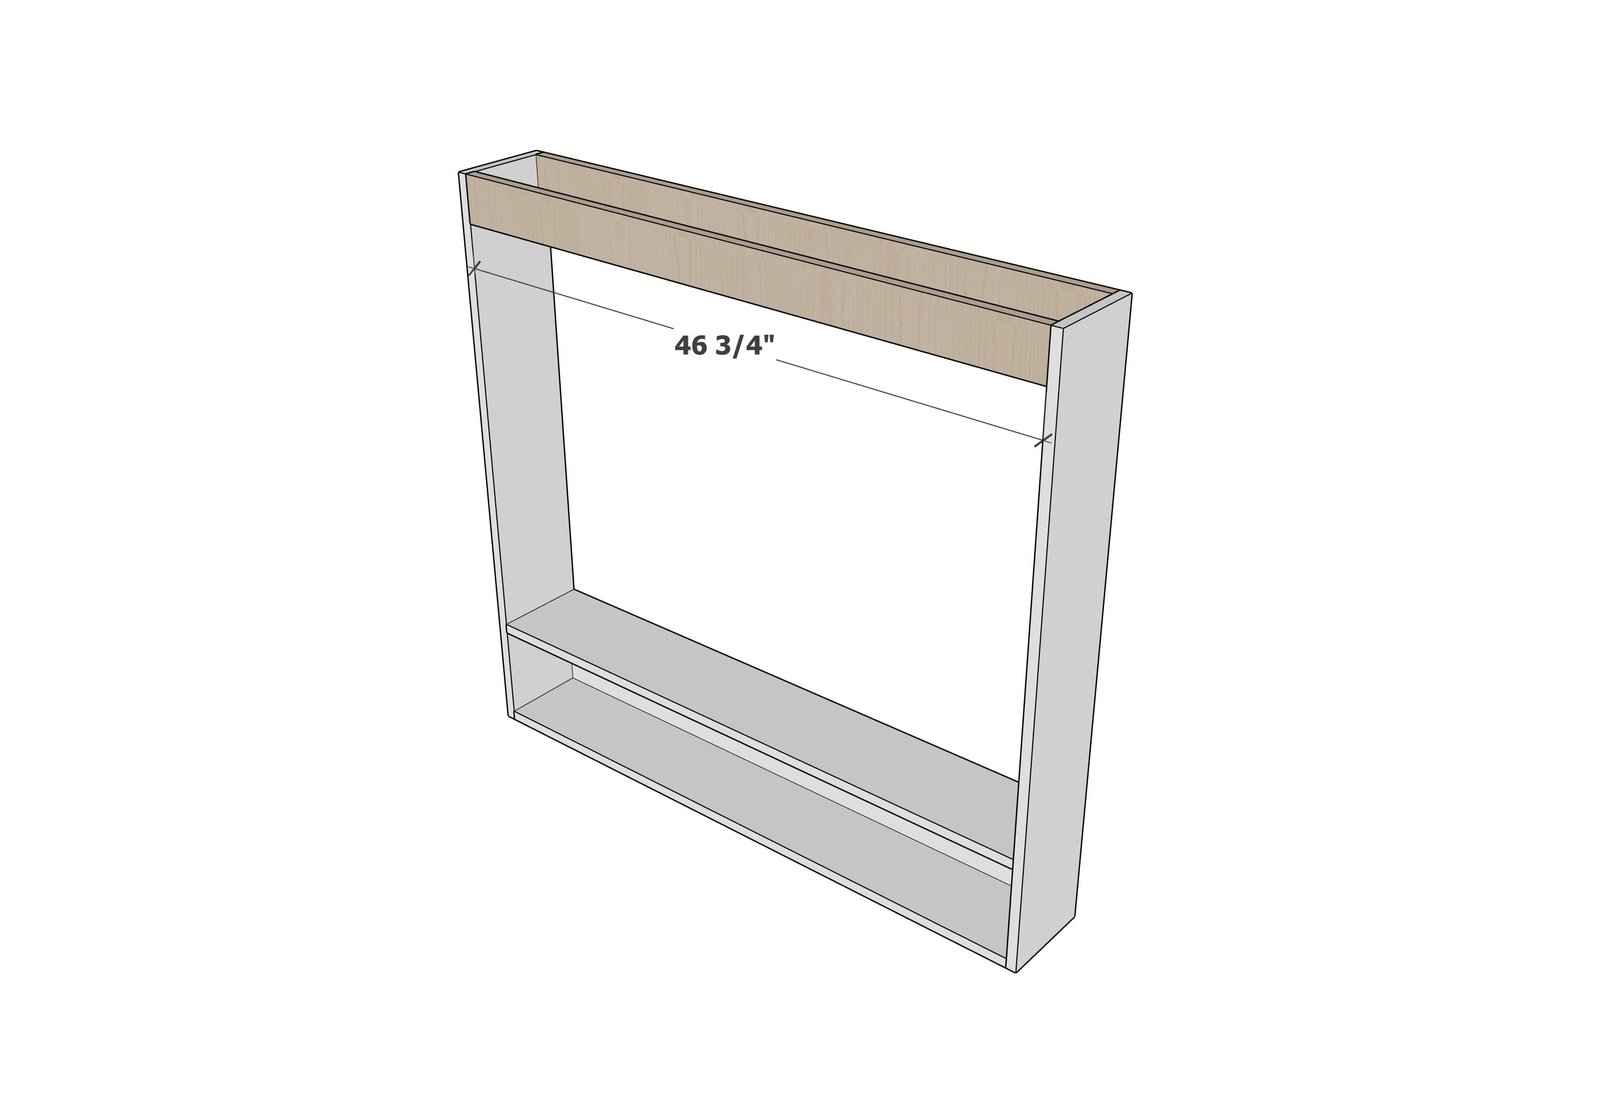
- 2 - 1x4 @ 46-3/4" - top holder
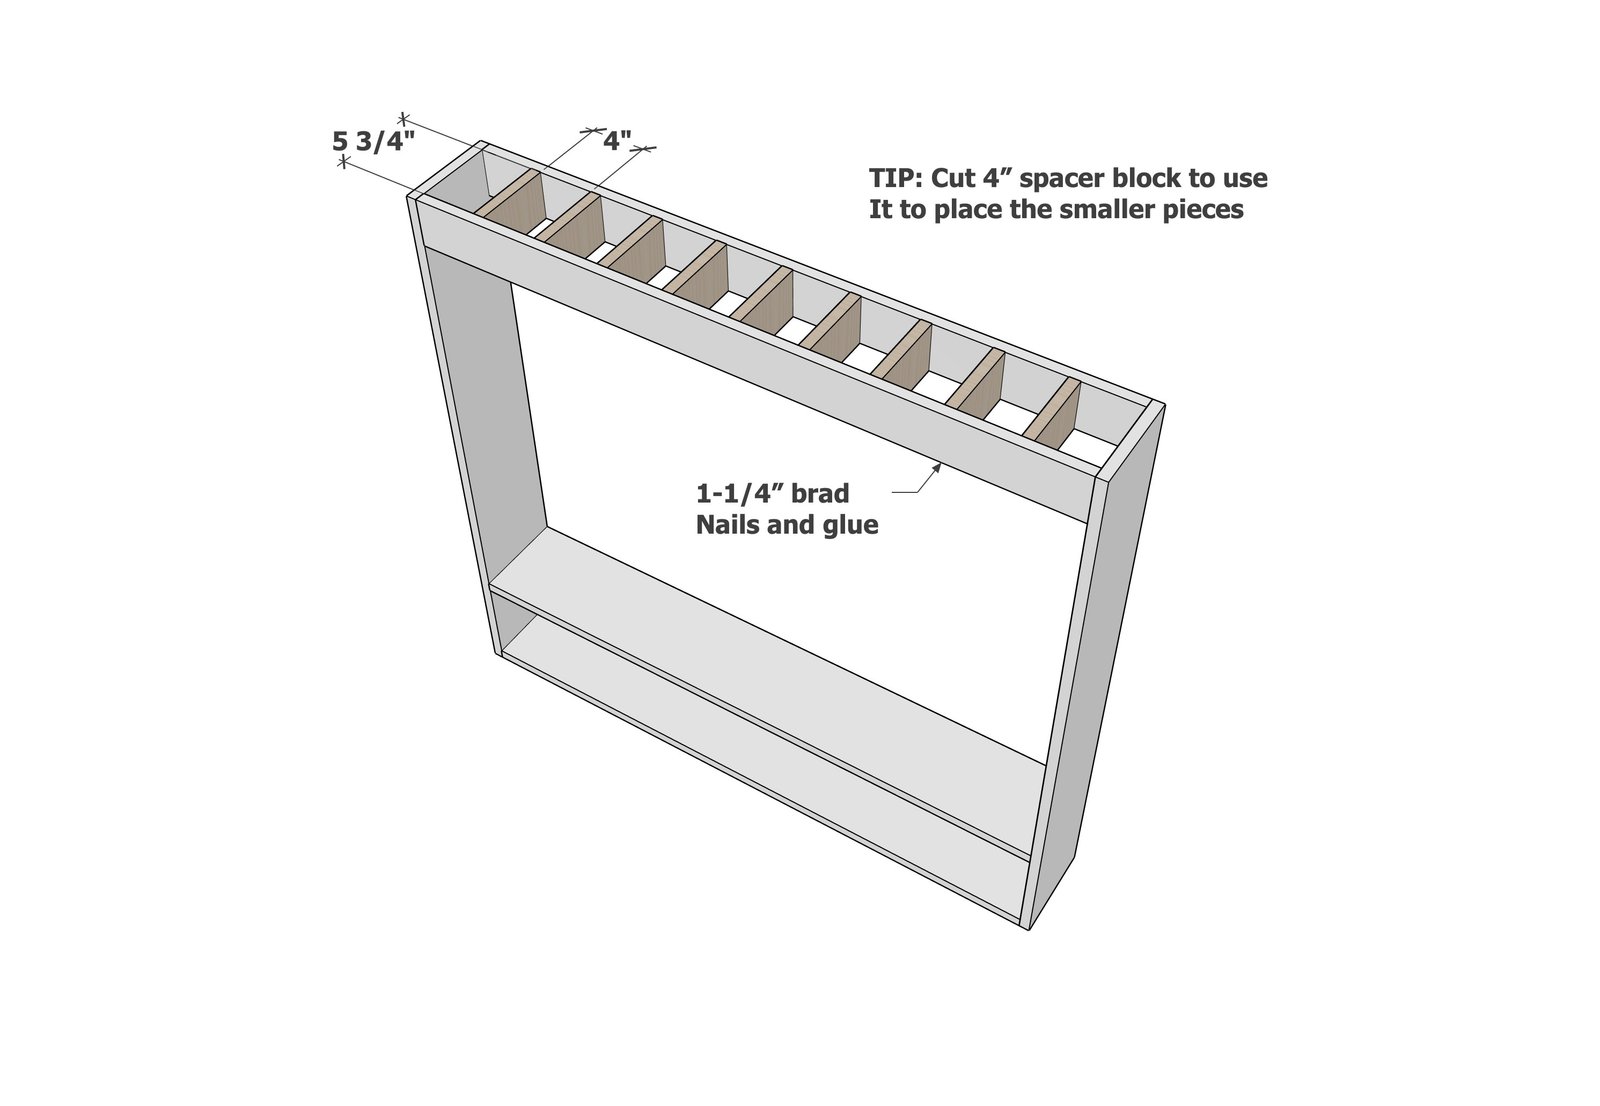
- 9 - 1x4 @ 5-3/4" - top holder
Tools
- measuring tape
- square
- pencil
- safety glasses
- kreg-jig
- drill
- compound miter saw
- nailer
- level
Step-by-step Instructions
Step 1
Build the lower shelving unit first. It should be built with pocket holes as the rifles and ammo can get heavy, so this needs to be built heavy duty. Make sure you predrill all pocket holes for future steps first as shown in the diagram.
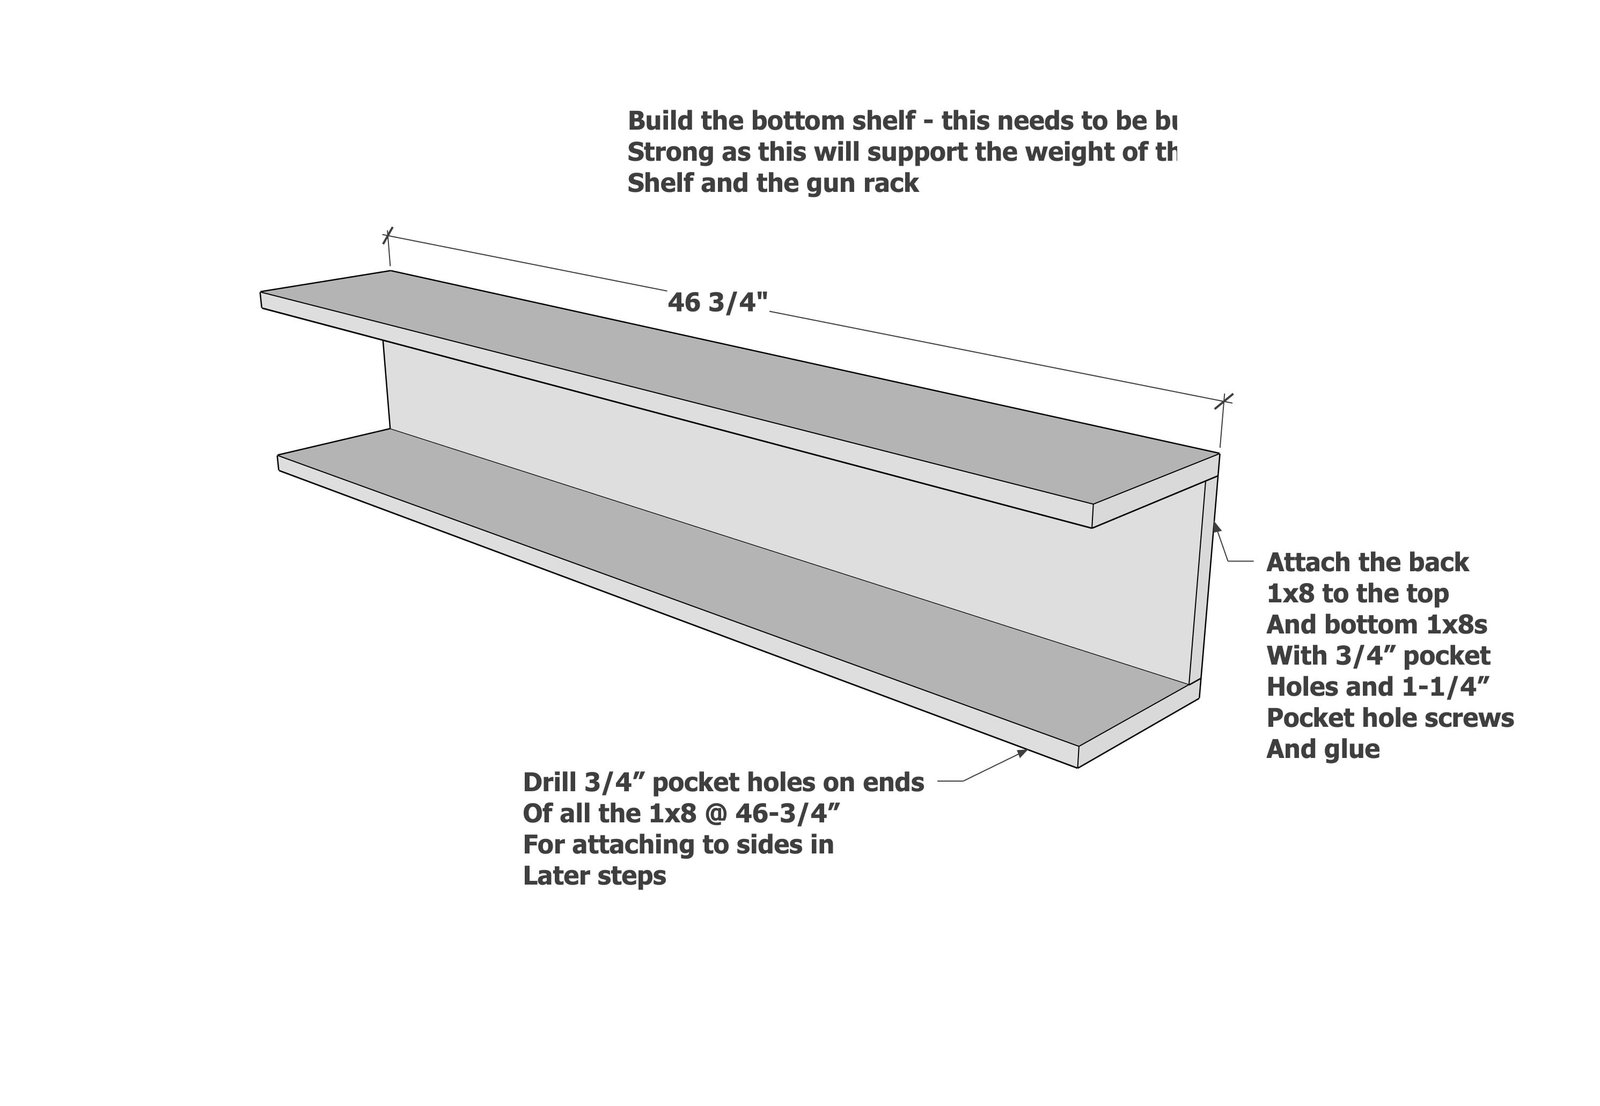
Step 2
Attach the lower shelf to the sides.
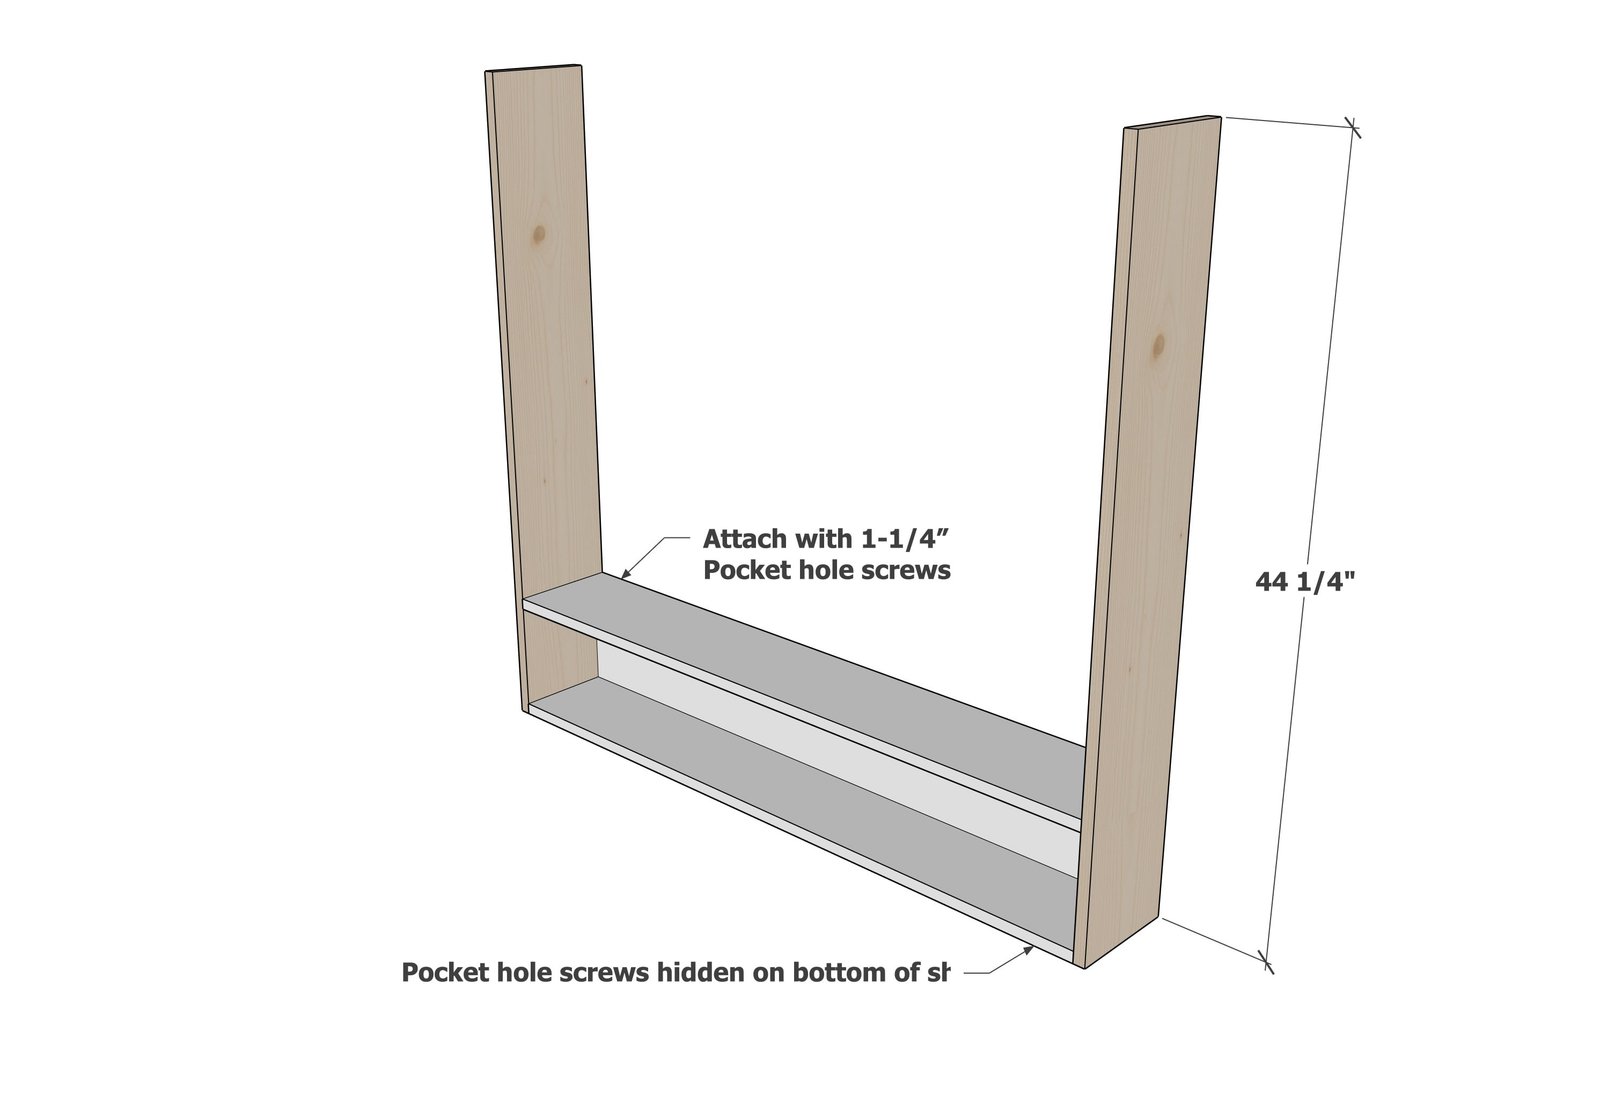
Step 3
Attach the top longer pieces to the sides.
Step 4
Attach the divider pieces inside.
Step 5
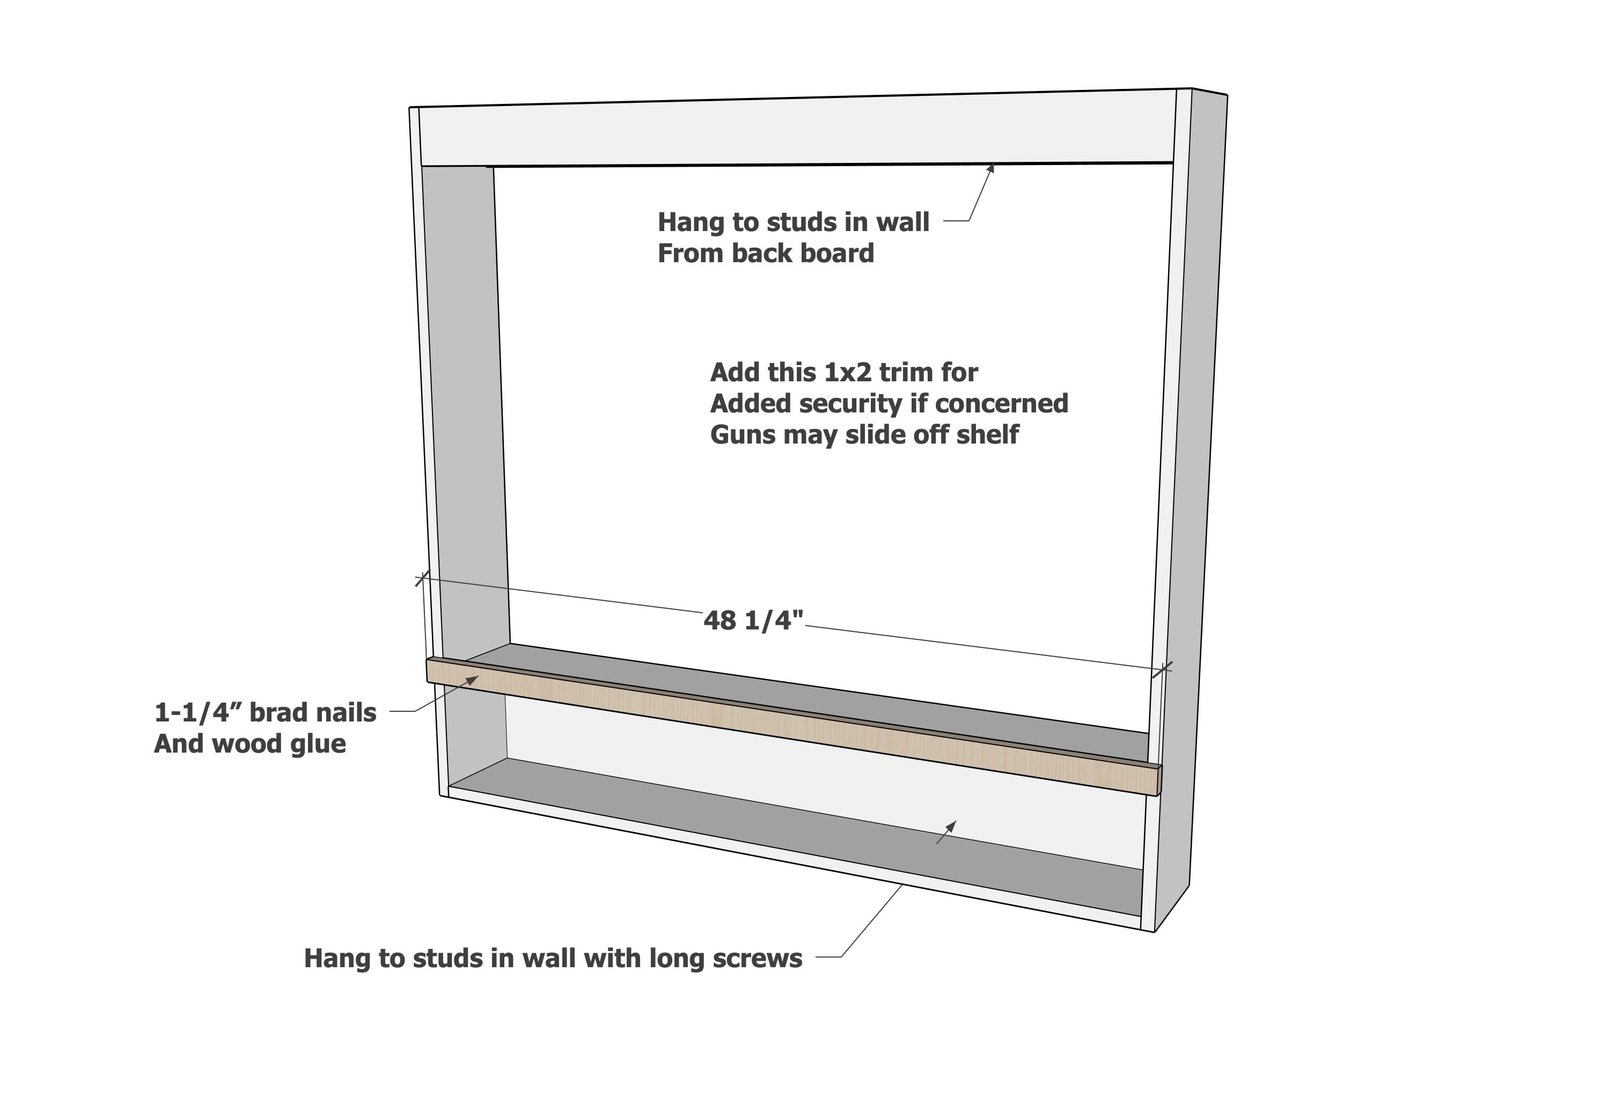
For added protection, add a 1x2 lip to the front. I didn't add this but I would recommend adding in case of an earthquake - just added security.
Finishing
Sand all surfaces, starting with a medium grit and finishing with fine. Wipe off the dust, fill any holes or gaps with wood filler, and sand smooth once dry. Apply primer if you're painting, then finish with your choice of paint or stain and seal with a durable clear topcoat. For outdoor projects, use exterior-rated primer, paint or stain, and sealer so the piece stands up to the weather.
Source (temporary): https://www.ana-white.com/woodworking-projects/wall-mounted-rifle-storage-rack-easy-diy-plans