Waterfall Framed Grand Console Table
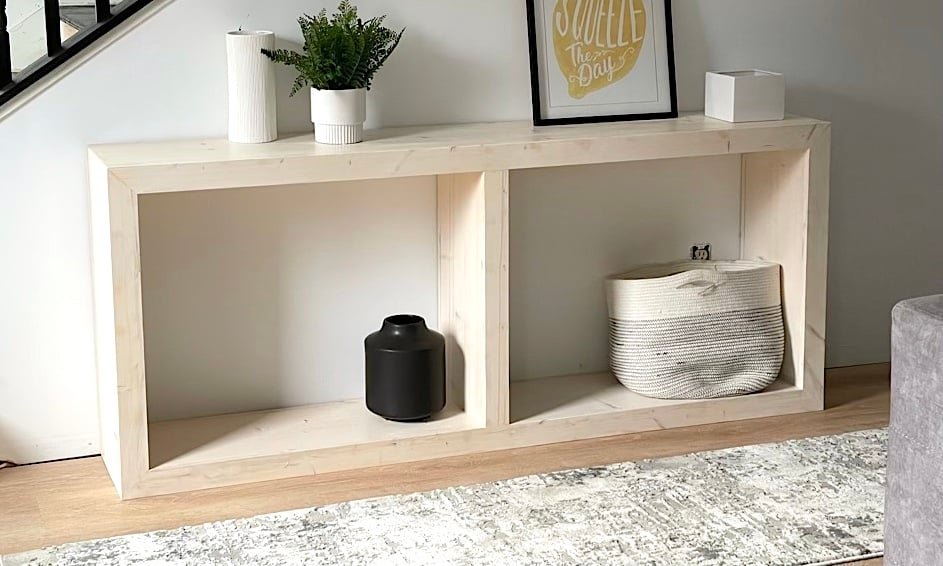
This DIY waterfall framed grand console table is absolutely stunning! I built it using about $150 in whitewood boards. In this post, I share a, including what to buy, a cut list, step by step diagrams, and a video showing the entire process. You can build it too! Related: Waterfall Framed 52" Console Plans
Specifications
| Project type | Media and Entertainment Centers |
|---|---|
| Room | dining room |
| Style | Farmhouse Furniture |
| Difficulty | Advanced |
Dimensions
Use the size-specific shopping and cut lists below.
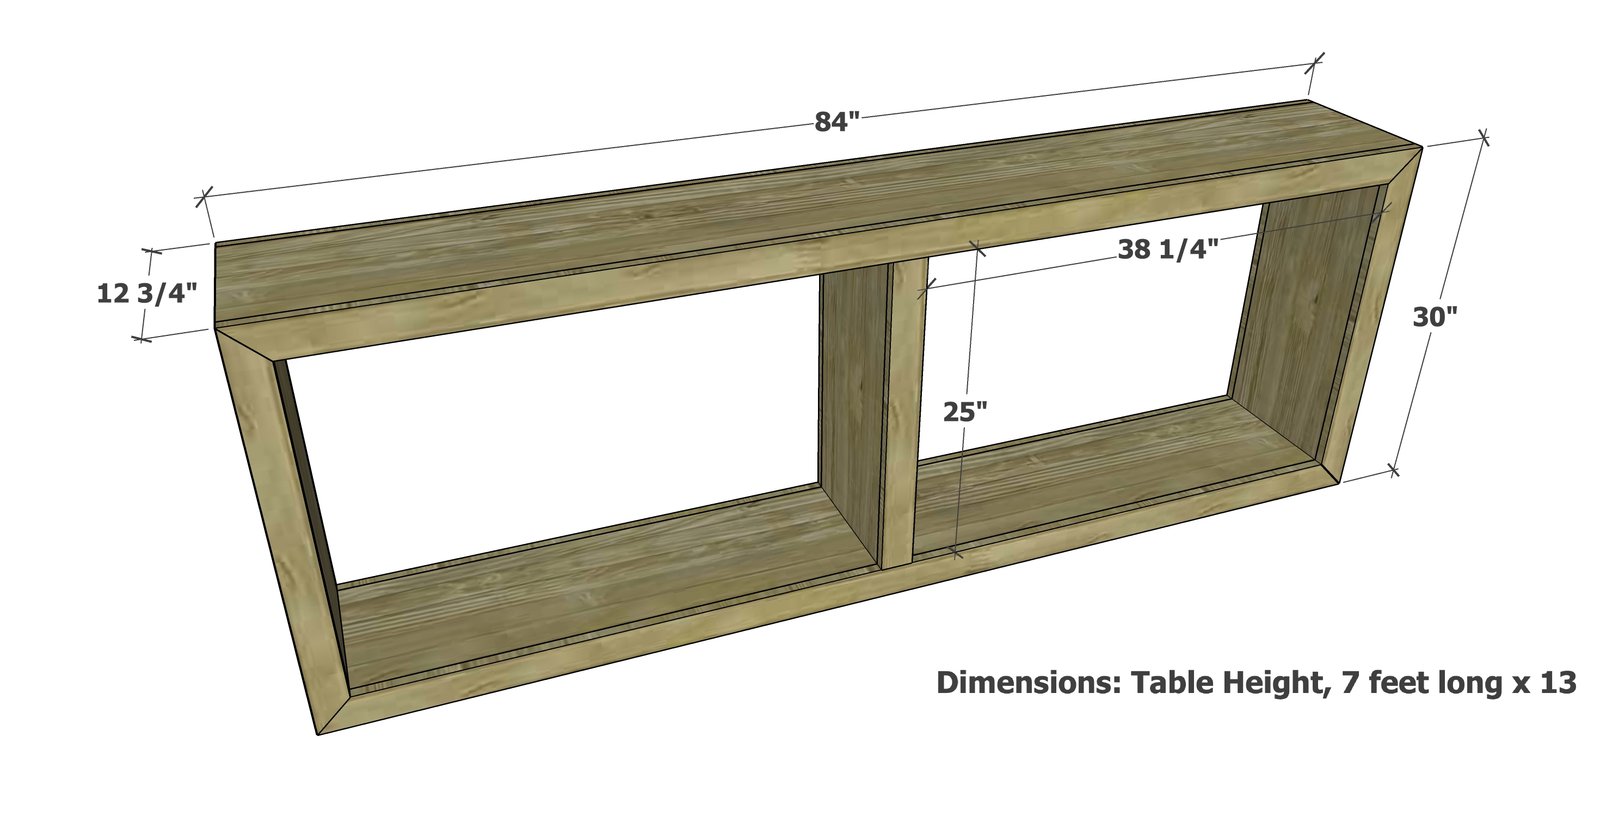
Shopping List
- 3 - 1x12 @ 10 feet long - Boards should be straight with minimal cupping
- 4- 1x3 @ 10 feet long - Use straight boards
- 1 - 1x3 @ 6 feet long (use for the center divider trim)
- 1x2 @ 4 feet long (scraps or furring strips is fine)
- 1-1/4" brad nails
- wood glue
Cut List
- 1 - 1x12 @ 84" - long point to long point measurement, both ends cut at 45 degree bevel, ends not parallel
- 2 - 1x12 @ 30" - longest point measurement, one end cut at 45 degree bevel, ends not parallel
- 1 - 1x12 @ 82-1/2" - bottom shelf
- 4 - 1x12 @ 26-3/4" - inside of sides, divider sides
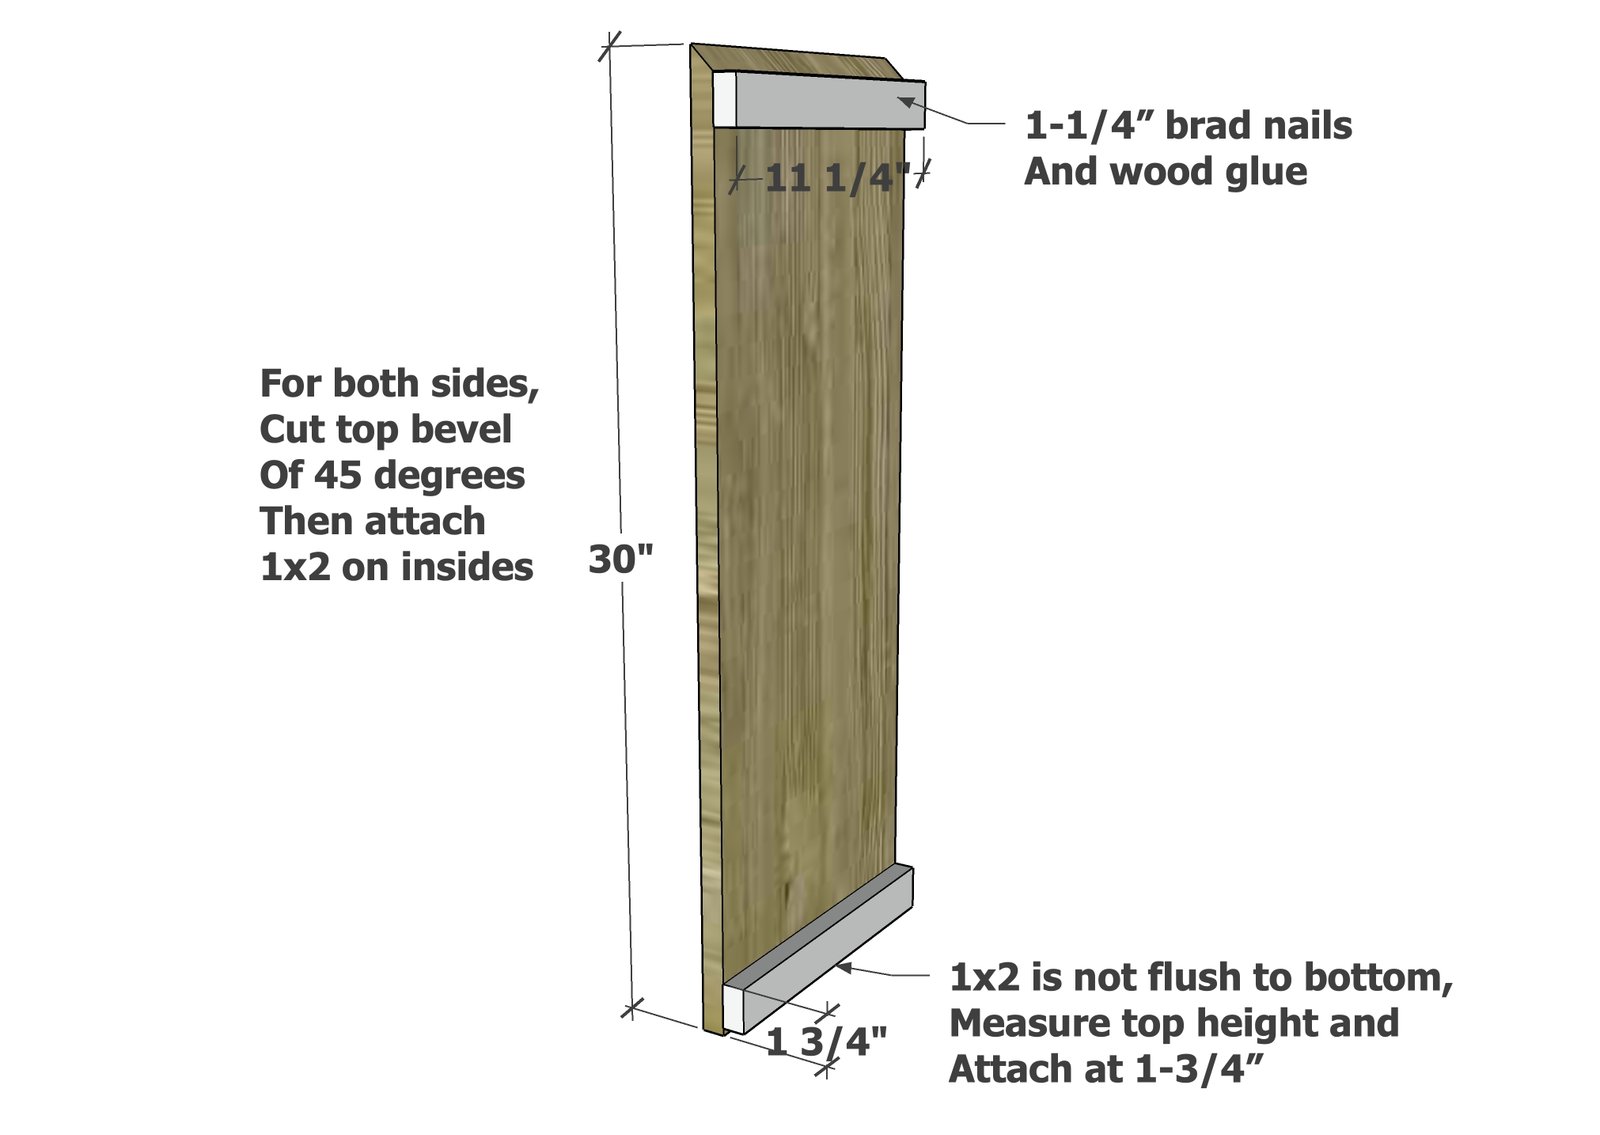
- 4 - 1x2 @ 11-1/4" - blocking for sides
- 4 - 1x3 @ 84" - long point to long point measurement, both ends cut at 45 degree miter, ends not parallel
- 4 - 1x3 @ 30" - long point to long point measurement, both ends cut at 45 degree miter, ends not parallel
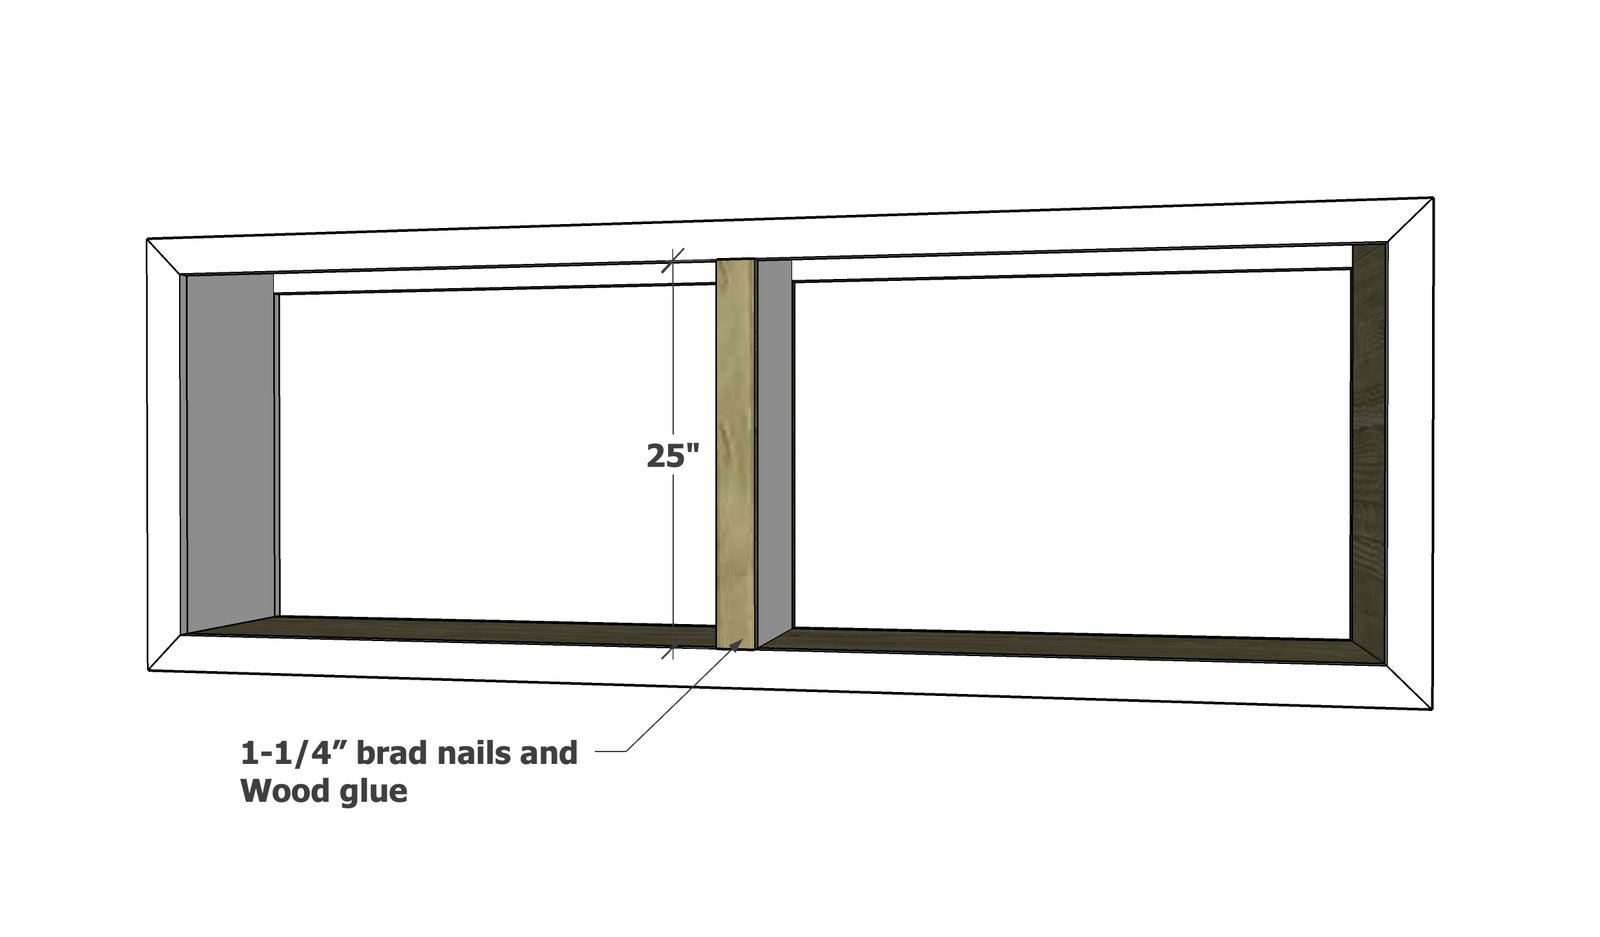
- 2 - 1x3 @ 25"
Tools
- measuring tape
- square
- pencil
- safety glasses
- compound miter saw
- nailer
- sander
Step-by-step Instructions
Step 1
For the side panels, attach the 1x2s on the insides, as shown in the diagram, with 1-1/4" brad nails and wood glue.
Step 2
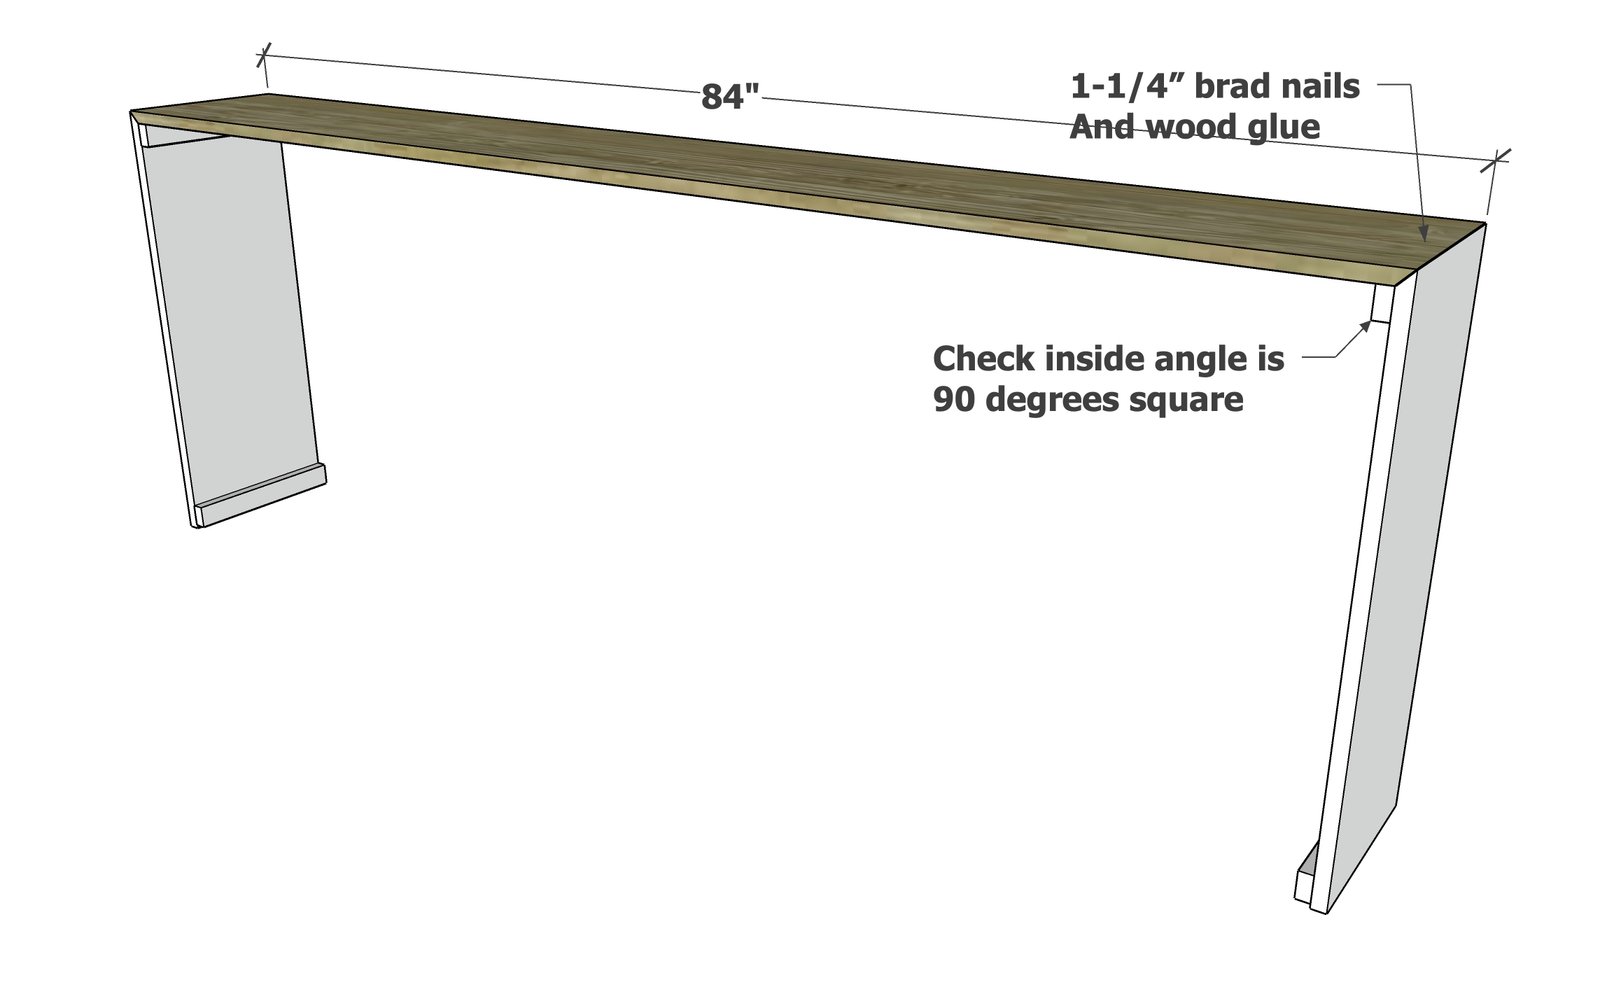
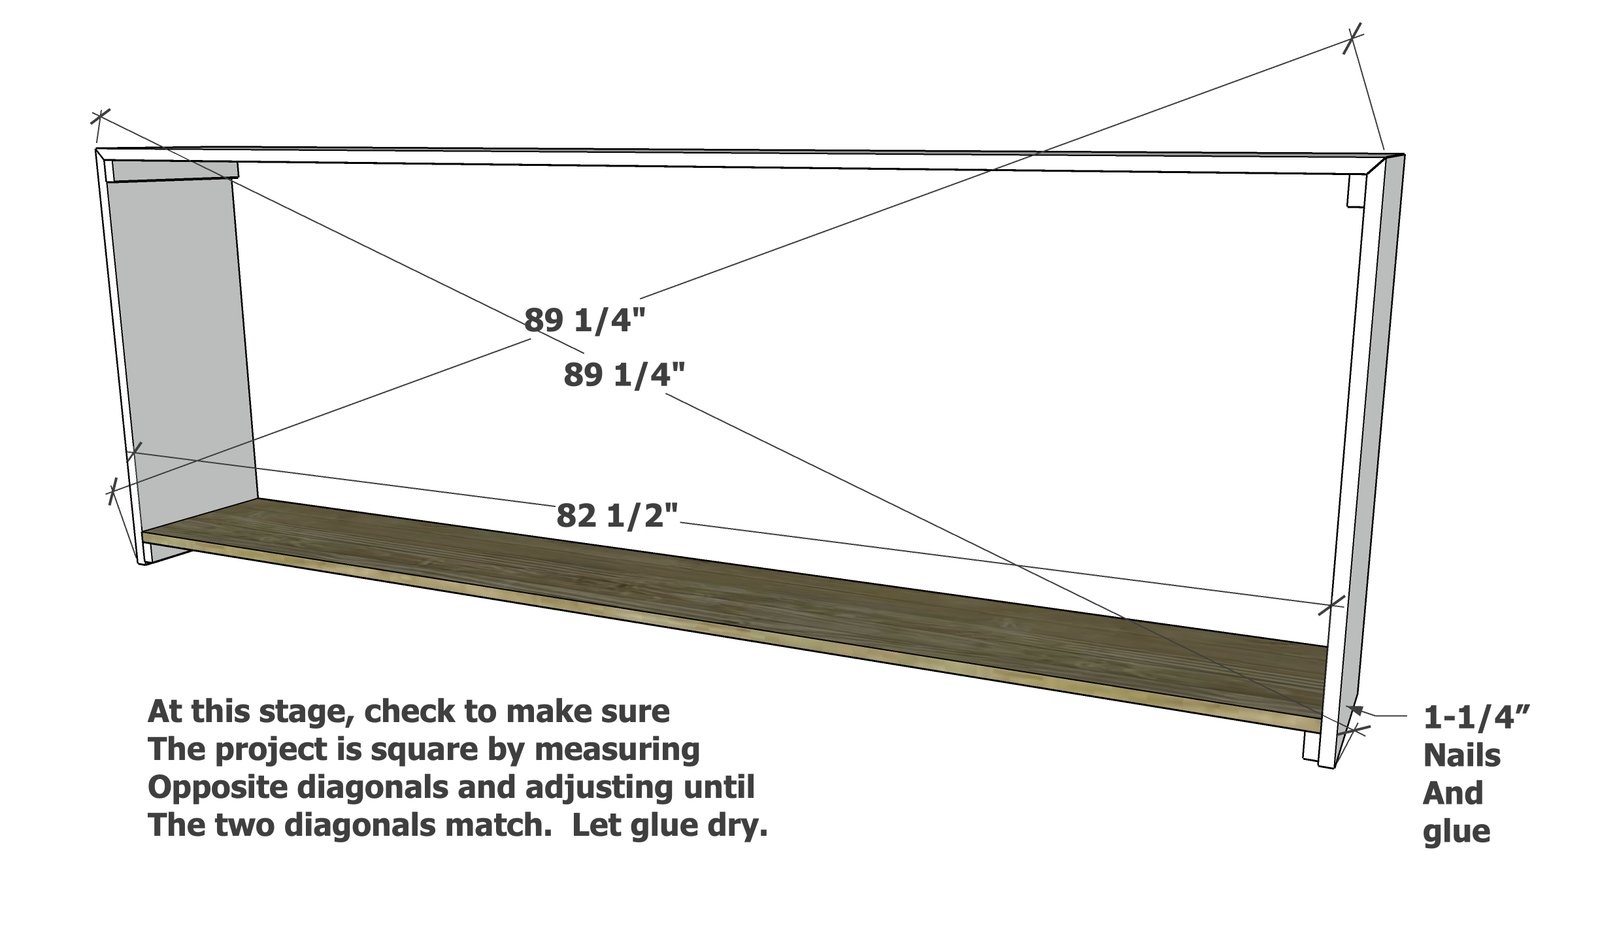
Attach top to the side panels, with nails and glue.
Attach bottom shelf to the side panels with nails and glue.
TIP: The bottom could also be attached from underneath with pocket holes. NOTE: If adjusting for a 1x4 chunkier frame, simply bring the shelf up 1". Adjust the project for square.
Step 4
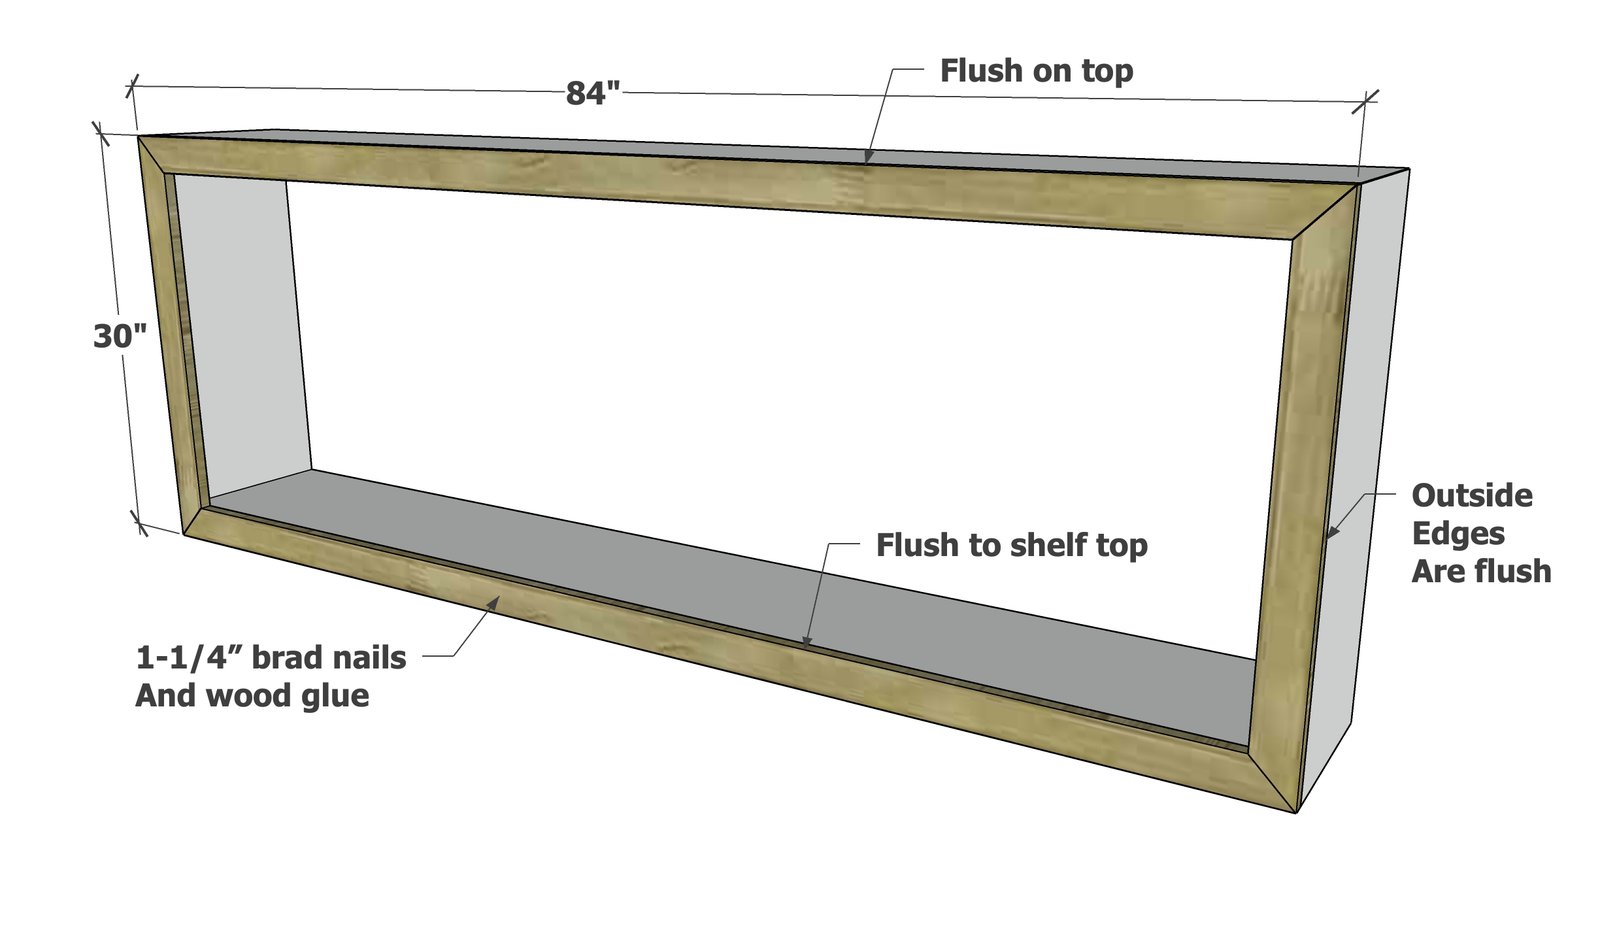
Attach the face frame to the front of the project. Outside edges should be flush, and mitered corners matched. TIP: For a guarantee the miter corners won't spread over time, attach mitered corners with pocket holes to build the face frame first, and then attach the entire completed face frame to the front. Trim screws could also be used to reinforce the face frame corners.
Step 5
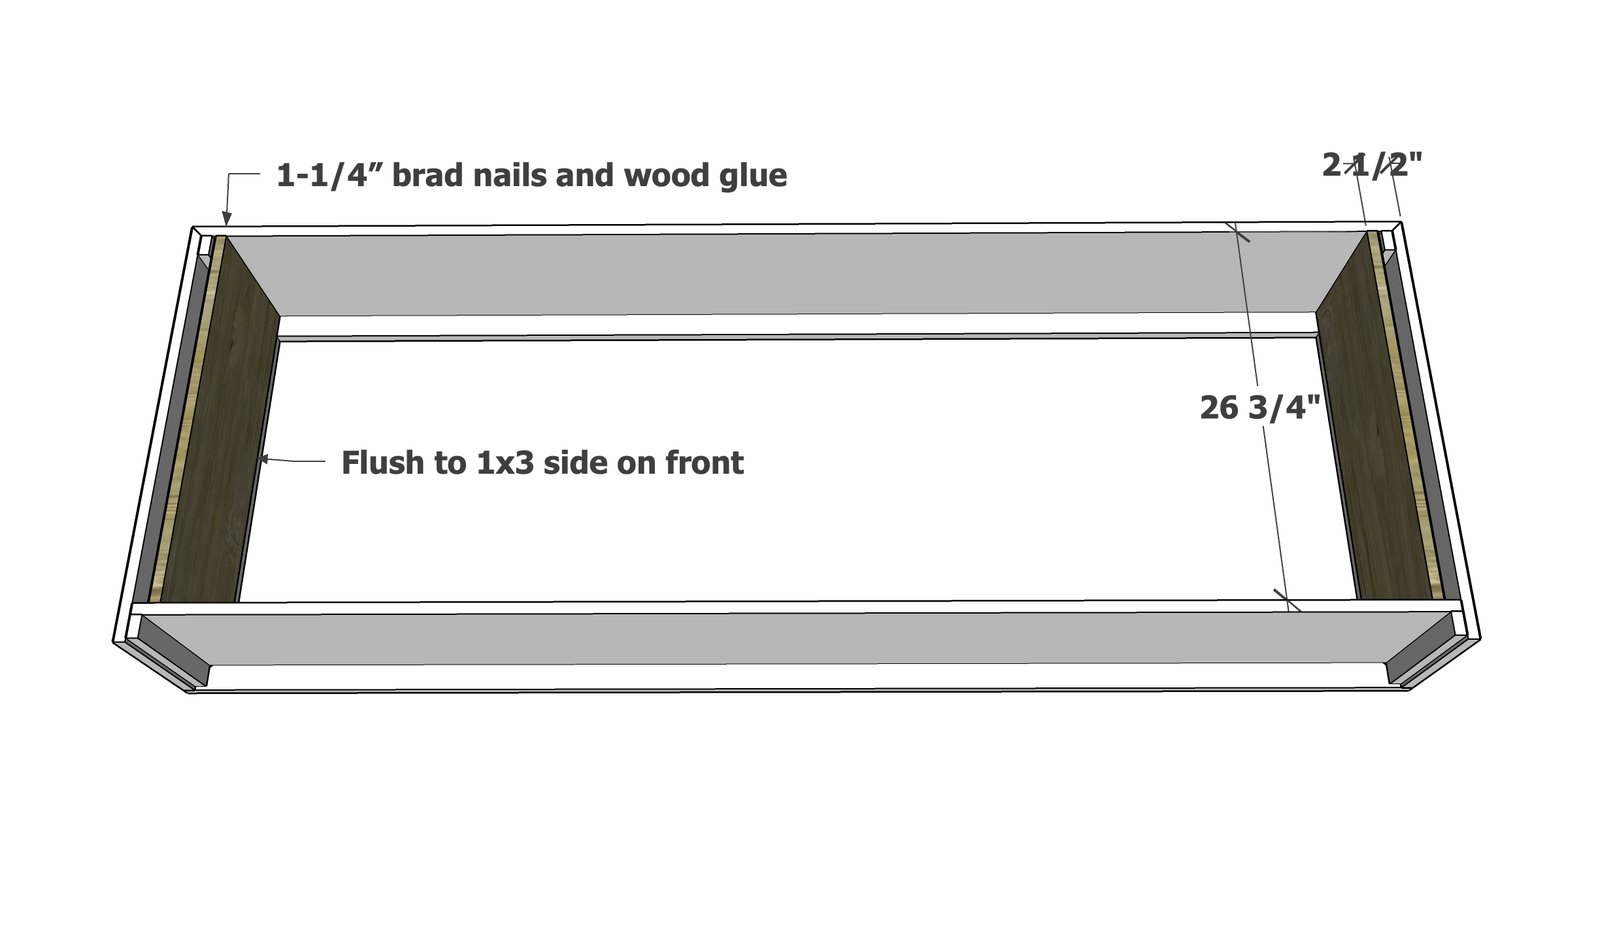
Flip the project over and fill in the sides of the legs, with the new 1x12 board flush to the face frame now on the bottom. Use a scrap 1x3 to help set the distance over for attaching on the top open side.
Step 6
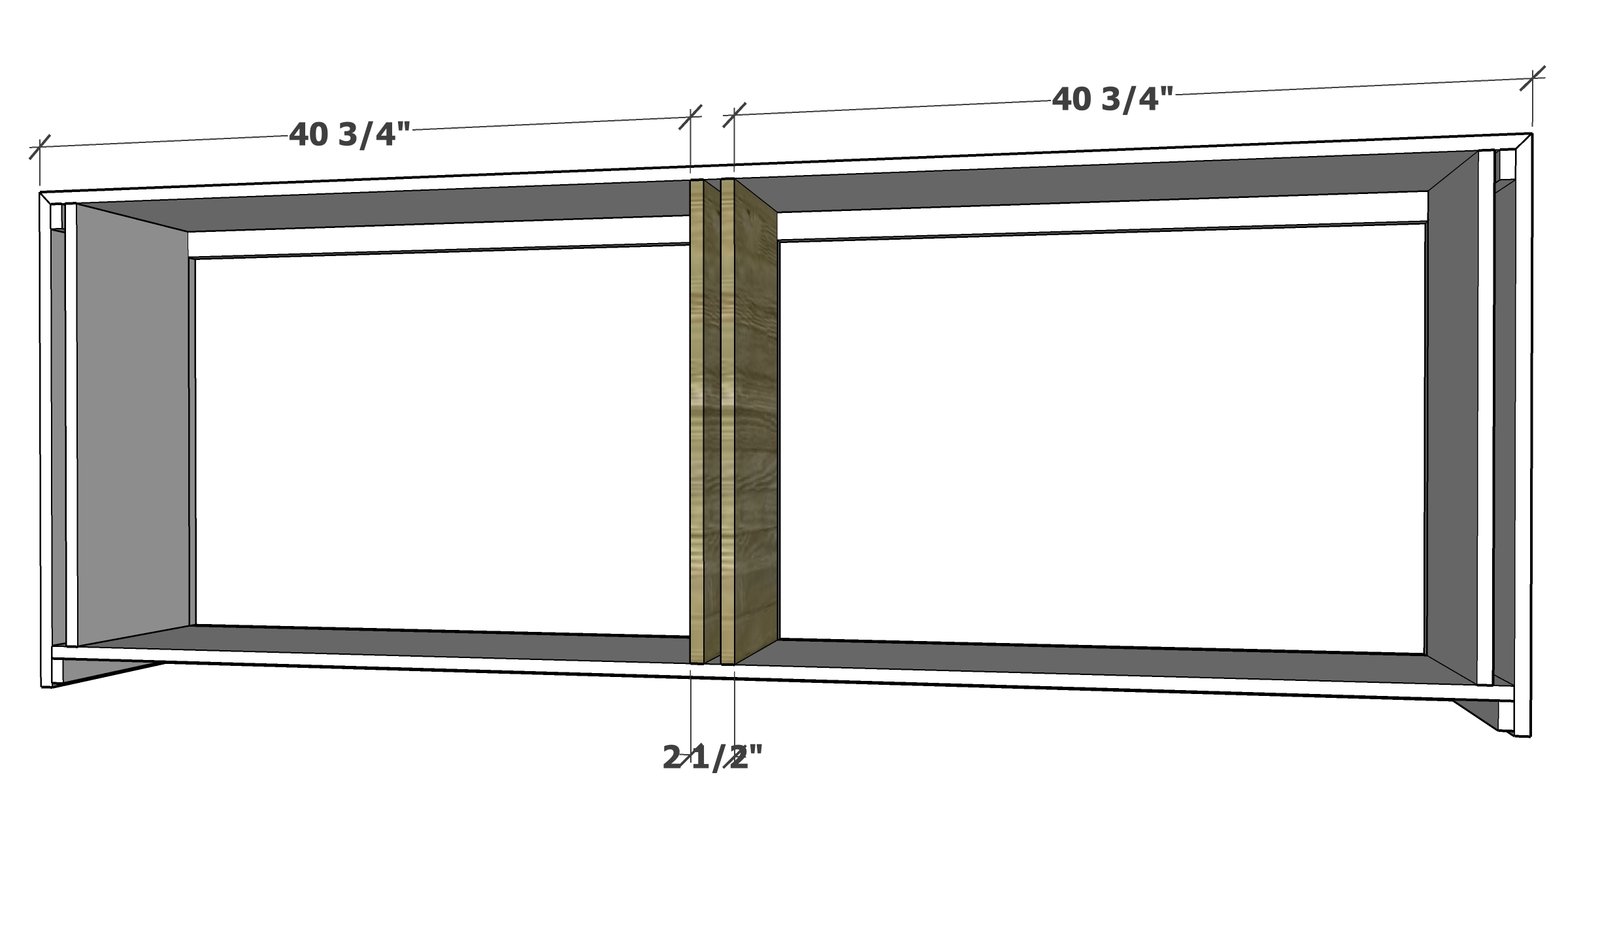
Attach the two middle 1x12 boards as shown. Check to make sure they are the width of a 1x3 apart, so when the 1x3 is added in later steps, the edges are flush. TIP: For the bottom, screws can be added to pull the bottom shelf in to the dividers. This is not necessary on the top, since the top is reinforced with the face frame and the joint is hidden.
Step 7
Add the face frame to the back side.
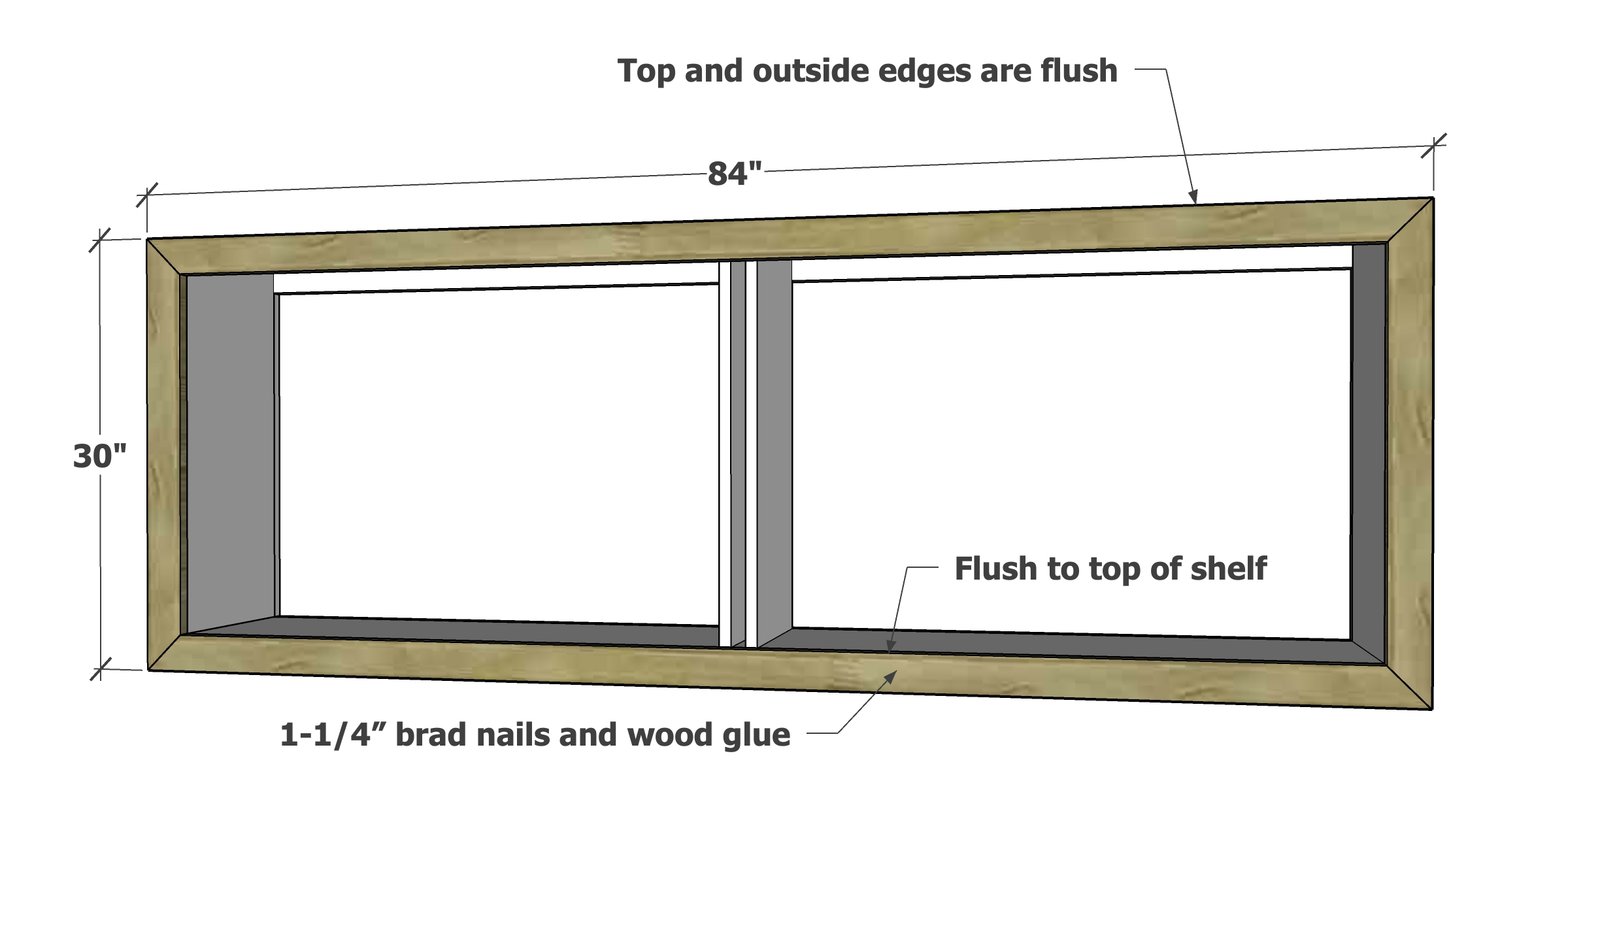
Fill in the face frame for the center divider with nails and glue.
Flip the project over and finish nailing off in areas that were missed.
Finishing
Sand all surfaces, starting with a medium grit and finishing with fine. Wipe off the dust, fill any holes or gaps with wood filler, and sand smooth once dry. Apply primer if you're painting, then finish with your choice of paint or stain and seal with a durable clear topcoat. For outdoor projects, use exterior-rated primer, paint or stain, and sealer so the piece stands up to the weather.
Source (temporary): https://www.ana-white.com/woodworking-projects/waterfall-framed-grand-console-table