Weatherly Pergola
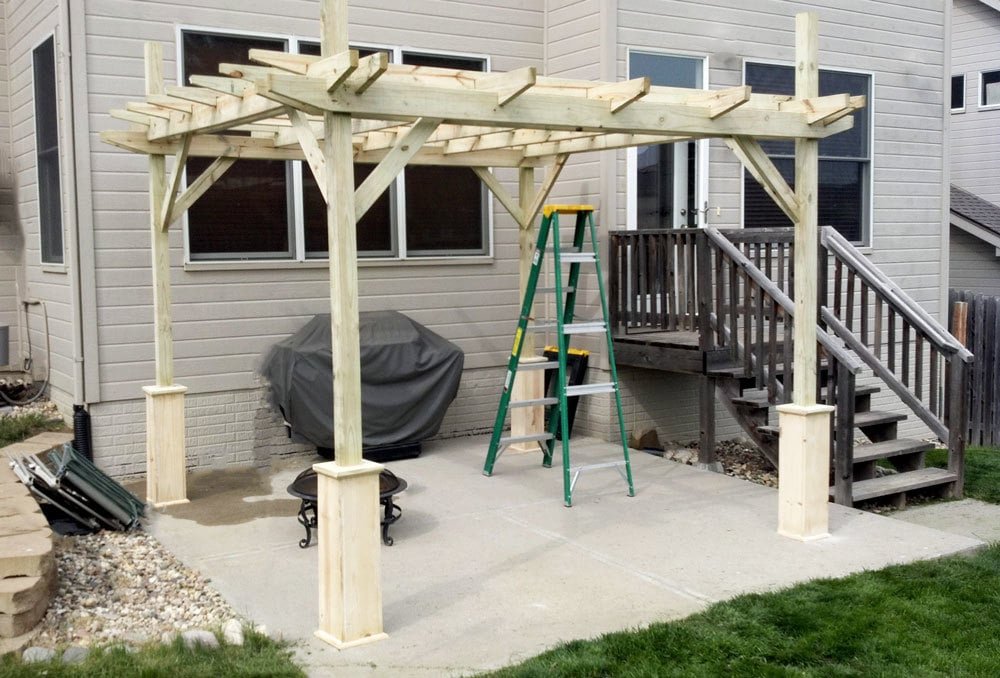
Free pergola
Specifications
| Project type | Buildings |
|---|---|
| Room | Outdoor |
| Style | Cottage Style Furniture Plans |
| Difficulty | Advanced |
| Estimated cost | $100-$150 |
Dimensions
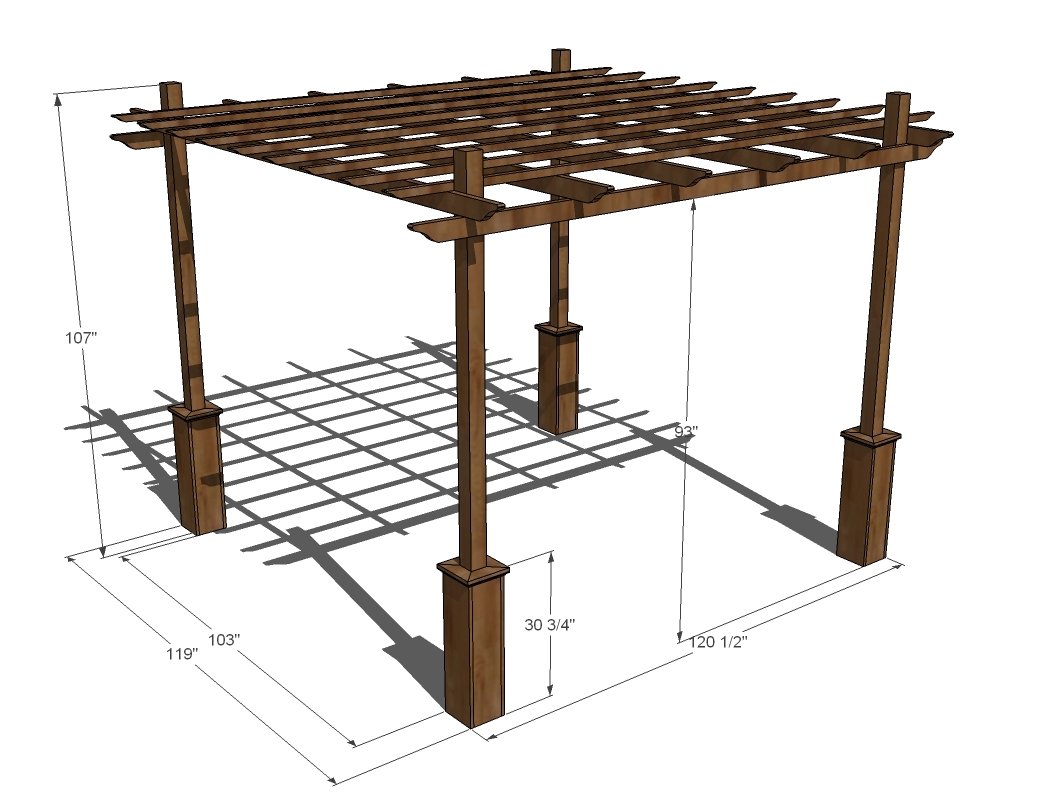
Use the size-specific shopping and cut lists below.
Shopping List
4 - 4x4 treated posts - 8-12 feet long (depending on how much of the posts you choose to bury or place in pier blocks)
4 - brackets or pier blocks or other foundation as necessary
8 - 2x4 Treated - 12 feet long
9 - 2x2 Treated - 12 feet long (if you can't find 2x2s, buy 3 - 2x6s treated and rip the 2x6s into three 2x2s per board using a table saw)
2 - 2x2 @ 8 feet long (these could be furring strips)
2 - 1x4 Treated @ 8 feet long
3/4" x 3/4" moulding, exterior preferred
3 - 1x10 treated @ 8 feet long
3 - 1x8 treated @ 8 feet long
(if you can't find treated 1x8s and 1x10s, these boards will be covered and are vertical, so you can use properly sealed boards if necessary)
Cut List
16 - 2x2 @ 3 1/2" long (short cleats)
16 - 2x2 @ 6 1/2" long (longer cleats)
8 - 1x8 ripped to 6 1/2" width @ 30" - cut to length
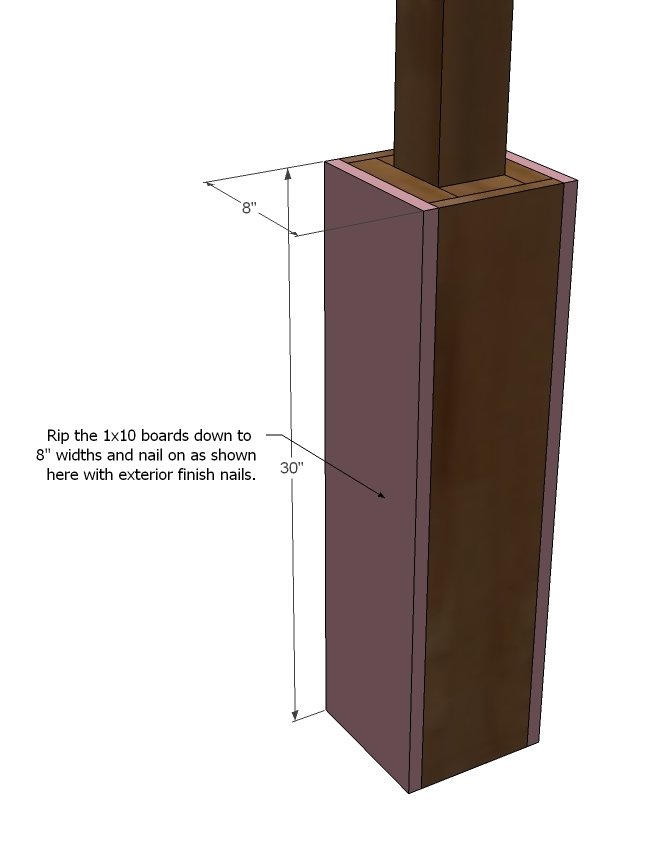
8 - 1x10 ripped to 8" width @ 30" - cut to length
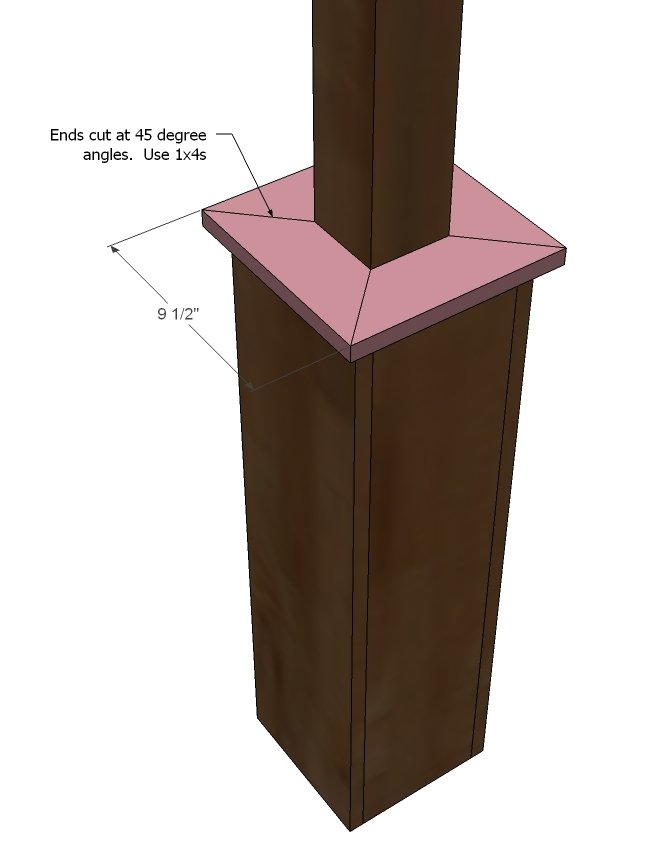
16 - 1x4 @ 9 1/2" (longest point, both ends mitered at 45 degrees off square, not parallel)
3/4" Moulding cut to fit
8 - 2x4 @ 140" Long, ends cut in decorative pattern
9 - 2x2 @ 140" long, ends cut in decorative pattern
Tools
- measuring tape
- square
- pencil
- hammer
- safety glasses
- hearing protection
- drill
- jigsaw
- compound miter saw
- table saw
- nailer
- sander
- level
- countersink drill bit
Step-by-step Instructions
Step 1
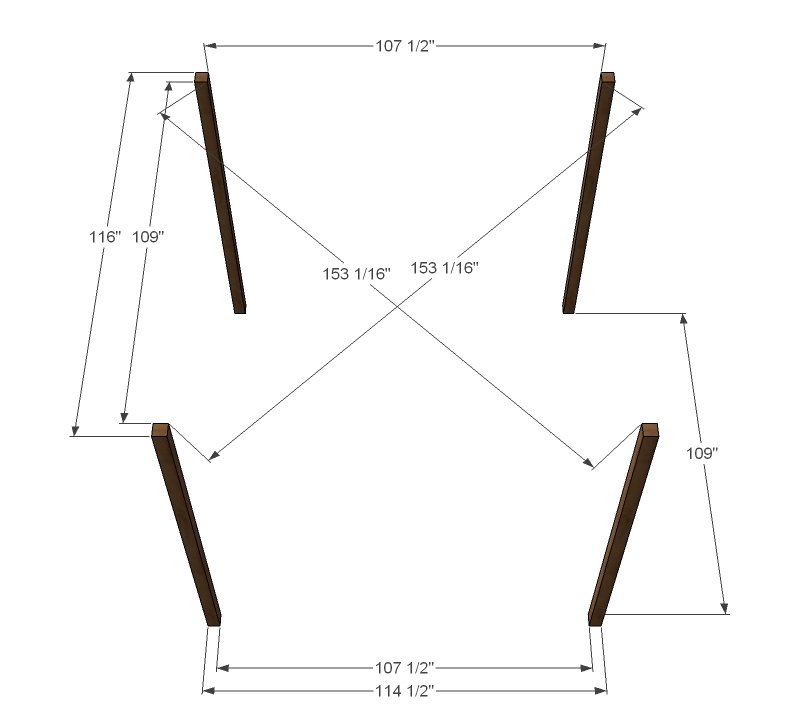
So you first and foremost need to set the posts in the ground. Make sure you space the posts exactly as shown above, and that the posts are square (take diagonals). The posts need to stick out of the ground 107" - but you may need the posts to be longer if for example you are using buried pier blocks.
Step 2
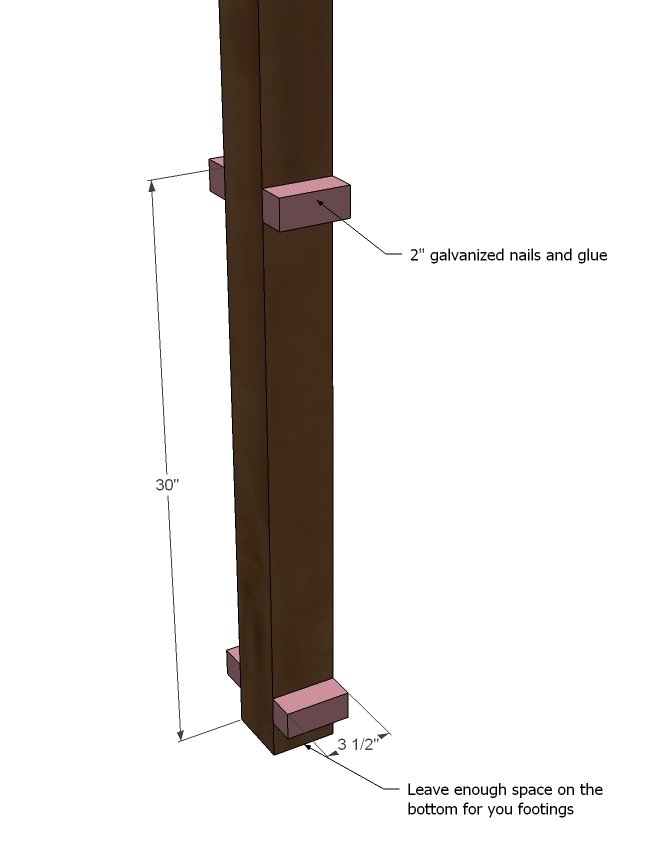
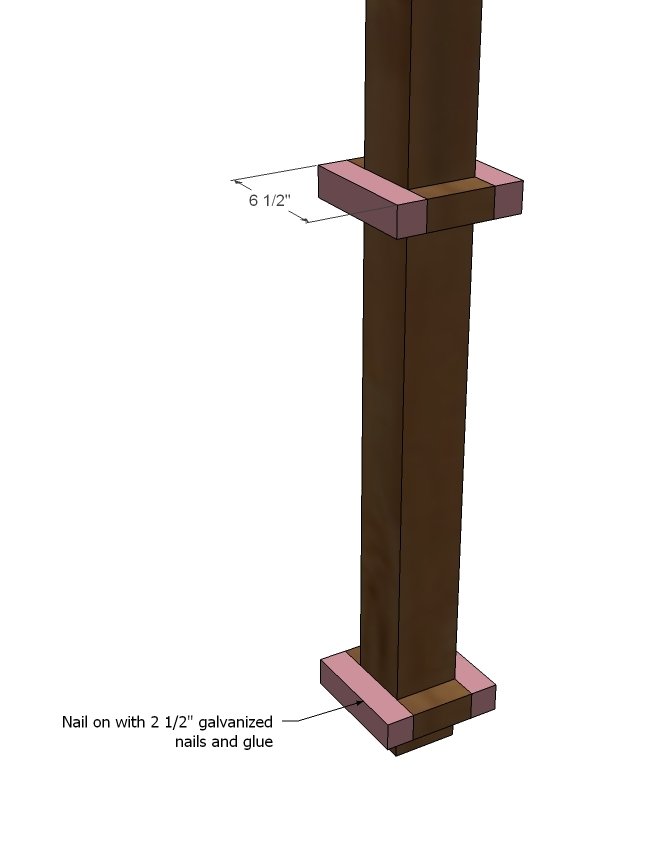
Now on all the posts, attach 2x2 cleats as shown here with 2 1/2" galvanized finish nails and glue. The bottom cleat should sit just above the brackets that hold the posts to the ground.
Step 3
And now simply complete the cleats by adding the other 2x2s as shown above.
Step 4
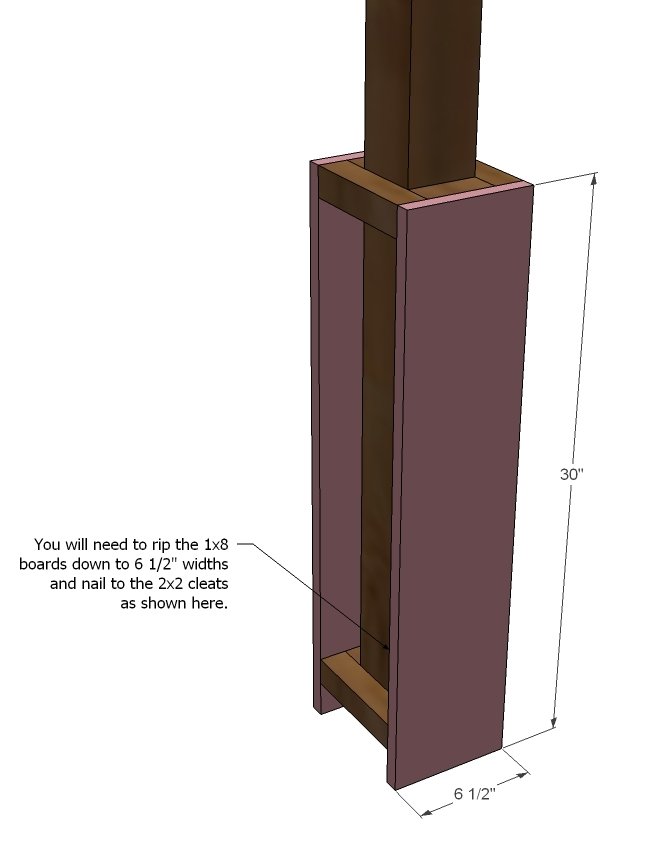
For this plan, you must have a tablesaw to rip boards with nice square edges. Rip your 1x8s down to 6 1/2" widths and use finish nails to attach to the cleats. The trim boards should be cut so that they hide the foundation. You could get extra fancy here and actually cover these posts in stone veneer as well.
Step 5
Step 6
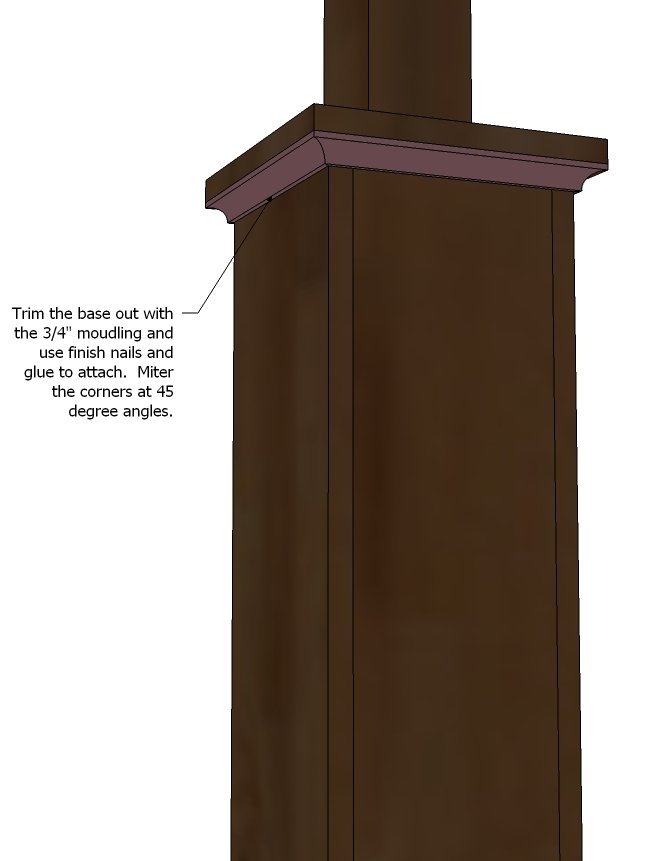
And now a little cap for the posts. Just miter 1x4s at 45 degrees around the bases as shown above. Use finish nails and glue to attach.
Step 7
And measure and add the moulding for a little extra touch. Use 1 1/4" finish nails and glue.
Step 8
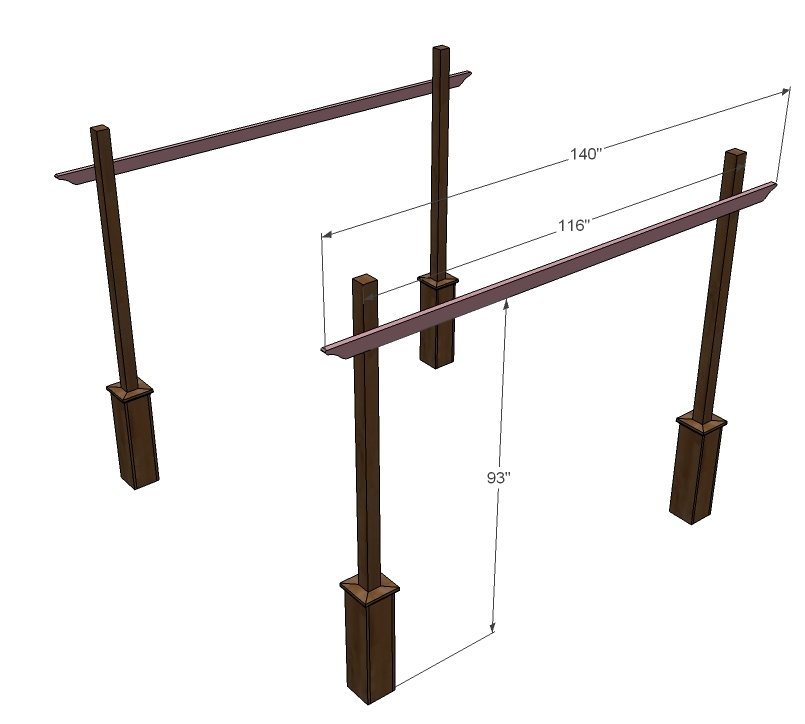
Okay, now comes the fun part - where we start seeing results. First cut all of your pergola top board ends into a fancy pattern of your choice. Then screw (3" exterior screws) the first boards up as shown above. Use a level to make sure that the boards are level.
Step 9
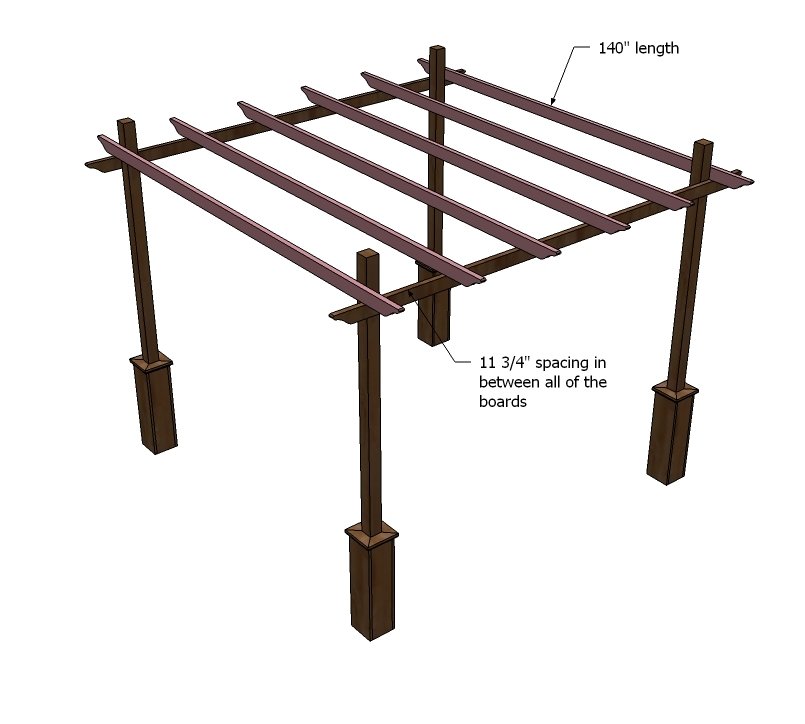
The diagram above should read 22" of spacing between the boards. You will want to take a square of the project here (see step 1). When your diagonals match, rest two more 2x4s on top of the existing 2x4s, to the outsides. Screw to the posts as shown above. Then add the remaining 2x4s spaced 22" apart, using either brackets, pocket hole screws, or long screws carefully predrilled and countersunk from the top.
Step 10
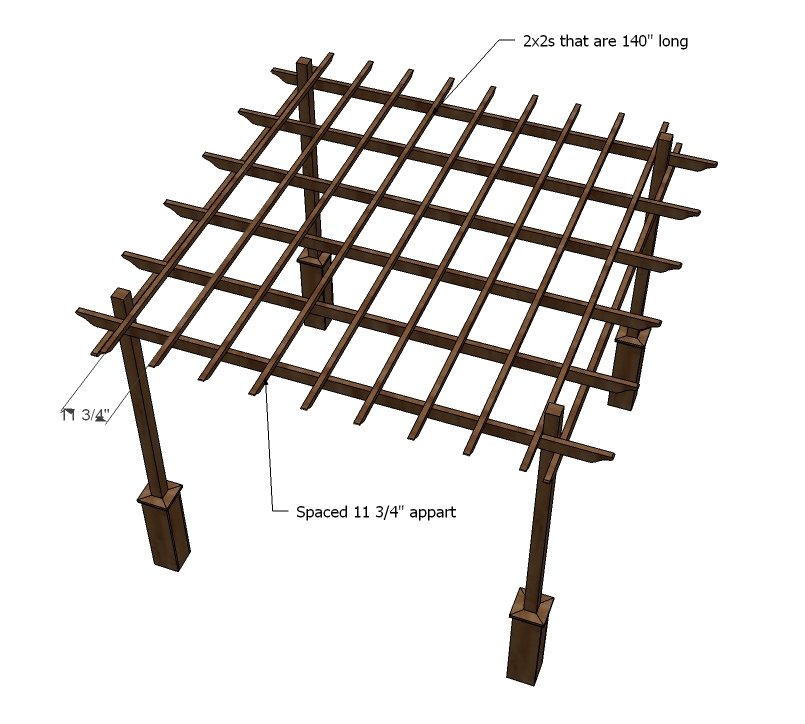
And now the final 2x2s. Space these out and screw to the 2x4s and to the 4x4 post when present with 3" exterior wood screws and glue. Make sure you fasten to all of the 2x4s for the most support.
Step 11
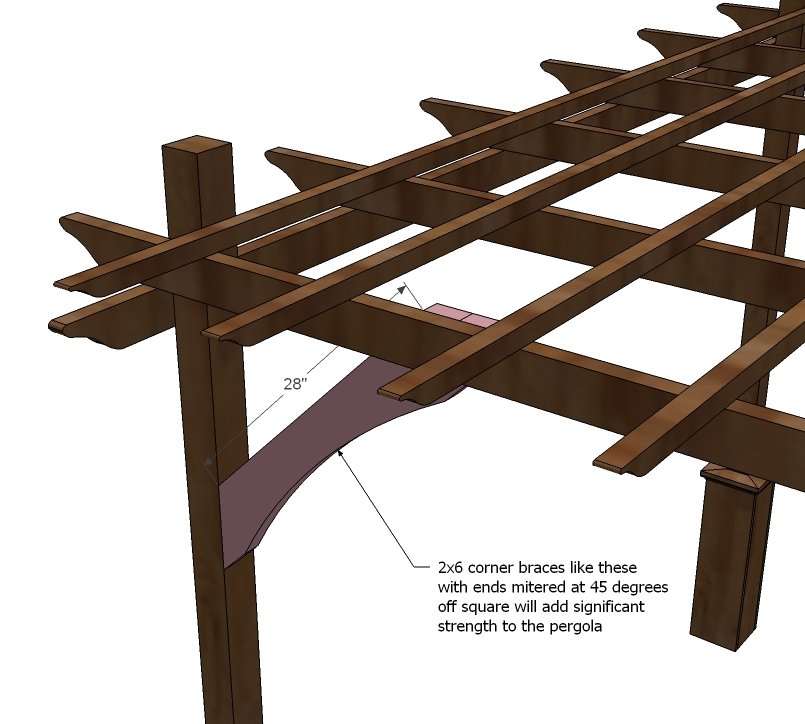
And this isn't what's done with the Pottery Barn one, but I'm a big believer in corner bracing. If you feel your pergola has any wobble or needs a little extra support, you can cut corner braces and screw on - you will be amazed at the difference the corner bracing does. Other means of "beefing up" the pergola (for example, high snow load or high winds) would be to use 2x6s boards instead of 2x4s and to notch out your boards) as done in the link given in the author notes.
Finishing
Sand all surfaces, starting with a medium grit and finishing with fine. Wipe off the dust, fill any holes or gaps with wood filler, and sand smooth once dry. Apply primer if you're painting, then finish with your choice of paint or stain and seal with a durable clear topcoat. For outdoor projects, use exterior-rated primer, paint or stain, and sealer so the piece stands up to the weather.
Source (temporary): https://www.ana-white.com/woodworking-projects/weatherly-pergola