Wide Dresser with Open Bottom Shelf
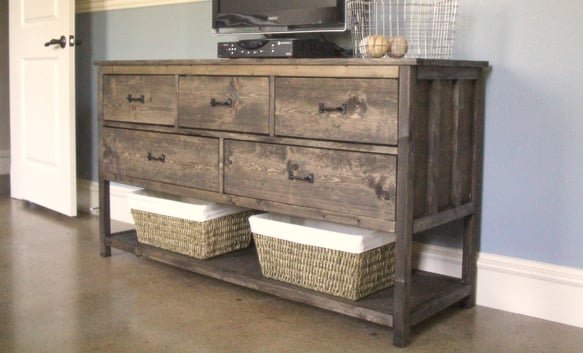
to build a wide dresser with open bottom shelf. This dresser is the perfect mix of drawers and shelves. Build it yourself with our free step by step dresser plans, with diagrams, shopping and cut list from
Specifications
| Project type | Dresser Plans |
|---|---|
| Room | Bedroom |
| Style | Farmhouse Furniture |
| Difficulty | Advanced |
Dimensions
Use the size-specific shopping and cut lists below.
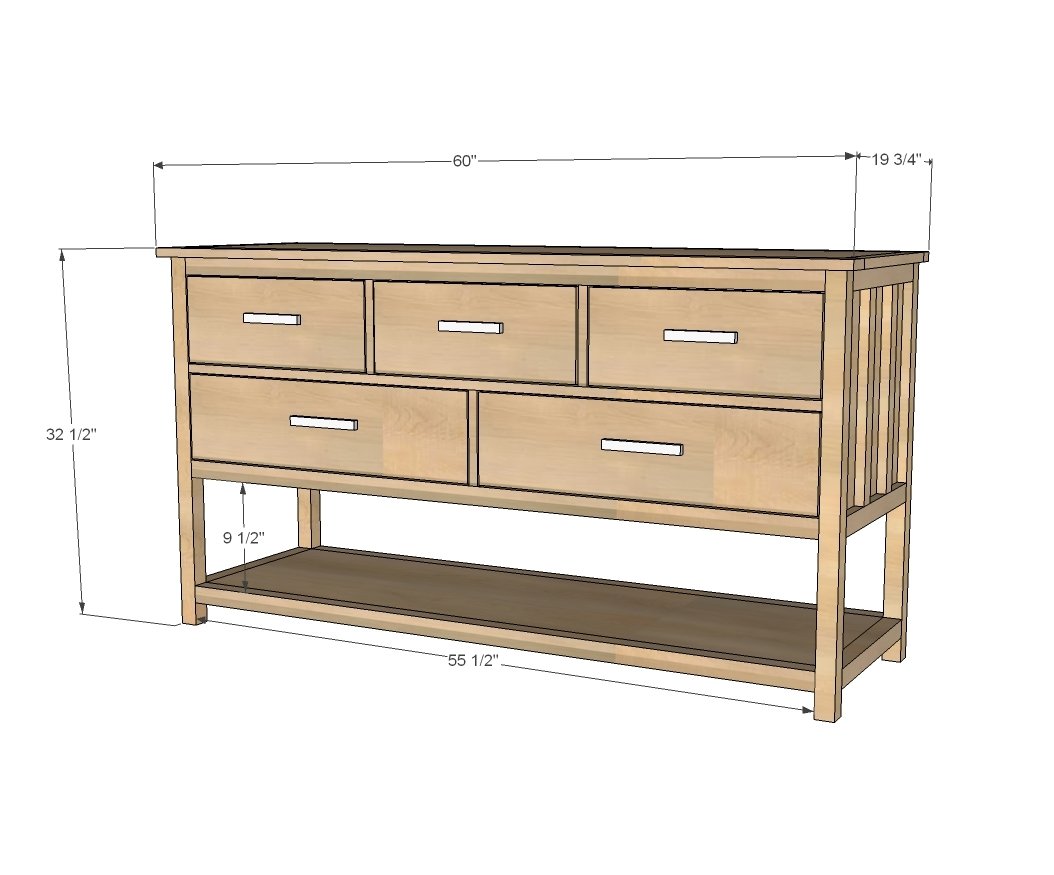
Shopping List
- 1 – sheet ¾” plywood cut into strips 15 ¾” wide
- 1 – sheet ¼” plywood
- 5 – 1x2 @ 8 feet long
- 6 – 2x2 @ 8 feet long (consider high grade 2x2s for added strength here)
- 4 – 1x6 @ 8 feet long
- 1 – 1x8 @ 10 feet long
- 5 knobs or handles
- 5 sets of 16” white euro style bottom corner mount drawer slides
- 1 ¼ and 2 ½” pocket hole screws
- 1 ¼” brad nails
Cut List
- 2 – 3/4" plywood @ 15-3/4" x 18 ¾” (sides)
- 8 – 1x2 @ 15 ¾”
- 4 – 2x2 @ 31 ¾”
- 2 – 2x2 @ 15 ¾”
- 6 – 2x2 @ 55 ½”
- 2 – 1x2 @ 55 ½”
- 6 – 1x2 @ 7 ½”
- 1 – 3/4" plywood @ 15-3/4" x @ 57” (top)
- 2 – 1x2 @ 15 ¾”
- 2 – 1x2 @ 60”
- 1 - 3/4" plywood @ 15-3/4" x 55 ½” (shelf)
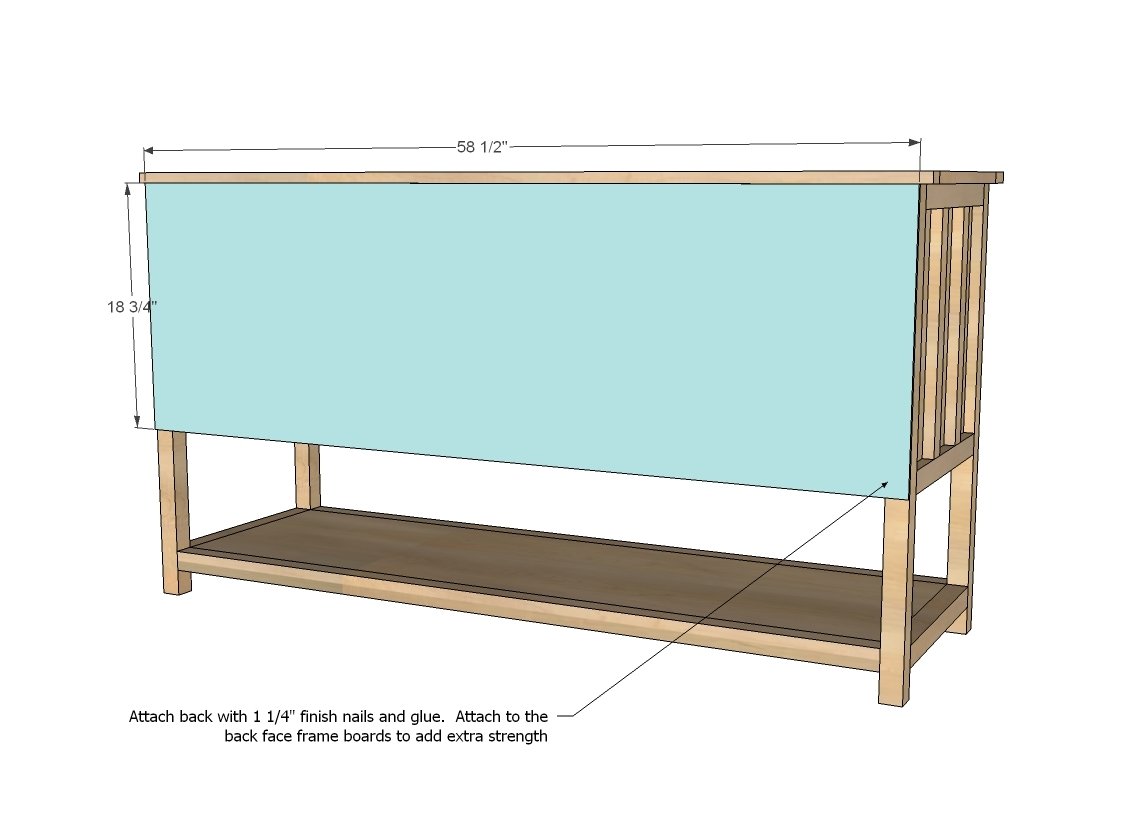
- 1 – ¼” plywood @ 58 ½” x 18 ¾” (back)
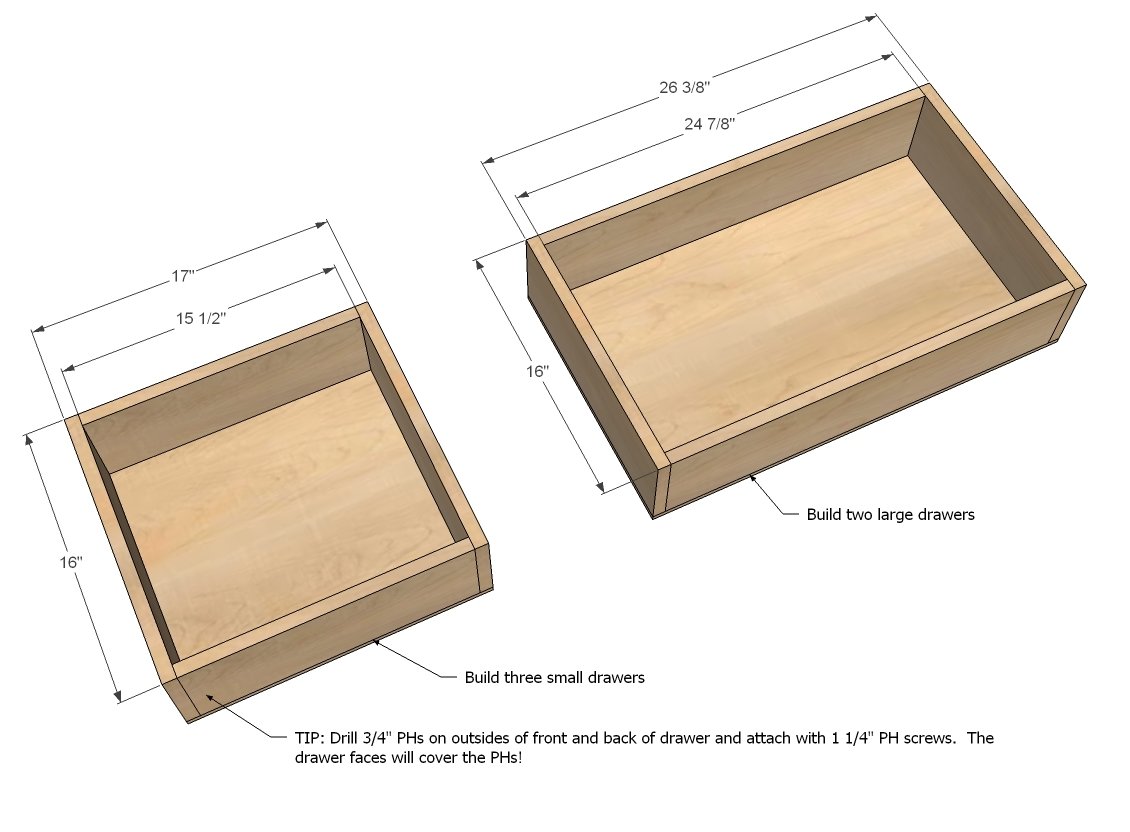
SMALL DRAWERS
- 6 – 1x6 @ 16”
- 6 – 1x6 @ 15 ½”
- 3 – ¼” plywood @ 17” x 16”
- 3 – 1x8 @ 17 3/4"
LARGE DRAWERS
- 4 – 1x6 @ 16”
- 4 – 1x6 @ 24 7/8”
- 2 – ¼” plywood @ 16” x 26 3/8”
- 2 – 1x8 @ 27 1/8”
Tools
- measuring tape
- square
- pencil
- safety glasses
- hearing protection
- kreg-jig
- drill
- compound miter saw
- nailer
- sander
Step-by-step Instructions
Step 1
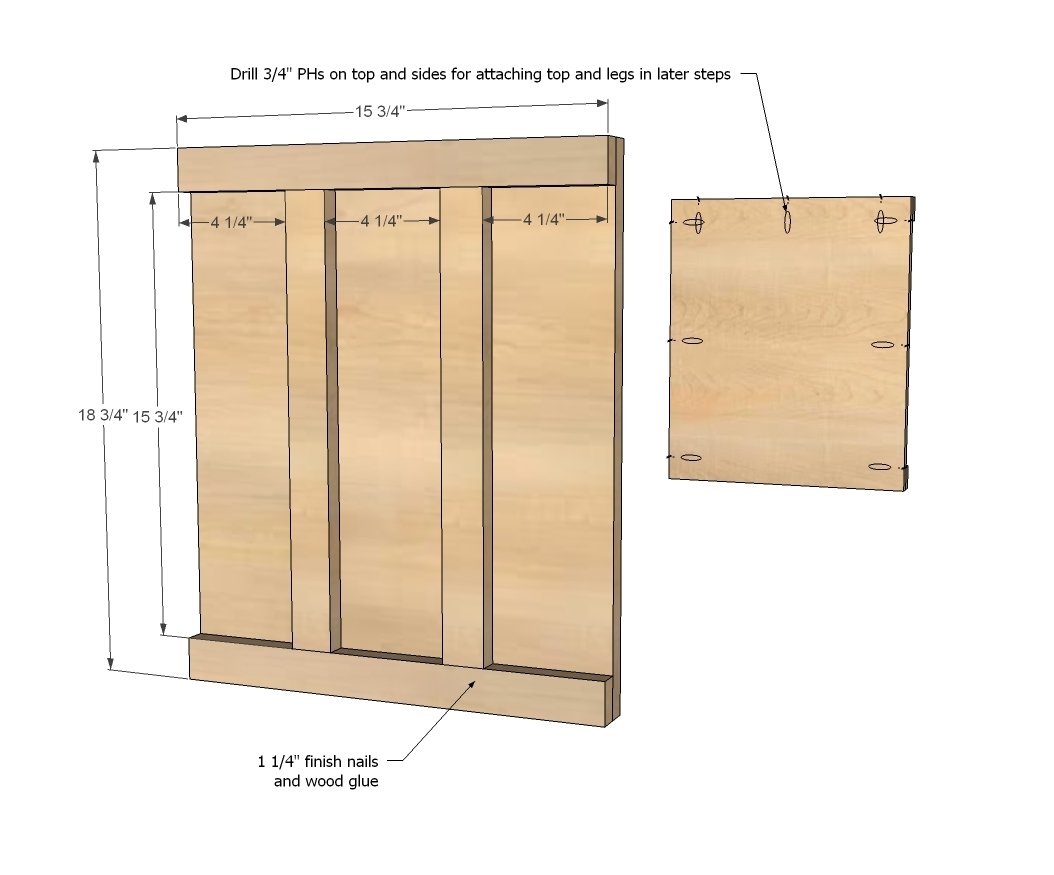
First things first... Go through and mark out all pocket holes. For the sides, drill 3/4 pocket holes along side and top edges on insides. Then attach trim as shown in diagram with 1-1/4" nails and glue.
Step 2
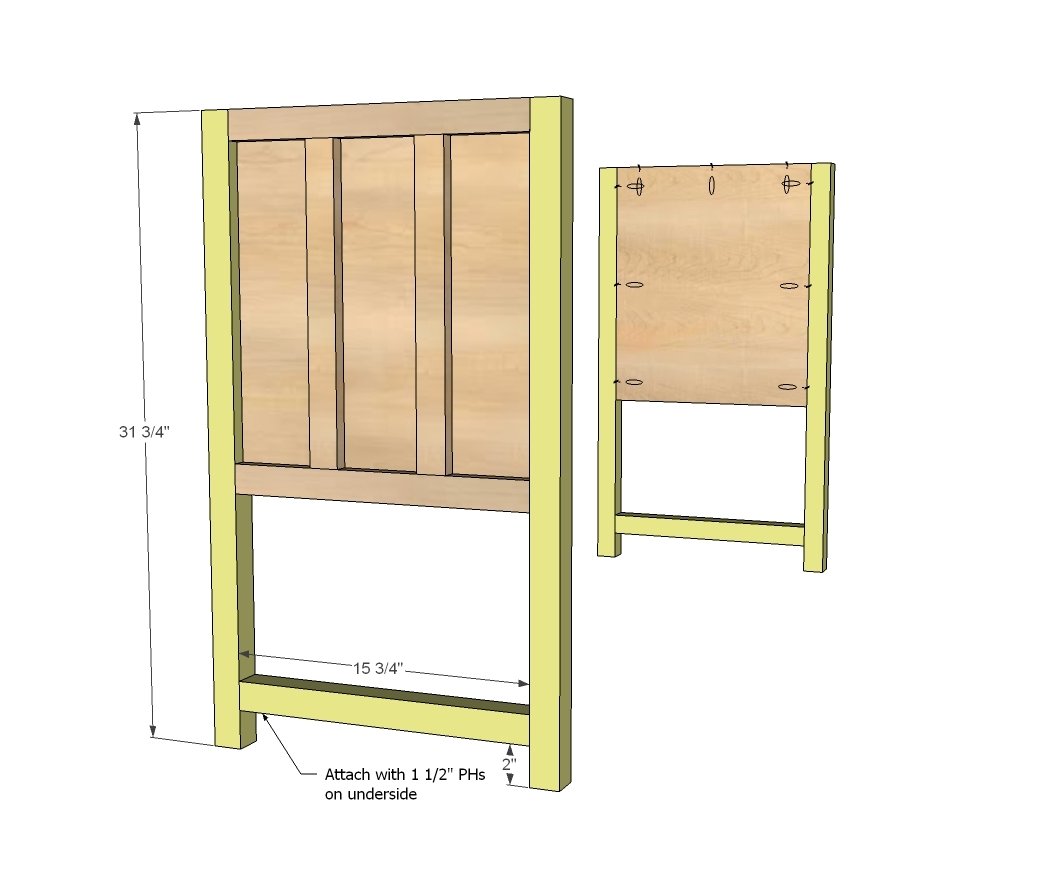
Now attach legs with 1 1/4" pocket hole screws through pure drilled holes. Then attach bottom with 1-1/2" pocket holes and 2-1/2" pocket hole screws.
Step 3
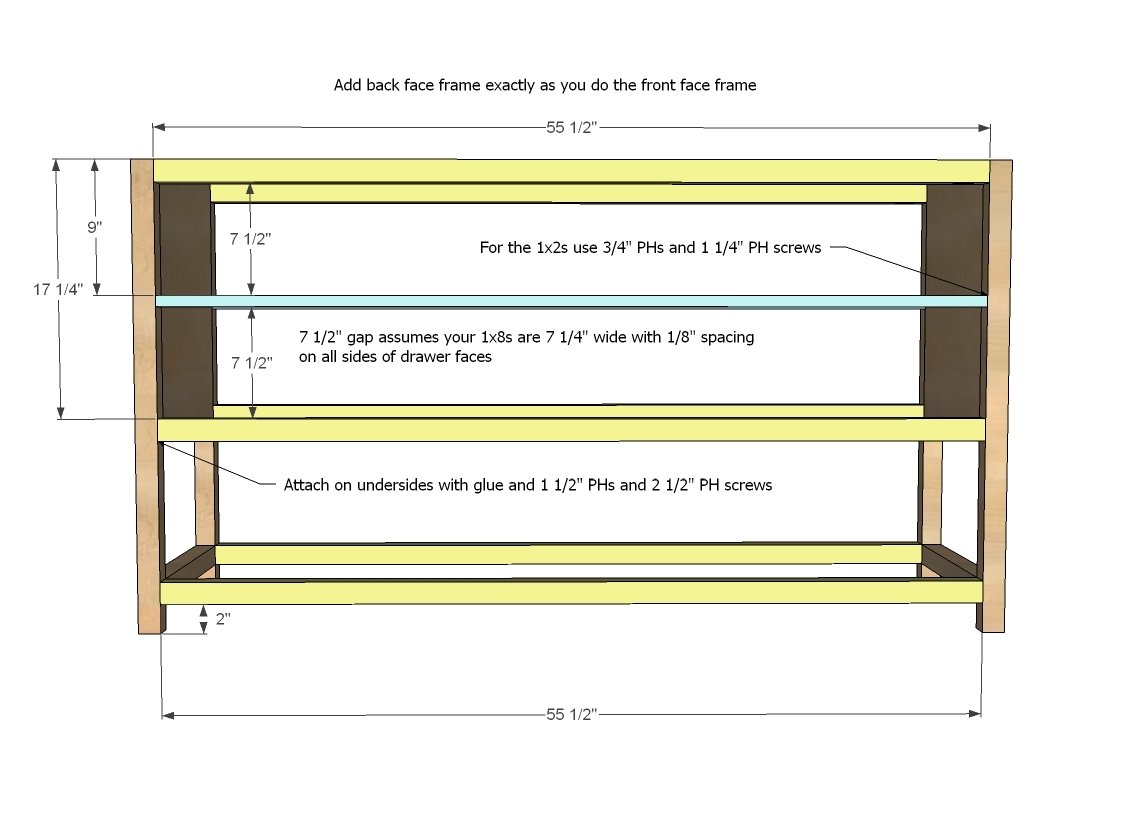
Now add the front and back trim to fom shape of dresser. TIP: Consider adding the dividers from next step as you go as it will get tight to fit a drill in later on.
Step 4
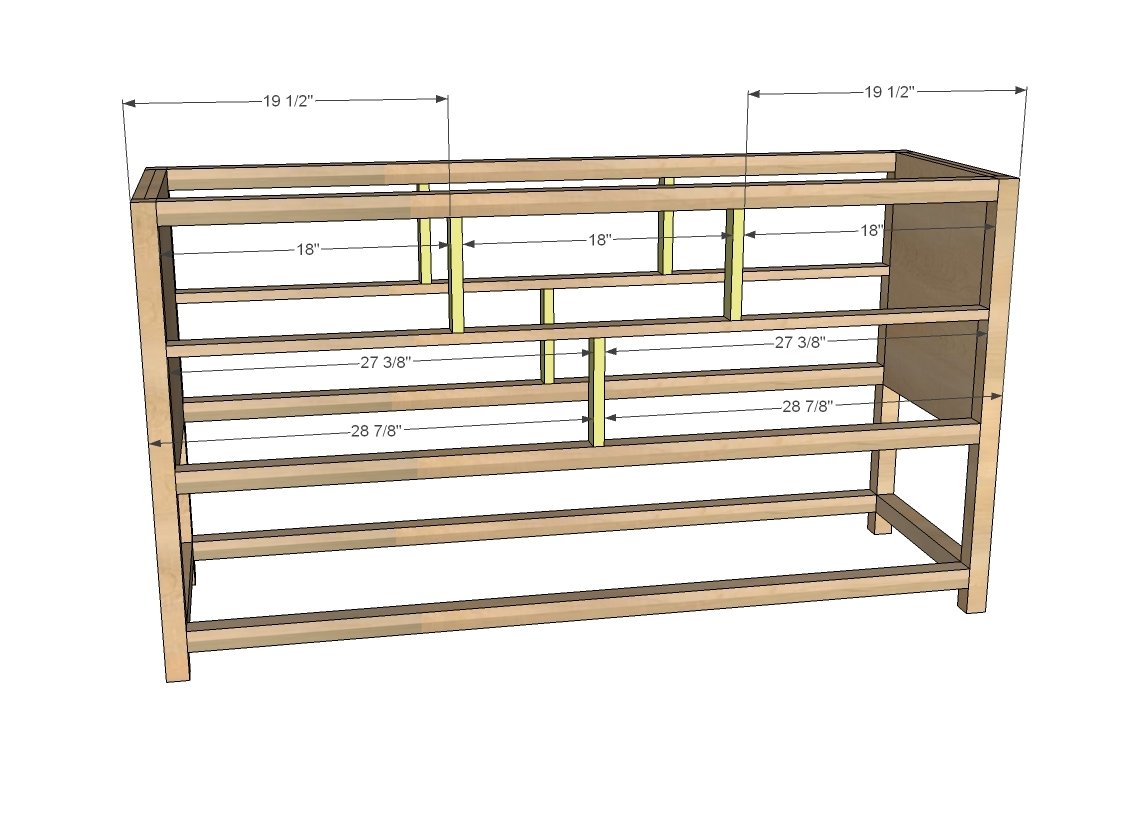
You may have to use a countersink bit to attach just because it will be hard to get your drill in there. Its super important here to be very accurate or your drawers won't slide right.
Step 5
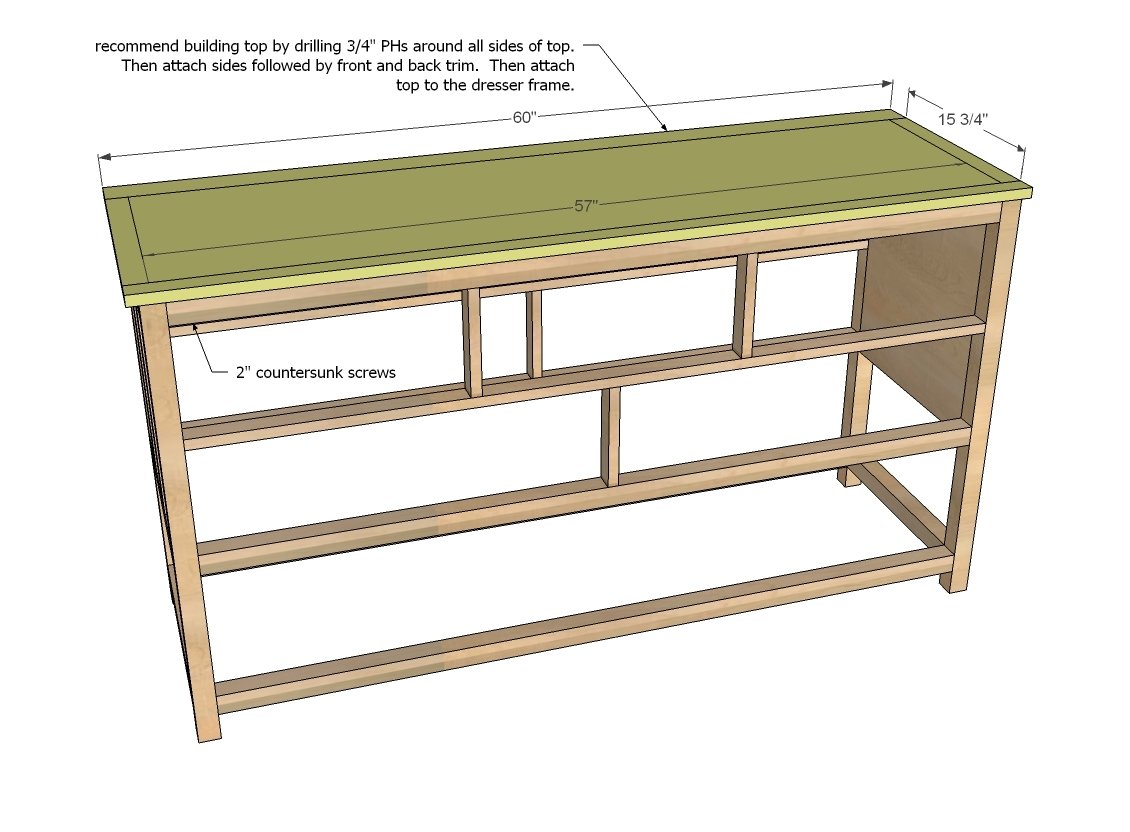
Attach trim to the outside edges of the top with 3/4" pocket holes and 1-1/4" pocket hole screws. Attach to top of dresser.
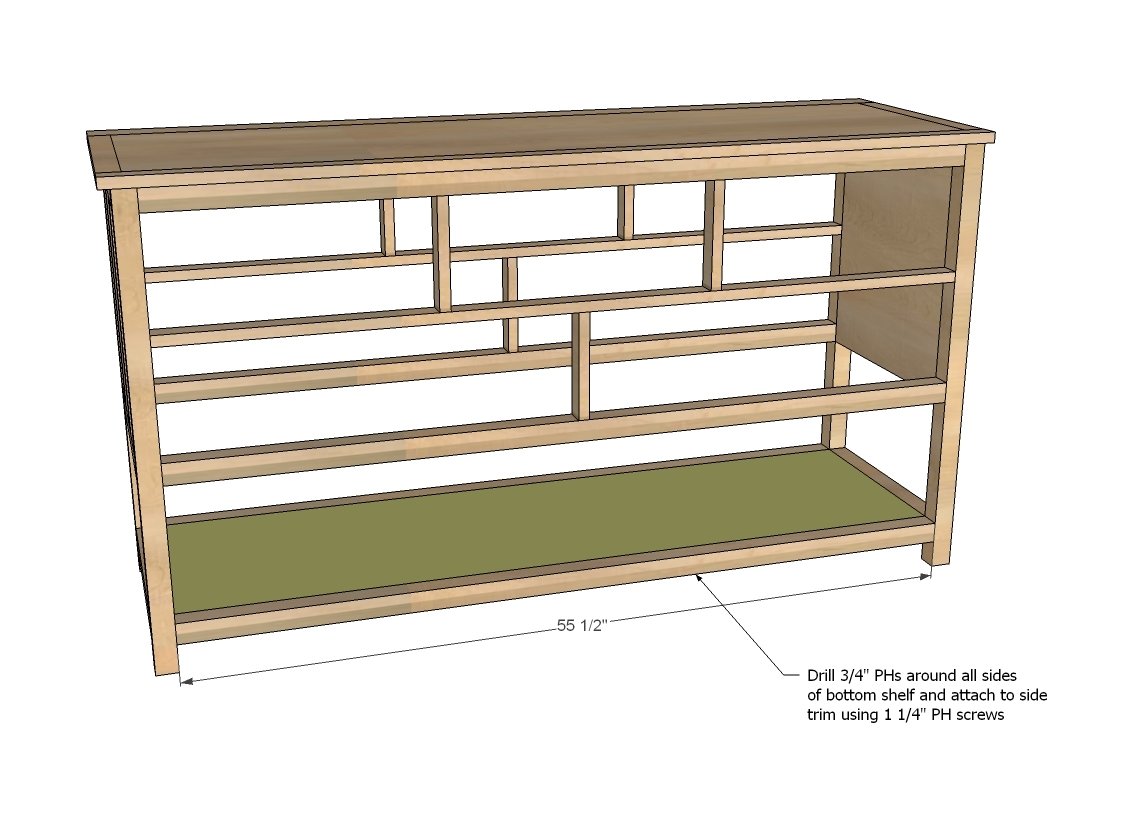
Drill 3/4" pocket holes on all four edges of the bottom shelf.
Attach to the shelf framing with 1-1/4" pocket hole screws.
Step 7
Build your drawers to fit openings, 1" less in overall width than inside openings. Here is a good video showing how to build and install drawers.
Step 8
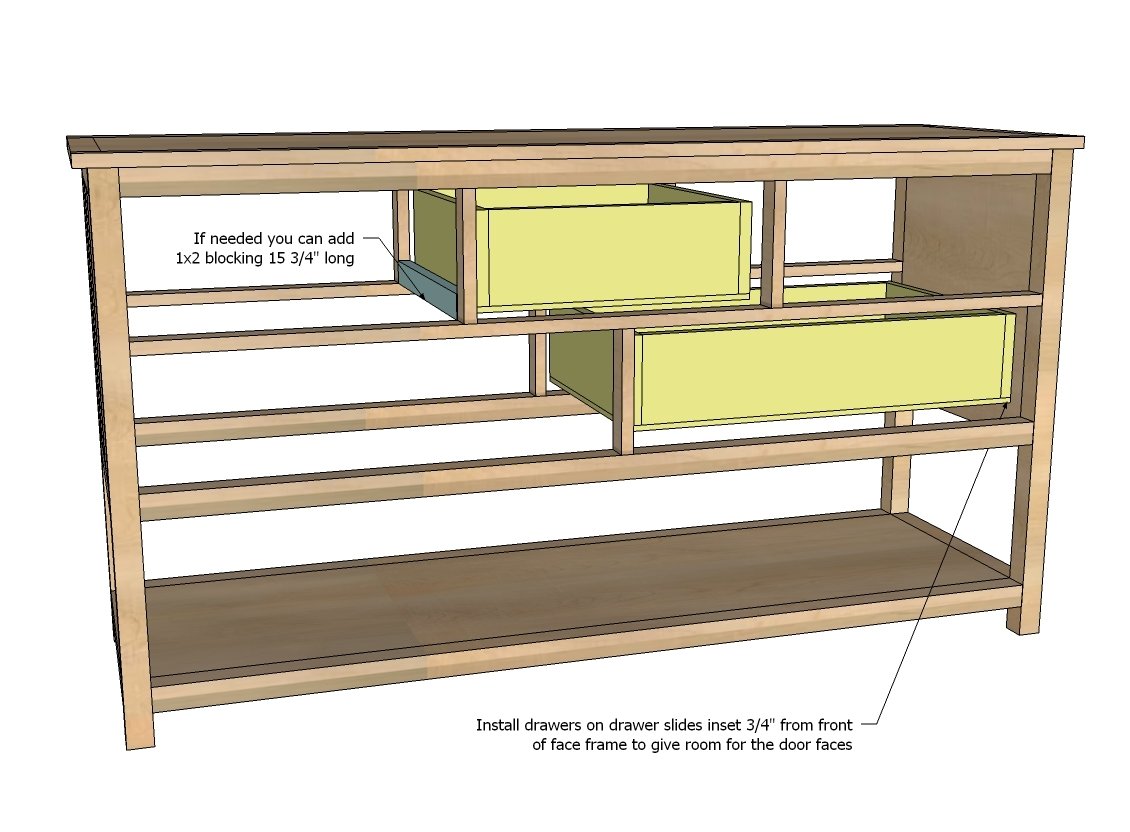
Step 9
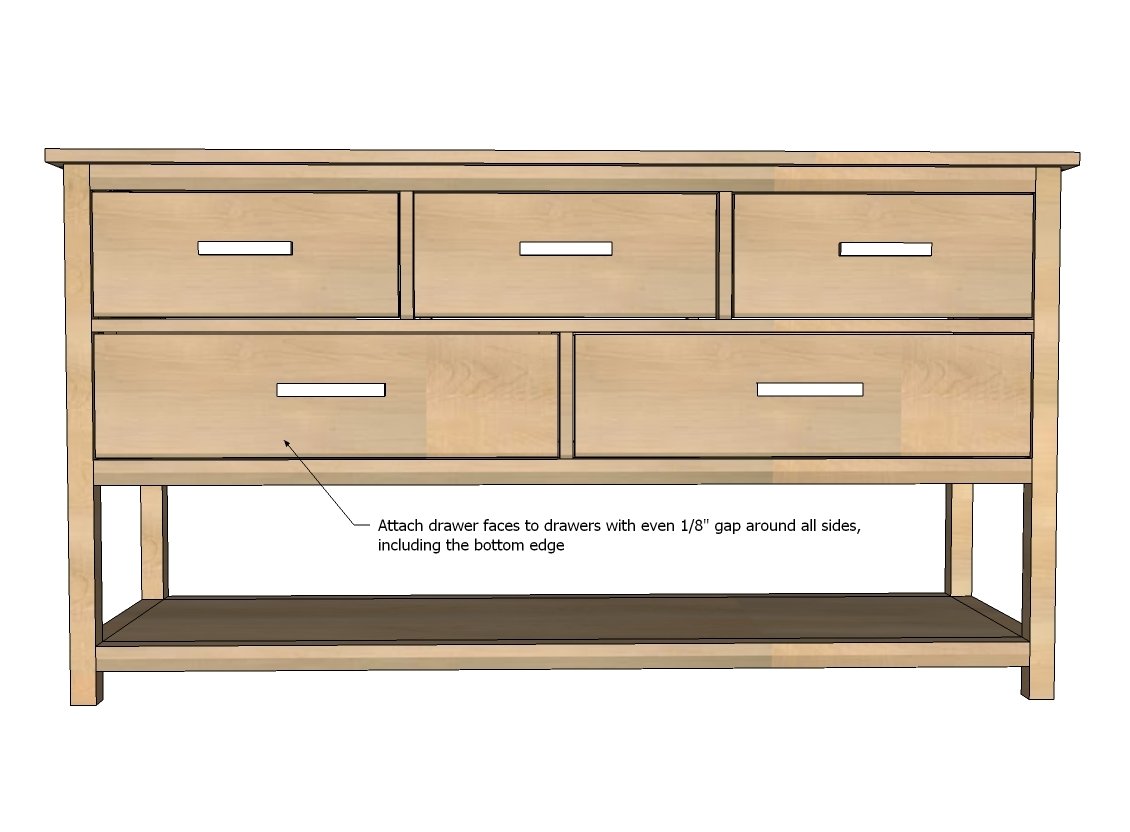
Insert drawers and attach drawer faces with even gap around all sides. I use 1 1/4" finish nails and glue"
Step 10
Attach back last so you can reach in and get your drawers just right.
Finishing
Sand all surfaces, starting with a medium grit and finishing with fine. Wipe off the dust, fill any holes or gaps with wood filler, and sand smooth once dry. Apply primer if you're painting, then finish with your choice of paint or stain and seal with a durable clear topcoat. For outdoor projects, use exterior-rated primer, paint or stain, and sealer so the piece stands up to the weather.
Source (temporary): https://www.ana-white.com/woodworking-projects/wide-dresser-open-bottom-shelf-cabin-collection