Wide Hutch for Grace's Town Collection
From Lindsay, this hutch is so many time cuter than the one I built! Originally designed for a Grocery Store, as Lindsay demonstrates, this hutch can be used for tons of other pretend play ideas as well! While the original plan call for an arched top, I love how Lindsay simplified the design by adding a simple curtain.
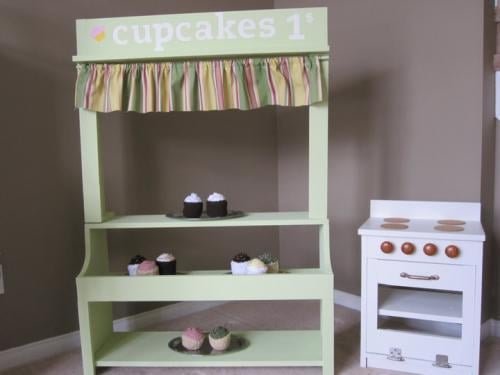
Specifications
| Project type | Grace's Town |
|---|---|
| Room | Kids and Toys |
| Difficulty | Intermediate |
| Estimated cost | Under $20 |
Dimensions
Use the size-specific shopping and cut lists below.
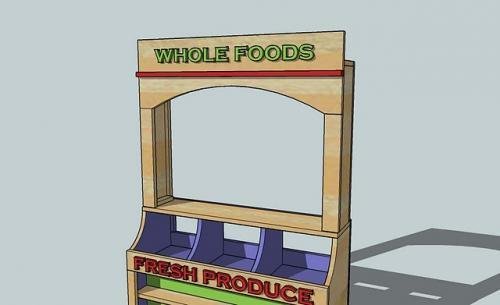
Shopping List
2 - 1x6 @ 8 feet long
2 - 1x2 @ 8 feet long
1 - 1x3 @ 8 feet long
Cut List
A) 2 – 1×6 @ 24 3/4″ (Sides)
B) 1 – 1×6 @ 36″ (Top)
C) 2 – 1×2 @ 5 1/2″ (Supports to attach to the base unit)
D) 1 – 1×6 @ 36″ (Sign Header)
E) 1 – 1×2 @ 36″ (Header Trim Piece)
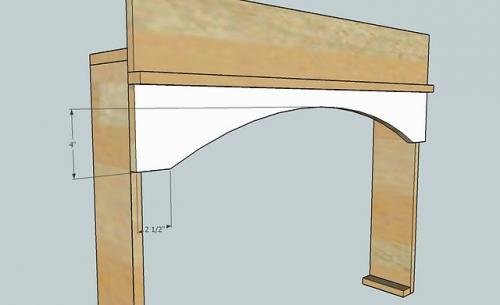
F) 1 – 1×6 @ 36″, Arch Cutout (Header)
G) 2 – 1×3 @ 17 3/4″ (Front Sides Trim)
H) 1 – 1×2 @ 36″ (Back Top Trim)
I) 2 – 1×2 @ 24″ (Back Sides Trim)
Cut out all your boards first.
Tools
- measuring tape
- square
- hammer
- safety glasses
- hearing protection
- drill
- circular saw
- nailer
- sander
Step-by-step Instructions
Step 1
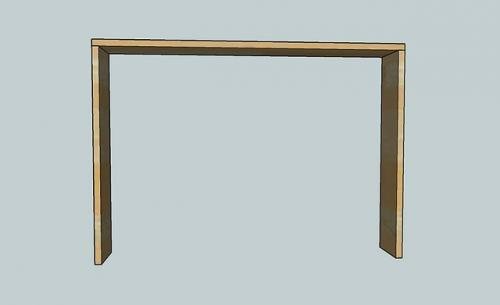
Start by “building the box” by nailing with 2″ nails and glue through the top of B into the end edges of A, to get the above diagram.
Step 2
Start by “building the box” by nailing with 2″ nails and glue through the top of B into the end edges of A, to get the above diagram.
Step 3
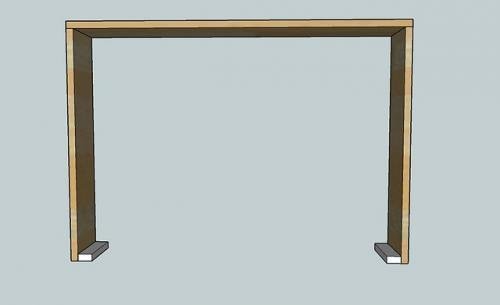
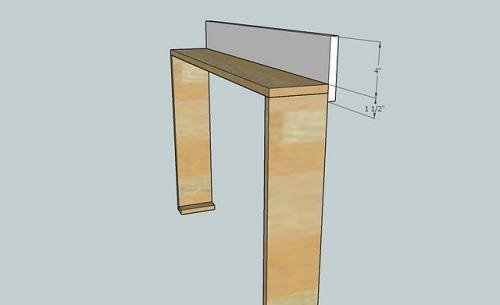
Add the Sign Header, D, as shown above. Use 2″ nails and glue, and make sure you nail into both the top and the sides of the hutch.
Step 4
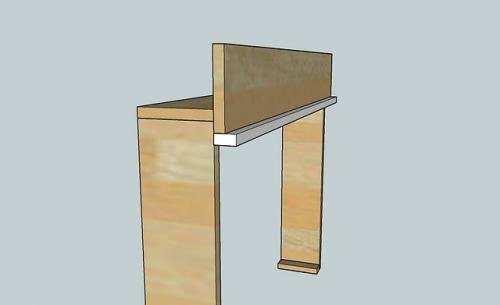
Nail through the bottom of the trim piece, E, shown above in white, into the header. Also nail through the front of E into the sides of the hutch. Use glue and 2″ nails.
Step 5
Step 6
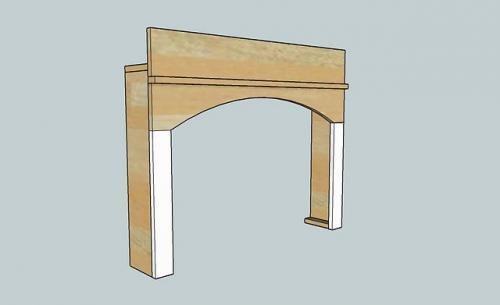
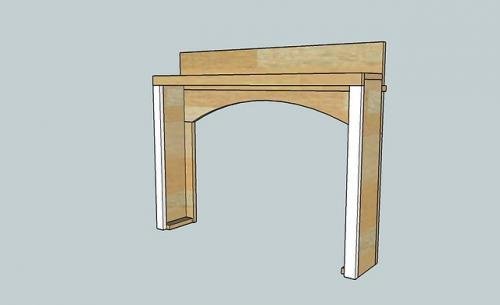
Hardest part is done! Now add the front sides trim pieces, G, as shown above, Make sure you nail and glue into both the sides and the bottom supports, C.
Step 7
Turn the cabinet over and nail and glue the back top trim piece, H, in place. Keep outside edges flush.
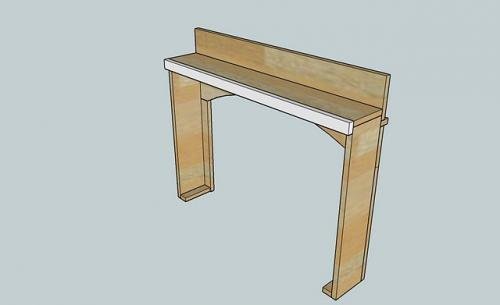
Then the side pieces, I, and you are done with the framing.
As always, fill nail holes with putty and sand and finish as desired. Make sure when you attach the hutch to the base that you use screws and screw through the supports into the top of the base unit.
Finishing
Sand all surfaces, starting with a medium grit and finishing with fine. Wipe off the dust, fill any holes or gaps with wood filler, and sand smooth once dry. Apply primer if you're painting, then finish with your choice of paint or stain and seal with a durable clear topcoat. For outdoor projects, use exterior-rated primer, paint or stain, and sealer so the piece stands up to the weather.
Source (temporary): https://www.ana-white.com/woodworking-projects/wide-hutch-graces-town-collection