Wide Painter’s Ladder Shelf
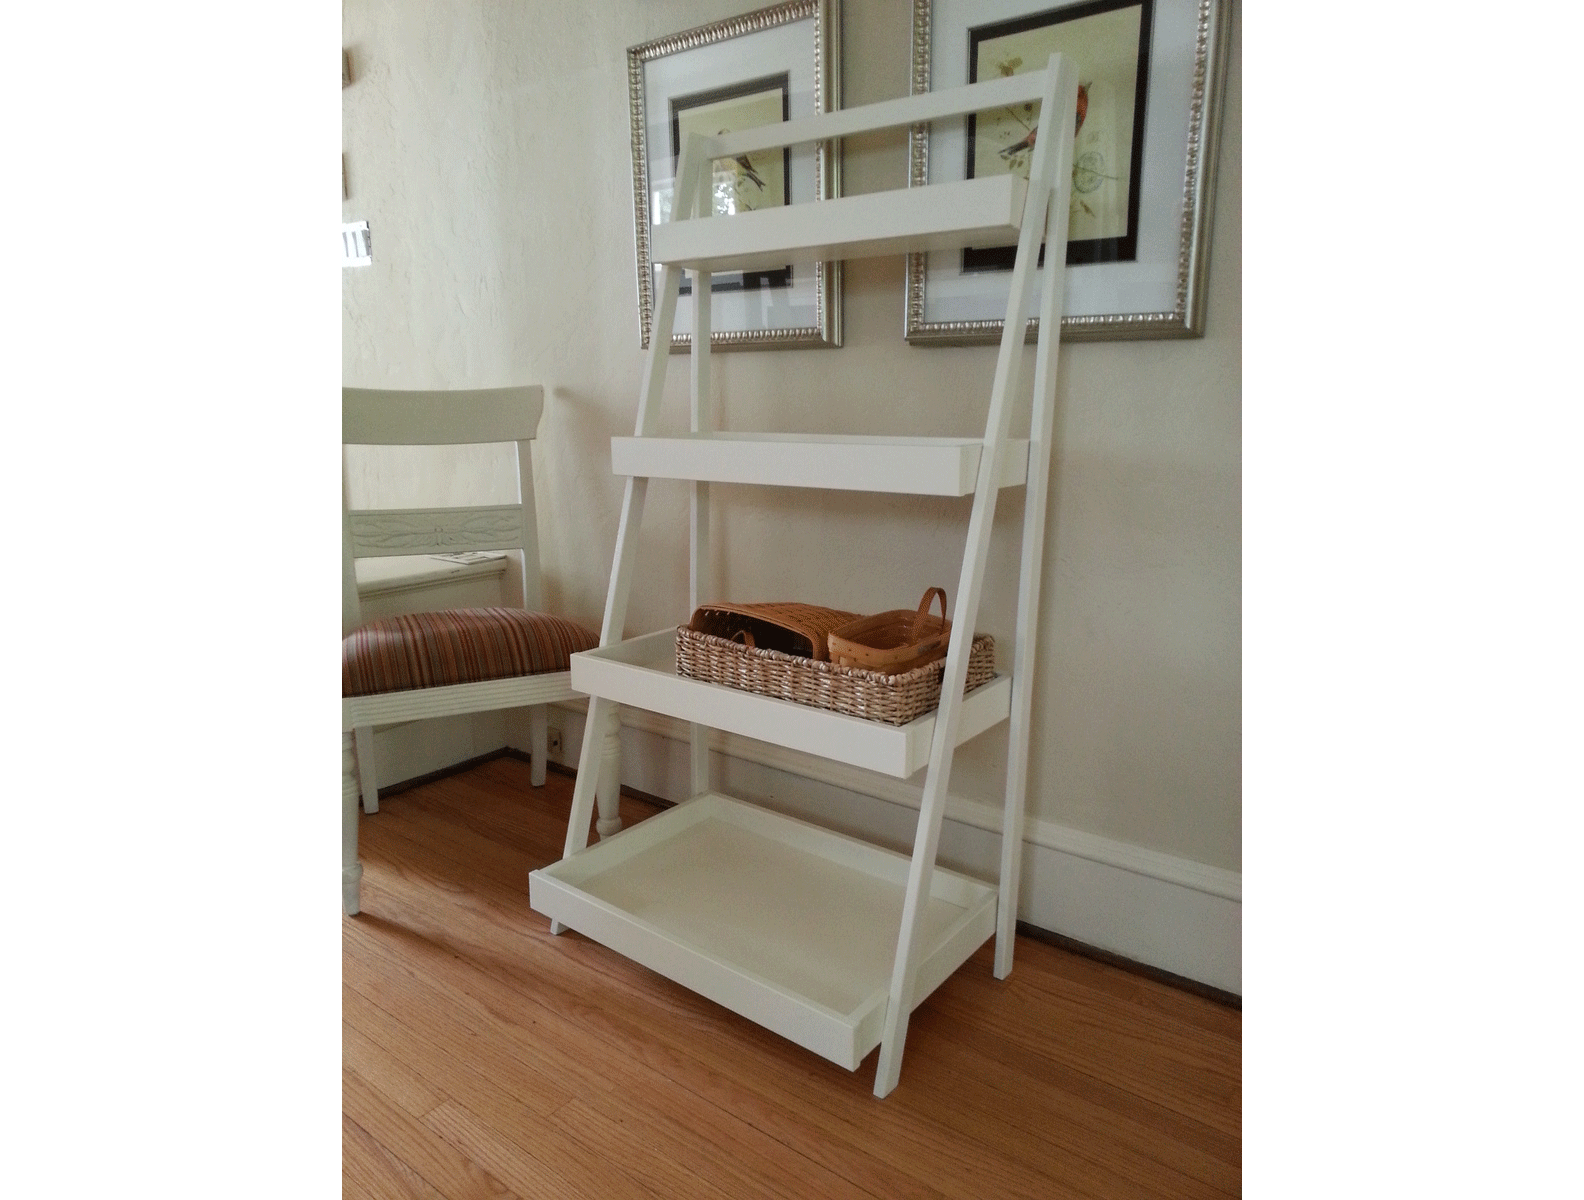
Build your own ladder shelf from This plan is for a free standing storage tower, with varying size shelves, good for different size objects, in narrower spaces or for tiered organization. We love it in bathrooms, entryways, kids rooms and more!
Specifications
| Project type | Bookshelf and Bookcase Plans |
|---|---|
| Room | Bathroom |
| Style | Cottage Style Furniture Plans |
| Difficulty | Intermediate |
| Estimated cost | $20 - $50 |
Dimensions
Use the size-specific shopping and cut lists below.
Shopping List
1 – 24" x 48" 3/4" thick plywood panel, prefer hardwood plywood (ie Purebond)
4 – 1×2 boards, 8 feet long
4 – 1×3 boards, 8 feet long
2" and 1-1/4" brad nails (can also use pocket holes or screws, the brad nails are the simplest and easiest, but not the strongest)
Wood Glue
Finishing Supplies
Cut List
2 – 1×2 @ 55 3/8″ (Front Legs, ends cut at 15 degrees off square)
2 – 1×2 @ 53 1/2″ (Back Legs)
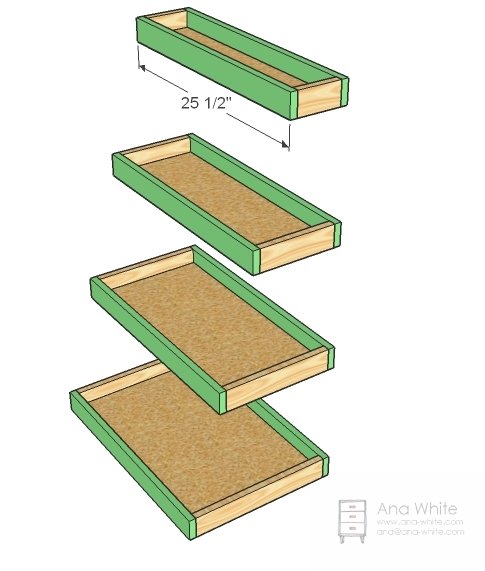
8 – 1×3 @ 25 1/2″ (Fronts and Backs of shelves)
1 – 1×2 @ 25 1/2″ (Top)
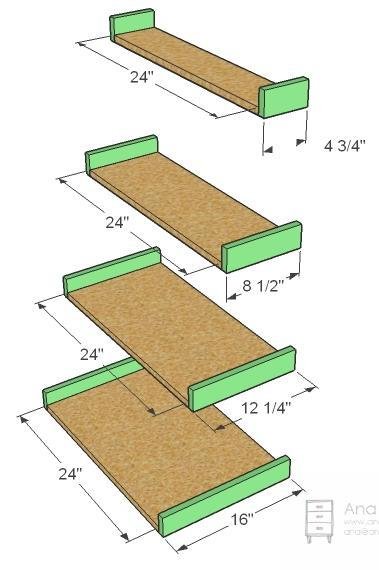
1 – 24″ x 4 3/4″ (Top Shelf cut from 24″ wide shelf)*
2 – 1×3 @ 4 3/4″ (Top Shelf Side Trim)
1 – 24″ x 8 1/2″ (Second Shelf)*
2 – 1×3 @ 8 1/2″ (Second Shelf Trim)
1 – 24″ x 12 1/4″ (Third Shelf)*
2 – 1×3 @ 12 1/4″ (Third Shelf Trim)
1 – 24″ x 16″ (Bottom Shelf)*
2 – 1×3 @ 16″ (Bottom Shelf Trim)
Tools
- measuring tape
- square
- pencil
- safety glasses
- circular saw
- compound miter saw
- nailer
- sander
- countersink drill bit
Step-by-step Instructions
Step 1
Legs Cut the legs as directed in the cut list. See step 2 for cutting the top corner of the front legs.
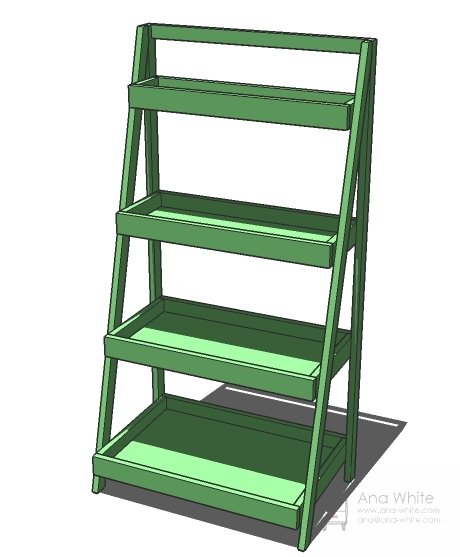
Tops of Legs
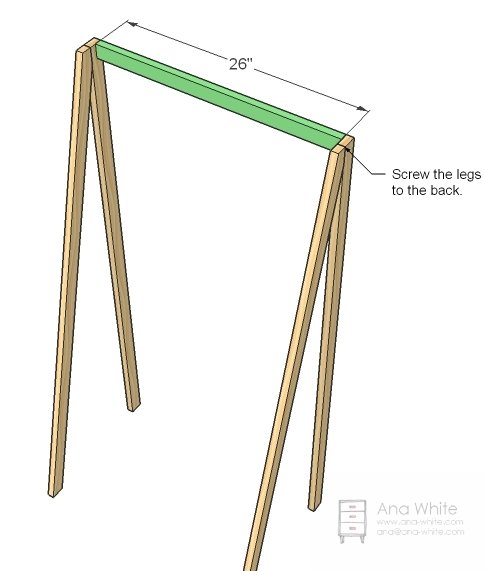
Cut the top of the front legs as shown. Join the front leg to the back leg with screws and glue. I used pocket hole screws, but a 2" trim screw or brad nail and glue from the back does the trick too. This joint will be reinforced in later steps.
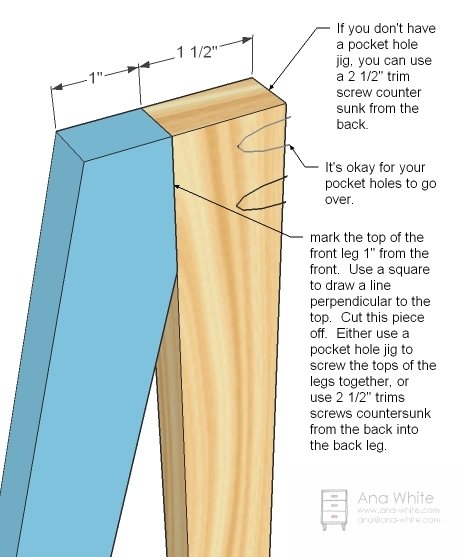
Top
Now attach the top to the legs as shown above. Again, I used pocket holes, but 2 1/2″ trim screws would do the trick. I layed the whole thing on it’s back on the garage floor to make things easier. Set the whole thing aside.
Shelf Sides
Measure and cut the side trim for the shelves. Attach with 1-1/4" brad nails and glue.
Step 5
Measure and cut the trim for the sides of the shelves. Attach with glue and 1-1/4" brad nails. Make sure you also attach 1x3s together at corners.
Assembly
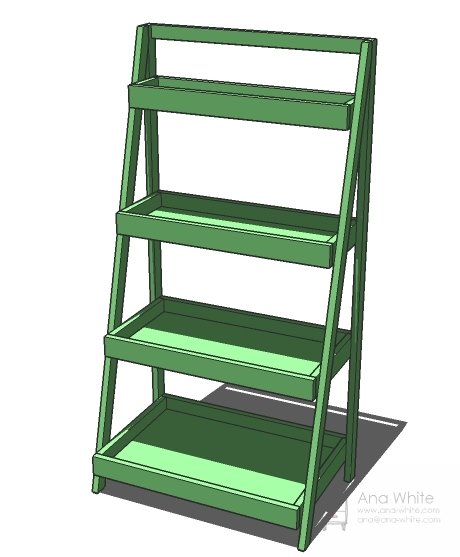
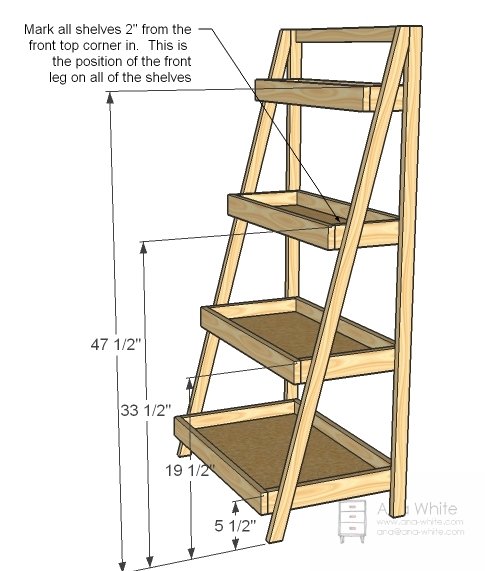
Take time to carefully prepare by cleaning your workspace free of sawdust. Now measure the legs and mark the shelf locations, as shown in the diagram above. Then mark each of the shelves 2″ in from the top front corners. This is the point where the shelves meet the marks you made on the legs. Lay the legs with the back down on the floor. Then start with the bottom shelf, screwing through the legs into the side trim for the bottom shelf with 1 1/4″ screws. Then work your way up. Check all the shelves and back legs for level – I did have to adjust mine.
Finishing
Sand all surfaces, starting with a medium grit and finishing with fine. Wipe off the dust, fill any holes or gaps with wood filler, and sand smooth once dry. Apply primer if you're painting, then finish with your choice of paint or stain and seal with a durable clear topcoat. For outdoor projects, use exterior-rated primer, paint or stain, and sealer so the piece stands up to the weather.
Source (temporary): https://www.ana-white.com/woodworking-projects/wide-painters-ladder-shelf