Wood Christmas Tree Collar
Easy DIY wood Christmas Tree collar - free
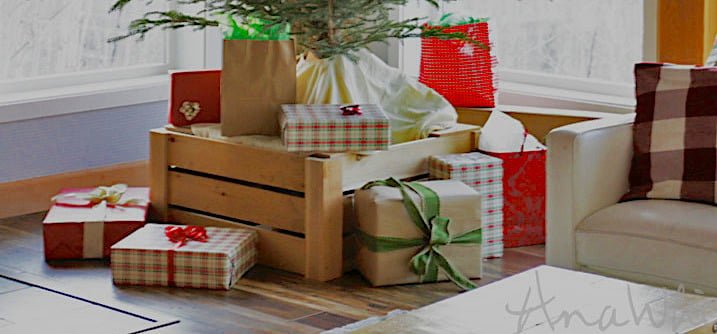
Specifications
| Project type | Home DIY |
|---|---|
| Room | living room |
| Style | Farmhouse Furniture |
| Difficulty | Beginner Projects |
Dimensions
Use the size-specific shopping and cut lists below.
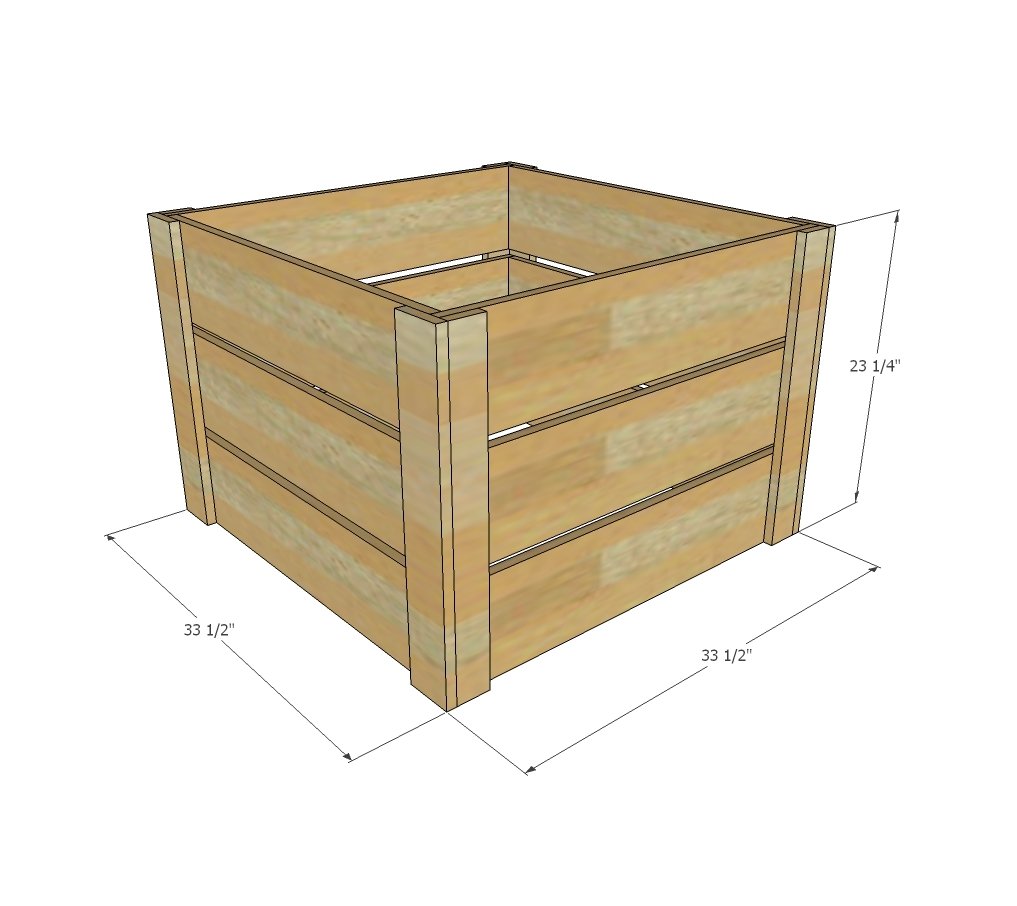
Shopping List
FOR THIS CHRISTMAS TREE COLLAR
4 - 1x8 @ 8 feet long
1- 1x3 @ 8 feet long
1 - 1x4 @ 8 feet long
Cut List
6 - 1x8 @ 32" - cut two from an 8 foot board, and then a 30-1/2" to get all cuts in
6 - 1x8 @ 30-1/2"
4 - 1x3 @ 23-1/4"
4 - 1x4 @ 23-1/4"
Tools
- measuring tape
- square
- pencil
- safety glasses
- hearing protection
- drill
- circular saw
- nailer
- sander
Step-by-step Instructions
Step 1
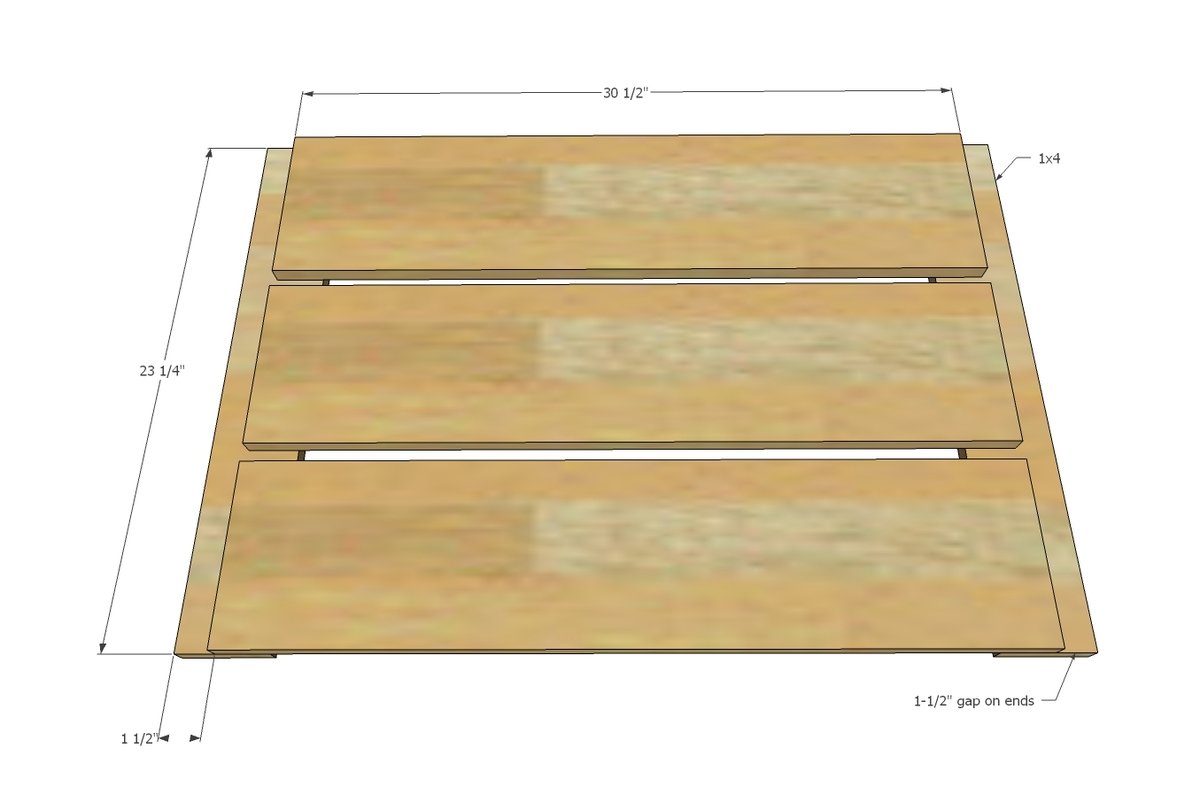
Lay 2 - 1x3s on flat surface and place two 1x8 @ 32" on top, lined up with each end. Use 1-1/4" nails and wood glue to attach.
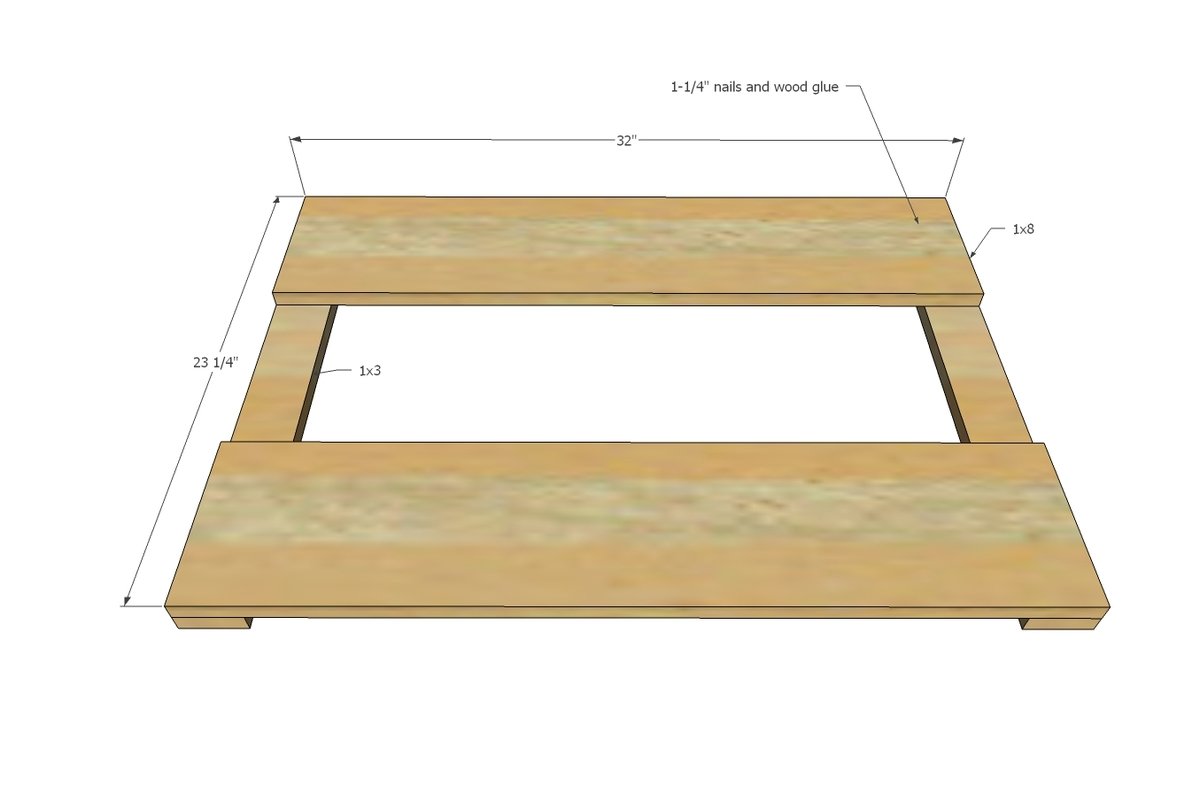
Position center 1x8 in middle with even gaps on both sides and attach.
Repeat to build two of the underlapped ends.
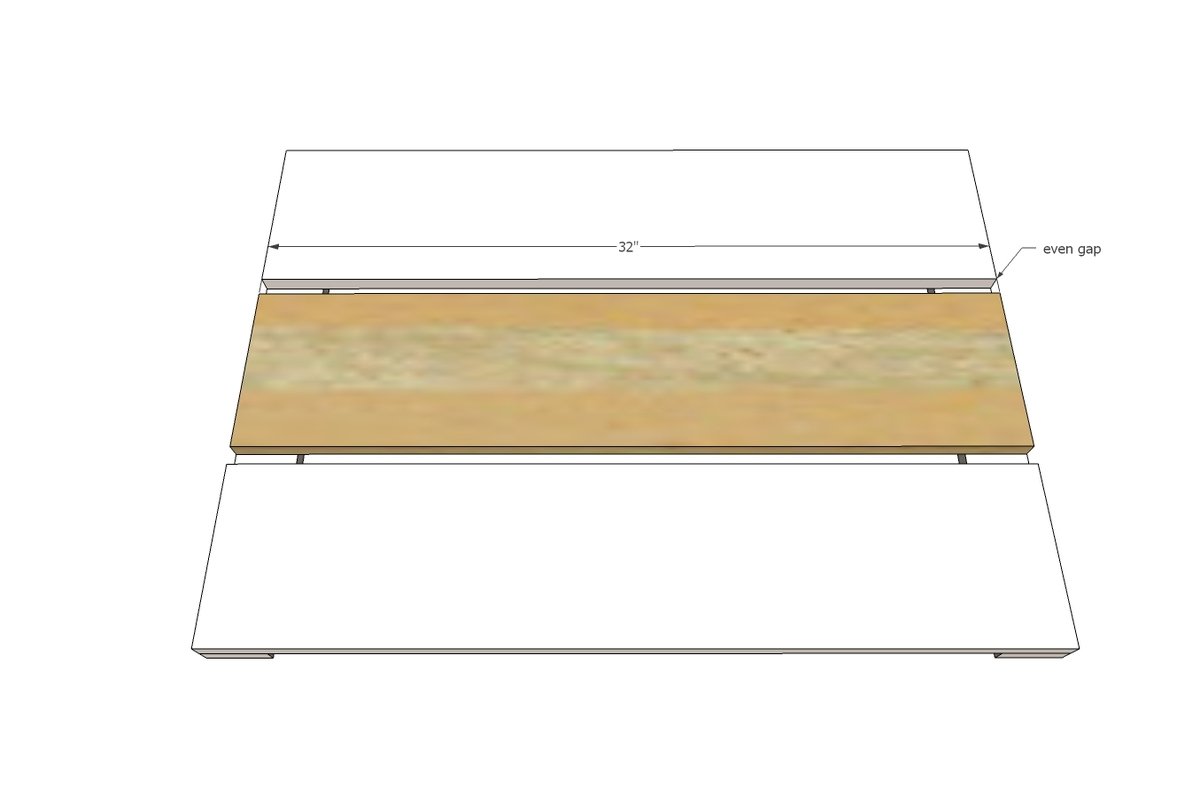
Now for the overlapped ends.
Repeat steps 1-2, but leave a 1-1/2" gap on ends of 1x8s. A 1x2 scrap works great as a guide (just clamp to the 1x8 or hold in place while attaching).
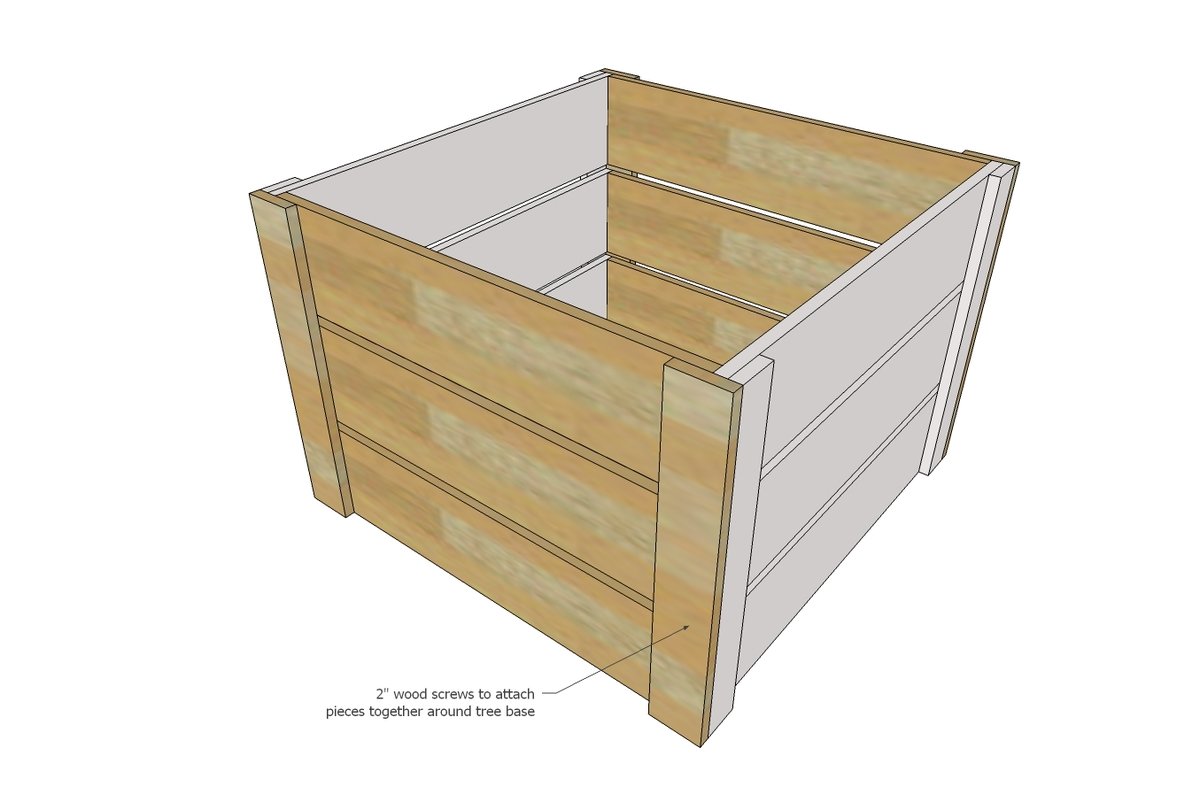
After Christmas tree has been set in stand, screw panels around tree base with 2" screws.
NOTE: We also added plywood scrap pieces on top for resting gifts on top of Christmas tree collar.
Finishing
Sand all surfaces, starting with a medium grit and finishing with fine. Wipe off the dust, fill any holes or gaps with wood filler, and sand smooth once dry. Apply primer if you're painting, then finish with your choice of paint or stain and seal with a durable clear topcoat. For outdoor projects, use exterior-rated primer, paint or stain, and sealer so the piece stands up to the weather.
Source (temporary): https://www.ana-white.com/woodworking-projects/wood-christmas-tree-collar