Wood Closet Shelving
A reader favorite, our wood closet shelving plans are easy to build, easy to customize, and budget friendly! It costs about $20 a linear foot (our 10 foot closet cost $200) to build. You'll love with full diagrams and lots of reader submitted photos.
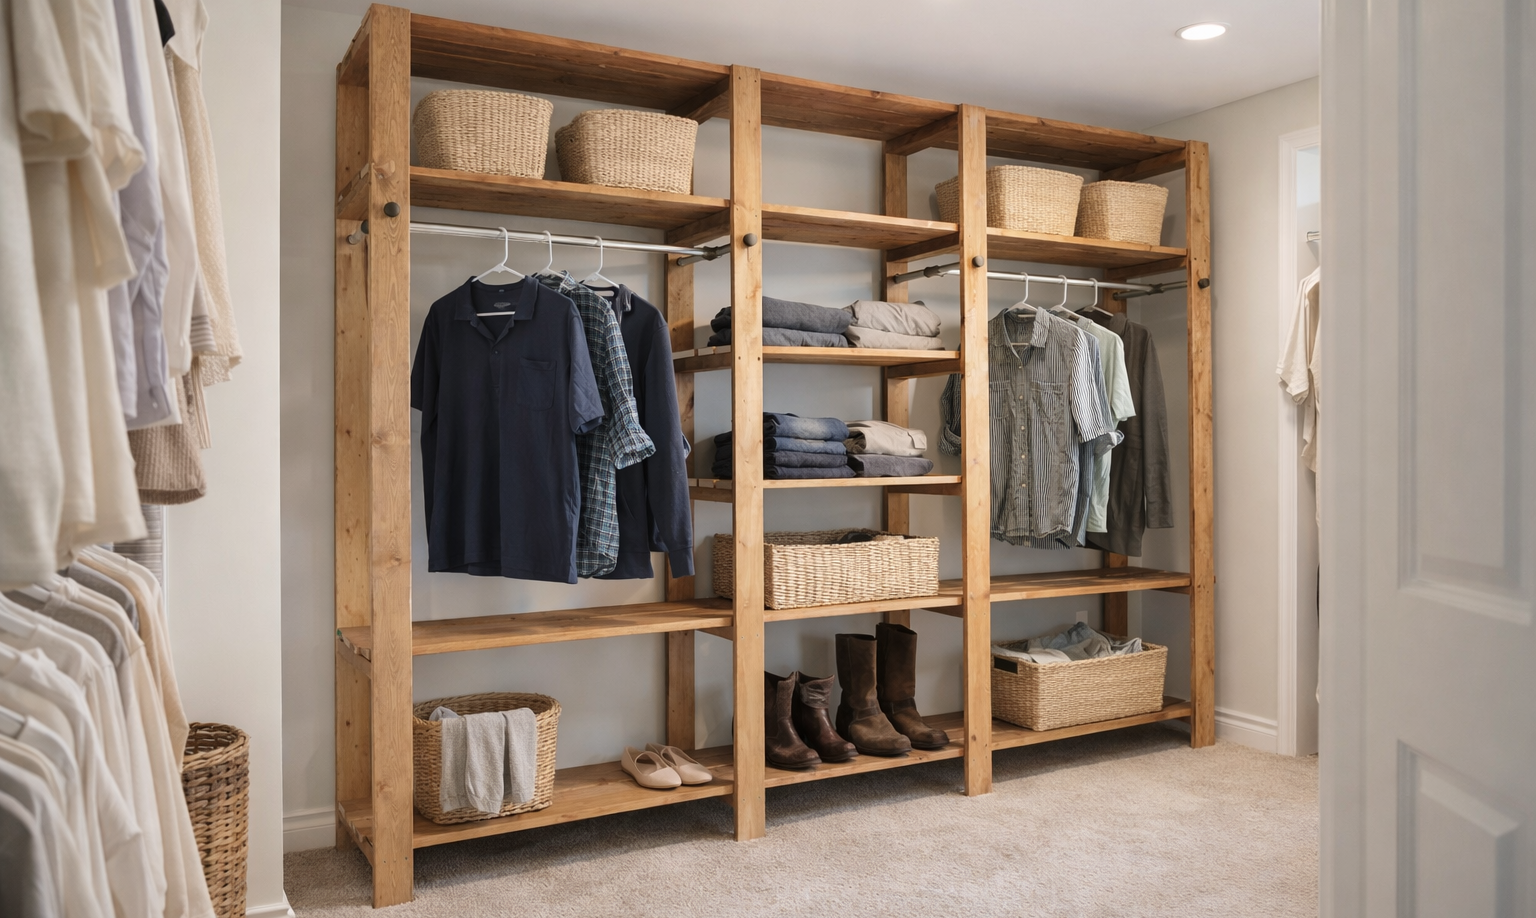
Specifications
| Project type | Storage Woodworking Plans |
|---|---|
| Room | Storage Solutions |
| Style | Industrial Style Furniture Plans |
| Difficulty | Beginner Projects |
Dimensions
Use the size-specific shopping and cut lists below.
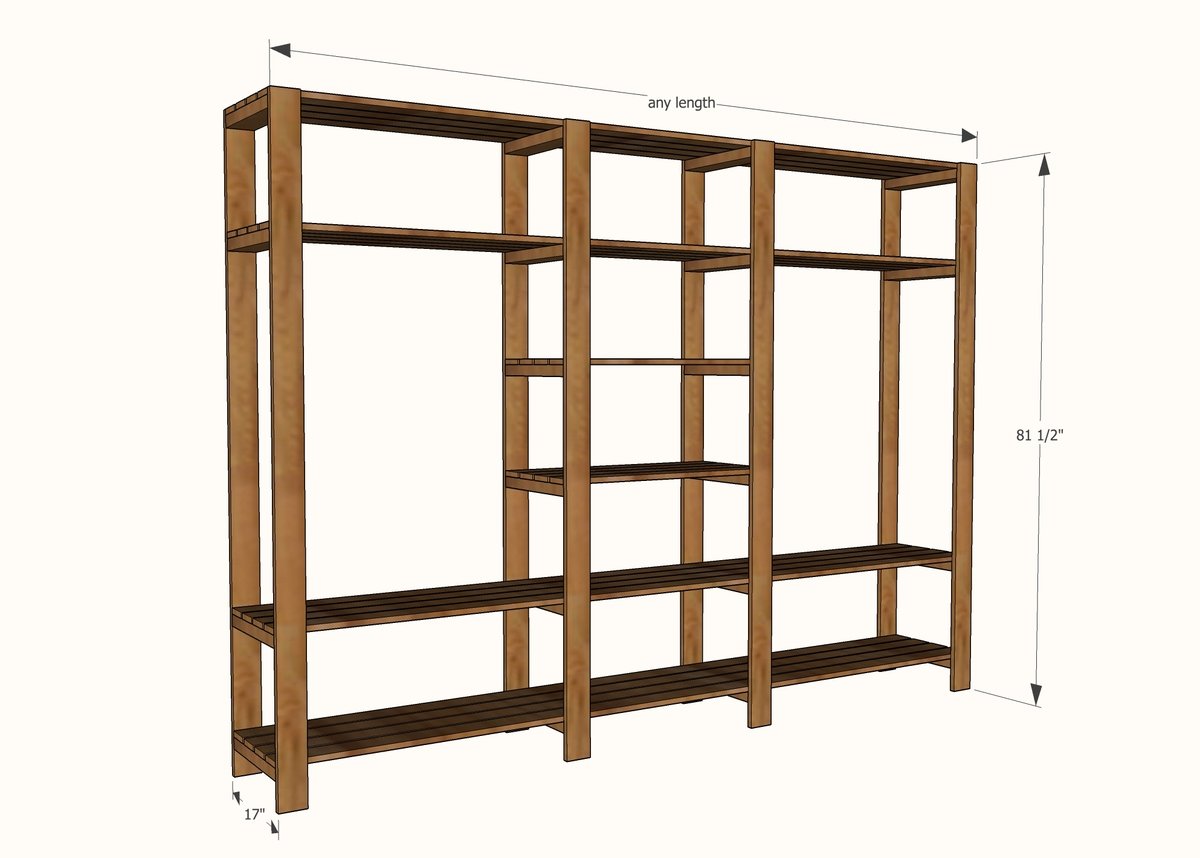
Shopping List
PER LEG SUPPORT (You'll need at least two leg supports, and additional leg supports every 3 feet or so)
- 2 - 1x4 @ 8 feet long (for the legs)
- 4 feet of 2x4 for the legs with closet rods and upper shelves, 8 feet of 2x4s for legs with closet rods, upper shelves AND and extra shelf supports
- I'd buy one extra 2x4 for things like supporting the closet rod (if not using the pipes) and for cutting around knots, cracks, splits etc
- 2-1/2" self tapping screws for attaching the legs to the 2x4 ends, two per joint
SHELVES
- 4 - 1x4 @ length of closet PER SHELF
- Additional 1x4s for smaller shelves if using
- 1-1/2" self tapping screws for attaching shelving or brad nails (recommend two per joint)
Wood stain or paint - I stained all of my boards first, before cutting. I let them dry overnight. After completing the project, I touched up unstained areas (cut ends).
Cut List
PER LEG SUPPORT
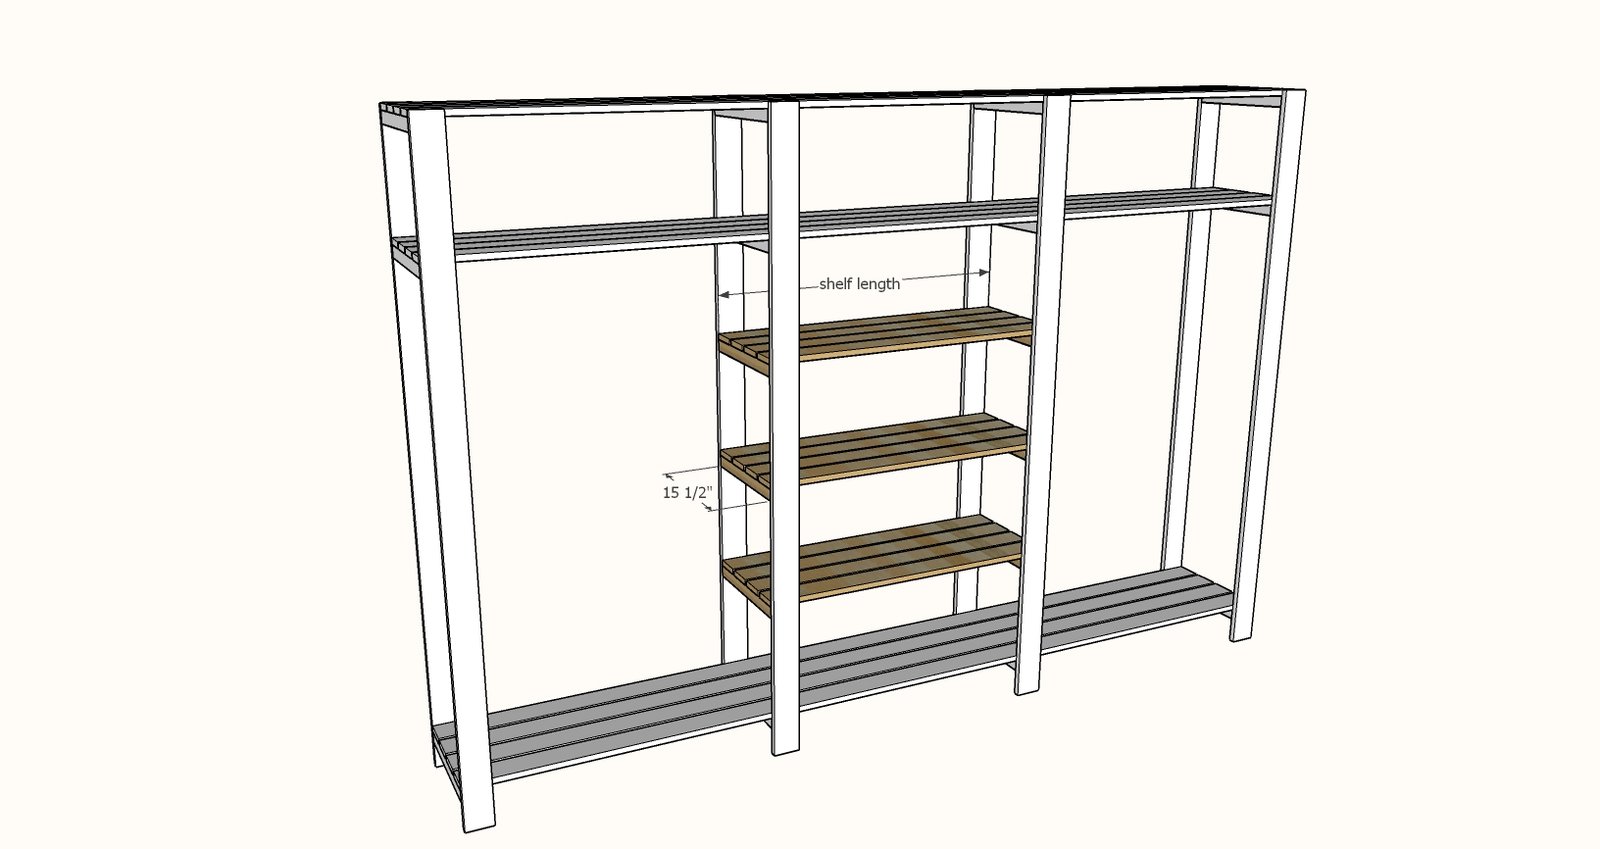
- 3 - 2x4 @ 15-1/2" (shelf supports - make sure you measure your pipes first to figure how deep the closet needs to be to work with the iron pipe closet rods)
- 2 - 1x4 @ 81-1/2" (legs - you may wish to shorten these to pass through doorways)
SHELVES
- Per each full length shelf - 4 - 1x4s cut to length of closet
FOR EACH SMALLER SHELF
- 2 - 2x4 @ 15-1/2"
- 4 - 1x4 cut to length of smaller shelf
Tools
- measuring tape
- square
- safety glasses
- hearing protection
- drill
- circular saw
- sander
- countersink drill bit
Step-by-step Instructions
Build leg supports using 2-1/2" self tapping screws and wood glue.
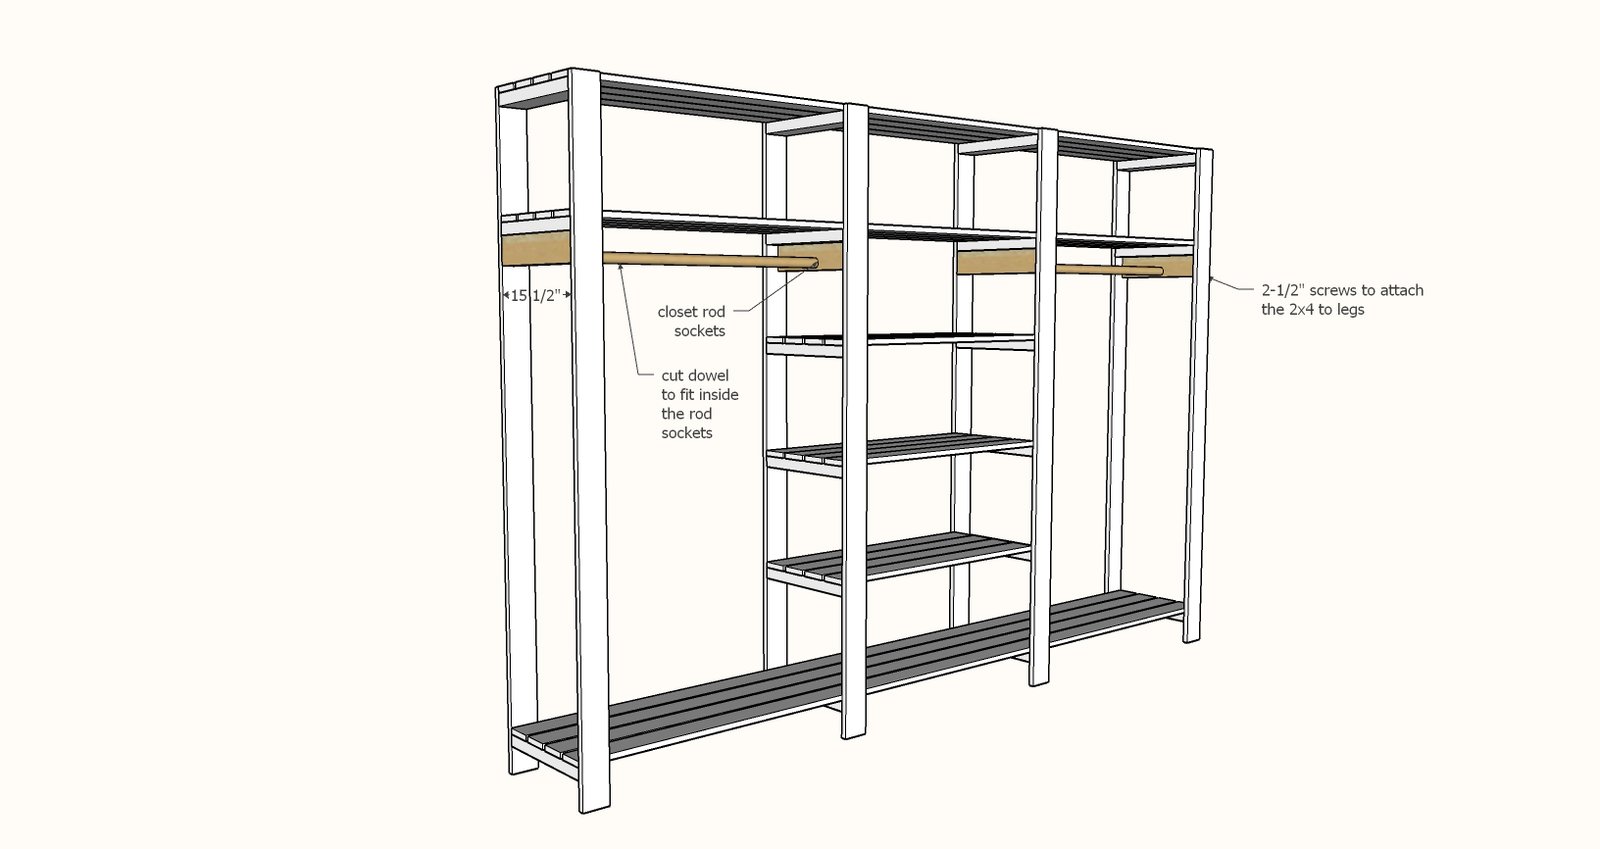
Since I was using the metal pipe closet rods, I installed them at this step.
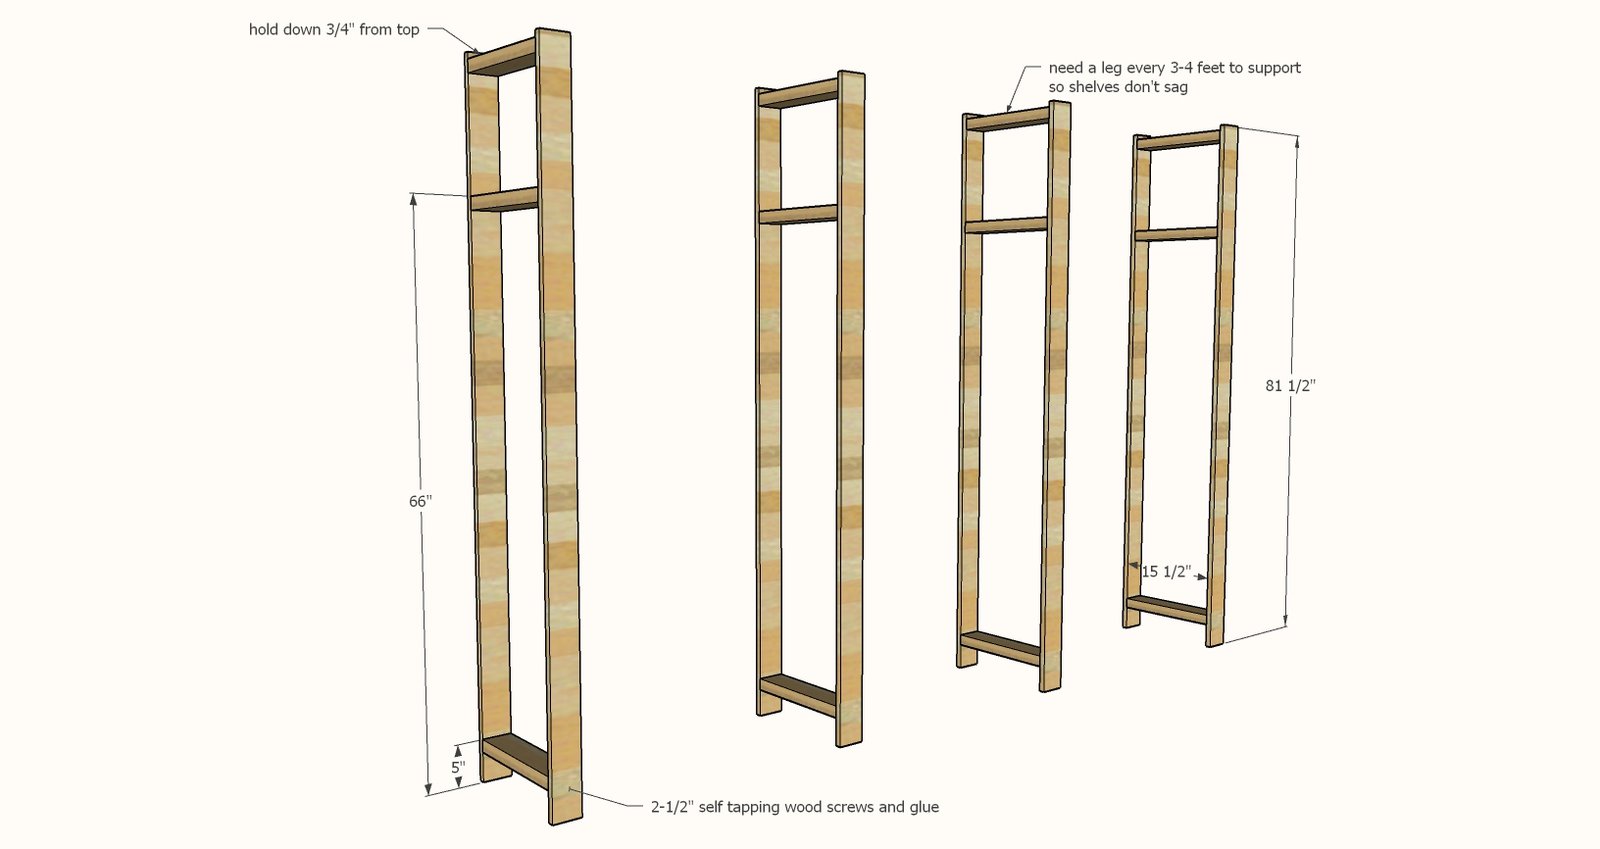
Step 2
I cut all my shelving to the length of the closet. Then I threaded two shelving boards on bottom shelf and two on second to top shelf. I screwed the shelving boards to the outside leg supports, flush to the inside of the legs (will come back and add the middle shelving boards). Once the two outside leg supports were screwed down, I used a level to place the remaining two legs, with the closet rod determining where the legs should go. Then I added the remaining shelving boards, screwing those down. Attach the outer shelving boards first, then evenly space the middle two shelving boards. I used 1-1/2" screws here. Once everything was tied in, it was pretty secure, but just for added security, I also screwed the shelving unit to the walls to prevent racking or forward tipping.
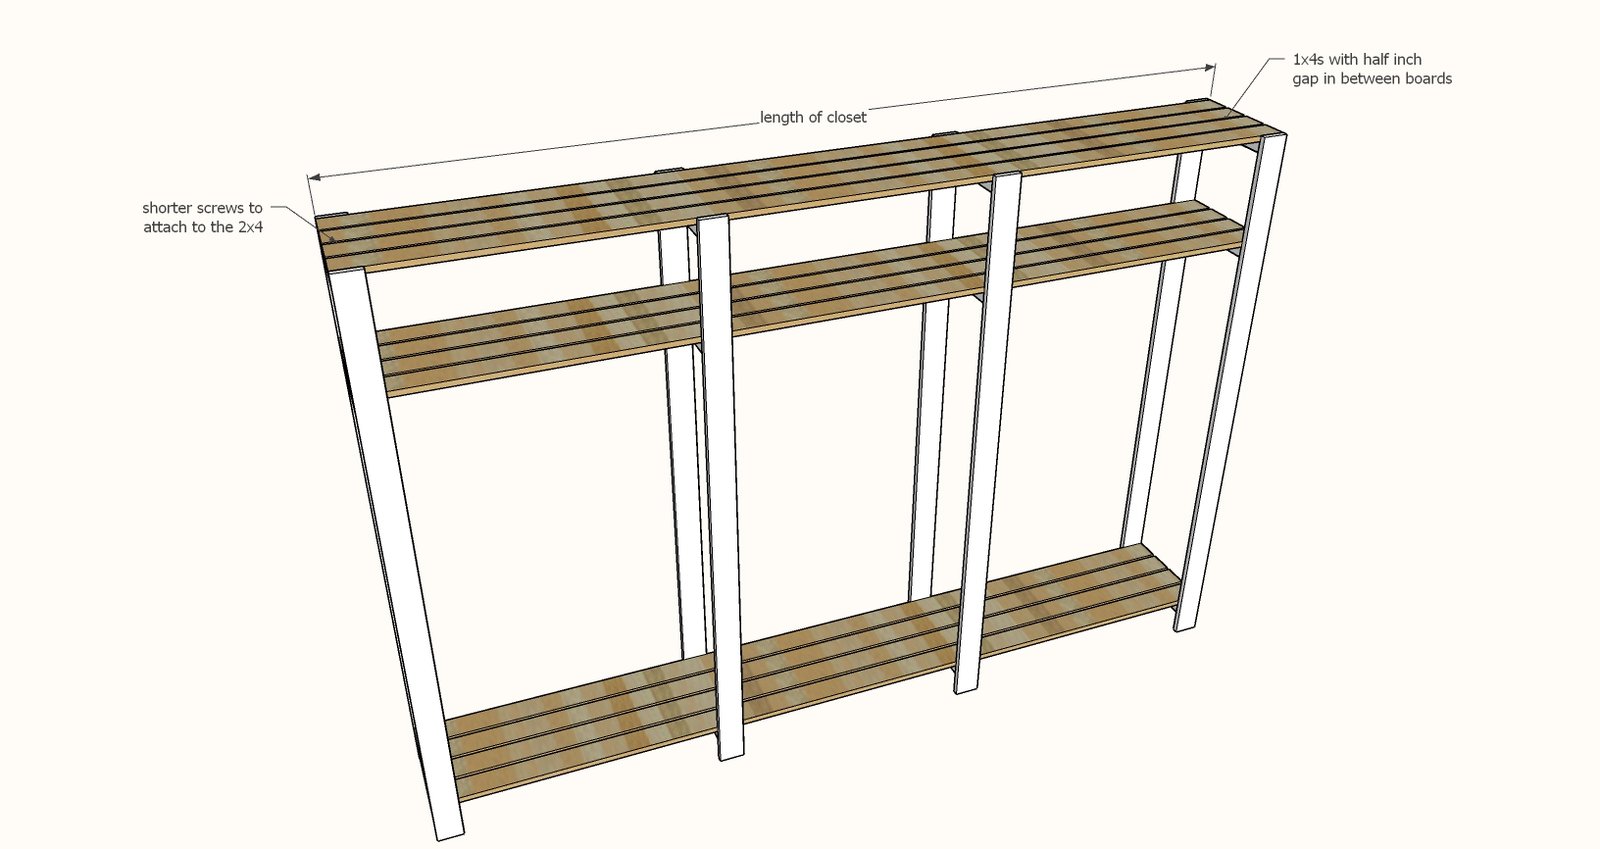
Step 3
Finally I simply measured the distance between the middle two legs, cut 1x4 shelving boards and more 2x4 shelf supports, and added two additional shelves.
We love the look of the iron pipes, but it is expensive.
Here's a cheaper way that will function just the same. Add more 2x4 @ 15-1/2" wherever you want a closet rod, but attach so the 2x4 runs tall, not flat and wide. Then use closet rod sockets and wood closet rods cut to length in between the 2x4s run tall.
Finishing
Sand all surfaces, starting with a medium grit and finishing with fine. Wipe off the dust, fill any holes or gaps with wood filler, and sand smooth once dry. Apply primer if you're painting, then finish with your choice of paint or stain and seal with a durable clear topcoat. For outdoor projects, use exterior-rated primer, paint or stain, and sealer so the piece stands up to the weather.
Source (temporary): https://www.ana-white.com/woodworking-projects/wood-closet-shelving