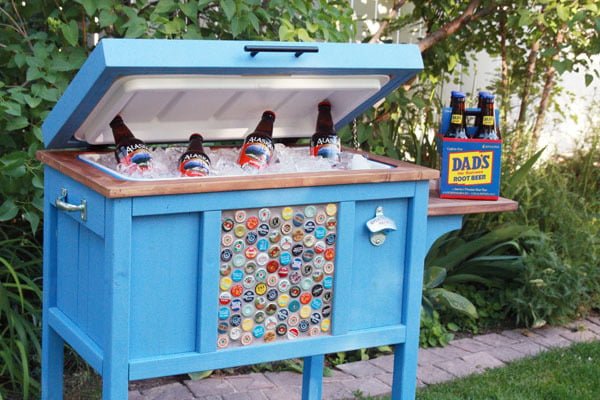
Wood Cooler by Birds and Soap
You all remember Jenny from Birds and Soap... creator of the Sweet Pea Bunk Beds?
Specifications
| Project type | Outdoor Projects |
|---|---|
| Room | Outdoor |
| Style | Modern Style Furniture Plans |
| Difficulty | Intermediate |
| Estimated cost | $50 - $100 |
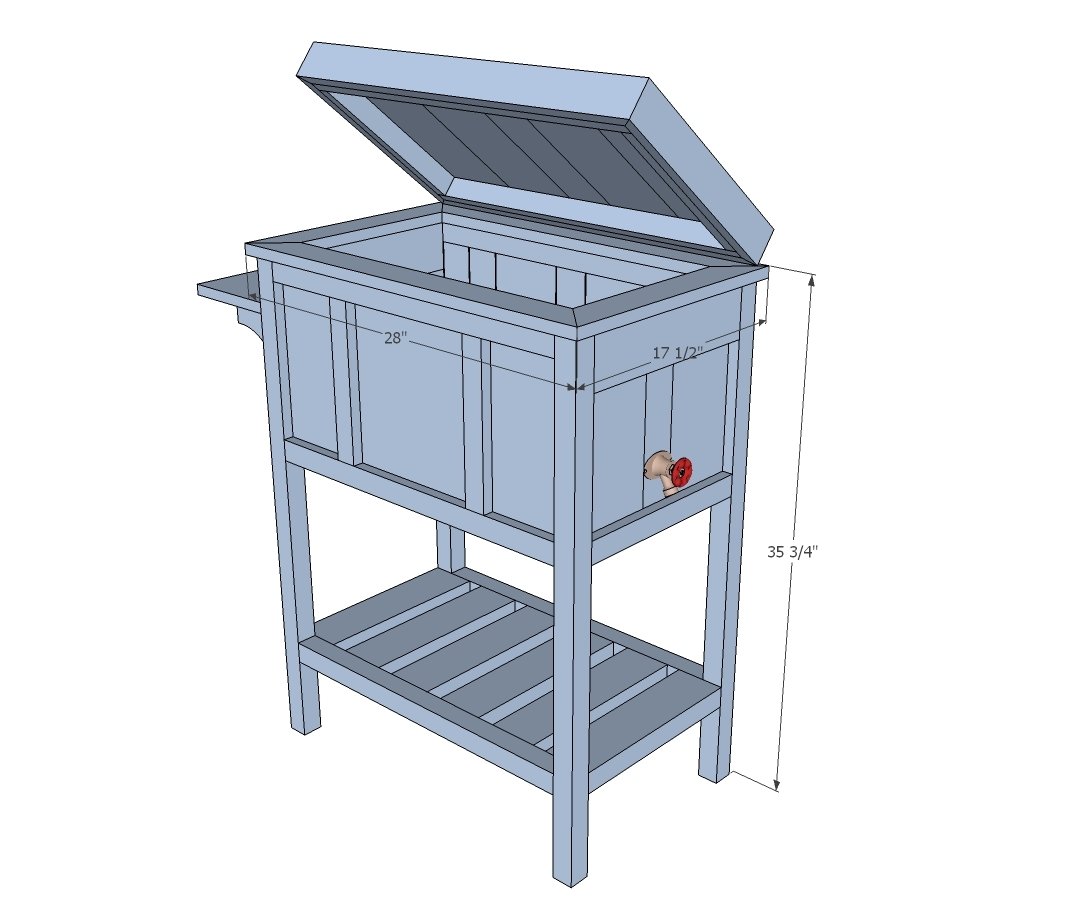
Dimensions
Use the size-specific shopping and cut lists below.
Shopping List
Cooler ( designed to fit this one ) 4 - 2x2 @ 8 feet long
3 - 1x3 @ 8 feet long
2 - 1x6 @ 8 feet long
2 - 2x4 @ 8 feet long
1 - 1x2 @ 8 feet long
Hinges, caster wheels if desired
Cut List
MAIN COOLER
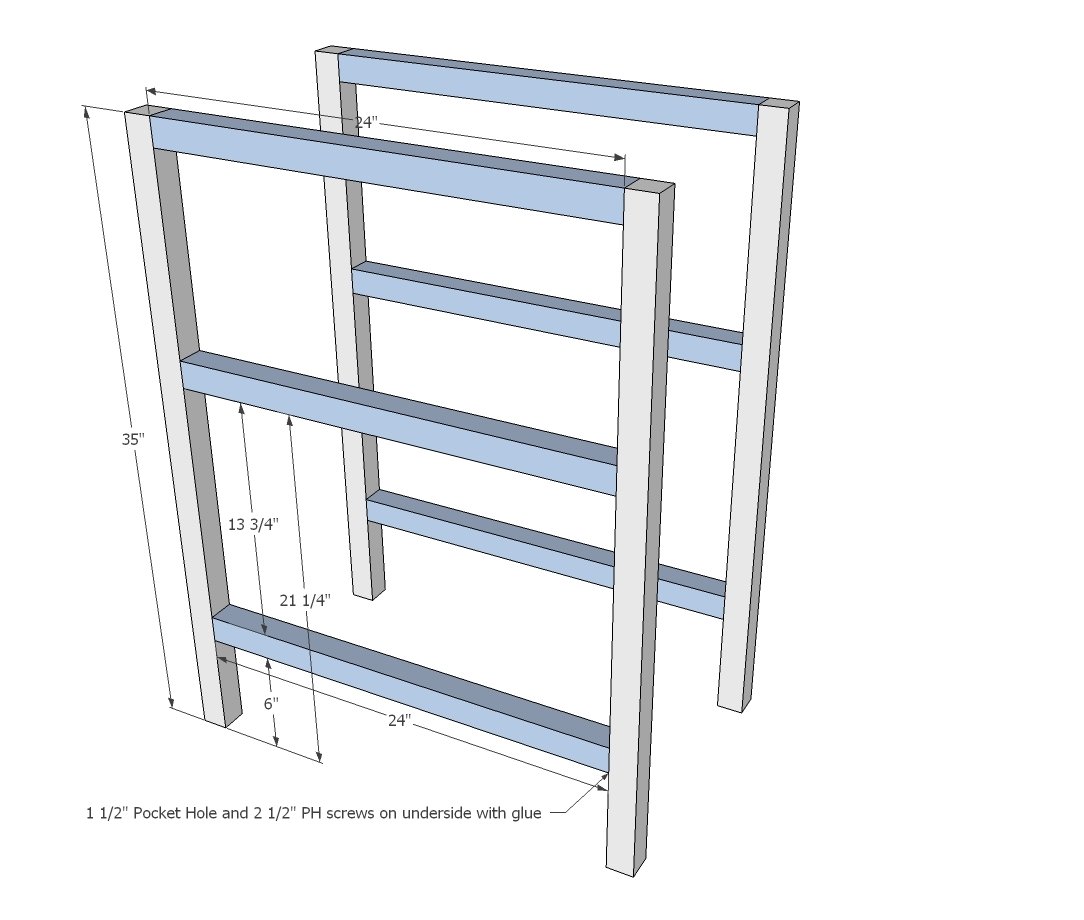
4 - 2x2 @ 35" (legs)
6 - 2x2 @ 24" (frame for front/back)
5 - 1x3 @ 10 3/4" (back panel boards)
4 - 1x6 @ 10 3/4" (front and back panel boards)
2 - 2x2 @ 10 3/4" (front panel boards)
Scrap plywood 10 3/4" x 10"
14 - 2x4 @ 13 1/2" (sides and shelf slats)
4 - 1x6 @ 8 3/4" (Side panels)
2 - 1x3 @ 8 3/4" (side panels)
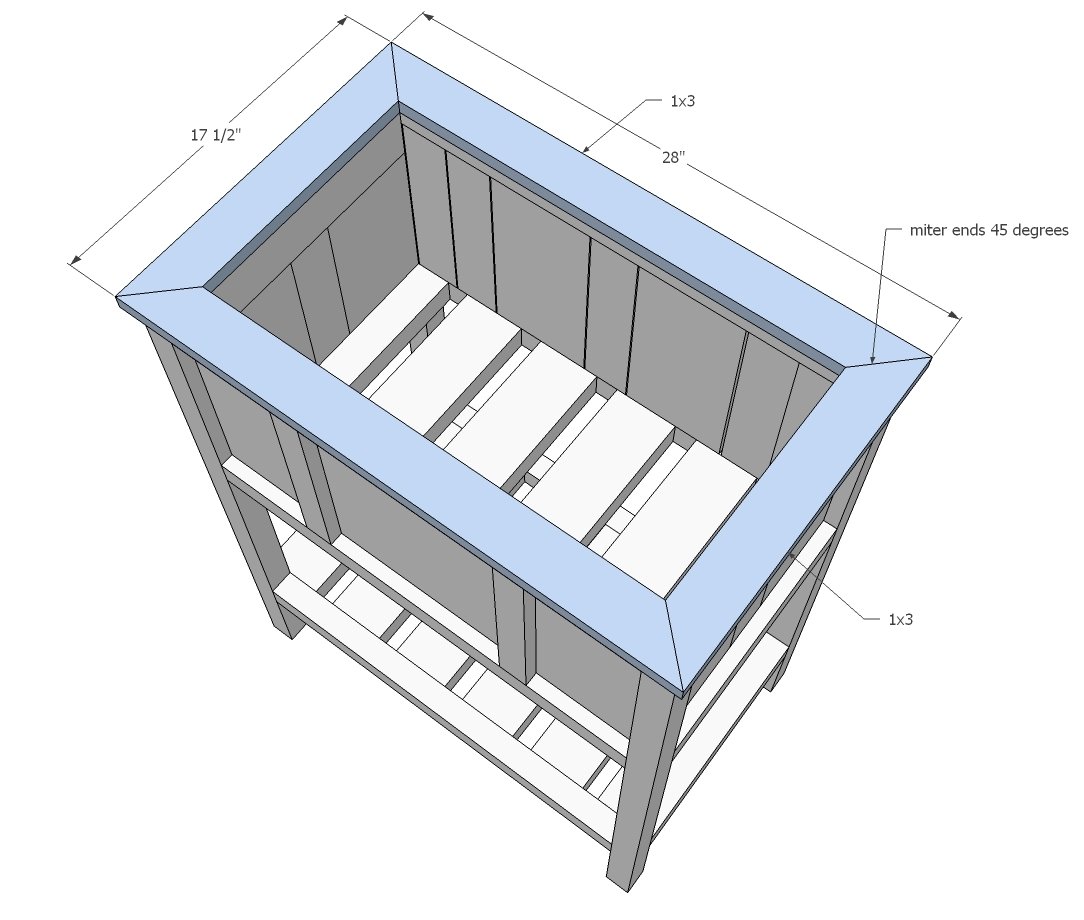
2 - 1x3 @ 28" - both ends mitered at 45 degrees NOT parallel, long point measurement (top frame)
2 - 1x3 @ 17 1/2" - both ends mitered at 45 degrees NOT parallel, long point measurement (top frame)
LID
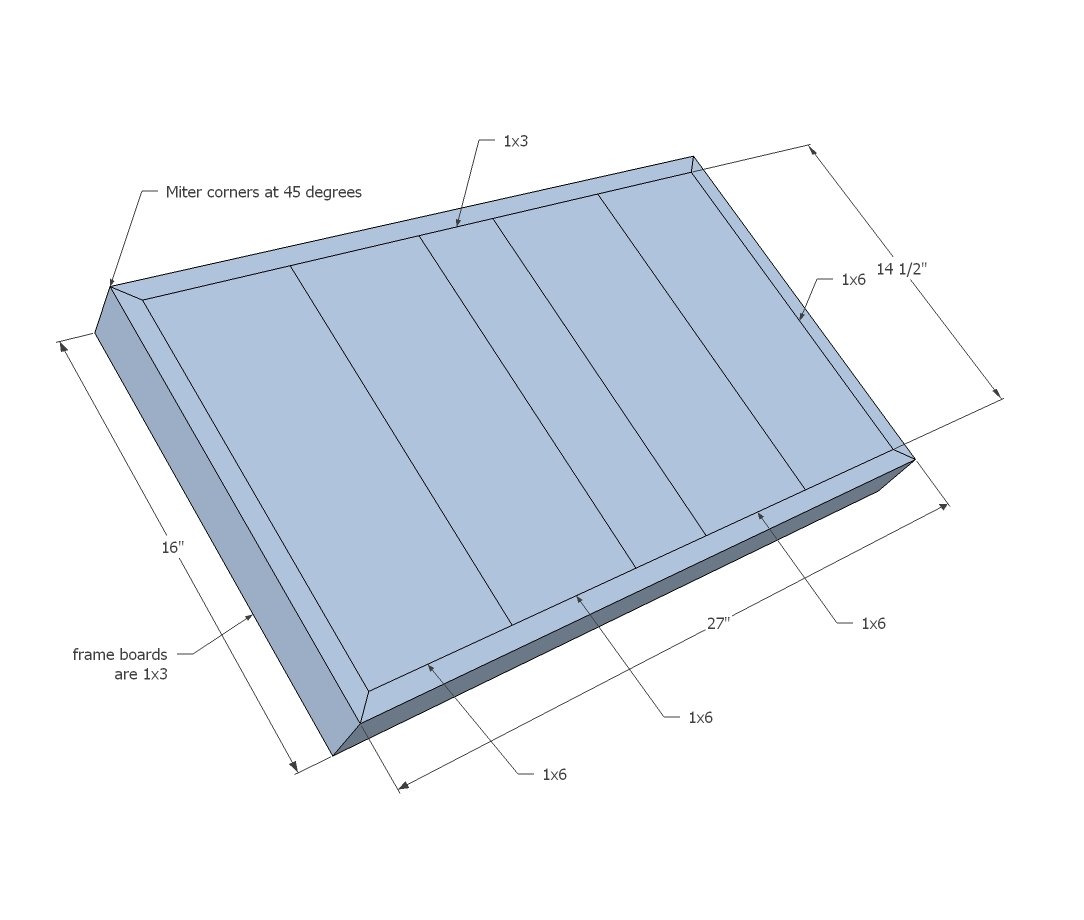
2 - 1x3 @ 27" - both ends beveled at 45 degrees NOT parallel, long point measurement (top frame)
2 - 1x3 @ 16" - both ends beveled at 45 degrees NOT parallel, long point measurement (top frame)
4 - 1x6 @ 14 1/2" (top panel)
1 - 1x3 @ 14 1/2" (top panel)
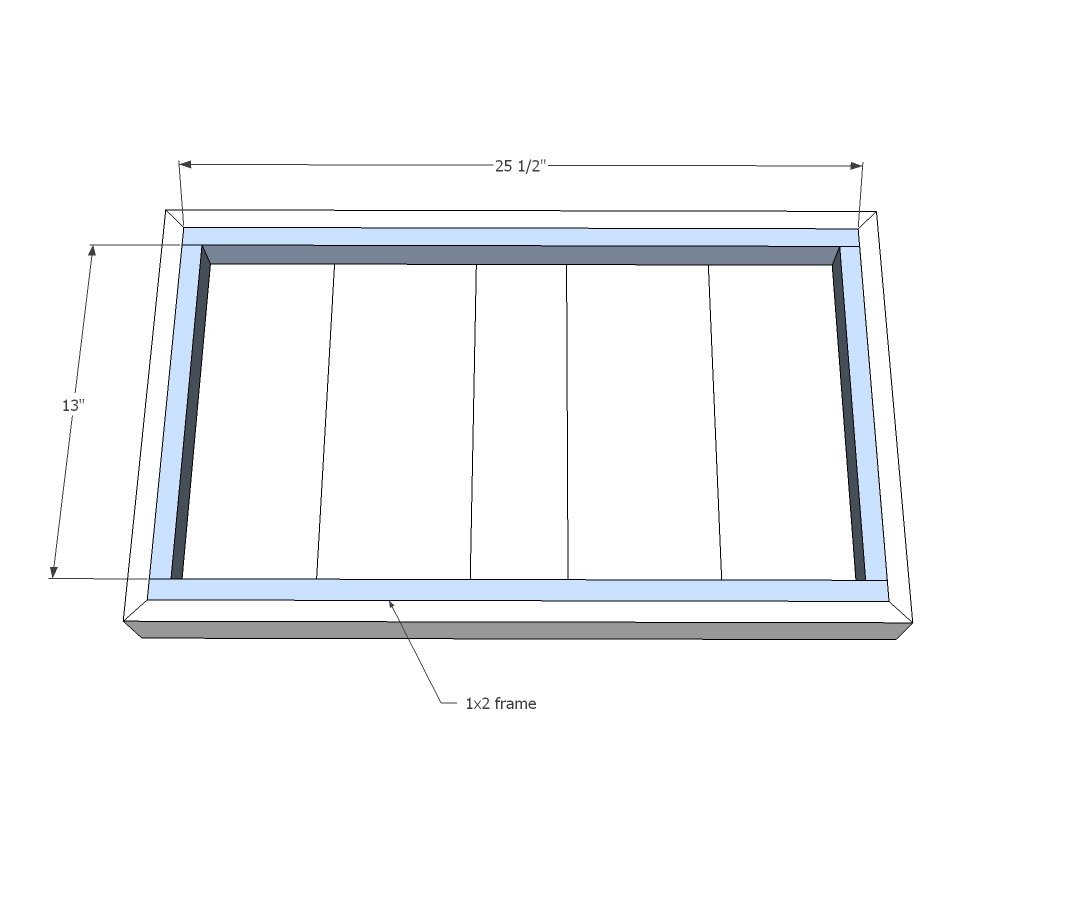
2 - 1x2 @ 13" (inner frame)
2 - 1x2 @ 25 1/2" (inner frame)
SHELF
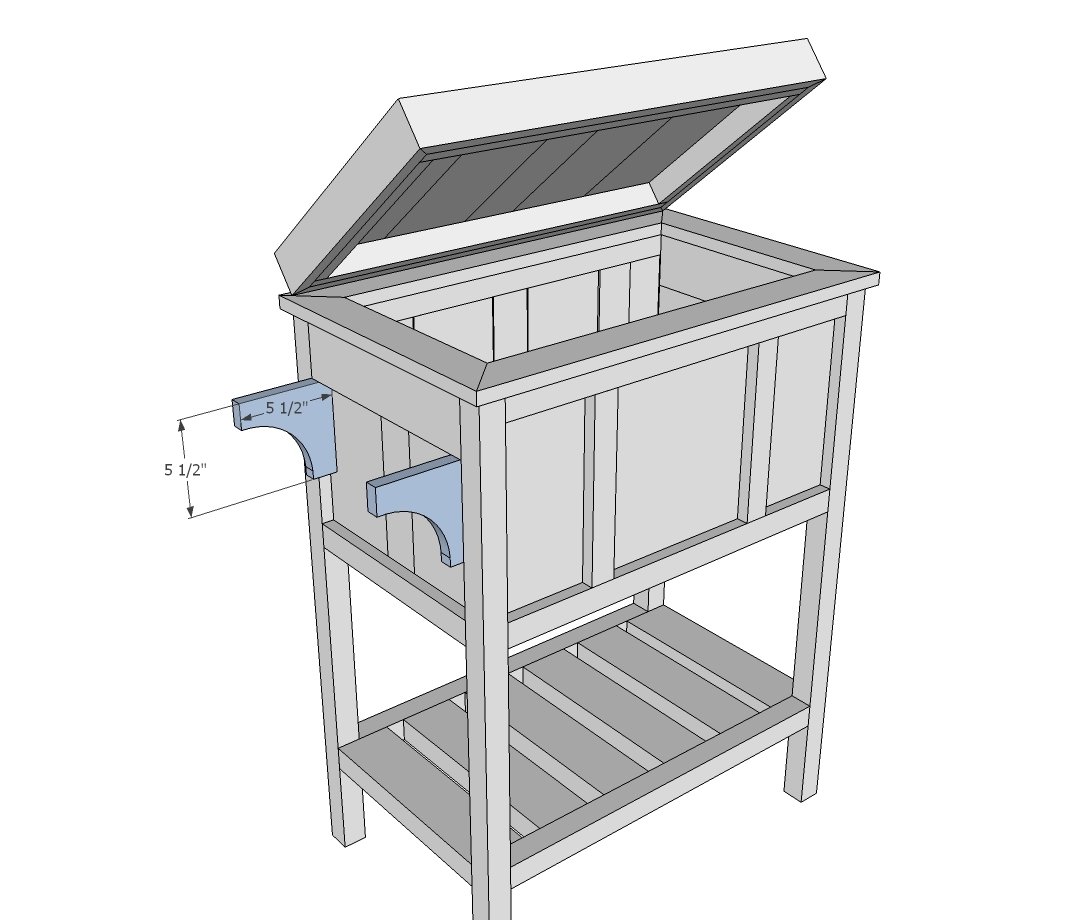
2 - 1x6 @ 5 1/2" - cut out arch shape (supports)
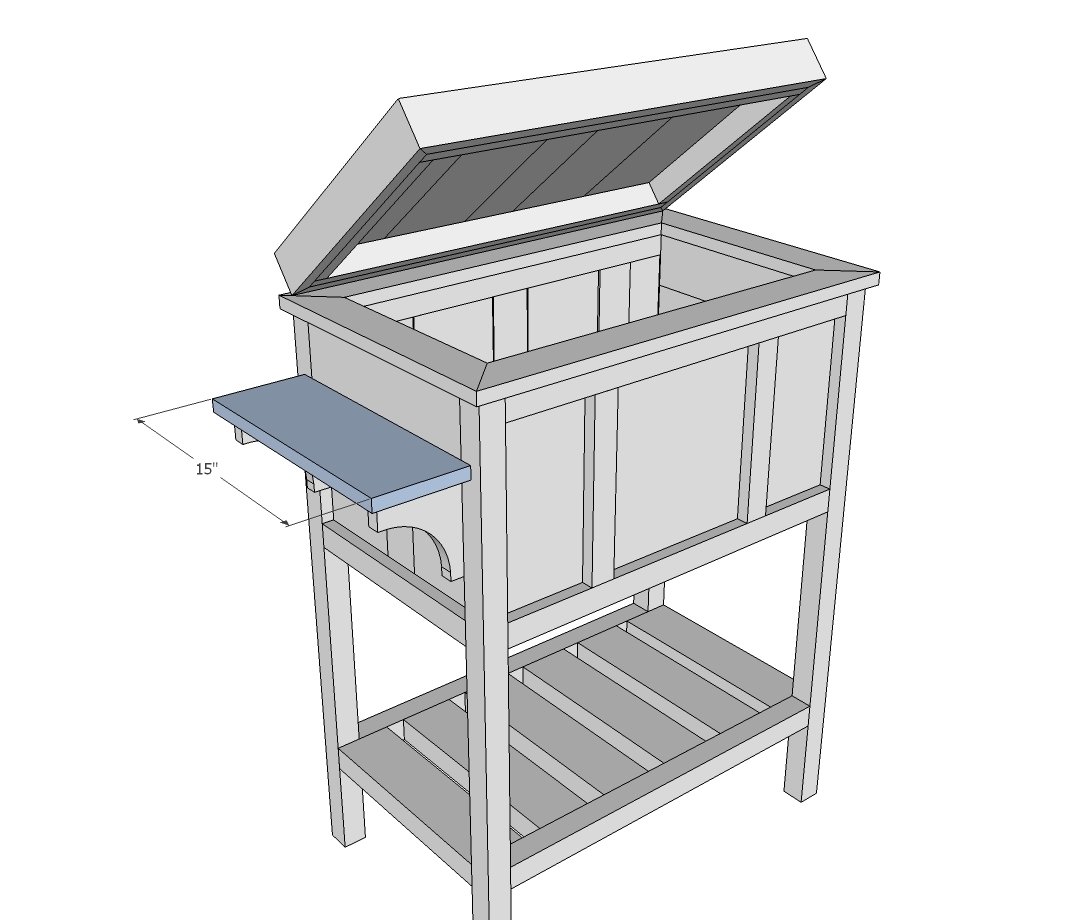
1 - 1x6 @ 15" (shelf)
Tools
- measuring tape
- square
- pencil
- safety glasses
- hearing protection
- kreg-jig
- drill
- compound miter saw
- sander
- level
- countersink drill bit
Step-by-step Instructions
Step 1
Build your two main frames as shown above.
Step 2
For the back frame, add paneling boards - there can be a gap in between these depending on your 1x board widths.
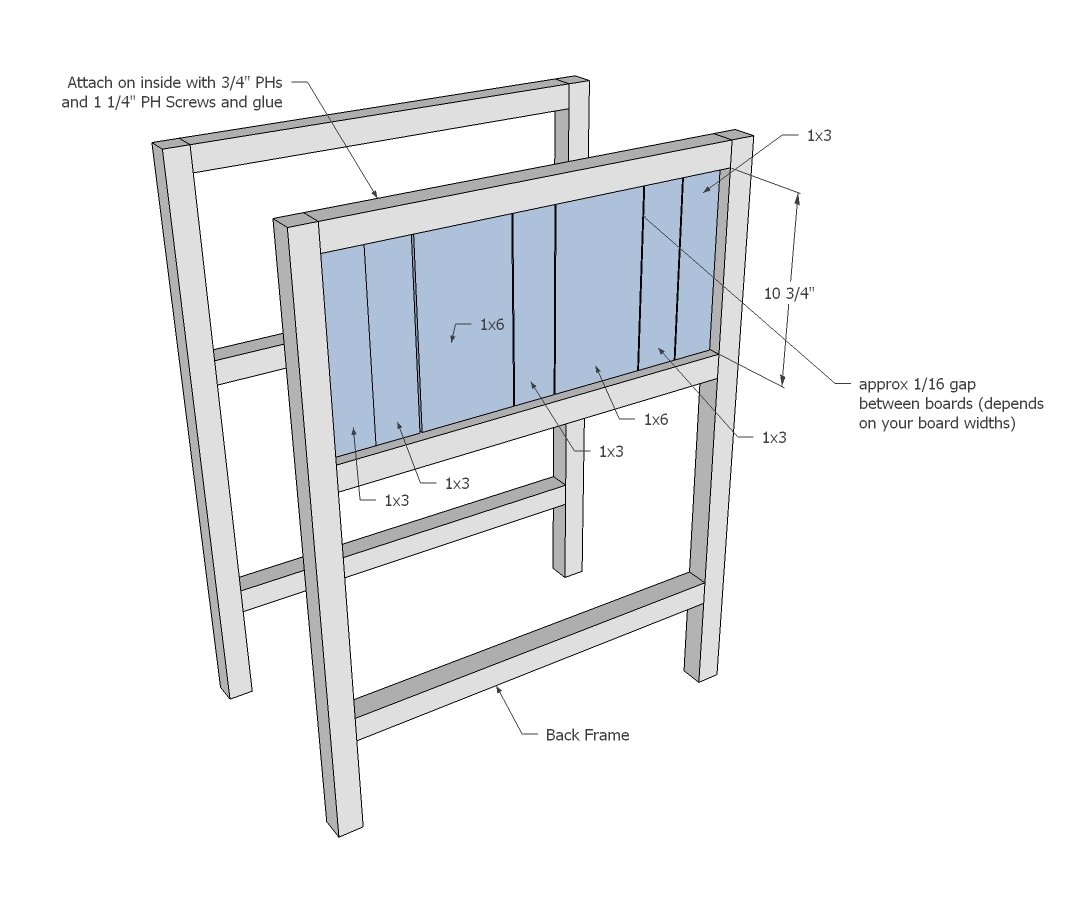
Then add the 1x6s to the front frame.
TIP: You can also drill 3/4" PHs facing the 2x2s for step 4 now to attach in next step.
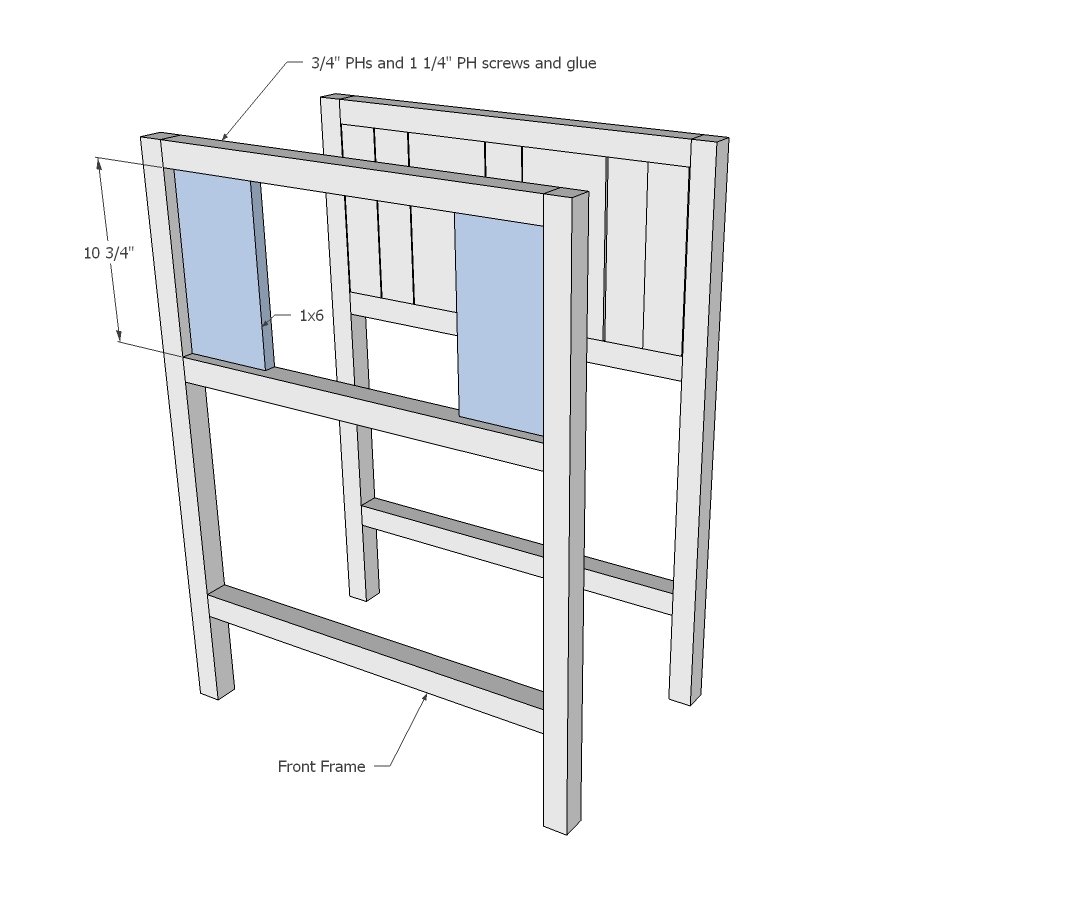
Step 4
And then the 2x2s.
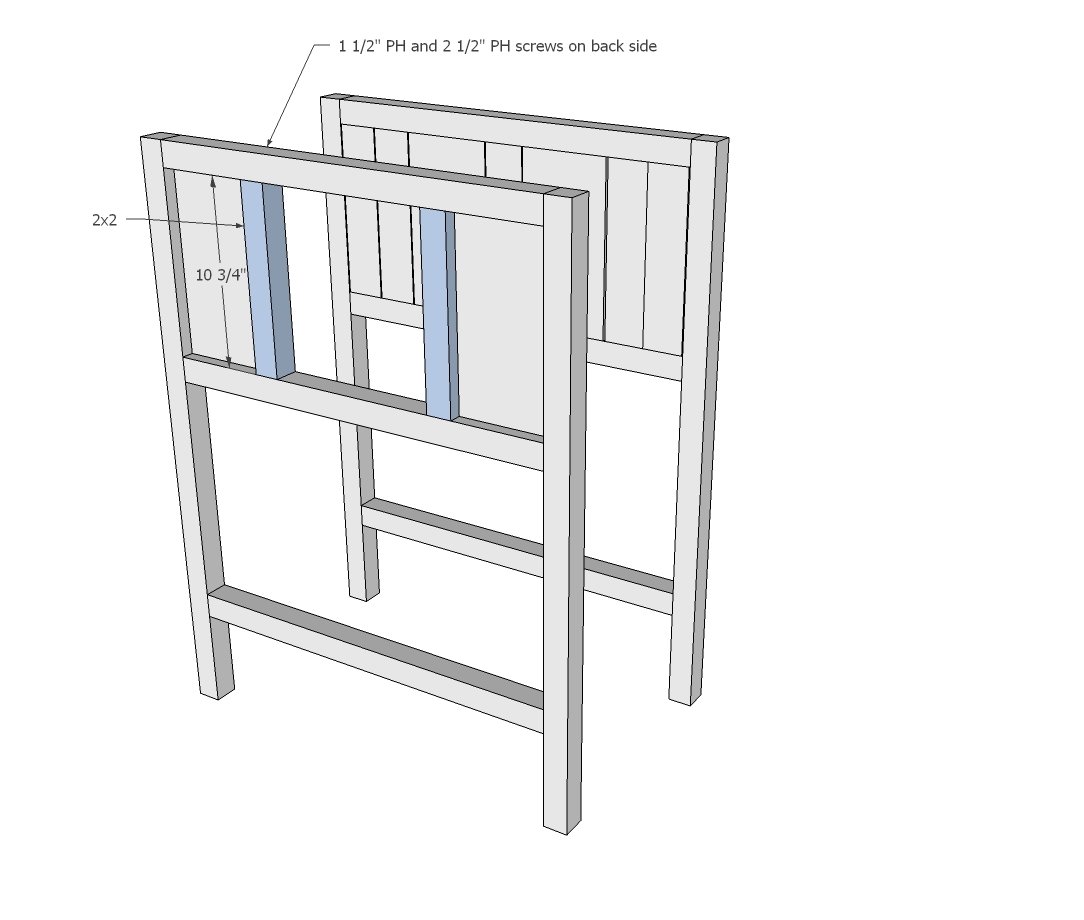
Step 5
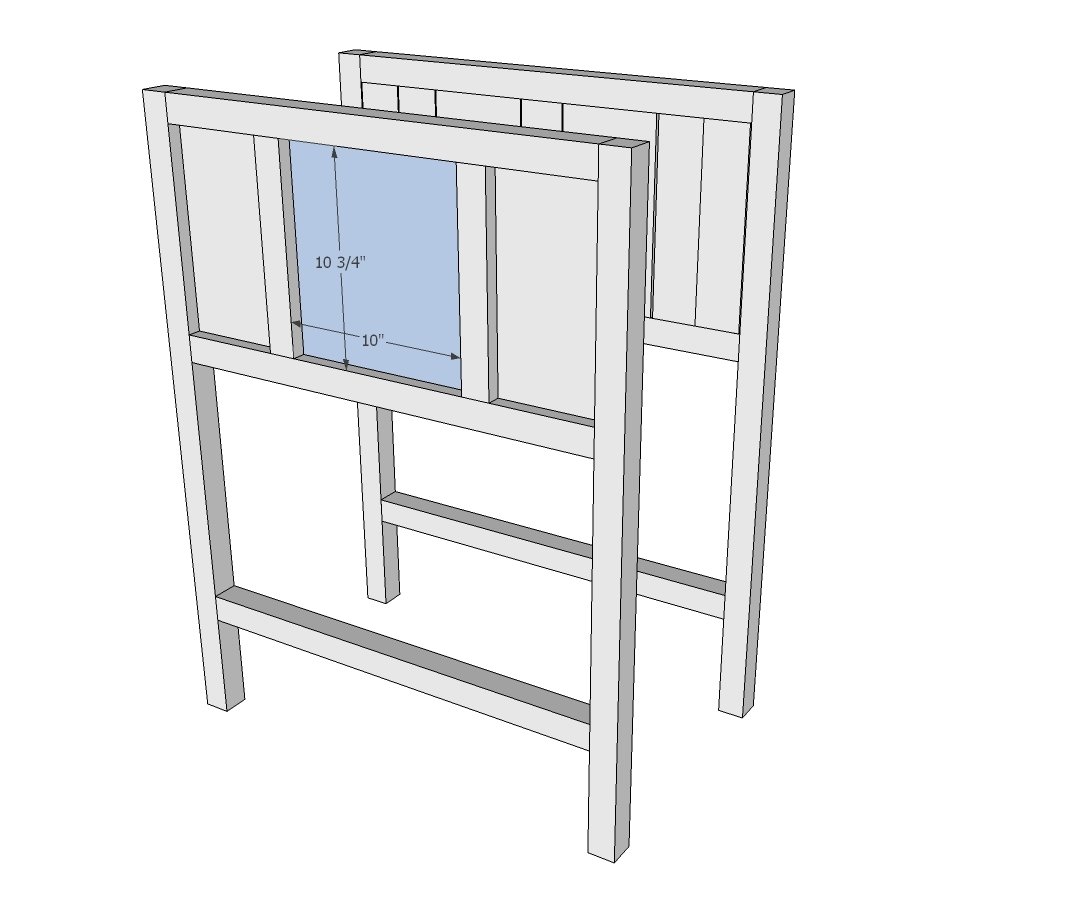
Step 6
Connect the two frames with the 2x4s - spacing for the shelf slats is approximately 1 1/4".
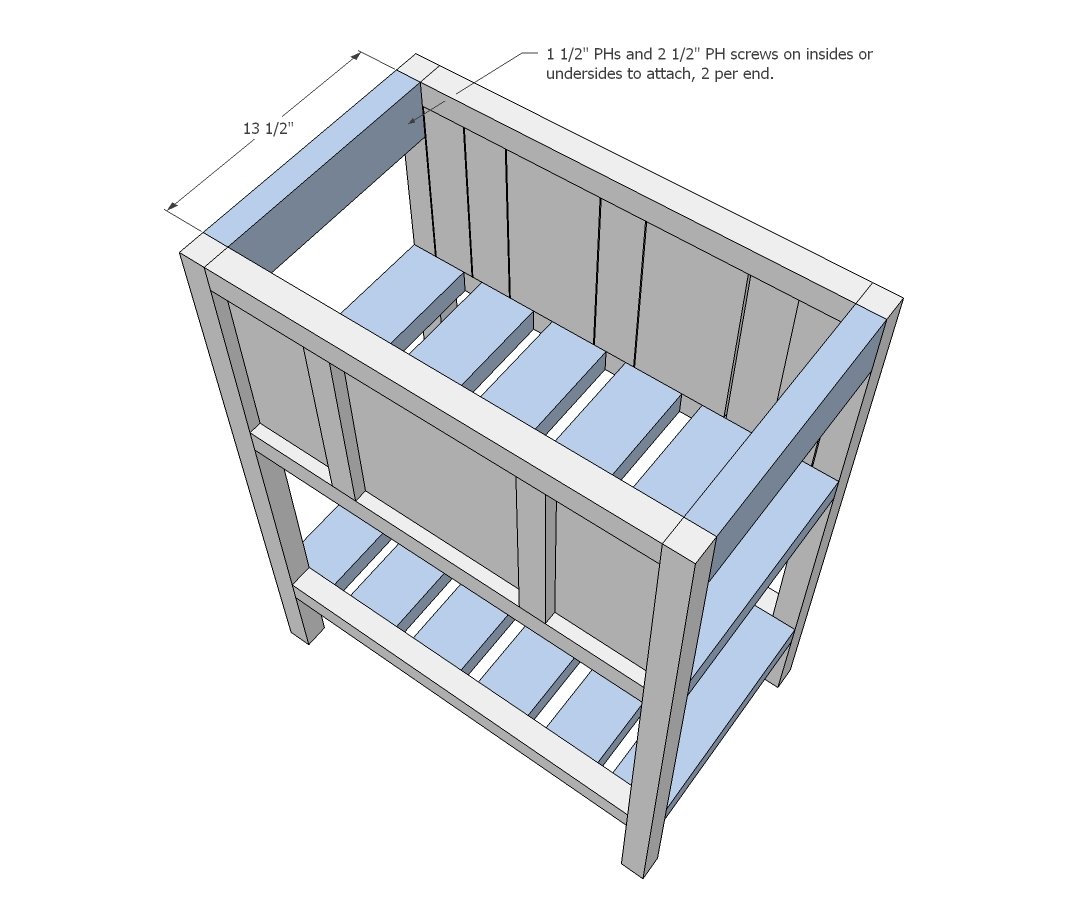
Step 7
Then fill in your side panels.
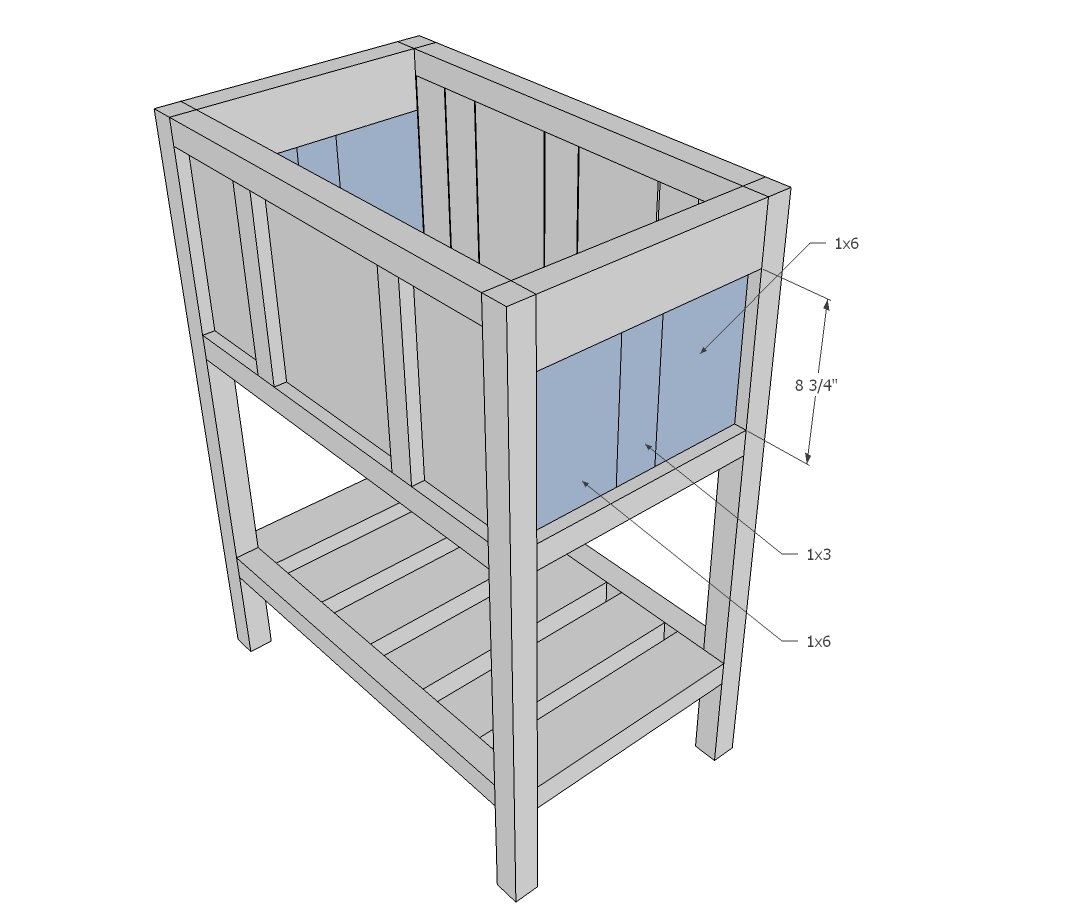
Step 8
And build the top frame separately with 3/4" PHs/1 1/4" PH screws and attach to top. You can attach to top with countersunk screws or nails. This completes the main wood cooler part.
Step 9
Moving on to the lid.... build your frame and add the panel boards.
And then add the inner frame to keep the lid in place.
Jenny shares tips for attaching the lid here.
Step 11
For the shelf, attach the brackets to the 2x2s - you can use PH screws or countersunk screws.
Step 12
And the shelf on top. I simplified in the plans with the 1x6 shelf - I love how Jenny made her shelf here.
Step 13
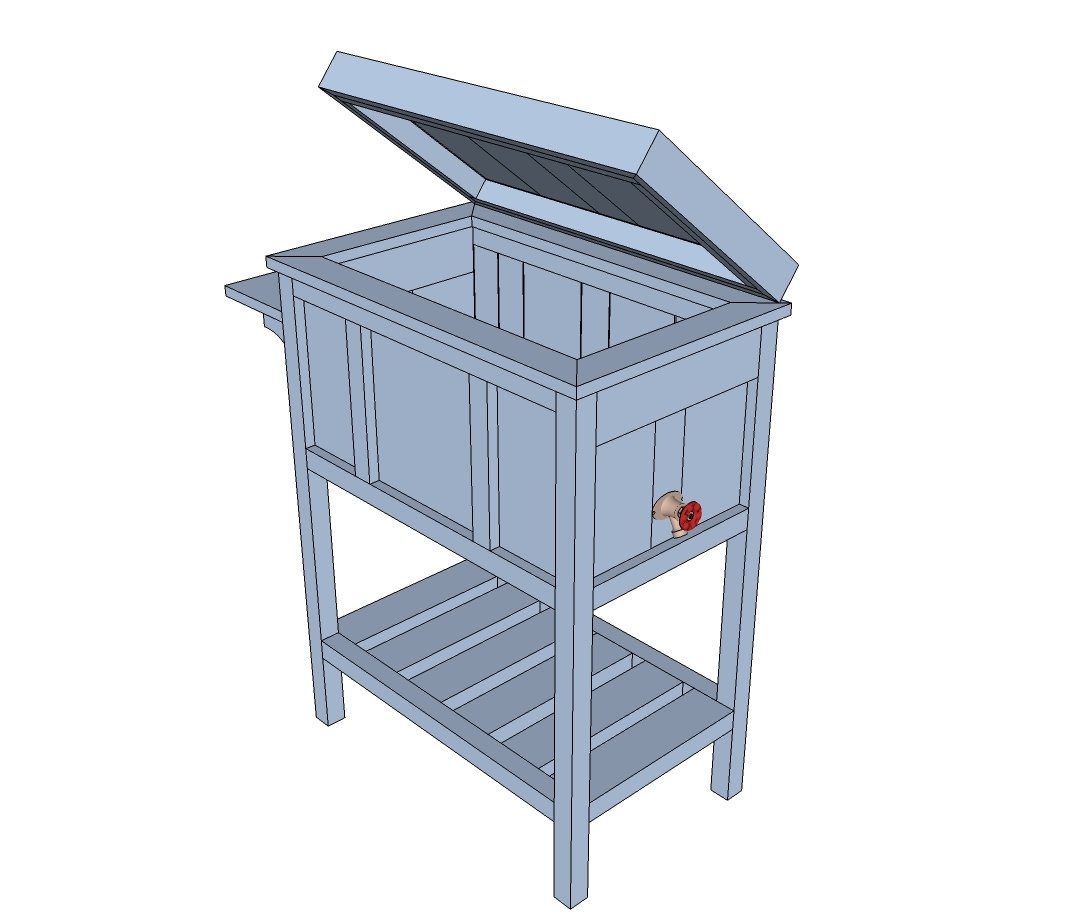
For more details on attaching the drain to the cooler - please read through Jenny's post as well.
Finishing
Sand all surfaces, starting with a medium grit and finishing with fine. Wipe off the dust, fill any holes or gaps with wood filler, and sand smooth once dry. Apply primer if you're painting, then finish with your choice of paint or stain and seal with a durable clear topcoat. For outdoor projects, use exterior-rated primer, paint or stain, and sealer so the piece stands up to the weather.
Source (temporary): https://www.ana-white.com/woodworking-projects/wood-cooler-birds-and-soap