Wood Crate Carts
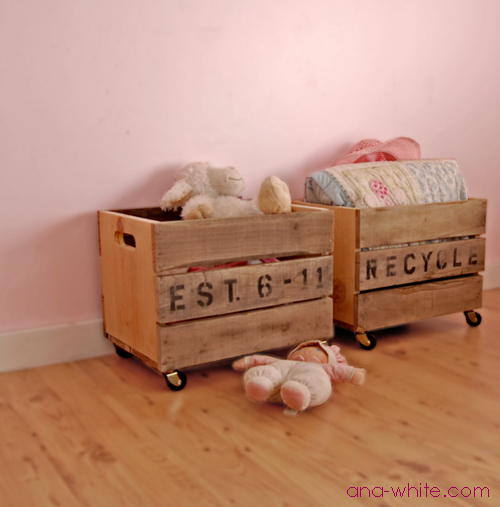
Build wood crates on wheels - to add extra storage in a mudroom, under tables or consoles, or just as beautiful storage. These easy to build wood crates on wheels are sturdy and durable. with diagrams, lots of reader submitted photos and more from Related: Wood Crate Building Guide
Specifications
| Project type | Crate Plans and Projects Made with Crates |
|---|---|
| Room | Storage Solutions |
| Style | Green or Eco-Friendly Style Furniture |
| Difficulty | Starter Projects |
| Estimated cost | Under $20 |
Dimensions
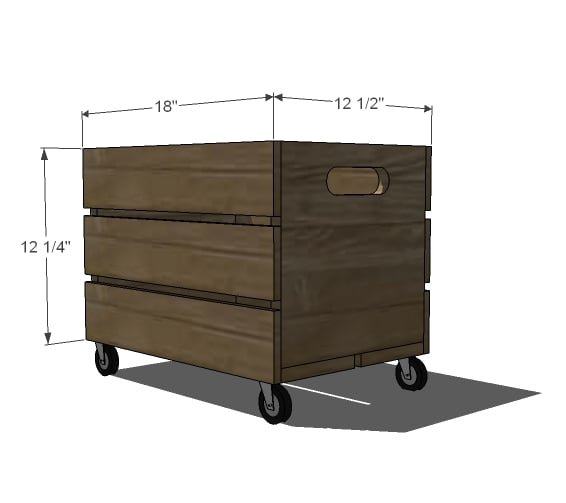
Use the size-specific shopping and cut lists below.
Shopping List
Shopping List for ONE Rolling Wood Crate
- 1 - 1x12 @ 2 feet long
- 1 - 1x6 @ 3 feet long
- 1 - 1x4 @ 6 feet long
- 2" self tapping star bit screws
- wood glue
- 4 caster wheels with 3/4" long screws
Cut List
- 2 – 1×12 @ 11 1/2″
- 2 – 1×6 @ 18″
- 6 – 1×4 @ 18″
Tools
- measuring tape
- square
- pencil
- hammer
- safety glasses
- hearing protection
- drill
- jigsaw
- sander
- countersink drill bit
Step-by-step Instructions
Preparation
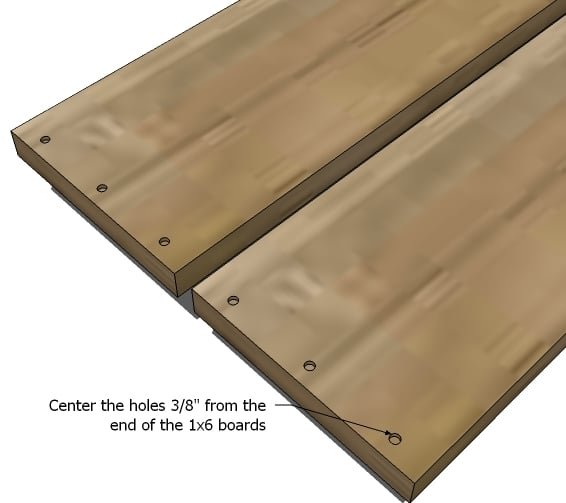
If you have a pallet, follow the instructions in this post to reclaim the boards. Otherwise, cut all of your boards. Drill holes on the ends of the 1x6s, two per end, with a countersink bit.
Build the Bottom and Ends
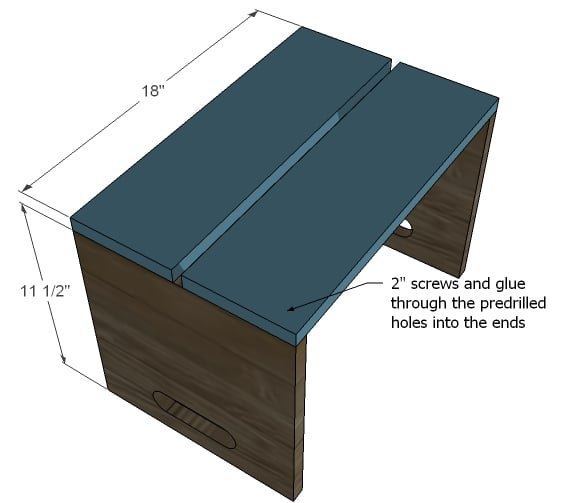
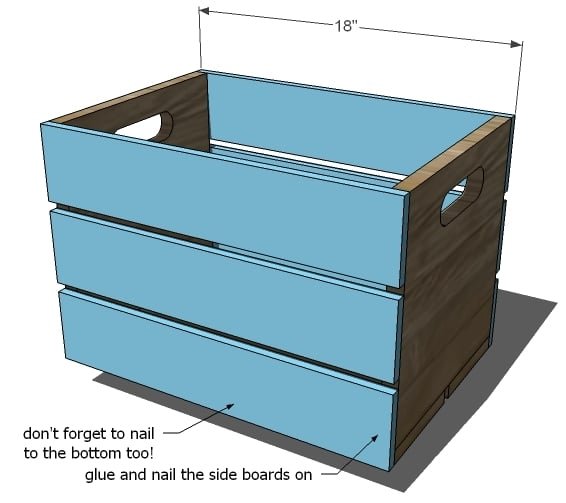
Insert screws into holes. Apply glue to the joint. Screw the bottom boards to the sides, keeping the outside flush.
Sides
Apply glue to the edges of the bottom and ends. Be careful not to apply glue in the spaces between the side boards, as glue will not take stain. Use 2″ nails and glue to nail the side boards on.
Handles
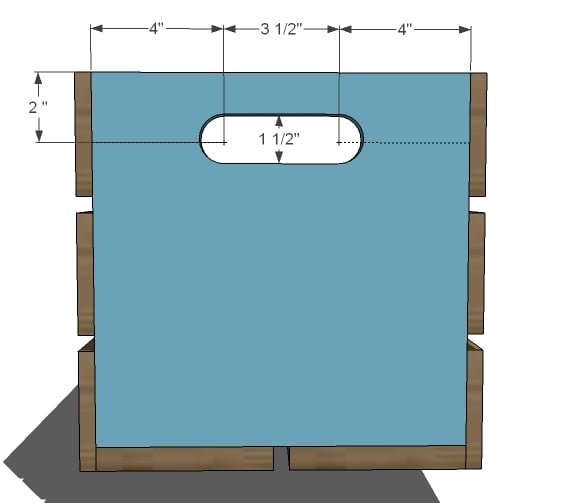
Mark then ends as shown above. Then drill holes with the 1 1/2″ spade bit on center with the marks. Cut between the marks with a saw to create handles.
Step 5
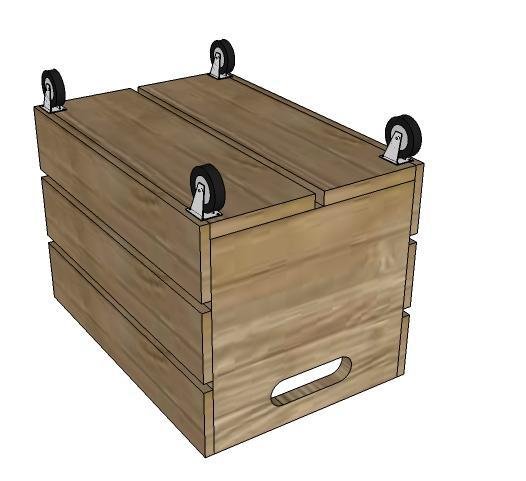
Attach caster wheels to base with 3/4" screws.
Finishing
Sand all surfaces, starting with a medium grit and finishing with fine. Wipe off the dust, fill any holes or gaps with wood filler, and sand smooth once dry. Apply primer if you're painting, then finish with your choice of paint or stain and seal with a durable clear topcoat. For outdoor projects, use exterior-rated primer, paint or stain, and sealer so the piece stands up to the weather.
Source (temporary): https://www.ana-white.com/woodworking-projects/wood-crate-carts