Wood Crate Dresser
Build your own cabinet for holding crates - this plan includes the tutorial for building the frame and the crates. include shopping list, cut list, full diagrams and lots of photos. By
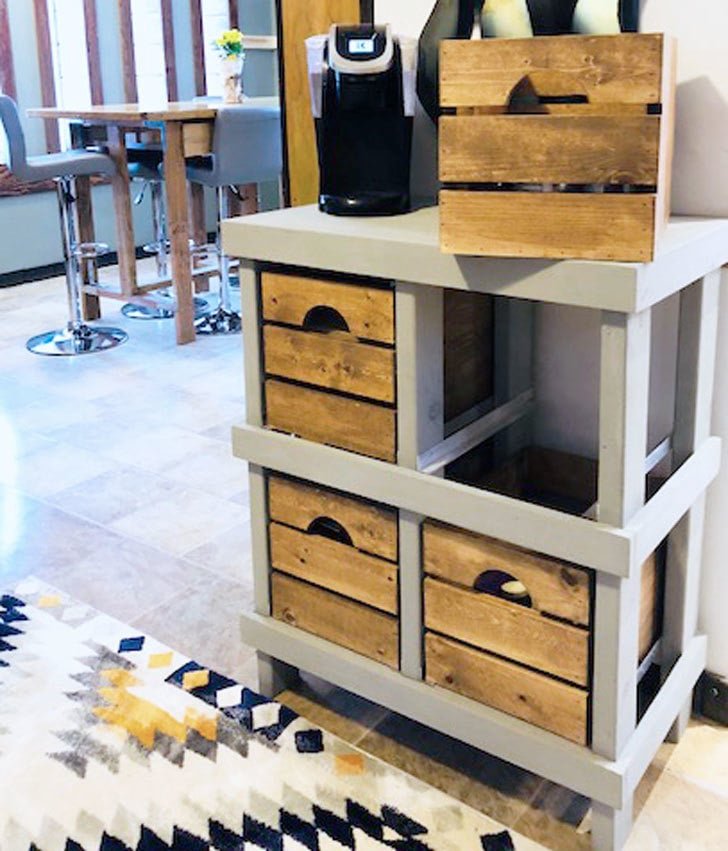
Specifications
| Project type | Crate Plans and Projects Made with Crates |
|---|---|
| Room | Storage Solutions |
| Style | Farmhouse Furniture |
| Difficulty | Intermediate |
Dimensions
Use the size-specific shopping and cut lists below.
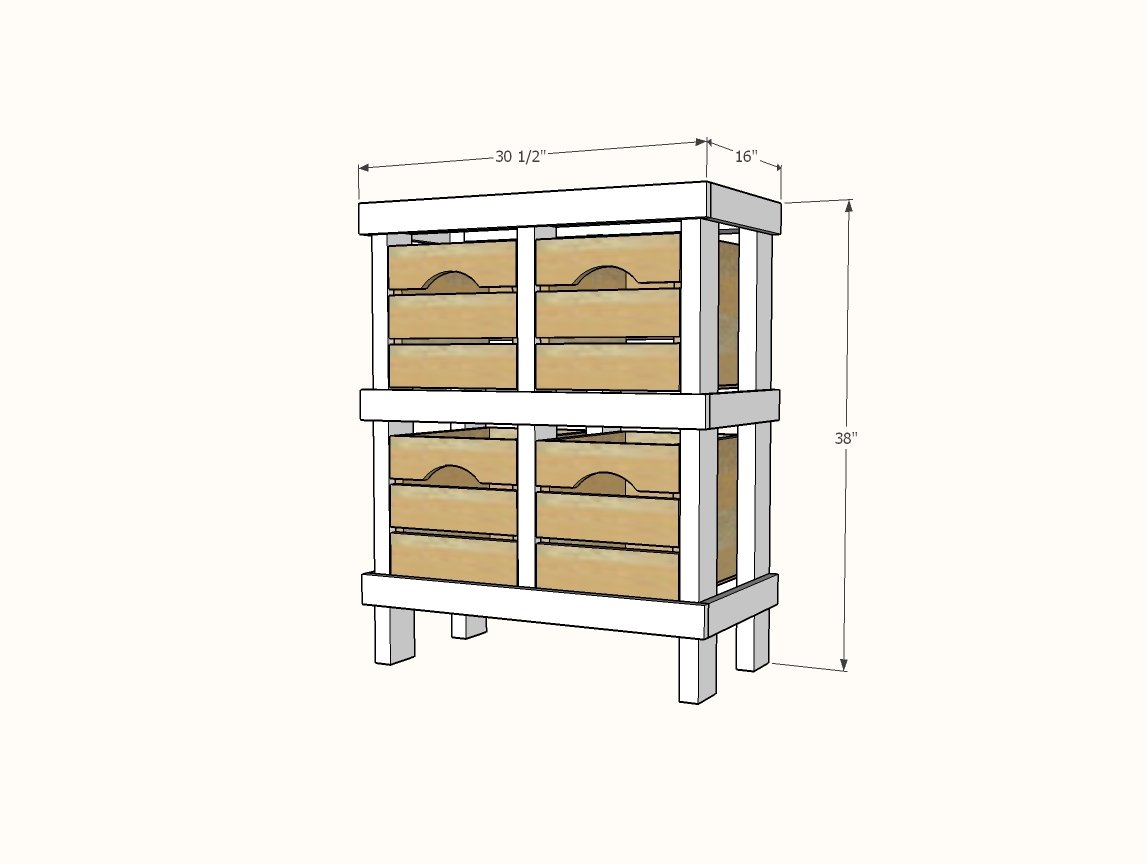
Shopping List
4 - 2x4 @ 8 feet long
3 - 1x3 @ 8 feet long
3 - 1x4 @ 8 feet long
1 - 1x12 @ 10 feet long (can also use 3/4" plywood if you have leftovers from the top piece)
1 - 3/4" plywood, at least 15-1/4" x 29"
1 - 1/4" plywood panel, at least 14" x 48"
12 feet of metal angle, 1/16" thick, at least 3/4" x 3/4" - we used this from Home Depot
16" - 1" Screws for attaching metal angle - we used these from Home Depot
24 - 2-1/2" self tapping wood screws - we used these from Home Depot
Cut List
RACK
4 - 2x4 @ 37-1/4" - legs
4 - 2x4 @ 26" - top/bottom of frames
2 - 2x4 @ 28-1/4" - center divider
1 - 3/4" plywood @ 15-1/4" x 29"
6 - 1x3 @ 15-1/4" - sides
3 - 1x3 @ 30-1/2"
8 - aluminum metal angle @ 15-1/4" long
CRATES AS SHOWN - finished size 11-3/4" wide x 15-1/4" deep x 11-1/2" tall
**MAKE SURE YOU MEASURE OPENINGS TO ENSURE THE CRATES FIT INSIDE THE METAL ANGLE BEFORE BUILDING**
There are many different ways to build crates. These ones ended up being a little on the heavy side. You can lighten things up by using 1/2" plywood for the slats on the front and back.
4 - 1/4" plywood @ 11-3/4" x 13-3/4"
8 - 1x12 @ 13-3/4"
24 - 1x4 @ 11-3/4" - crate fronts/backs
Tools
- measuring tape
- pencil
- safety glasses
- hearing protection
- drill
- circular saw
- jigsaw
- compound miter saw
- nailer
- sander
Step-by-step Instructions
Step 1
Build two of the frames with the 2x4s, screw together with 2-1/2" self tapping wood screws.
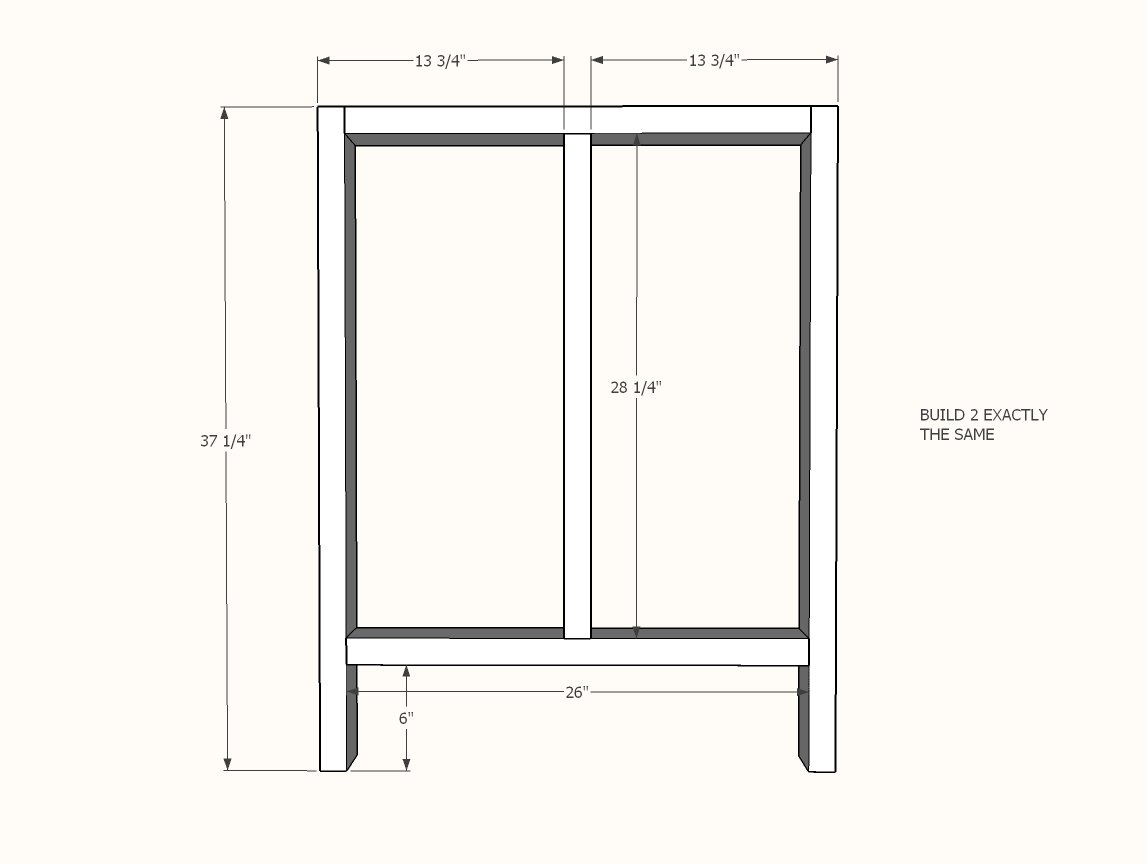
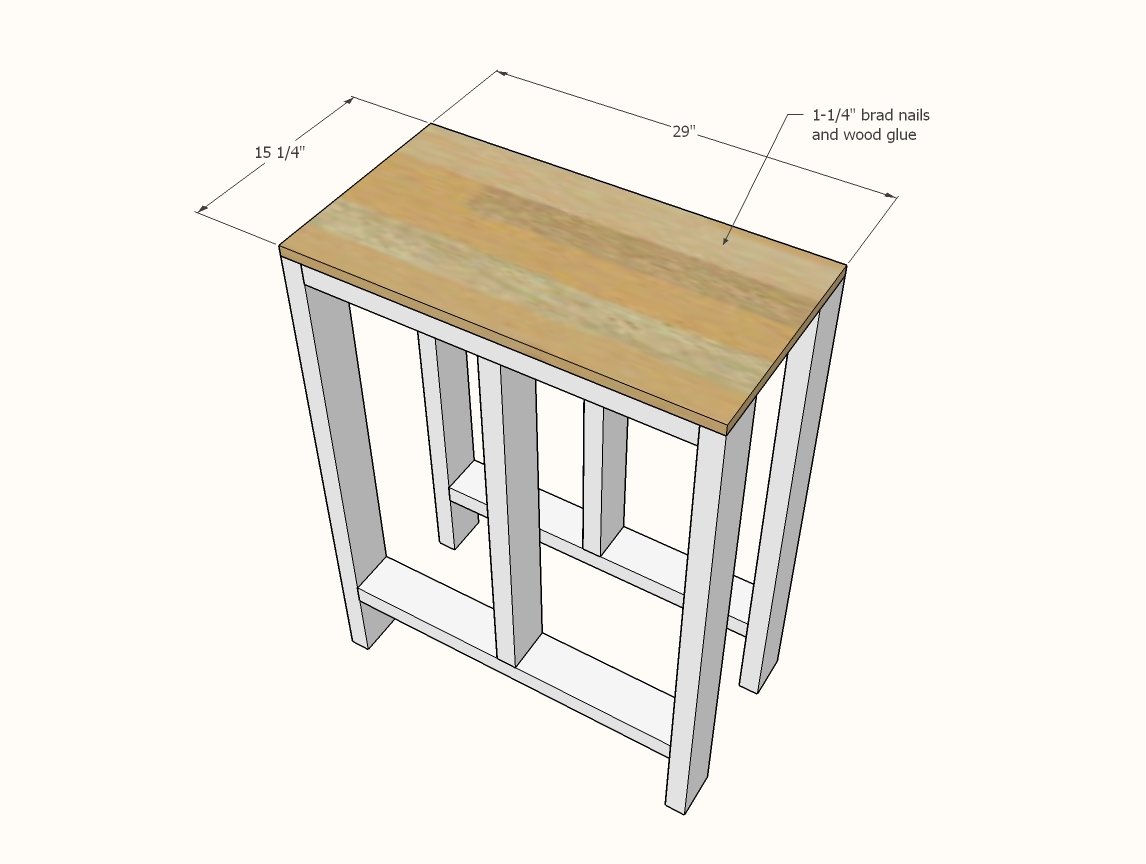
Step 2
Attach top with 1-1/4" brad nails and wood glue.
Step 3
Attach side supports with 1-1/4" brad nails and wood glue.
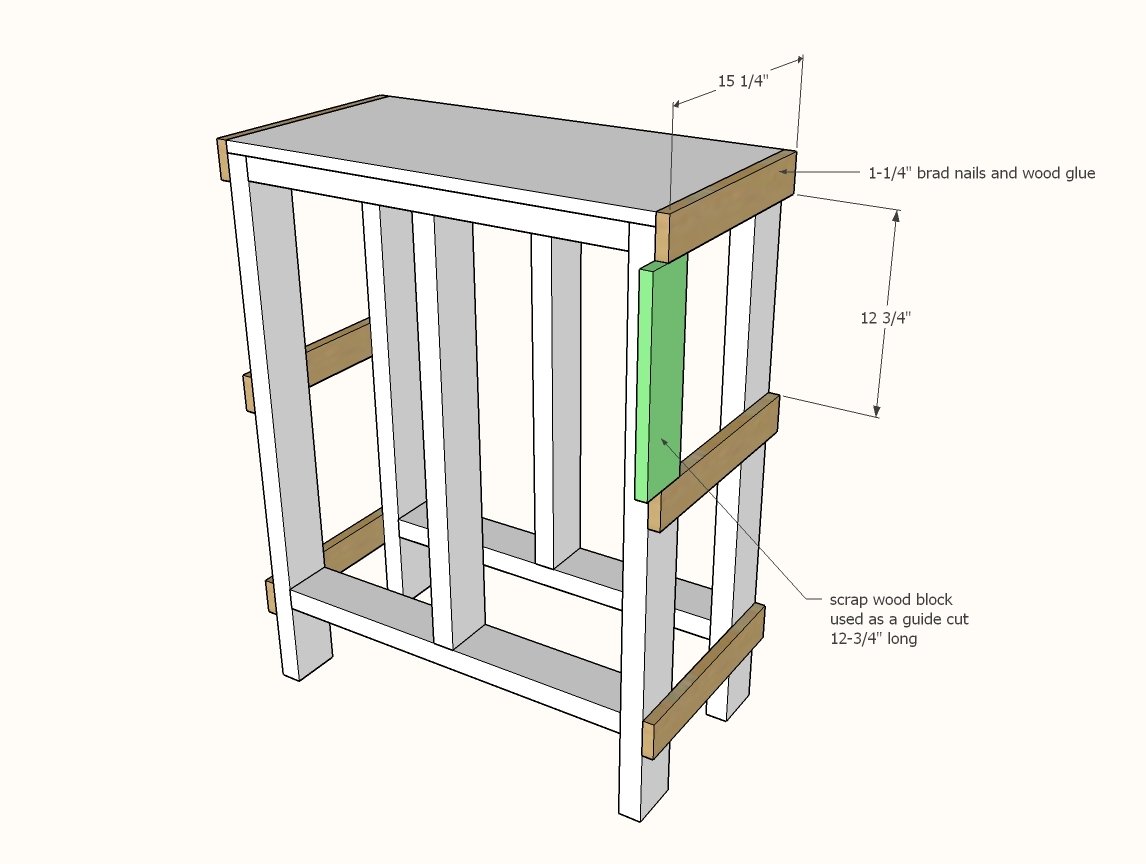
Step 4
Attach front trim with 1-1/4" brad nails and wood glue.
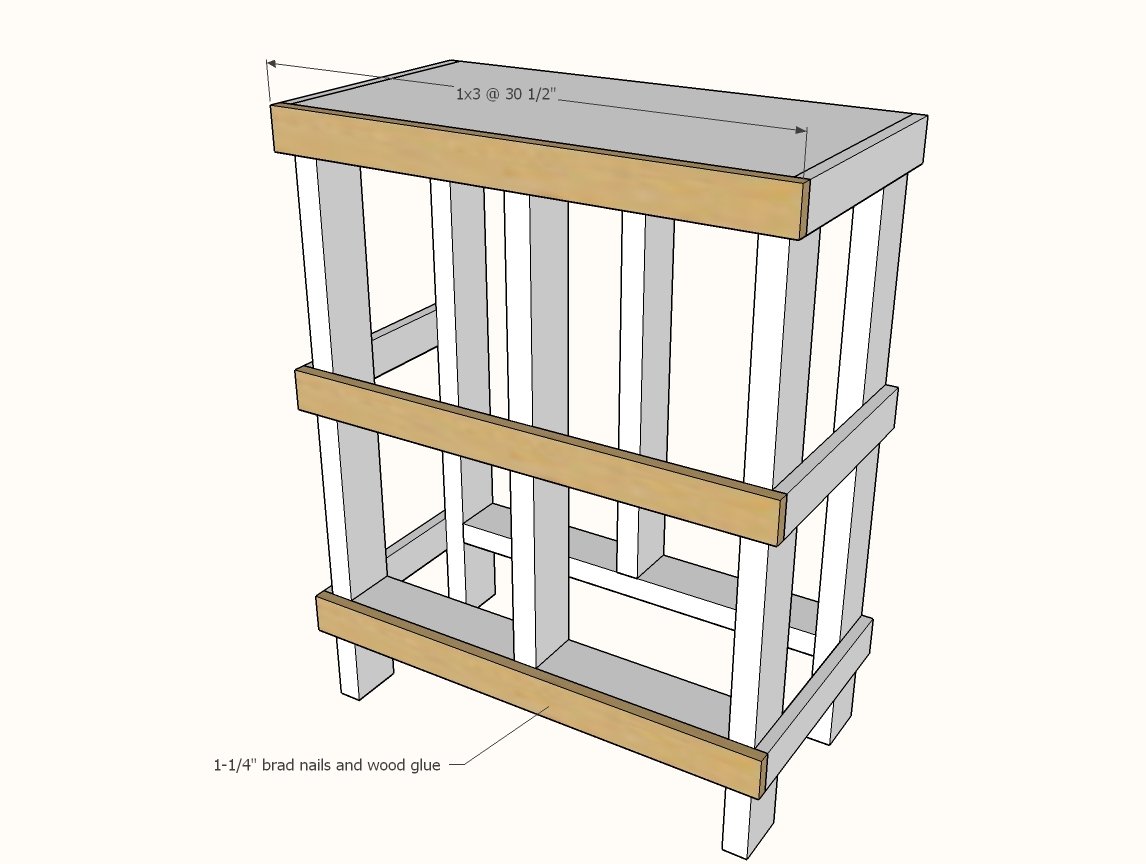
Cut the metal angle using a jigsaw.
Drill holes and attach to insides of the cabinet. No metal angle? You can also use 2x2s for the crates to sit on top of the 2x2s.
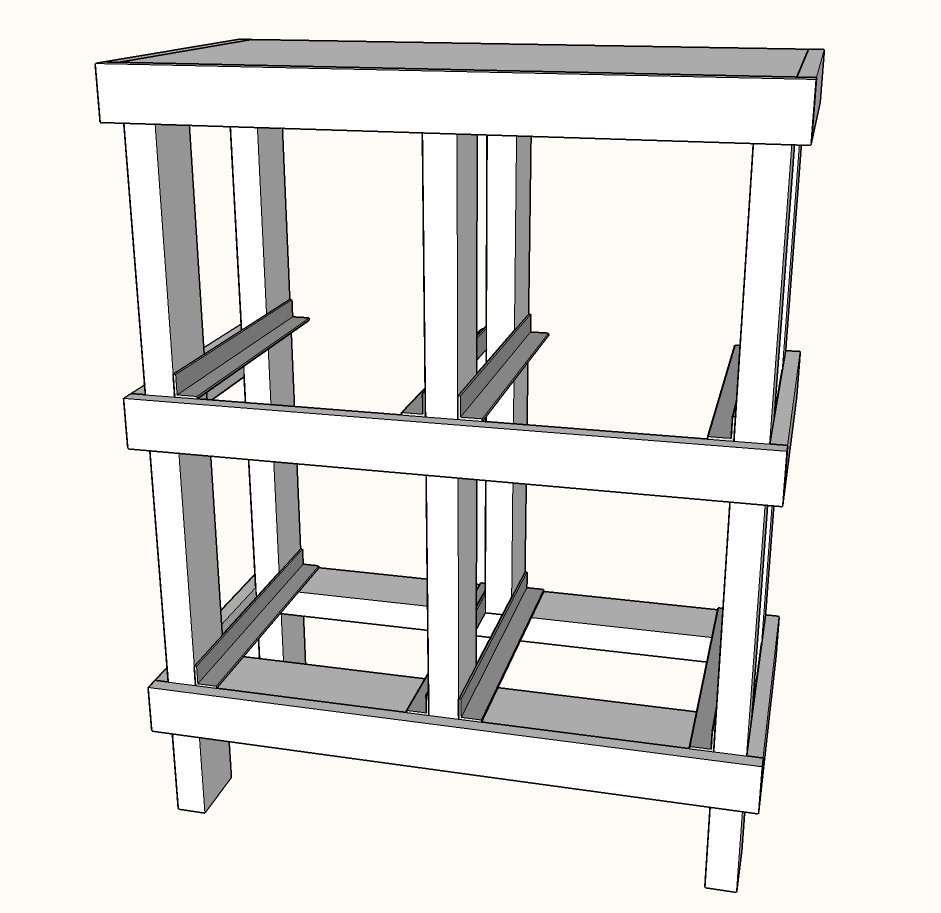
Step 6
Attach 1/4" plywood to bottom of 1x12 with wood glue and brad nails.
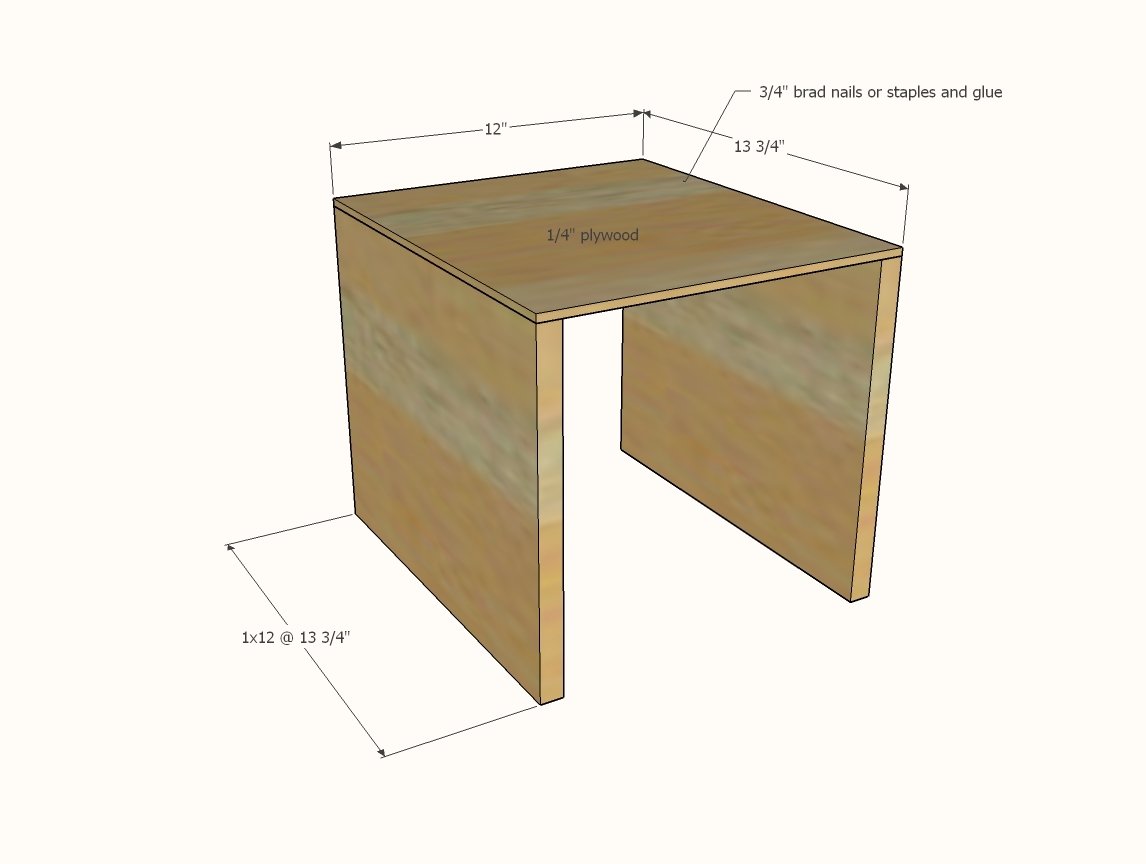
Add 1x4s to top and bottom with wood glue and brad nails.
Cut optional handle with jigsaw.
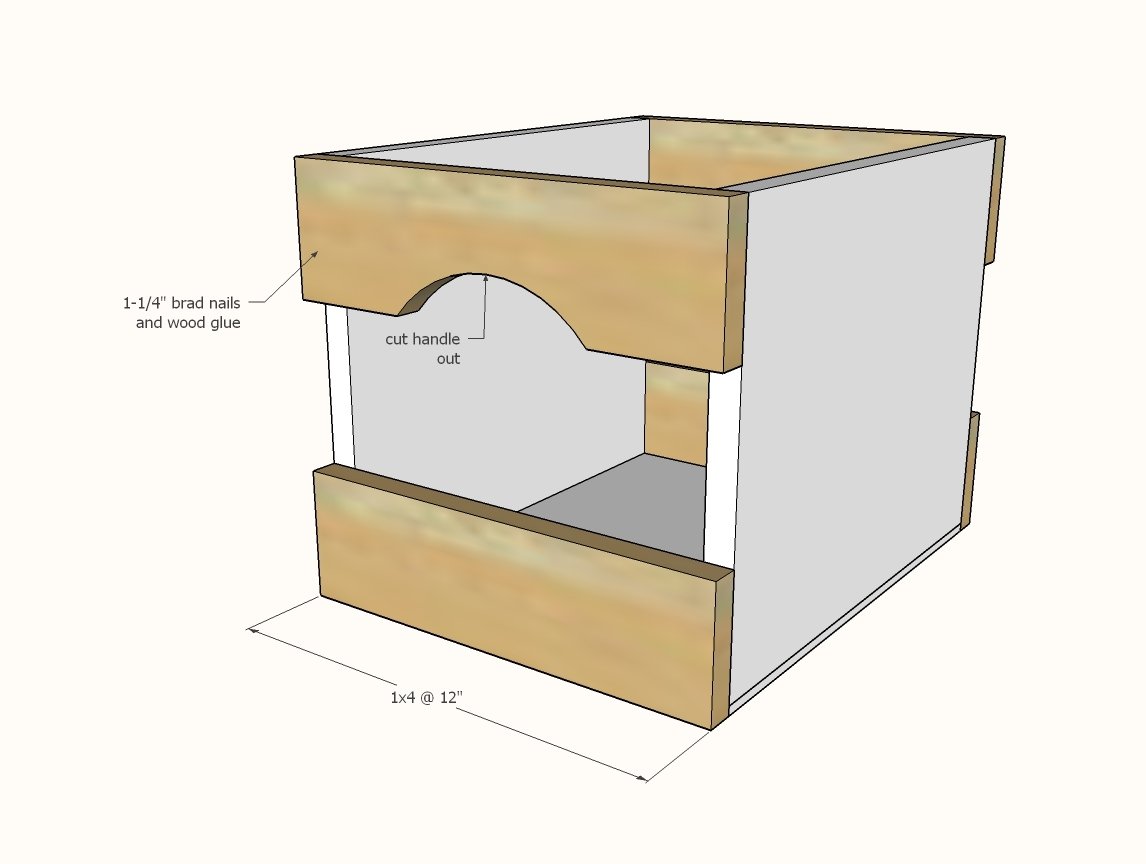
Step 8
Add center 1x4 with wood glue and brad nails.
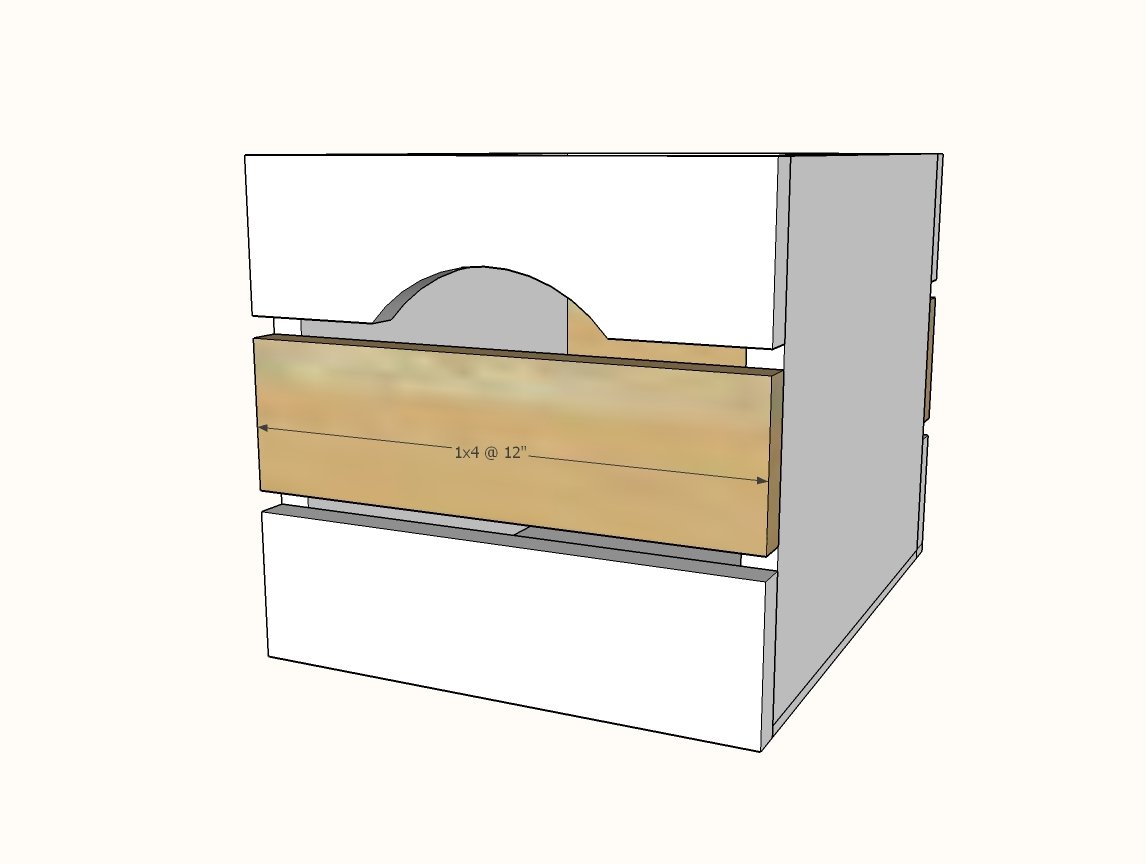
Finishing
Sand all surfaces, starting with a medium grit and finishing with fine. Wipe off the dust, fill any holes or gaps with wood filler, and sand smooth once dry. Apply primer if you're painting, then finish with your choice of paint or stain and seal with a durable clear topcoat. For outdoor projects, use exterior-rated primer, paint or stain, and sealer so the piece stands up to the weather.
Source (temporary): https://www.ana-white.com/woodworking-projects/wood-crate-dresser