Wood Doll Cradle
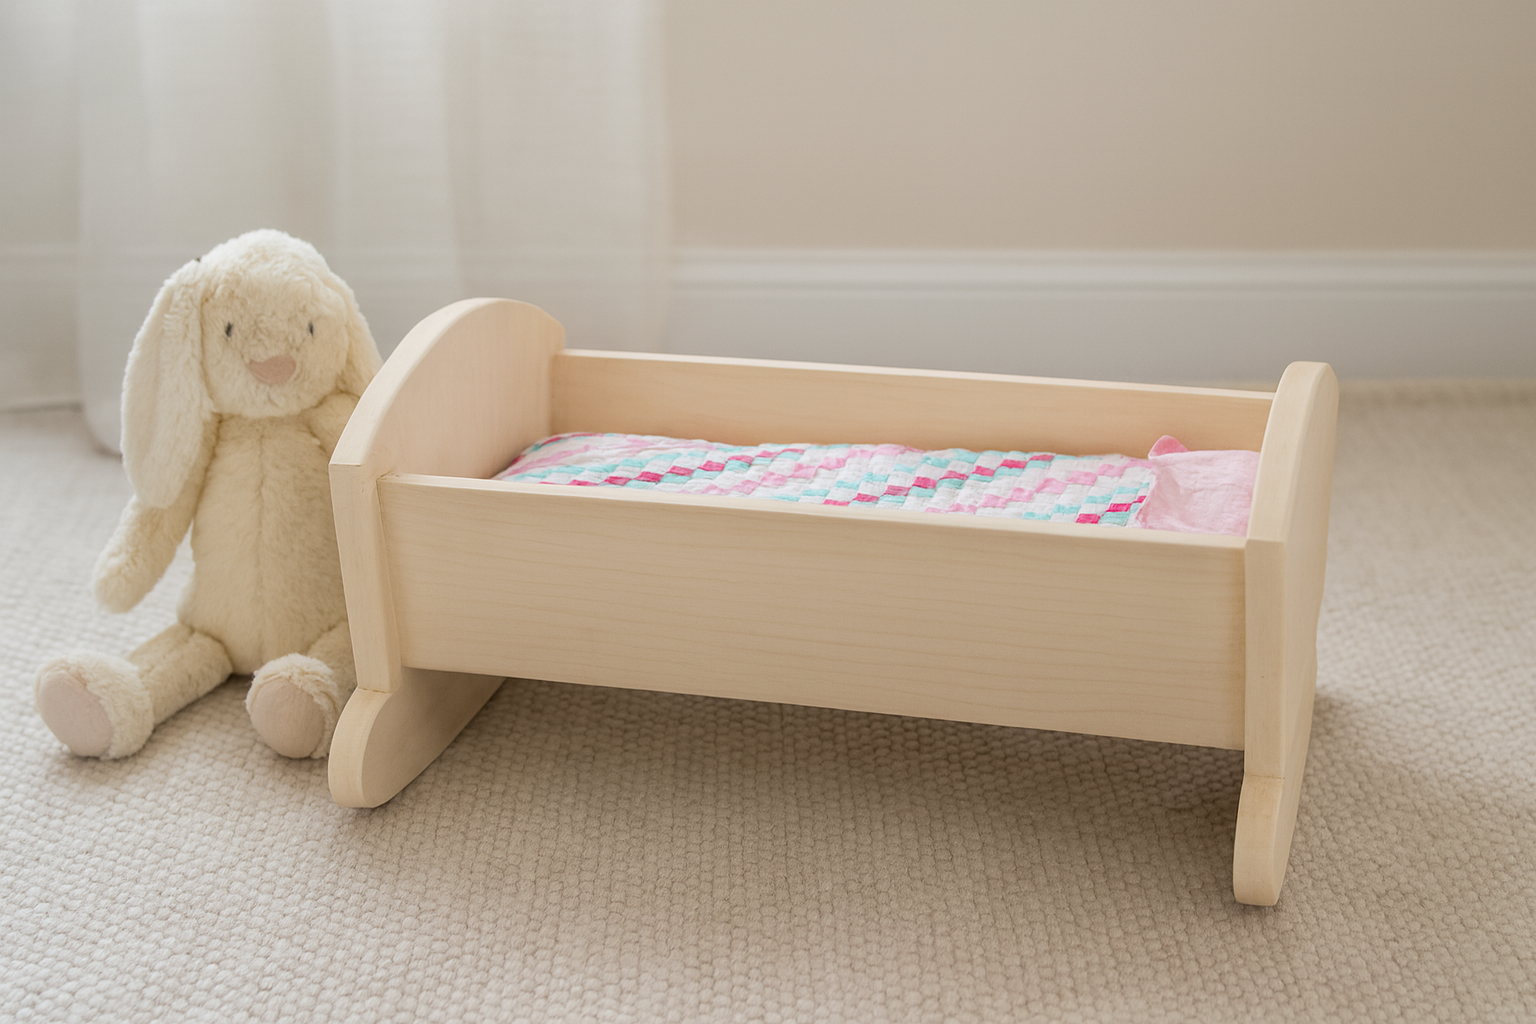
This classic wooden doll cradle is the perfect handmade toy for imaginative play. Built with smooth curves and a gentle rocking base, it’s sturdy enough for years of love and soft enough for little hands to handle. The natural wood finish highlights the simple, timeless design—perfect for displaying in a nursery or gifting to a child. Add a small quilt or blanket to make it extra special! Designed to fit standard dolls and plush toys, this easy weekend project uses basic tools and affordable materials.
Specifications
| Project type | Doll Furniture |
|---|---|
| Room | Kids and Toys |
| Style | Children's and Kid's Room Furniture and Toy Plans |
| Difficulty | Beginner Projects |
| Estimated cost | Under $20 |
Dimensions
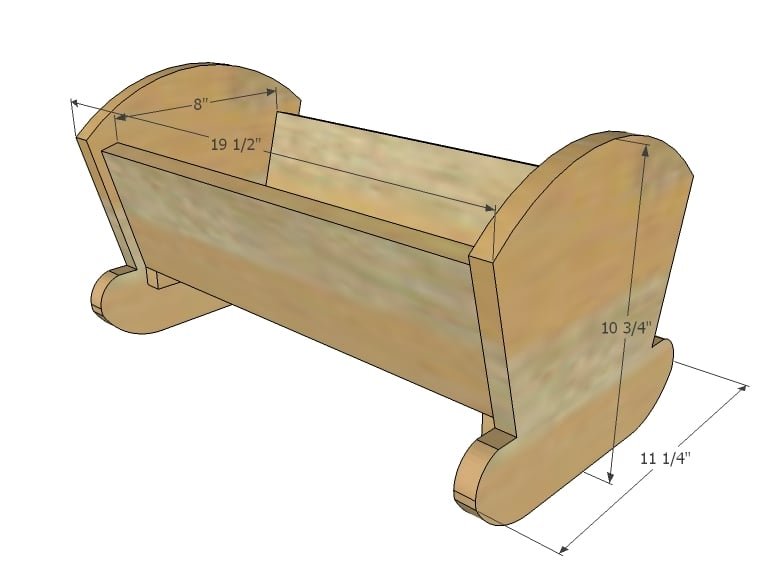
Use the size-specific shopping and cut lists below.
Shopping List
- 1 – 1x12 @ 24”
- 1 – 1x6 @ 5 feet long
- 1x1 moulding or scraps cut to 1x1 size
- 1-1/4” brad nails or screws
- wood glue
Cut List
- 2 – 1x12 @ 10 ¾”
- 2 – 1x1 @ 6 ¾”
- 3 – 1x6 @ 18”
Tools
- measuring tape
- square
- pencil
- safety glasses
- hearing protection
- drill
- jigsaw
- nailer
- sander
- countersink drill bit
Step-by-step Instructions
Step 1
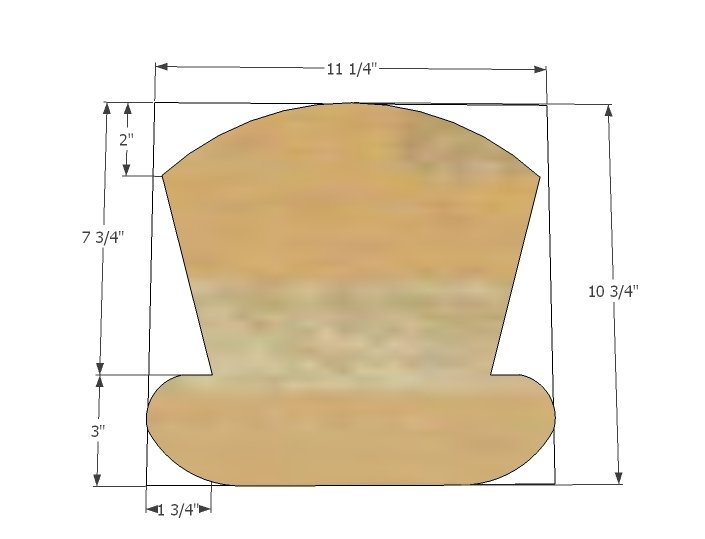
Draw pattern out on 1x12 ends. Edges can be rounded to avoid sharp corners. Cut out carefully with jigsaw and sand all rough edges. TIP: It’s a good idea to mark out the location of the cleat (next step) while the board is still square. Also mark center of board so you can easily line up center of bottom at step 3.
Step 2
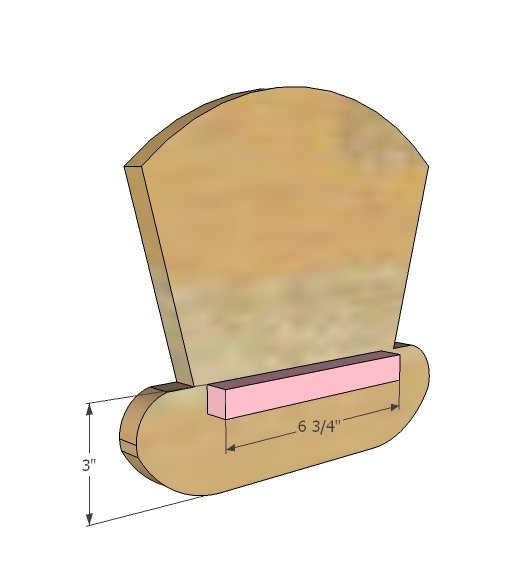
Attach cleats as shown in diagram with 1 ¼” finish nails and wood glue.
Step 3
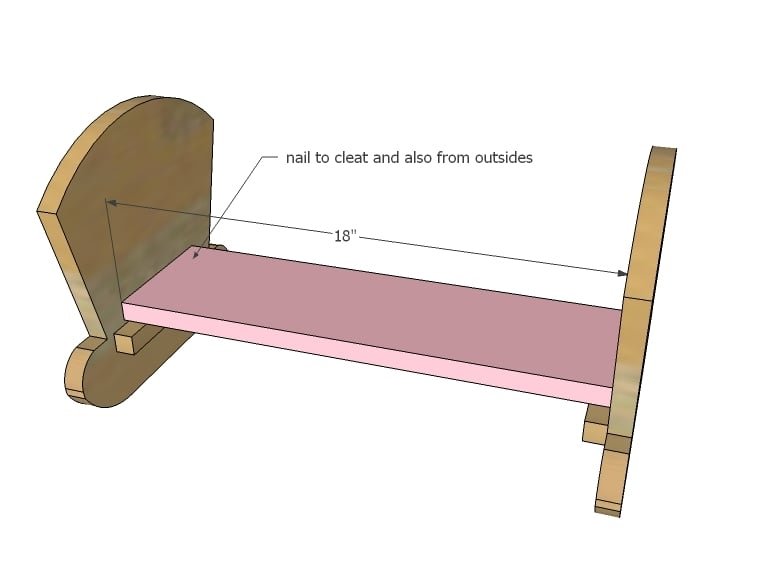
Now add bottom shelf. Use 2" countersunk screws and glue. Kreg Jig users - use 3/4" pocket holes and 1 1/4" pocket hole screws.
Step 4
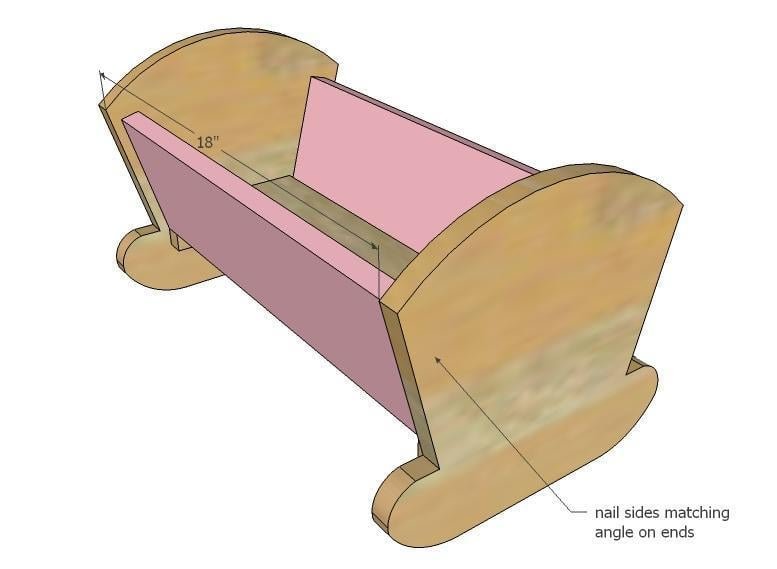
Attach sides with 2" screws and glue. Sides follow the angle of the ends.
Finishing
Sand all surfaces, starting with a medium grit and finishing with fine. Wipe off the dust, fill any holes or gaps with wood filler, and sand smooth once dry. Apply primer if you're painting, then finish with your choice of paint or stain and seal with a durable clear topcoat. For outdoor projects, use exterior-rated primer, paint or stain, and sealer so the piece stands up to the weather.
Source (temporary): https://www.ana-white.com/woodworking-projects/wood-doll-cradle-free-diy-plans