Wood Doll Crib
This is a free, easy-to-build doll crib plan that's perfect for beginners. Simple design, minimal tools, and a fun weekend project.
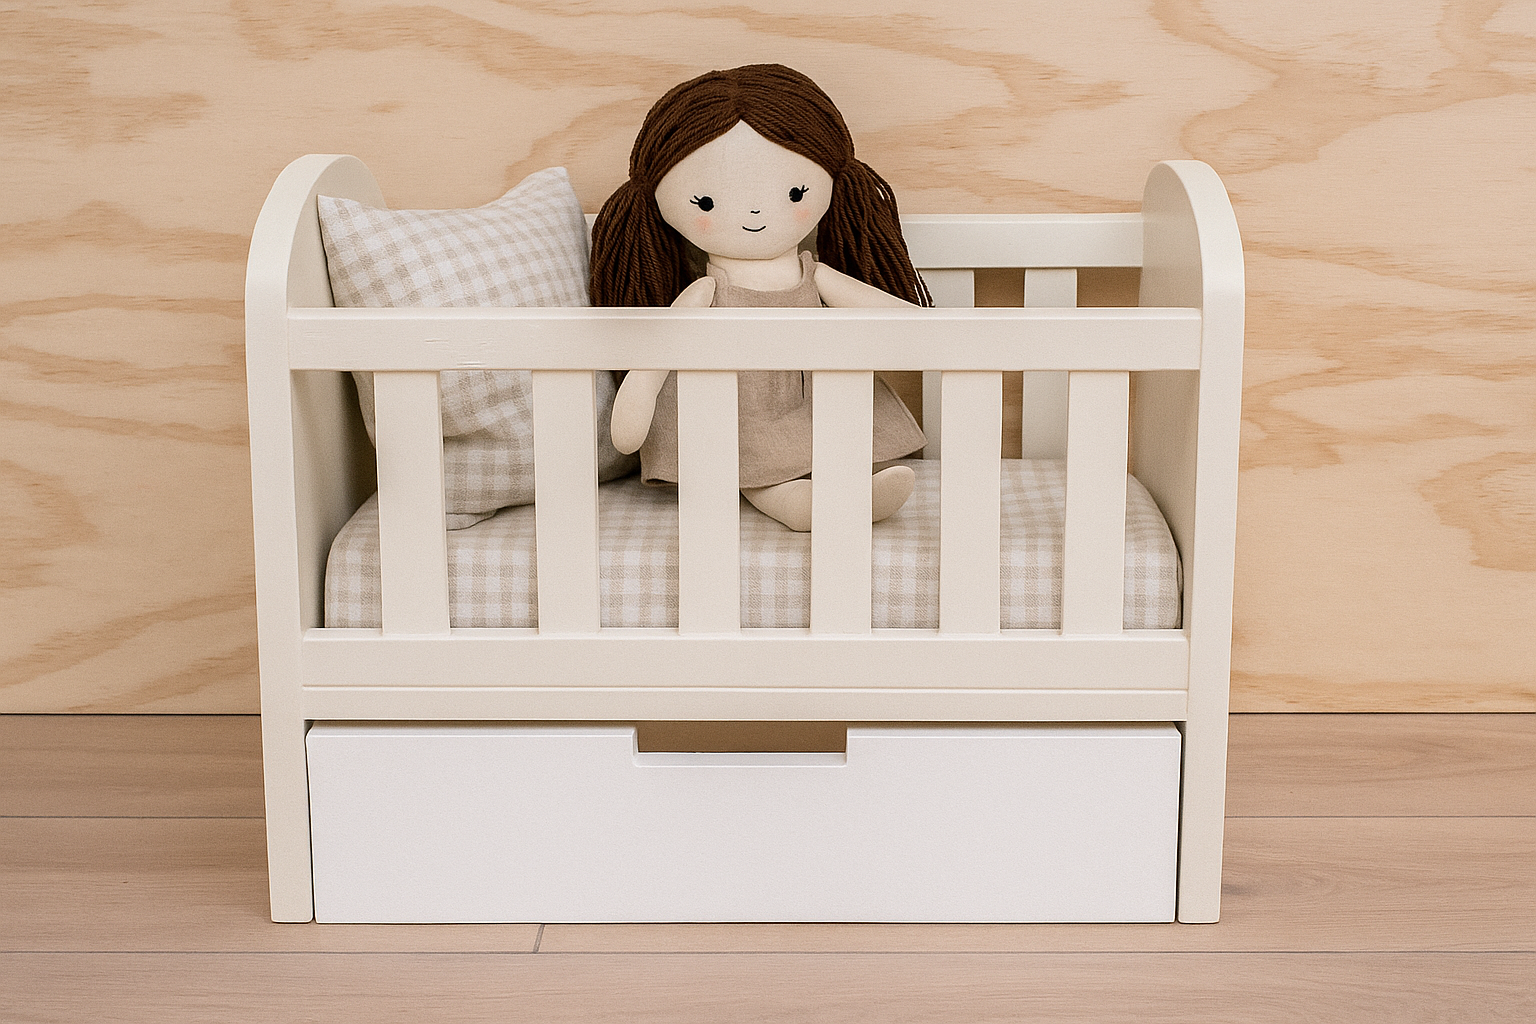
Specifications
| Project type | Doll Furniture |
|---|---|
| Room | Kids and Toys |
| Style | Children's and Kid's Room Furniture and Toy Plans |
| Difficulty | Beginner Projects |
| Estimated cost | $20 - $50 |
Dimensions
Use the size-specific shopping and cut lists below.
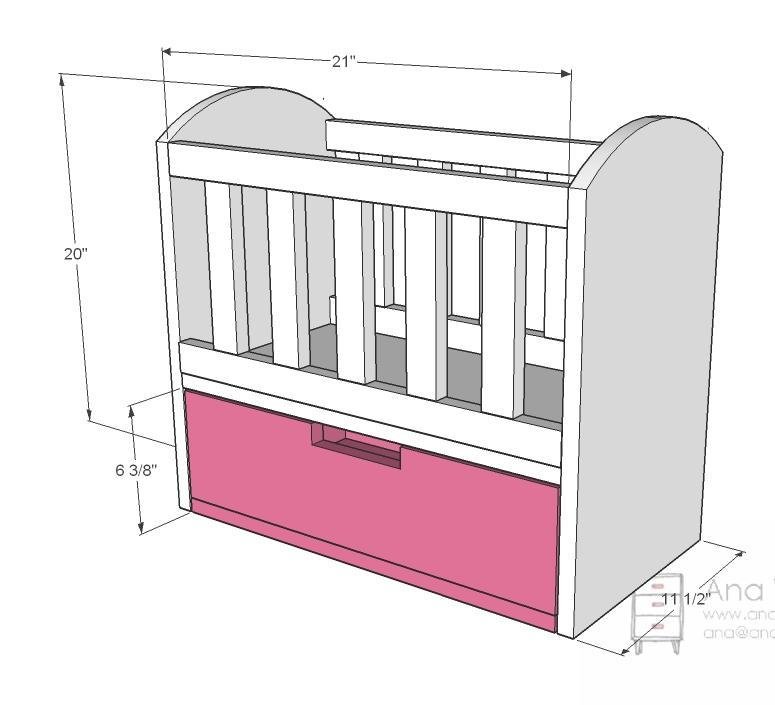
Shopping List
- 1 – 1×12, 8 feet long
- 1 – 1×6, 6 feet long
- 2 – 1×2, 8 feet long
- wood filler, glue, and finishing supplies
- 1 1/4″ pocket hole screws or 2″ self tapping trim screws
- 2″ self tapping star bit wood screws (can use the 2″ trim screws)
- sand paper
Cut List
- 2 – 1×12 @ 20″ (Round tops as shown in step 2)
- 1 – 1×12 @ 21″ (Crib Bottom)
- 1 – 1×12 @ 20 3/4″ (Drawer Bottom)
- 2 – 1×6 @ 20 3/4″ (Drawer Front and Back)
- 2 – 1×6 @ 10″ (Sides of Drawer)
- 4 – 1×2 @ 21″ (Tops and Bottoms of Crib Rails)
- 10 – 1×2 @ 7 3/4″ (Crib Rails)
Tools
- measuring tape
- square
- pencil
- safety glasses
- hearing protection
- kreg-jig
- drill
- jigsaw
- sander
Step-by-step Instructions
Rails
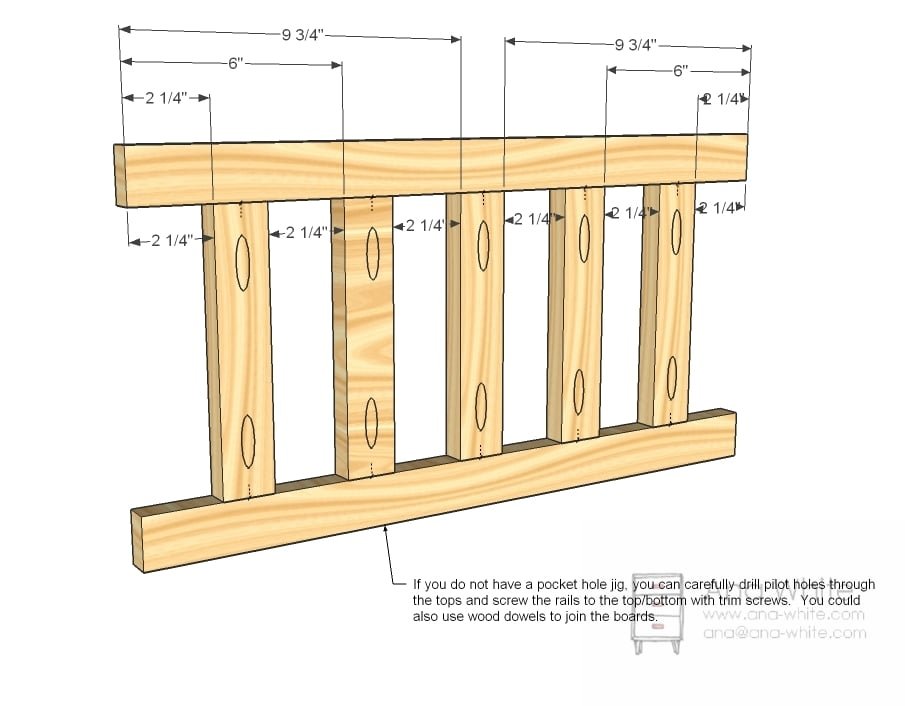
Mark all of the 1x2s @ 21″ long as shown above. Drill either pocket holes in all the rails or in the tops/bottoms of rails and attach the rails to the tops/bottoms with screws. Use 1 1/4″ screws for pocket holes. or 2″ trim screws if you choose to drill through the tops and bottoms. Use glue. One screw will do for each rail if you use glue.
Box
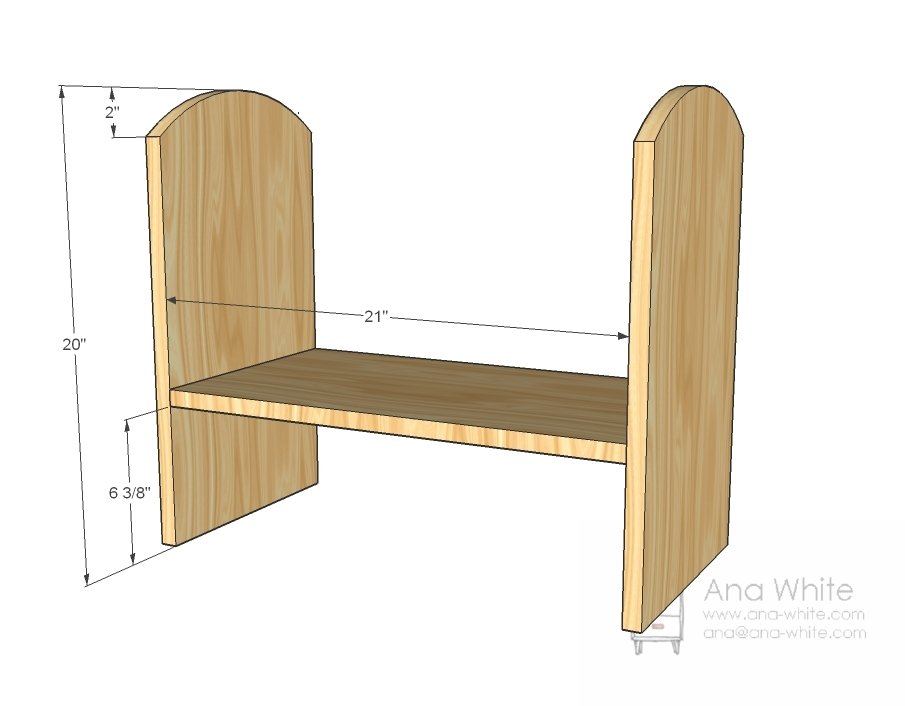
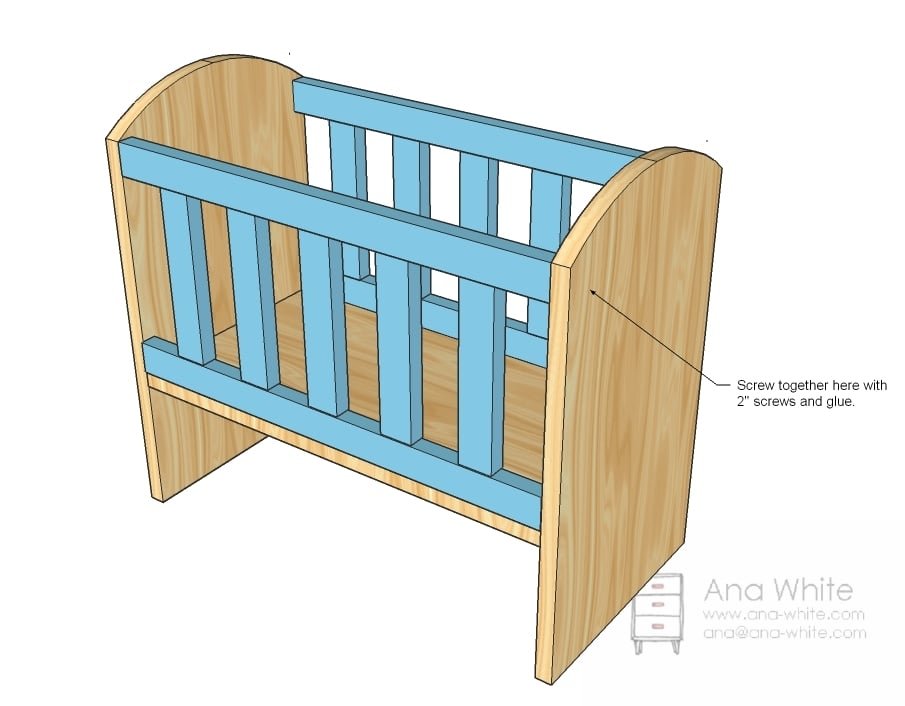
The most difficult part of this entire project was cutting the tops of the ends the same rounded curve. I actually thought about just making the tops straight (would have been much easier and given the crib a cool modern feel) but decided to stick out the curve. Lots of sanding later, and the tops look great. After cutting with a jigsaw, I clamped the two ends together and sanded, sanded, sanded, until the ends matched. Then I built the box as shown above. Use 2″ screws through predrilled holes or 1 1/4″ pocket hole screws and glue.
Assembly
Now simply attach the rails to the ends and bottom.
Drawer
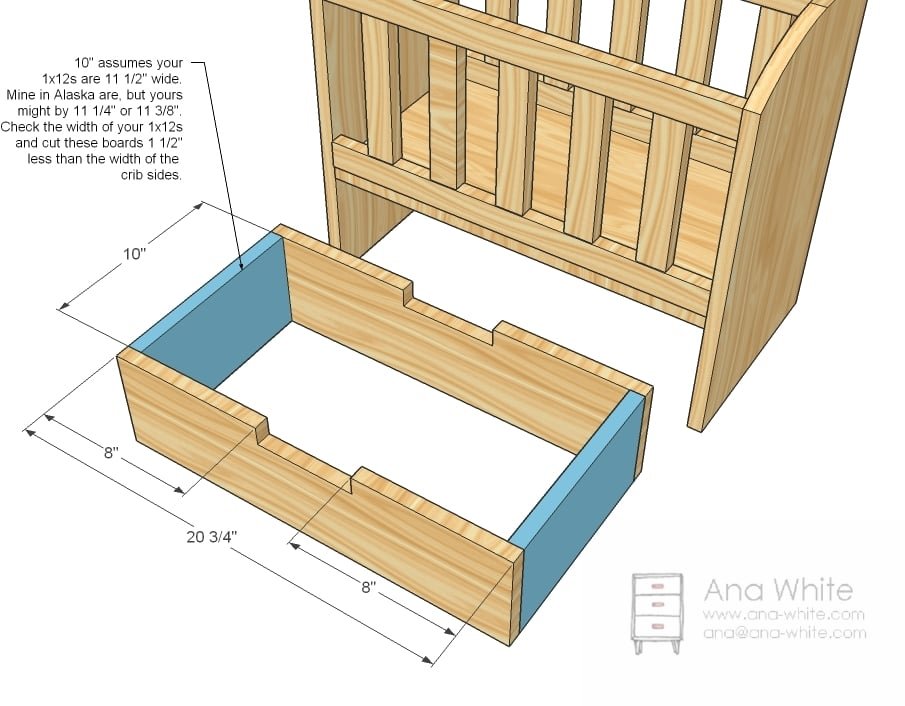
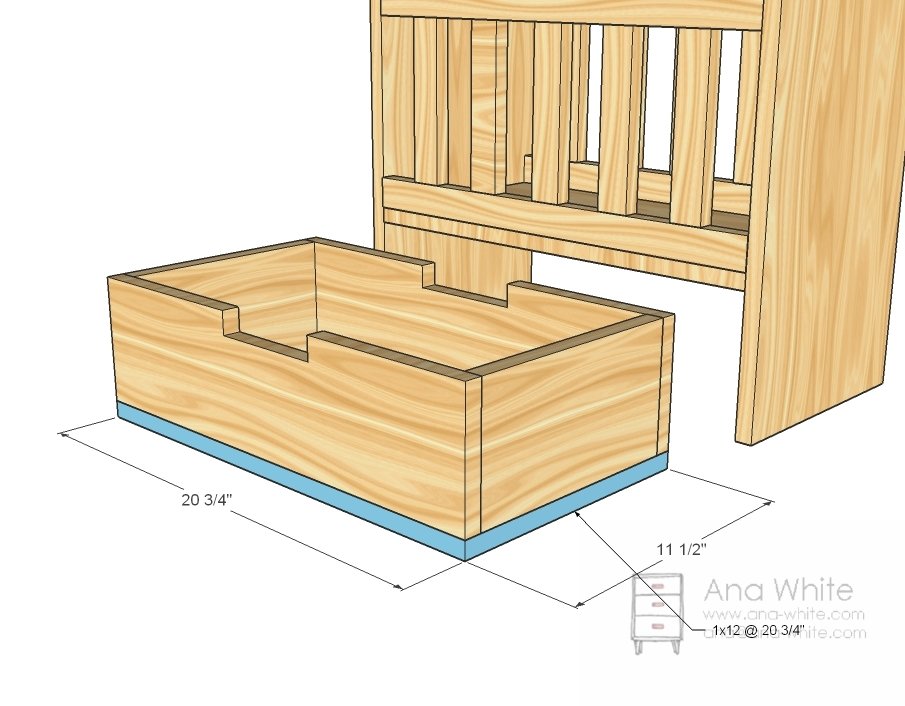
Build the drawer box as shown above. Notch out the drawer with a jigsaw.
Step 5
Finishing
Sand all surfaces, starting with a medium grit and finishing with fine. Wipe off the dust, fill any holes or gaps with wood filler, and sand smooth once dry. Apply primer if you're painting, then finish with your choice of paint or stain and seal with a durable clear topcoat. For outdoor projects, use exterior-rated primer, paint or stain, and sealer so the piece stands up to the weather.
Source (temporary): https://www.ana-white.com/woodworking-projects/wood-doll-crib-plans