Wood Folding Sling Chair, Deck Chair or Beach Chair
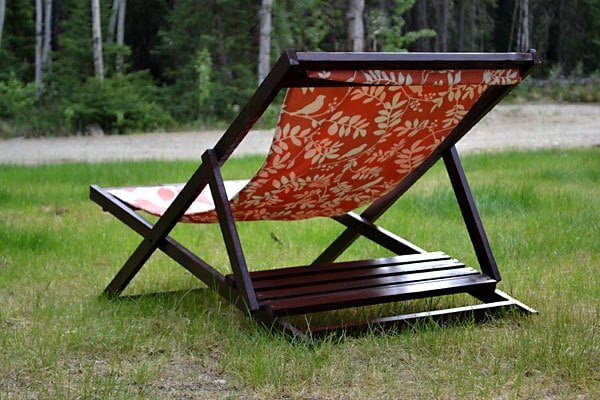
Folding adult sized wood sling chair, also known as wood beach chairs or deck chairs. Folds flat for storage, opens up for easy relaxation! Adjusts to three positions for customized reclining. Features removable slings. Child sized plans also available.
Specifications
| Project type | Chairs |
|---|---|
| Room | Outdoor |
| Style | Farmhouse Furniture |
| Difficulty | Advanced |
| Estimated cost | $20 - $50 |
Dimensions
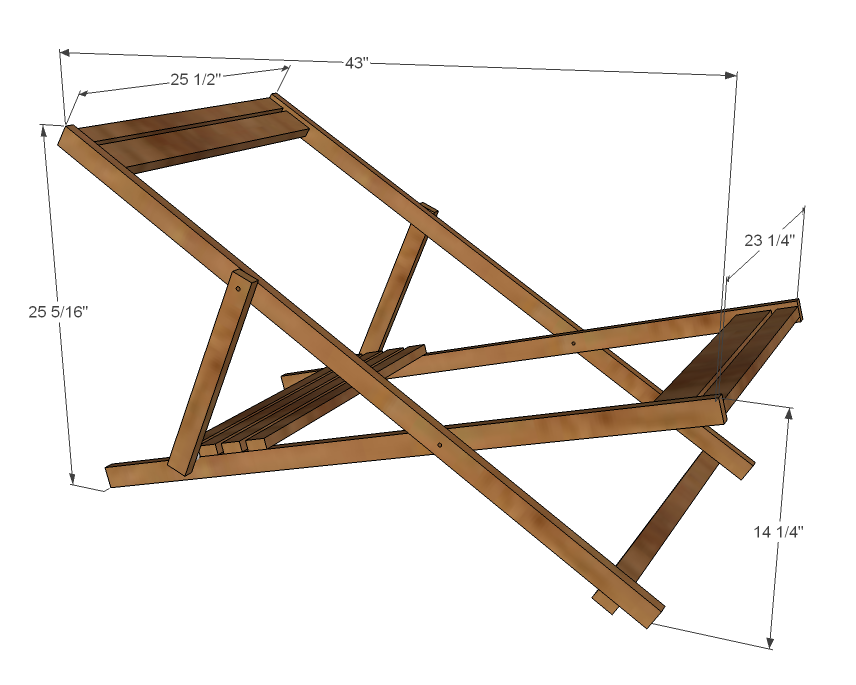
Use the size-specific shopping and cut lists below.
Shopping List
1 - 6' 1/2" Diameter Wood Dowel
1 1/2 Yards Outdoor Fabric, 54" wide
Sewing Notions and Thread
1 - 1x3 @ 48" long
4 - 1x2 @ 8 feet long
4 - 1/4" diameter bolts, 2" long with matching nuts
12 - washers to fit bolts
Cut List
Backrest Frame
2 - 1x2 @ 48"
1 - 1x2 @ 24"
1 - 1x2 @ 25 1/2"
1 - 1x3 @ 24"
Seat Frame
2 - 1x2 @ 44"
4 - 1x2 @ 23 3/4"
1 - 1x2 @ 22 1/4"
1 - 1x3 @ 22 1/4"
Prop-Up Support
2 - 1x2 @ 15"
1 - 1/2" Diameter Wood Dowel @ 25 1/2"
Fabric Slings
2 - Outdoor Fabric Squares @ 54" x 22 3/4"
2 - 1/2" Diameter Wood Dowel @ 22"
Tools
- measuring tape
- square
- pencil
- safety glasses
- hearing protection
- drill
- circular saw
- sander
- countersink drill bit
Step-by-step Instructions
Step 1
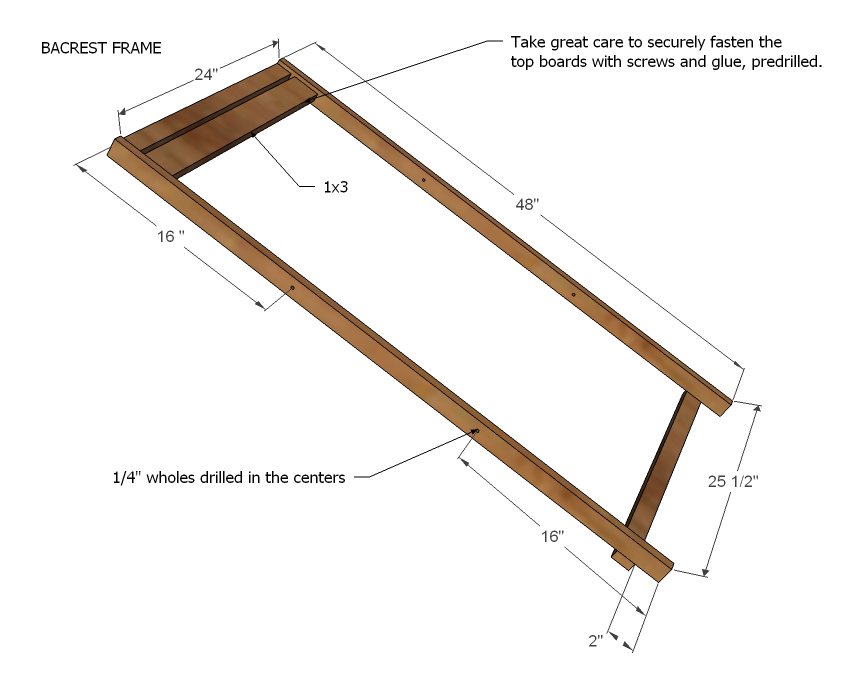
Build the back frame very carefully as shown above. The main weight bearing joints are going to be where the fabric slings pull on the headers - so take great care to use glue, carefully predrill holes, avoid splitting your wood, and attach in place. There is a 3/8" gap between the header boards. Drill the holes as shown above for the bolts.
Step 2
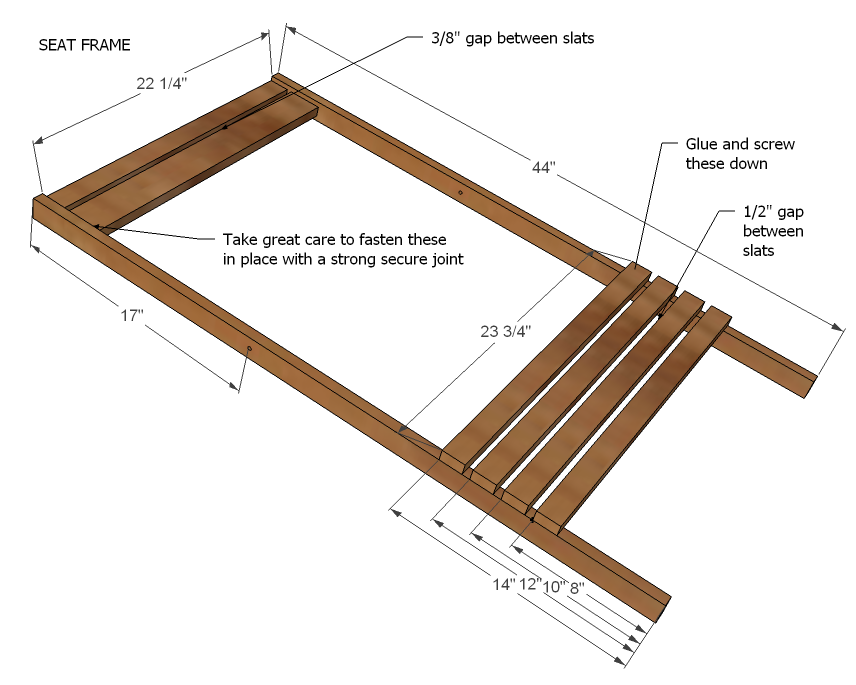
Build the smaller sling as shown above, taking great care again to create strong joints for the headers.
Step 3
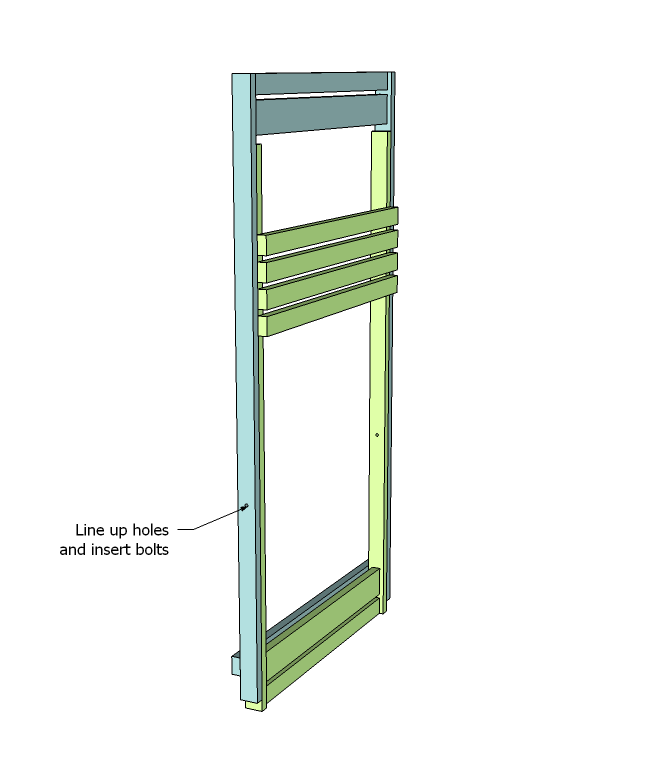
Once both frames are complete, line the frames up as shown above, and insert bolts, with washers on both sides of bolt, and one washer between the two wood frames to protect the finish on your wood frames. The chair should now swing open, but there will be nothing to keep the chair from staying open. See next step...
Step 4
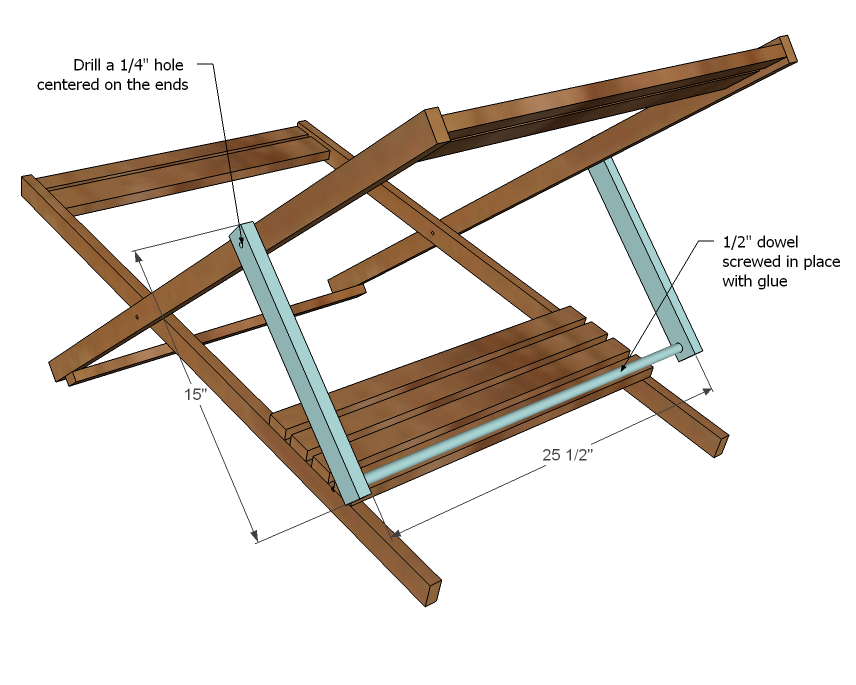
Build the propup support as shown above. Attach with bolts and washers to the backrest frame, in the remaining predrilled bolt hole. Rest between seatframe slats. You will be able to move the prop up to adjust the angle of the chair. Time to make that sling.
Step 5
Step 6
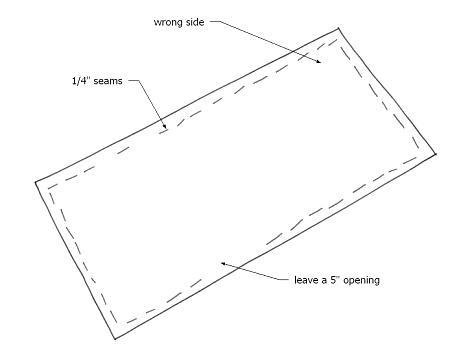
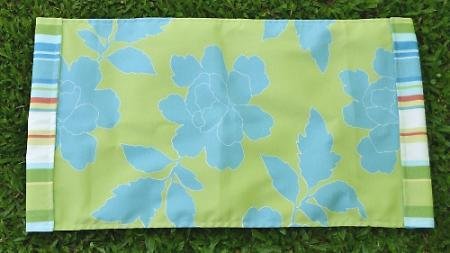
Using a larger stitch length, topstitch edges along both (long) sides only. A decorative stitch is optional. Finish edges by tucking thread into project.
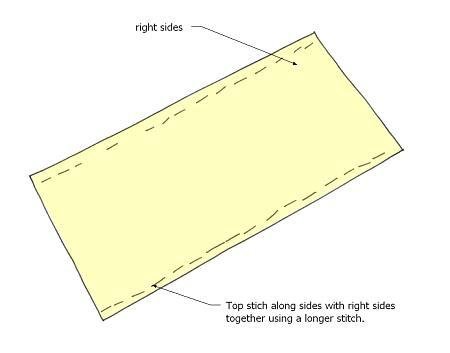
Fold bottom and top over 1 1/2” to create “sleeves.”
Topstitch using same seam allowance as on the sides. Finish edges by tucking thread into project.
Step 8
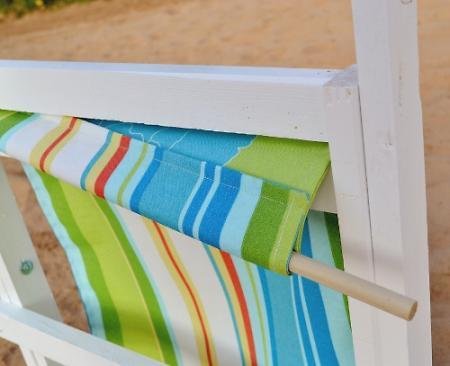
By threading the slings through the chair headers, then threading the dowels in the "sleeves" you create a sling that is held in place sturdily, but is easy to remove to wash or change the look up.
Finishing
Sand all surfaces, starting with a medium grit and finishing with fine. Wipe off the dust, fill any holes or gaps with wood filler, and sand smooth once dry. Apply primer if you're painting, then finish with your choice of paint or stain and seal with a durable clear topcoat. For outdoor projects, use exterior-rated primer, paint or stain, and sealer so the piece stands up to the weather.
Source (temporary): https://www.ana-white.com/woodworking-projects/wood-folding-sling-chair-deck-chair-or-beach-chair-adult-size