Wood Framed Upholstered Headboard- Queen
Make your own upholstered panel headboard in a wood frame - free
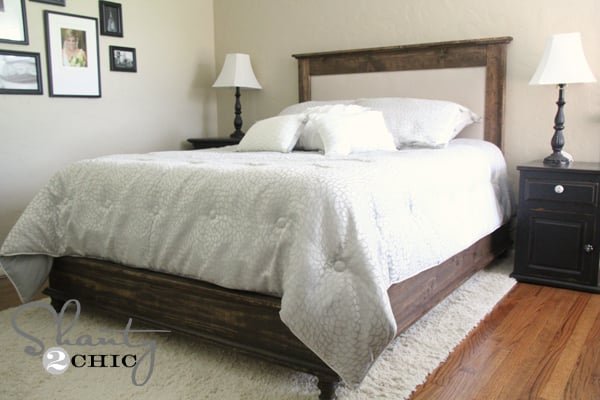
Specifications
| Project type | Headboard |
|---|---|
| Room | Bedroom |
| Style | Farmhouse Furniture |
| Difficulty | Intermediate |
| Estimated cost | $50 - $100 |
Dimensions
Use the size-specific shopping and cut lists below.
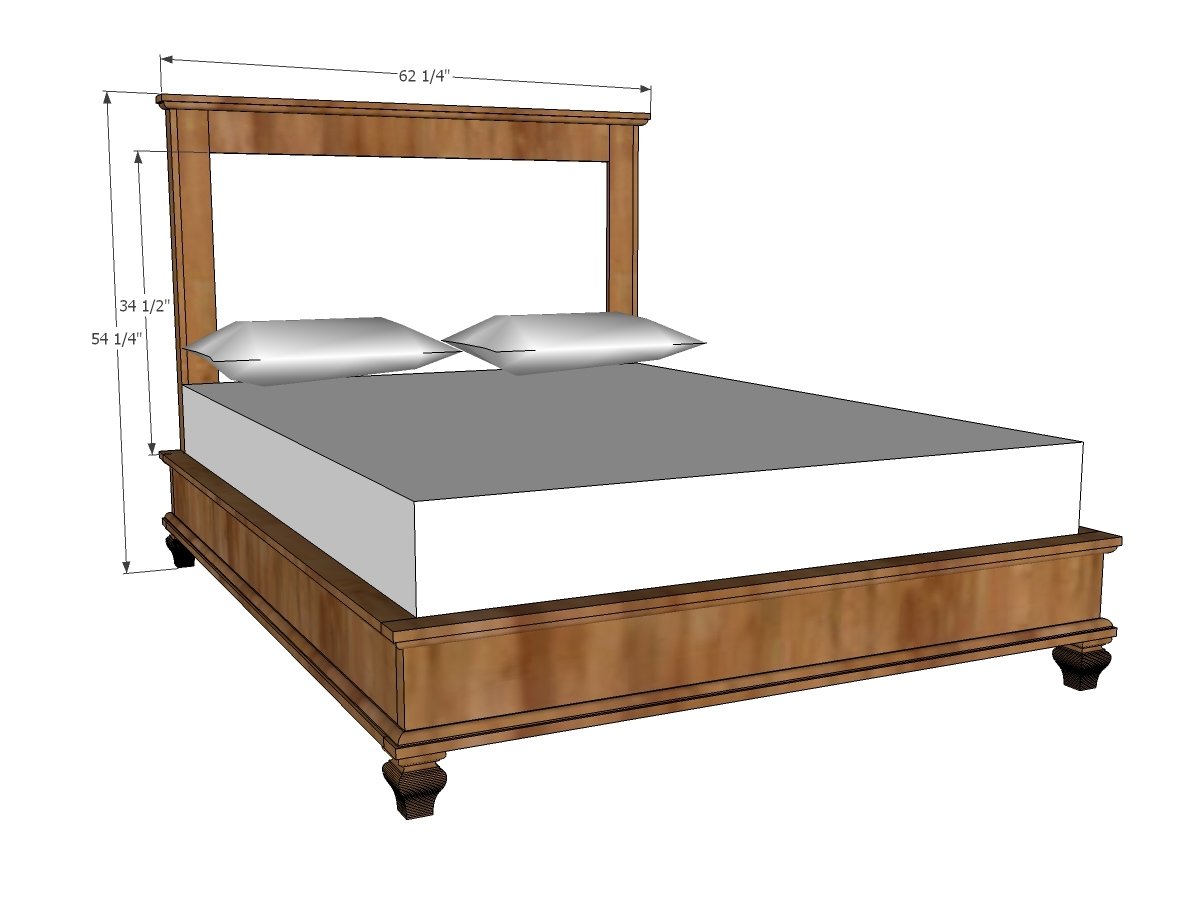
Shopping List
- 1 sheet 1/2” plywood or MDF
- 1 – 1x4 @ 12 feet long
- 2 – 1x3 @ 8 feet long
- 1 – 1x6 @ 6 feet long
- 1” thick foam for center panel
- Batting to cover foam
- 1 yard 54” wide decorator fabric
- ½” staples
- Spray adhesive
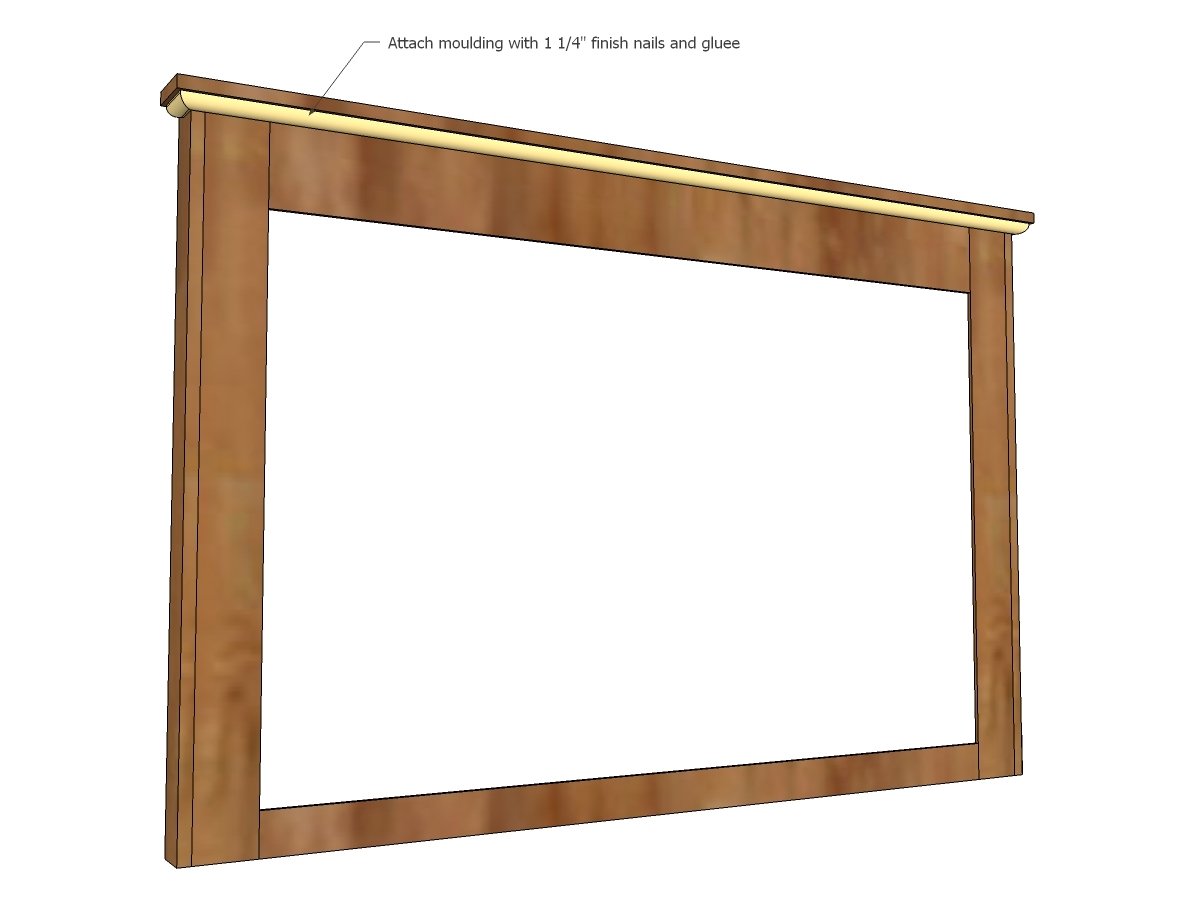
- 1 – stick moulding
- 1 ¼” and 2 ½” brad nails
- Wood glue
- Finishing supplies
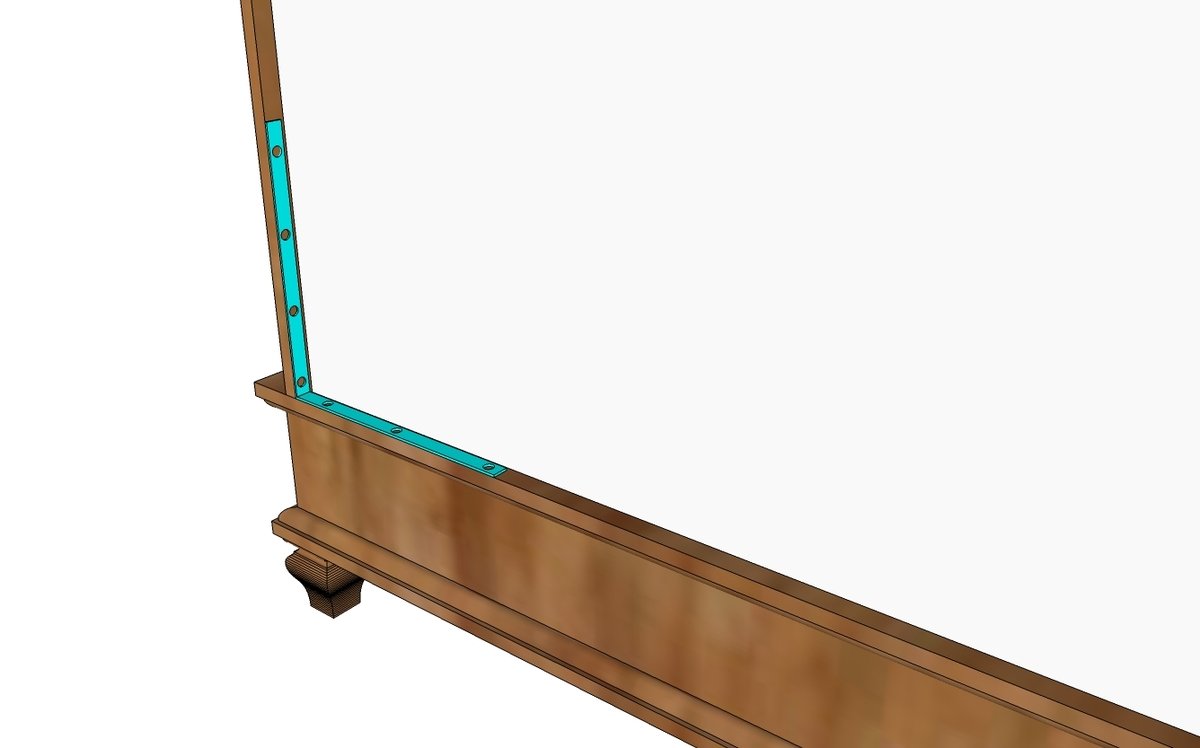
- 2 heavy duty metal shelf brackets for attaching headboard to bed
Cut List
- 1 – 1/2” plywood, particle board or MDF @ 40” x 58
- LEGS: 2 – 1x4 @ 40” OR 53" if legs extend all the way to the floor for a freestanding headboard
- 1 – 1x3 @ 51 ½”
- 1 – 1x6 @ 51 ½”
- 2 – 1x3 @ 40” OR 53" if legs extend all the way to the floor for a freestanding headboard
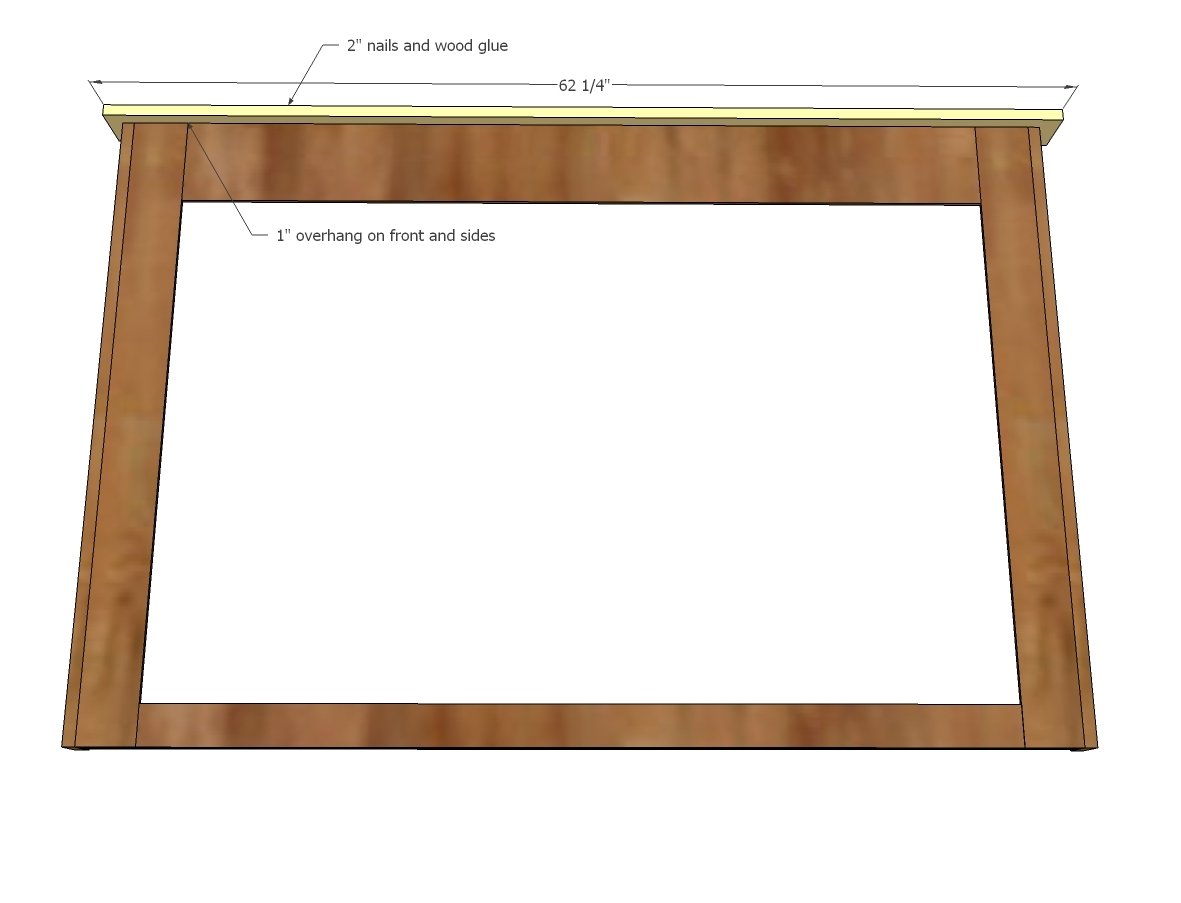
- 1 – 1x4 @ 62 ¼” (header) Moulding cut to fit
Tools
- measuring tape
- square
- pencil
- safety glasses
- hearing protection
- kreg-jig
- drill
- circular saw
- compound miter saw
- nailer
- sander
- staple gun
Step-by-step Instructions
Step 1
Glue the foam to the plywood carefully, positioned as shown in the diagram. This is very important to get just right. Cover with batting and fabric, stapled right to the plywood. This area is to be covered by wood frame boards. Make sure all staples are pounded into the plywood.
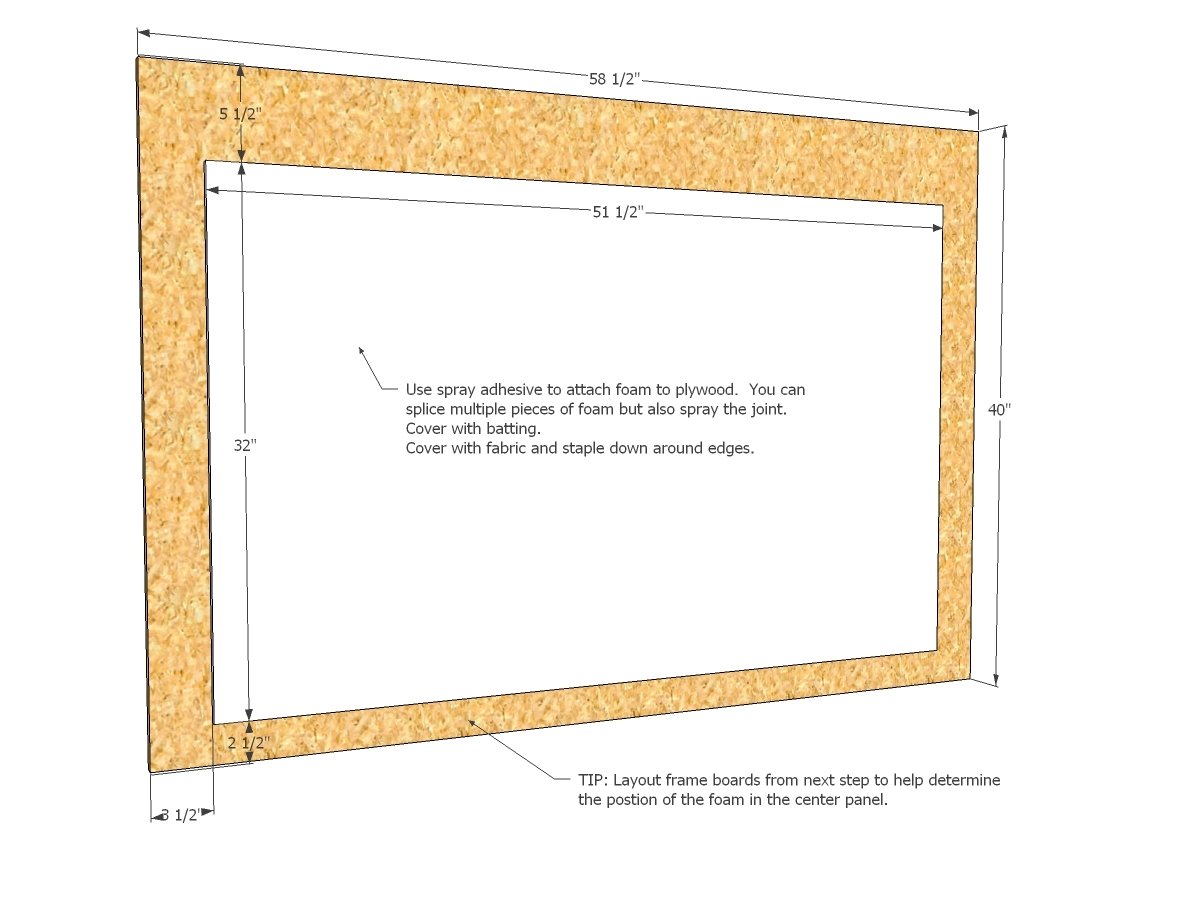
If legs extend all the way to the floor, cut to 53" instead of 40" and extend past.
Now you can either use the Kreg Jig to build the wood frame first, and then nail to your plywood or nail each board individually to the plywood, framing the foam piece in center. NOTE: I did change the center plywood to 1/2" thick to weigh less and be less expensive to build, so change nail lengths to fit your plywood. You may wish to use screws so the center panel is removeable for changing up the fabric.
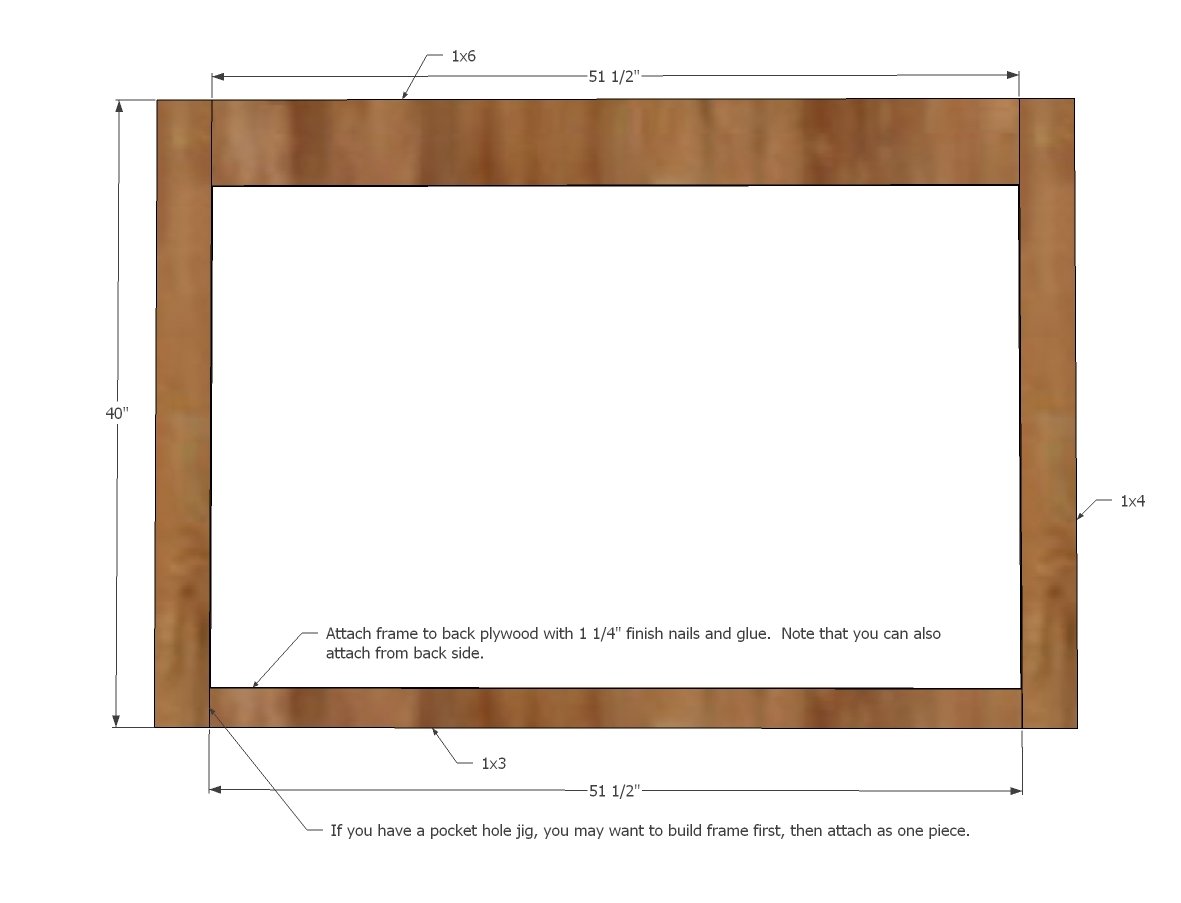
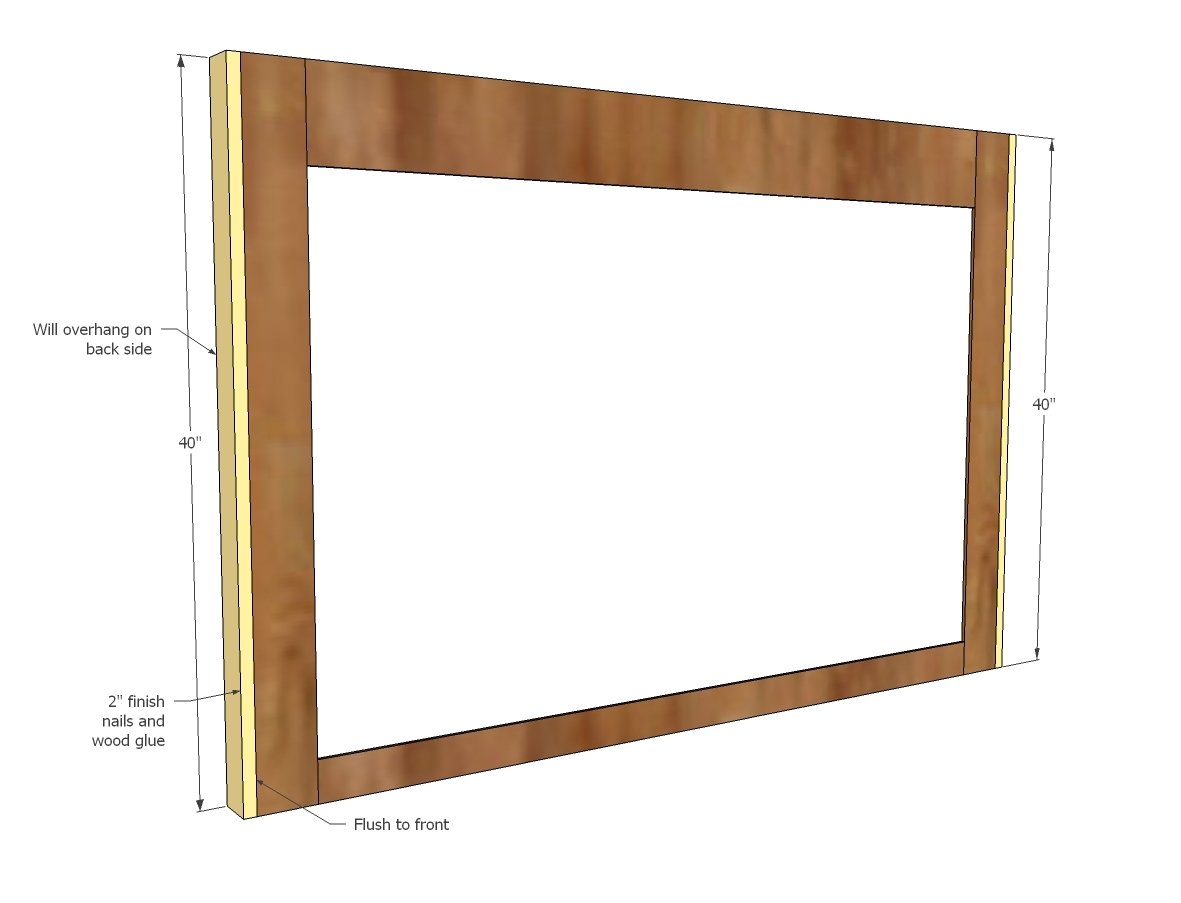
Now add the side trim.
If legs extend to the floor, cut the side trim to 53" and attach all the way to the floor.
Step 4
Followed by top trim.
Step 5
Step 6
To attach headboard to bed, use the shelf support brackets as shown above. You may also need to attach to wall.
Finishing
Sand all surfaces, starting with a medium grit and finishing with fine. Wipe off the dust, fill any holes or gaps with wood filler, and sand smooth once dry. Apply primer if you're painting, then finish with your choice of paint or stain and seal with a durable clear topcoat. For outdoor projects, use exterior-rated primer, paint or stain, and sealer so the piece stands up to the weather.
Source (temporary): https://www.ana-white.com/woodworking-projects/wood-framed-upholstered-headboard-queen