Wood Handrail
How to DIY a wood handrail - from
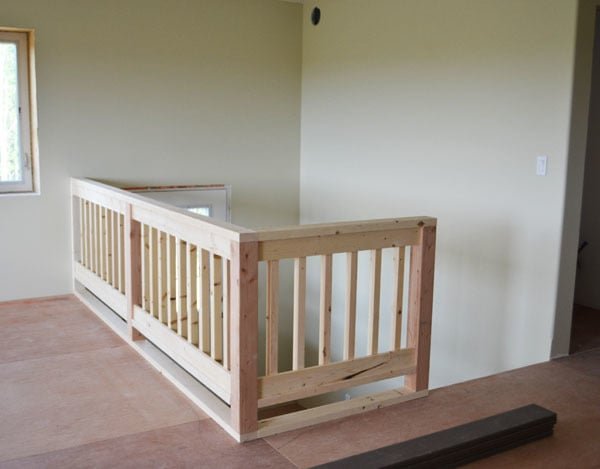
Specifications
| Project type | Home DIY |
|---|---|
| Room | Entryway and Mudroom |
| Style | Farmhouse Furniture |
| Difficulty | Intermediate |
| Estimated cost | $100-$150 |
Dimensions
Use the size-specific shopping and cut lists below.
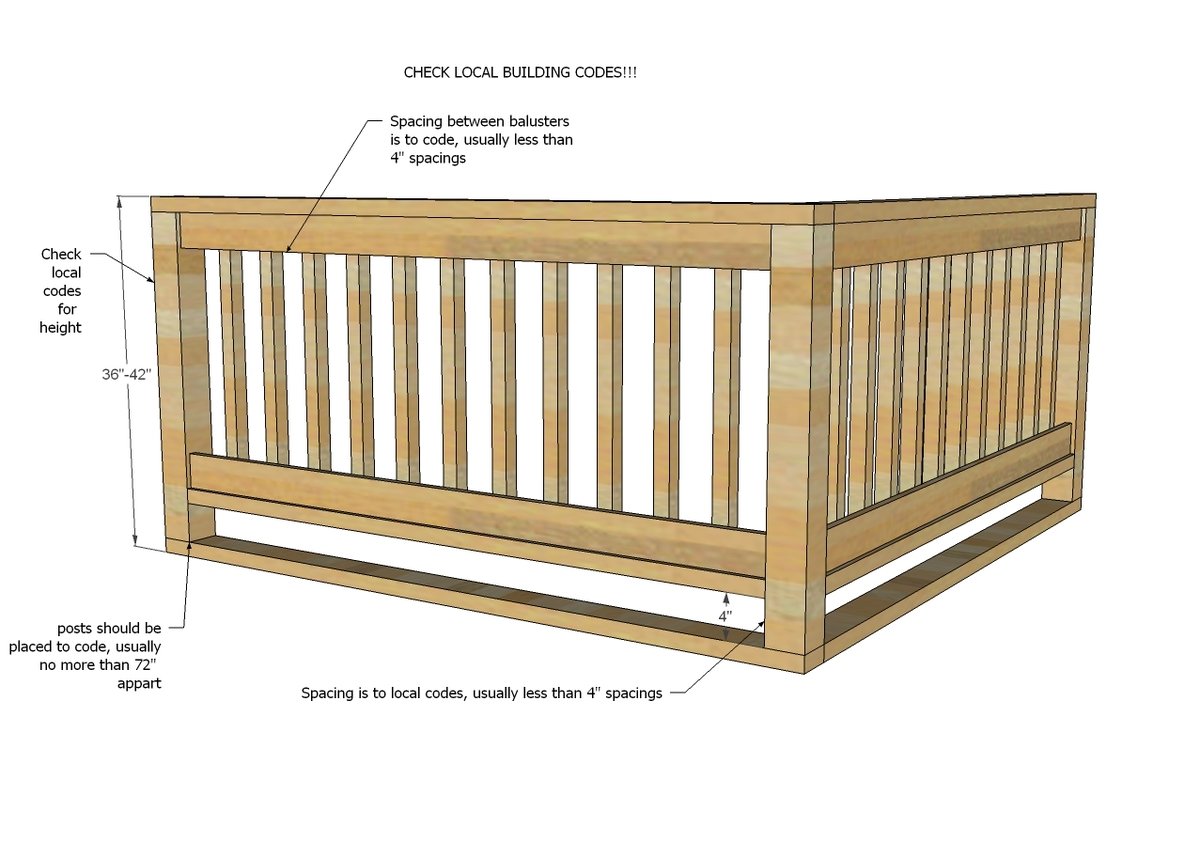
Shopping List
4x4s for posts
2x4s for horizontal supports
2x2s for balusters
1x4s for trim over balusters
3" screws for attacing 2x4s to 4x4 posts
2 1/2" pocket hole screws for attaching 2x4s to 4x4 posts and balusters
Screws or hardware for attaching handrail to building
Cut List
Handrail is cut to fit -
Tools
- measuring tape
- square
- pencil
- safety glasses
- hearing protection
- kreg-jig
- drill
- circular saw
- table saw
- nailer
- sander
- level
- countersink drill bit
Step-by-step Instructions
Step 1
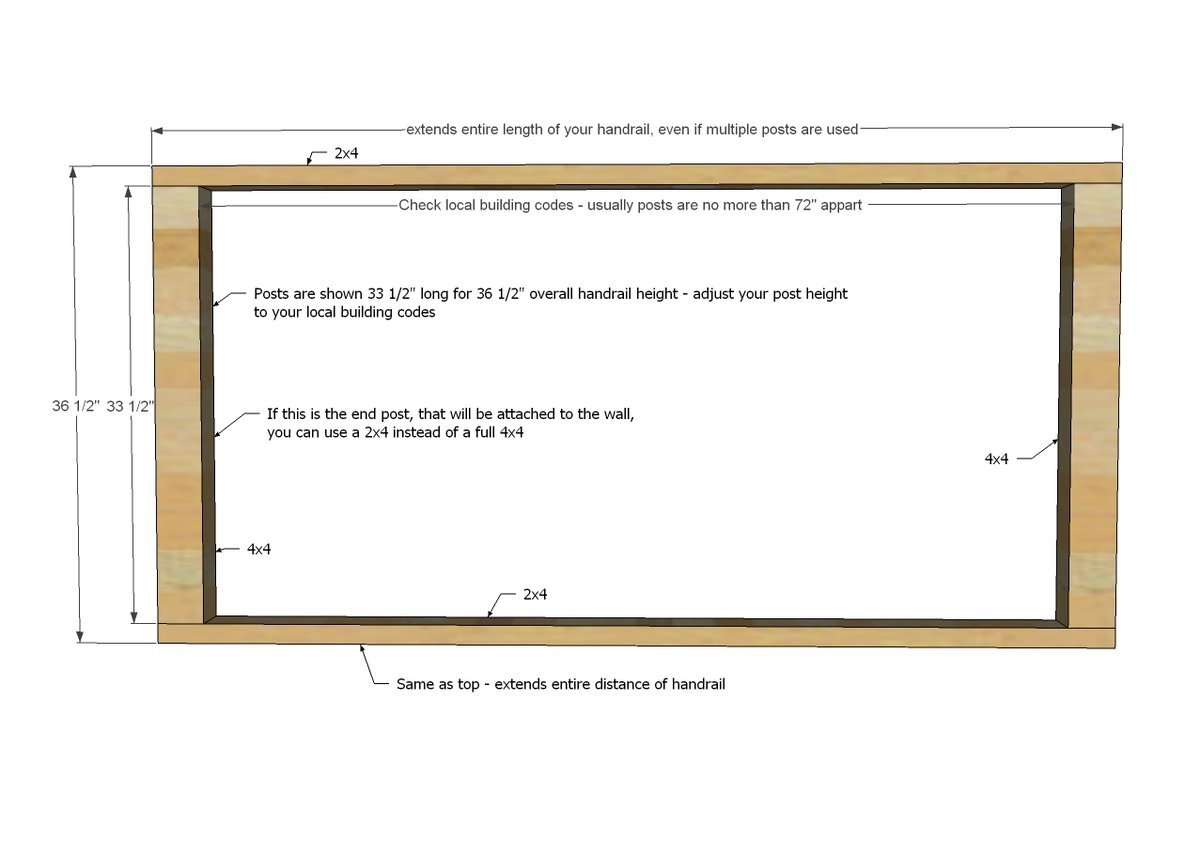
Once you have your handrail figured out, start by building the main straight section. The top 2x4 and bottom 2x4 should be the overall length of your straight section. 4x4 posts are attached with 3" countersunk screws and wood glue through top and bottom. If your handrail extends more than 6 feet (check local codes for spans) you will also need to add additional 4x4 posts to meet codes. We centered our center 4x4 posts:
Step 2
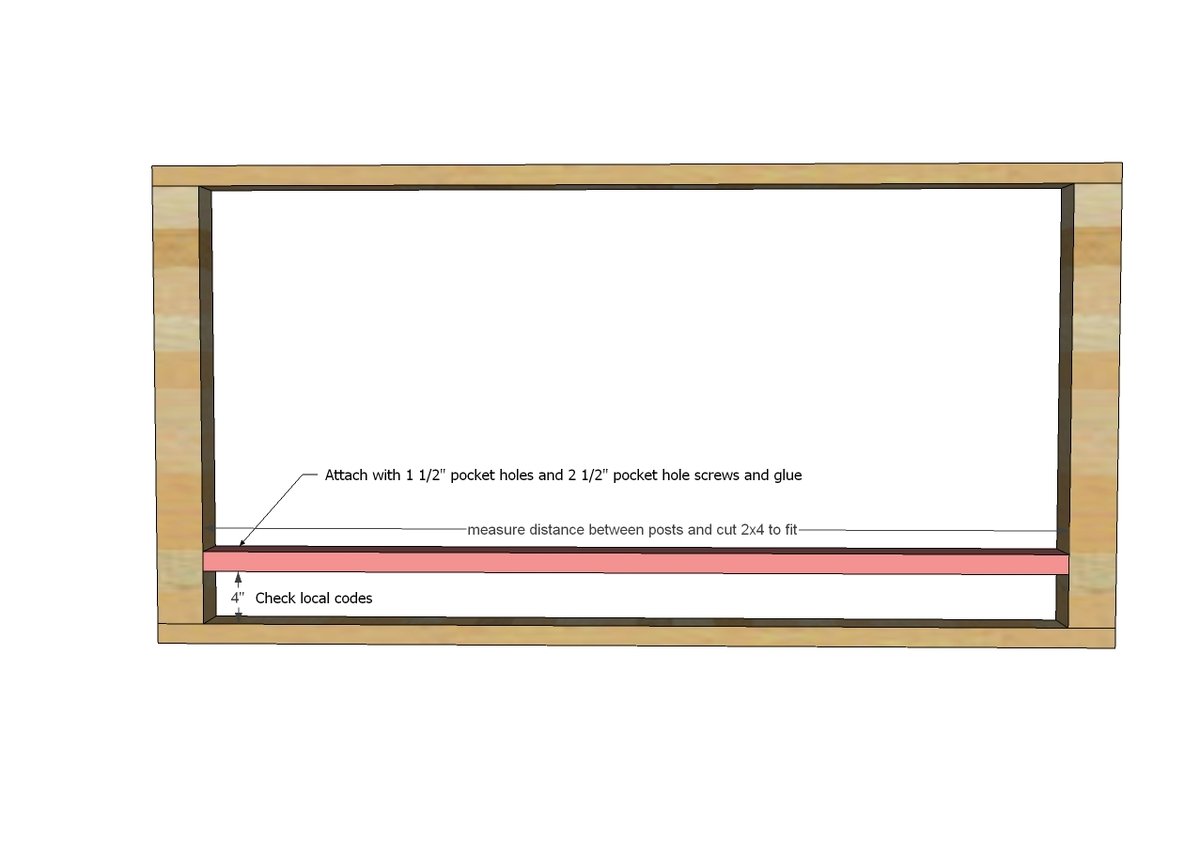
I wanted a space at the bottom (kinda like a toekick if you will) so we added bottom 2x4 boards, keeping to code spacings.
Now you'll need to figure how many balusters you will need.
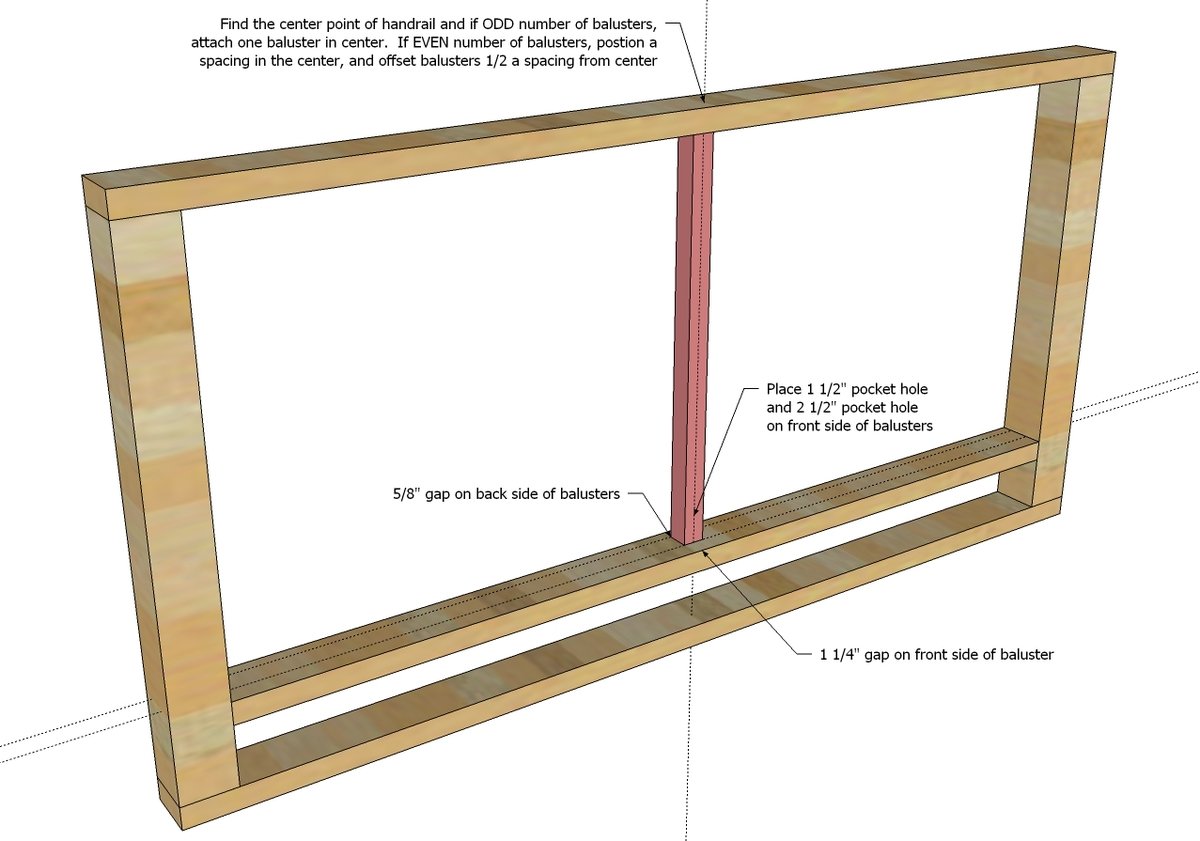
This may take some thinking - consider the width of your balusters and spacings, and then end spacings. Once you know how many balusters you'll need, if it is an ODD number of balusters, attach a baluster through 1 1/2" pocket holes to the center of the railing section as noted in the diagram. If you need an EVEN number of balusters, the center will be a spacing. So find the center, and measure 1/2 the distance of your spacing off the center. Attach a baluster here.
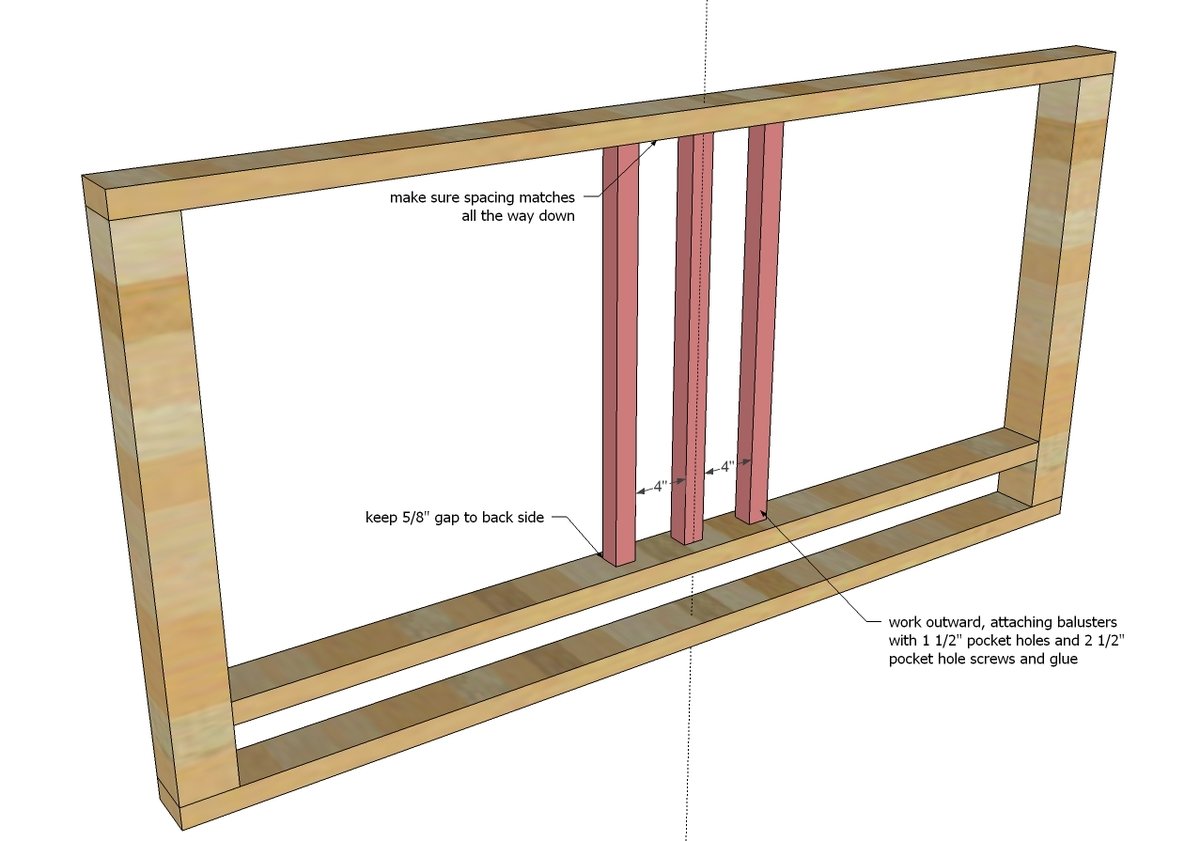
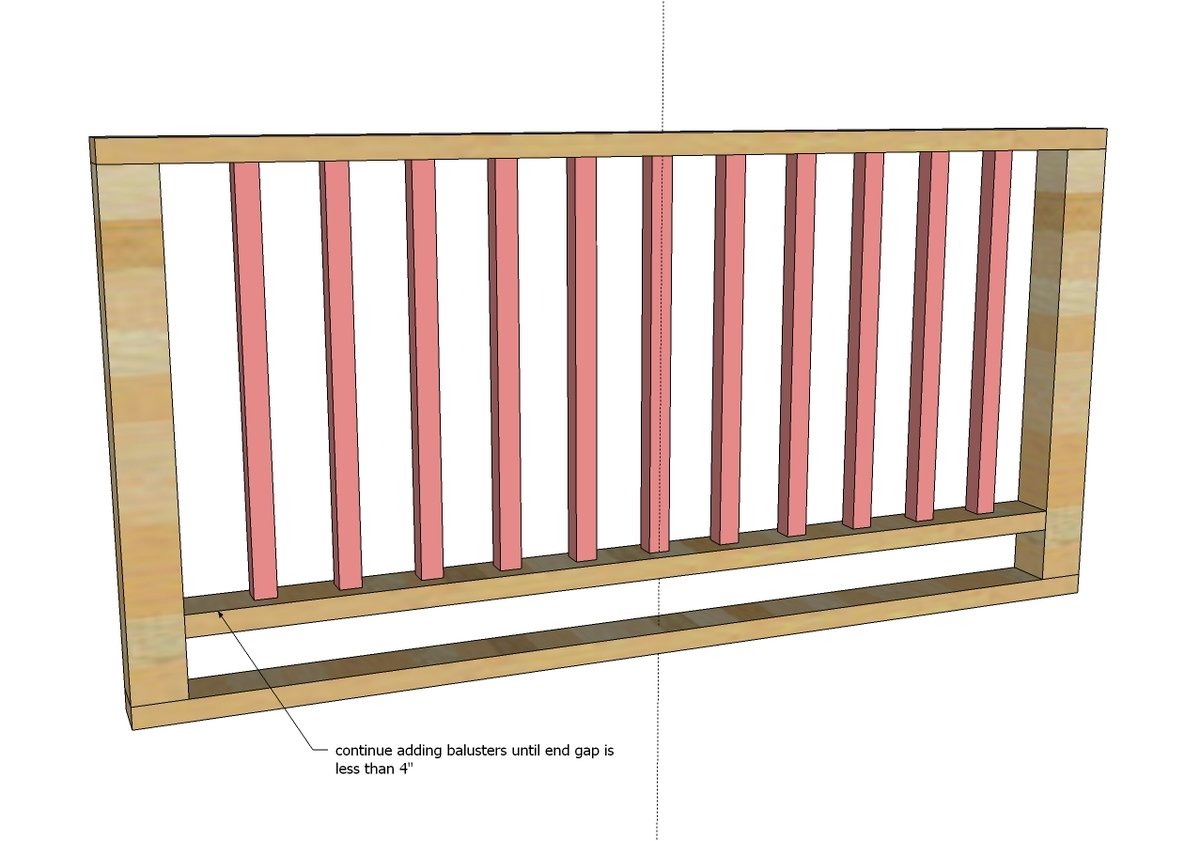
Then from the first attached baluster, add remaining balusters the spacing difference appart.
We cut spacing blocks to help us maintain the correct spacing as we added balusters.
Step 5
Step 6
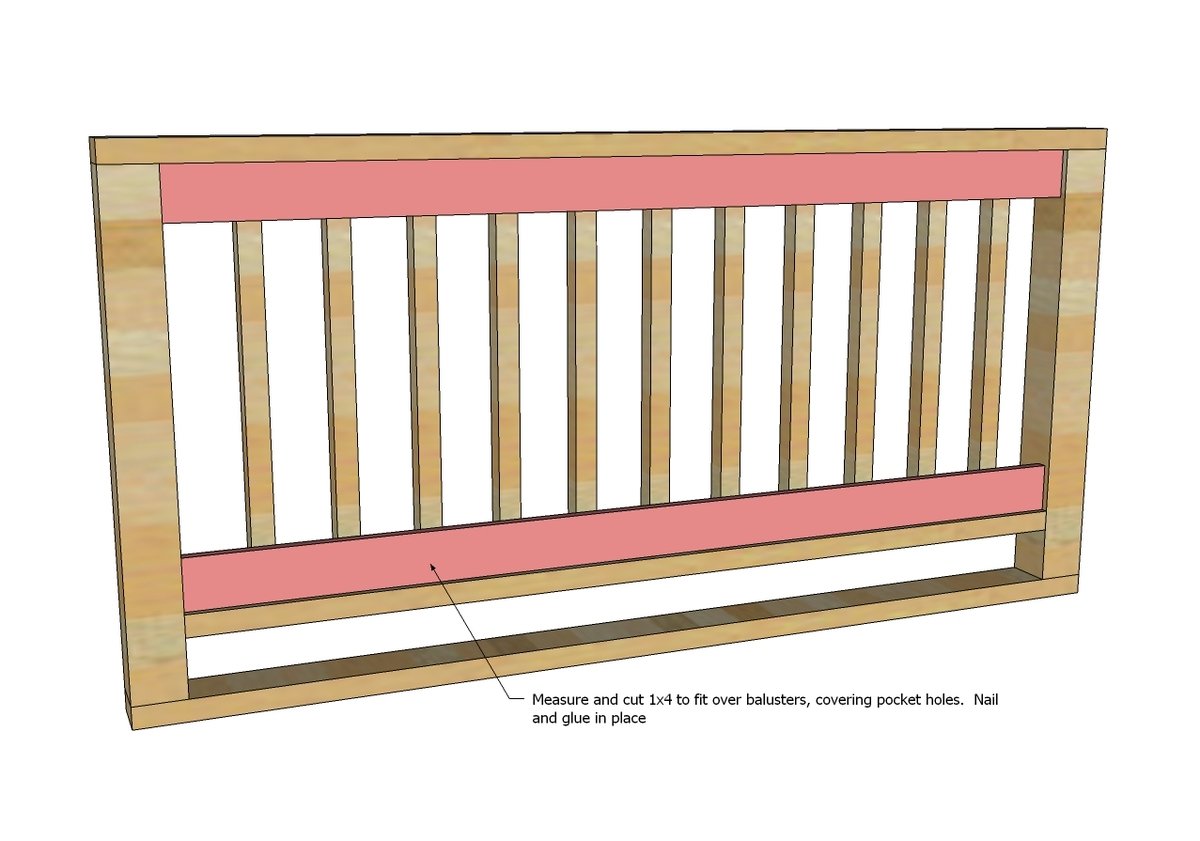
You'll have pocket holes showing on the insides. We used 1x4s to cover the pocket holes. Worked awesome and gives the inside a finished look. That's the straight section....
Step 7
If your baluster turnes a corner, use the corner post for the next section.
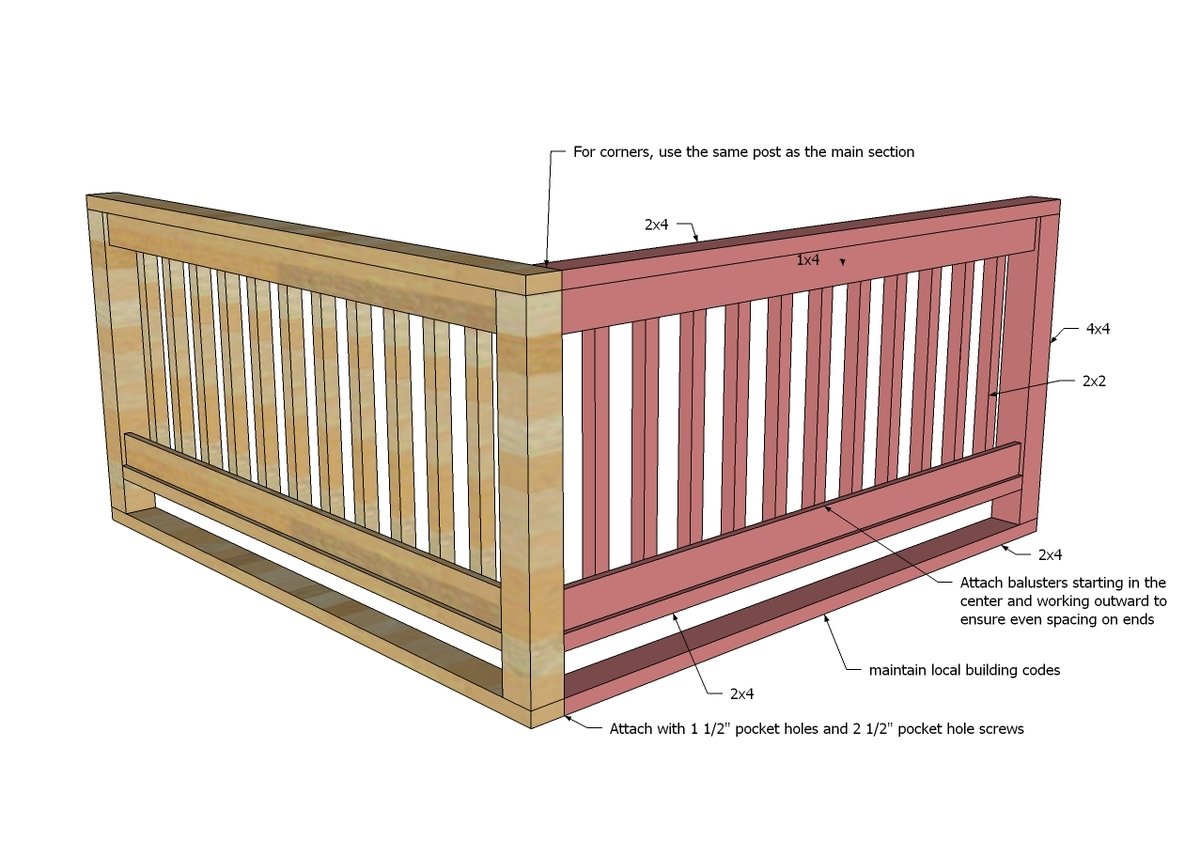
Step 8
Secure your handrail to the floor and wall - every home is different, so how you attach your handrail could differ from our installation.
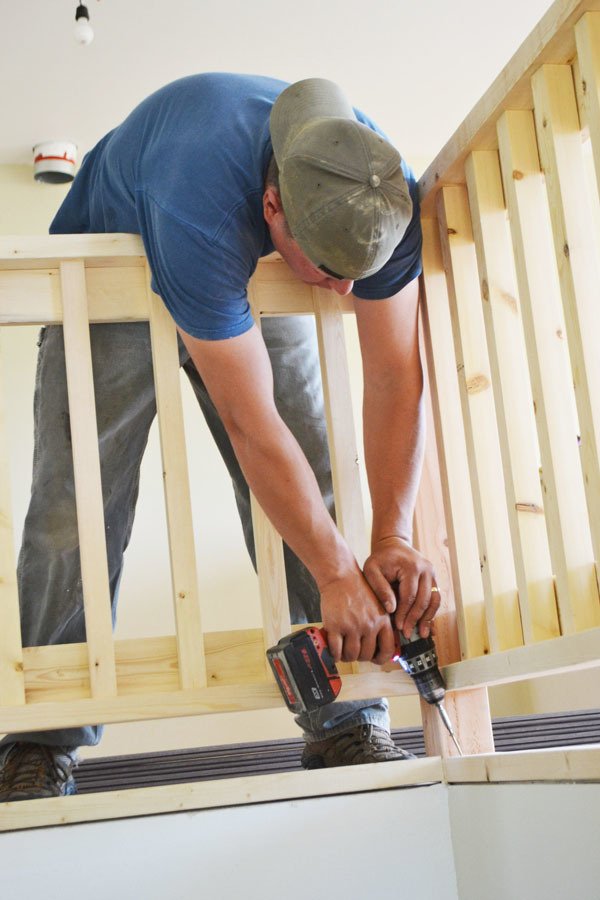
Finishing
Sand all surfaces, starting with a medium grit and finishing with fine. Wipe off the dust, fill any holes or gaps with wood filler, and sand smooth once dry. Apply primer if you're painting, then finish with your choice of paint or stain and seal with a durable clear topcoat. For outdoor projects, use exterior-rated primer, paint or stain, and sealer so the piece stands up to the weather.
Source (temporary): https://www.ana-white.com/woodworking-projects/wood-handrail-plans