Wood Organizer Caddy for Utensils and More
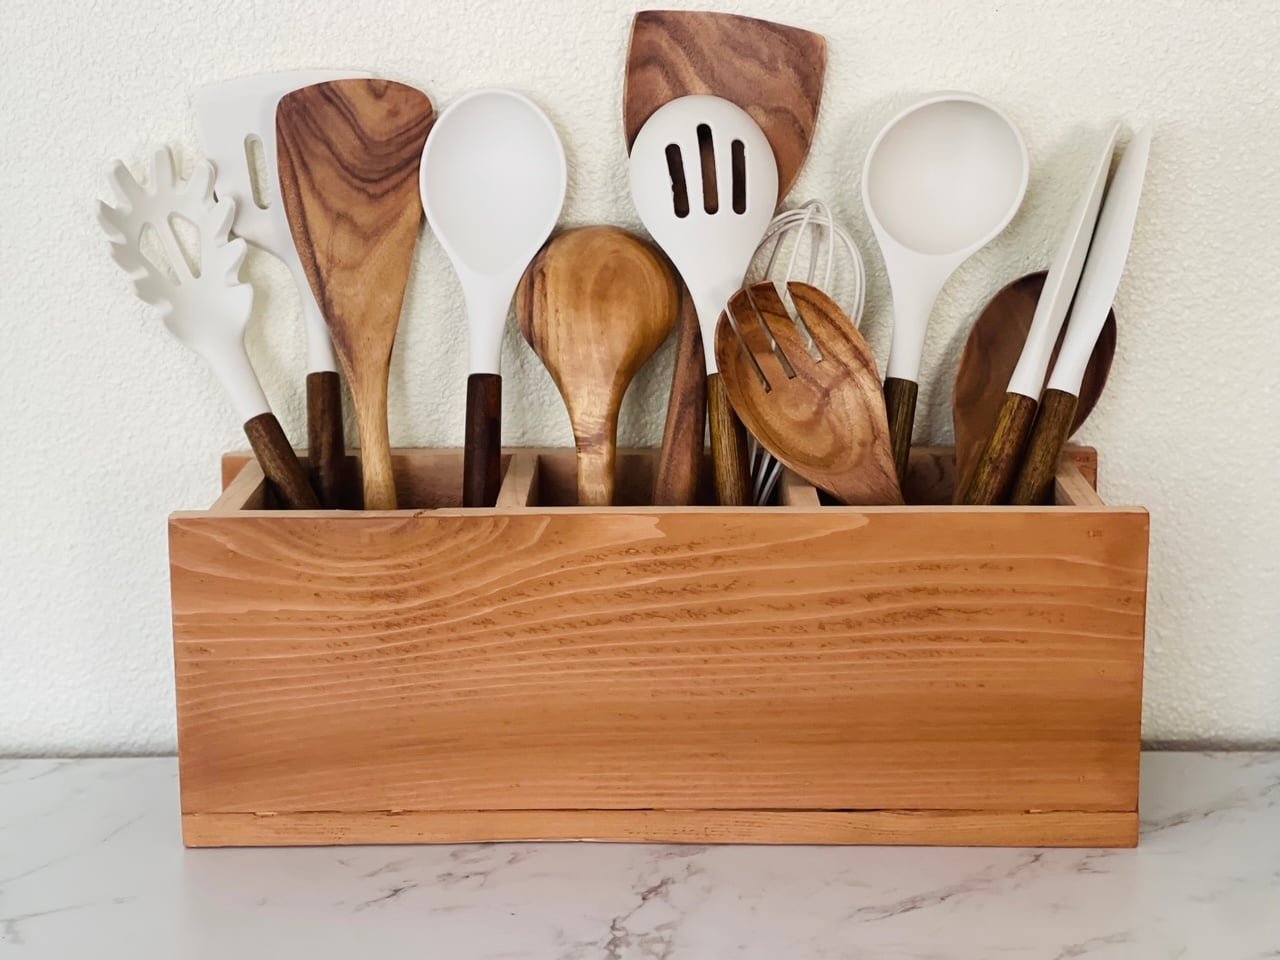
Use one fence picket to make an organizer caddy beautiful enough for a countertop. This wood organizer features three compartments, and is perfect for utensils, office supplies, as a beauty organizer, and more. include step by step diagrams, shopping and cut list and more photos, from
Specifications
| Project type | Kitchen Cabinet Plan, Accessories and Serving |
|---|---|
| Room | kitchen |
| Difficulty | Starter Projects |
Dimensions
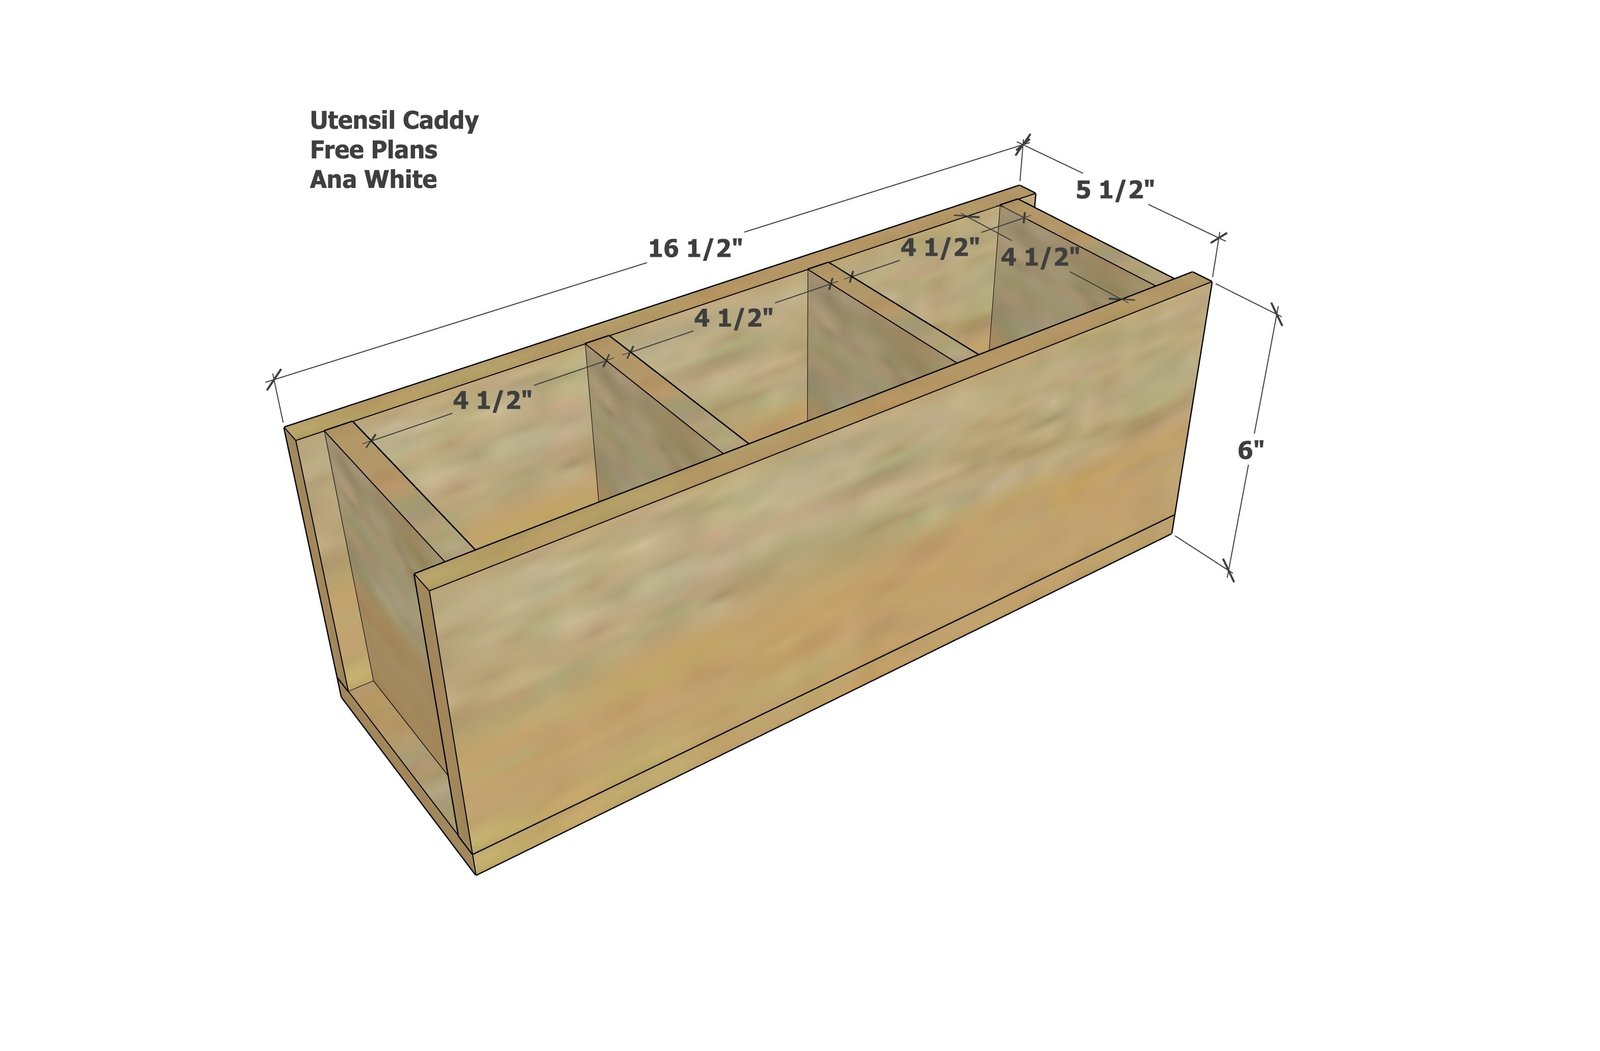
Use the size-specific shopping and cut lists below.
Shopping List
- 1 - 6' cedar fence picket, by 5 1/2" Wide
- 1-1/4" brad nails
- wood glue
- paint or stain as desired
- foam applicator brush
Cut List
- 3 @ 16-1/2" sides and bottom
- 4 @ 4-1/2" dividers - measure and cut to fit
Tools
- measuring tape
- square
- pencil
- safety glasses
- compound miter saw
- nailer
- sander
Step-by-step Instructions
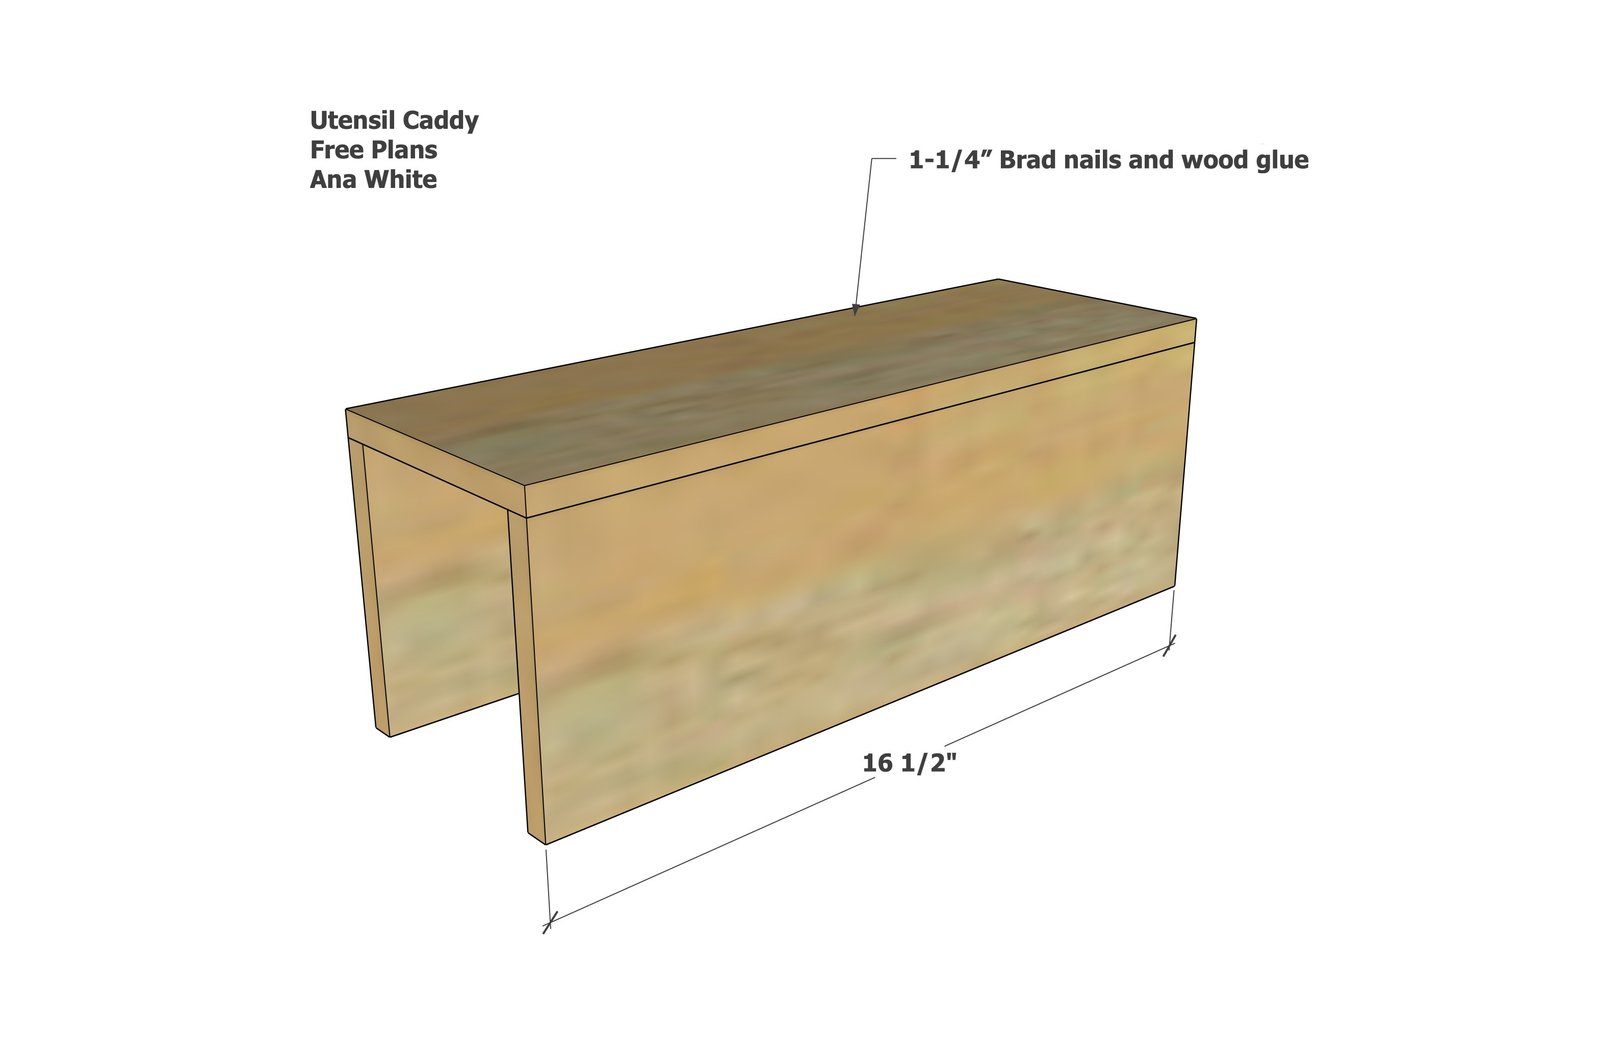
Use glue and nails to attach the bottom to the sides.
Finish cut ends as needed.
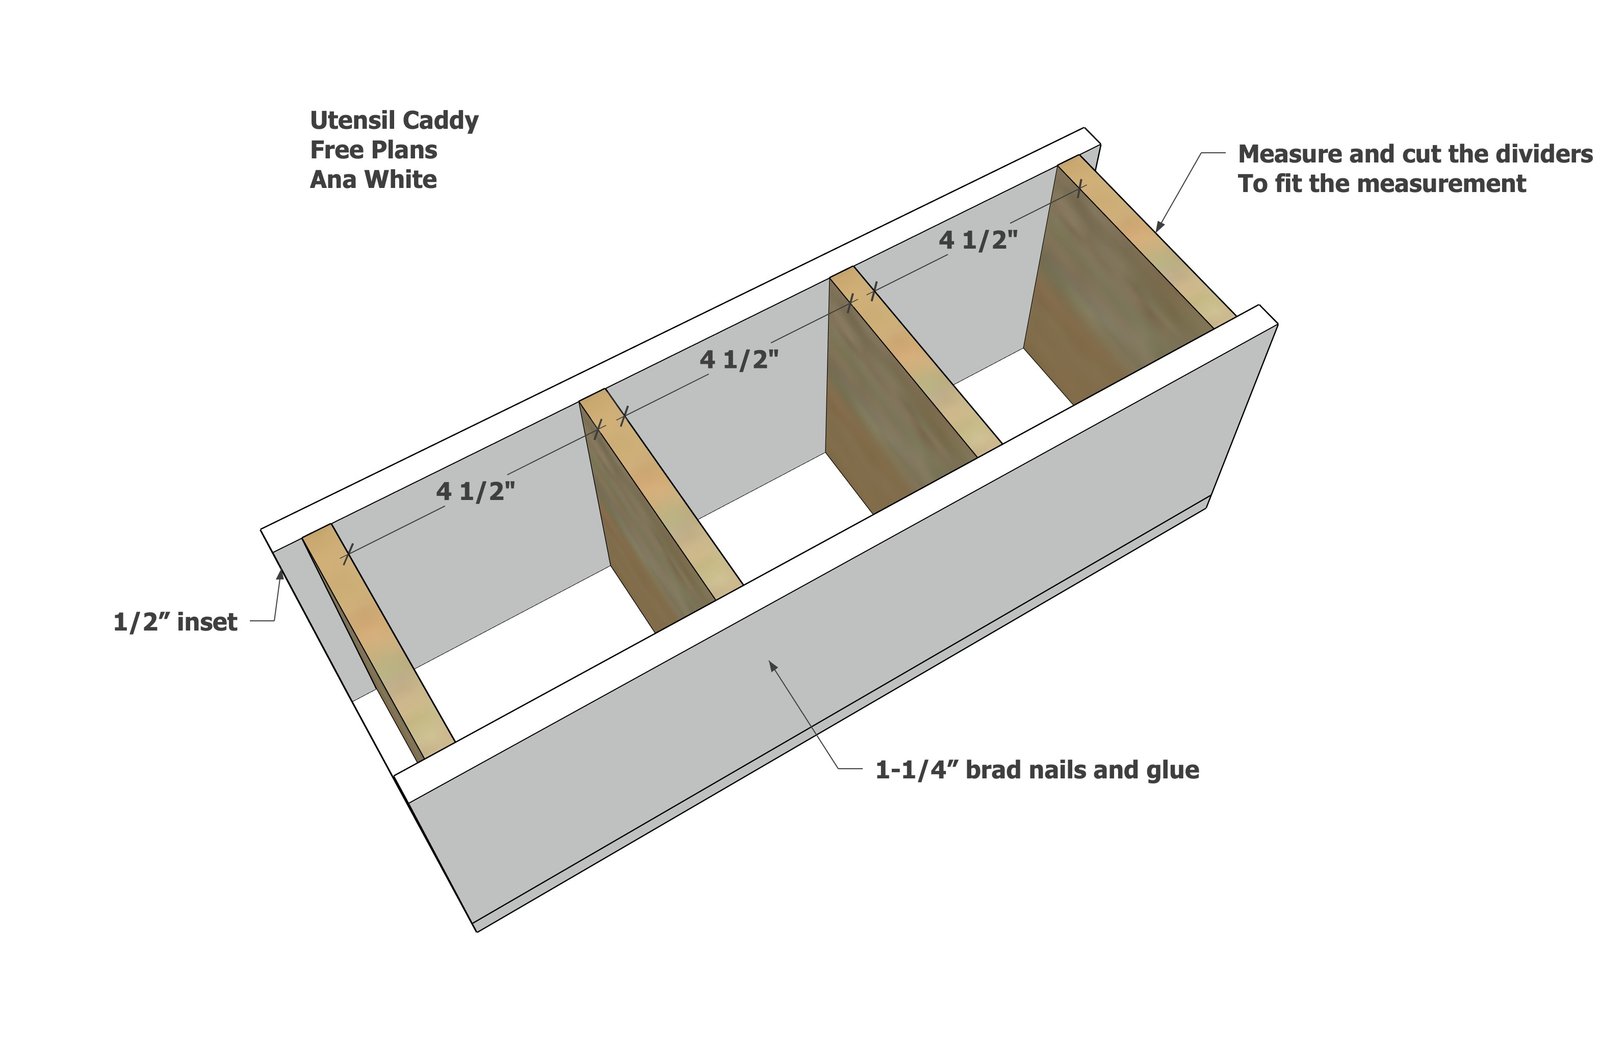
Measure and cut the dividers to fit inside.
Nail and glue in place.
Finishing
Sand all surfaces, starting with a medium grit and finishing with fine. Wipe off the dust, fill any holes or gaps with wood filler, and sand smooth once dry. Apply primer if you're painting, then finish with your choice of paint or stain and seal with a durable clear topcoat. For outdoor projects, use exterior-rated primer, paint or stain, and sealer so the piece stands up to the weather.
Source (temporary): https://www.ana-white.com/woodworking-projects/wood-organizer-caddy-utensils-and-more