Wood Pullout Cabinet Drawer Organizer
After organizing my junk drawer successfully, I felt confident and inspired to tackle some more cabinet storage. And of course, first up, what to do with all the princess plates, lunchroom trays and sippy cups with missing lids. How about a drawer, right at the height of a four year old? And how about a nice deep drawer, with a big chalkboard label on it? Of course, you could install this drawer on the bottom shelf, make the drawer have taller or shorter sides, or even put it under the sink for trash cans... and attach the cabinet door to the front of it for a real pullout trash can on a super budget. There are no limits, beyond your time and your imagination. I'm going to show you today how I built this drawer for Grace (and will probably be building more drawers for my pots and pans and maybe even one for our dog... ) and you can easily modify it to fit your cabinets. I spent about $10 on the drawer, with $6 for the 1x6 (I actually had scraps so this was free for me) and about $4 for the drawer slides. I also used half of a 2x2, so there's another buck. I made the chalkboard label with scrap plywood and chalkboard paint and glued in on. The drawer as shown here has not yet been finished.
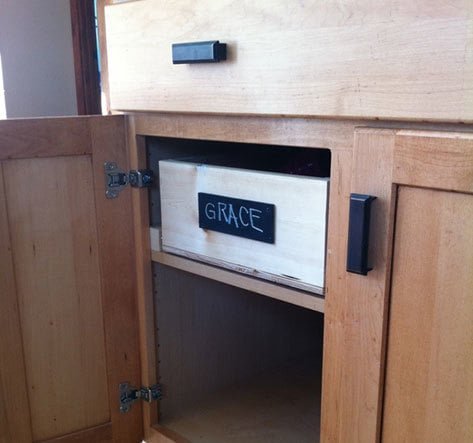
Specifications
| Project type | Kitchen Island Plans |
|---|---|
| Room | kitchen |
| Style | Cottage Style Furniture Plans |
| Difficulty | Intermediate |
| Estimated cost | Under $20 |
Shopping List
- 1 - 1x6 @ 8 feet long
- 1 - 2x2 @ 4 feet long
- scrap 1/4" plywood
- 21" Drawer Slides
Cut List
Cut to fit your cabinets.
Tools
- measuring tape
- square
- pencil
- hammer
- safety glasses
- hearing protection
- drill
- circular saw
- sander
- countersink drill bit
Step-by-step Instructions
Step 1
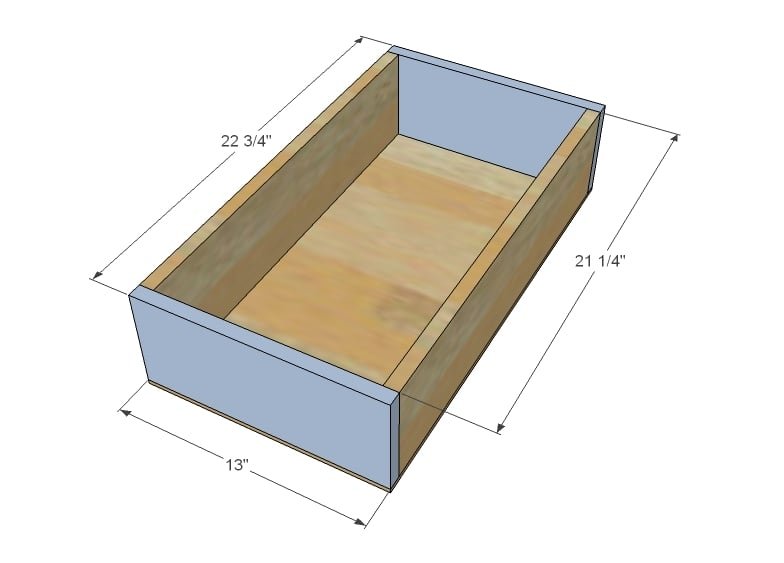
The first thing you need to do is measure the opening of your cabinets and the depth of your cabinets. Mine had a clearance opening (the hinges took up a little room too) of 14 1/2". Remember that your drawer slides also take up 1" all for both, so that's a total drawer width of 13 1/2". To be safe, I made mine 13" wide, and cut 2 1x6s to this length. Then I measured the depth of the opening. Mine was 22 3/4" deep. So I cut the 2x2s to the depth of the cabinet and then cut the two 1x6s to this measurement minus 1 1/2" - so for me, 21 1/4". I then cut the 1/4" plywood to 13" x 22 3/4".
Step 2
With all the boards cut, I built a simple box (used 1 1/4" pocket hole screws but you could also use 2" screws countersunk) and glue. The I tapped the bottom on with 1 1/4" finish nails and glue.
Step 3
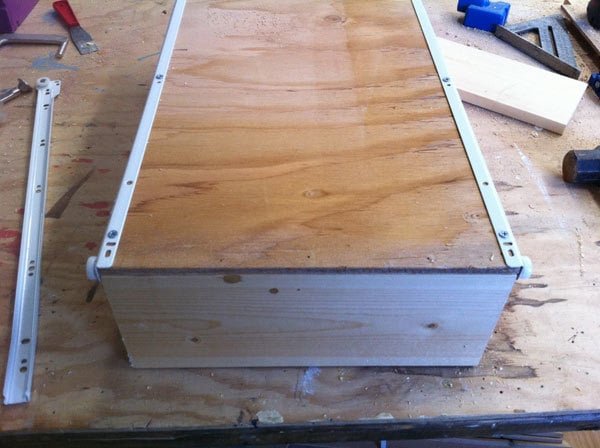
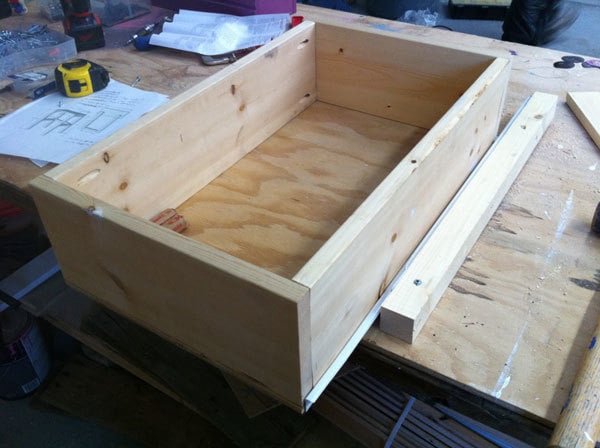
Because these cheapo drawer slides (that actually work really well and are quite strong) are side/bottom mount, you can get away with just tacking 1/4" plywood to the bottom. The weight of the drawer contents sits right on the slides. I attached the two drawer parts of the slides to the bottom of the drawer as shown above.
Step 4
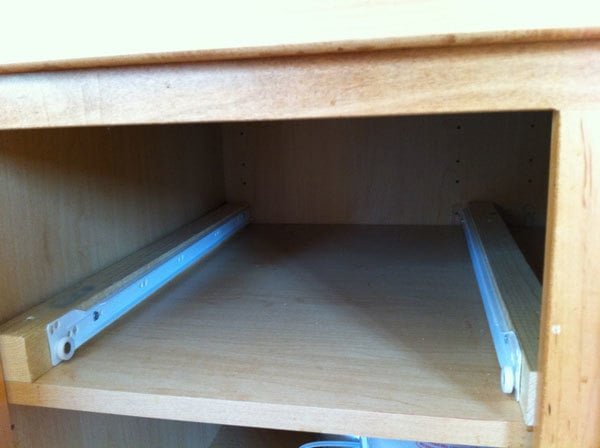
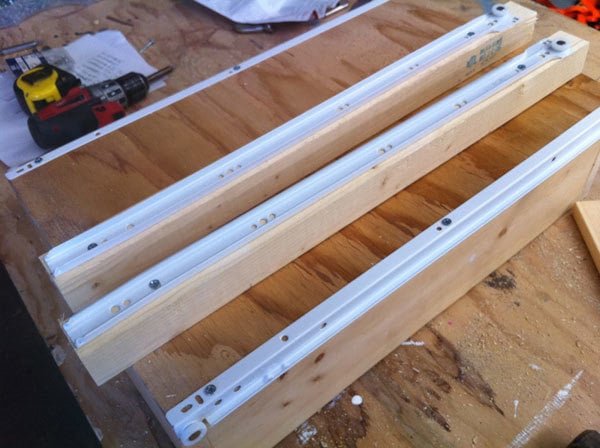
Then I attached the remaining drawer slide pieces to the 2x2s as shown here. Make sure these pieces are attached level and in the same position on both 2x2s. This is important. I used the screws that came with the slides, and followed the directions on the slides.
Step 5
Step 6
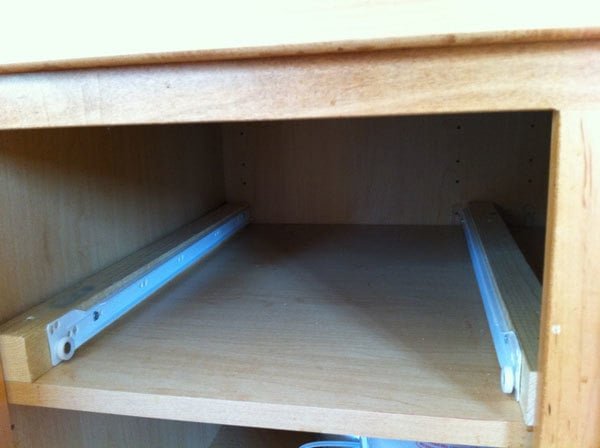
Then I simply positioned the whole setup inside the cabinet, and because of the tight fit, screwed the 2x2s to the shelf from the underside. But if you had more clearance from the top, you could screw from the top too. Used 2" screws here, just two per 2x2.
Step 7
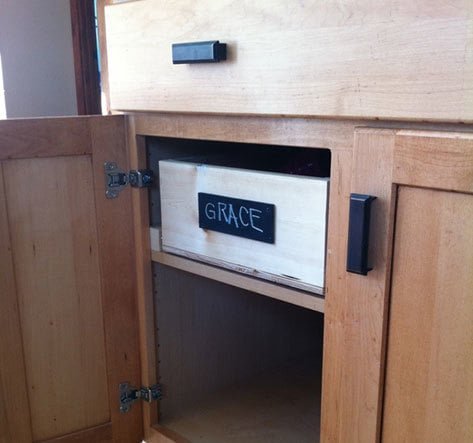
And then just put the drawer in. The drawer is easy to remove and clean (and in my case, finish) and I really love the 2x2s in there, because they keep things from sliding under your drawer. Off to build... six more.
Finishing
Sand all surfaces, starting with a medium grit and finishing with fine. Wipe off the dust, fill any holes or gaps with wood filler, and sand smooth once dry. Apply primer if you're painting, then finish with your choice of paint or stain and seal with a durable clear topcoat. For outdoor projects, use exterior-rated primer, paint or stain, and sealer so the piece stands up to the weather.
Source (temporary): https://www.ana-white.com/woodworking-projects/wood-pullout-cabinet-drawer-organizer