Wood Seesaw or Teeter Totter
Make a teeter totter or seesaw for less than $20! You'll just need some 2x framing lumber, a bolt and screws, and our free, easy step by step seesaw plans. This project has been built hundreds (if not thousands) of times and beloved by children everywhere. Build and use at your own risk.
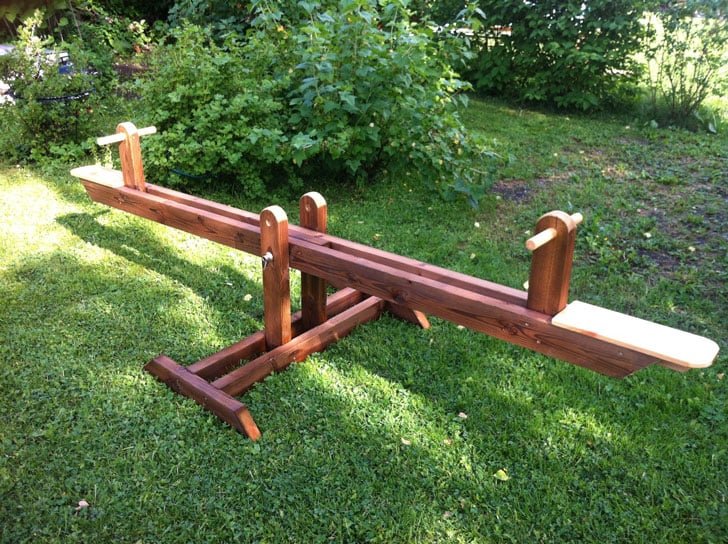
Specifications
| Project type | Playhouse |
|---|---|
| Room | Outdoor |
| Style | Children's and Kid's Room Furniture and Toy Plans |
| Difficulty | Intermediate |
| Estimated cost | Under $20 |
Dimensions
Use the size-specific shopping and cut lists below.
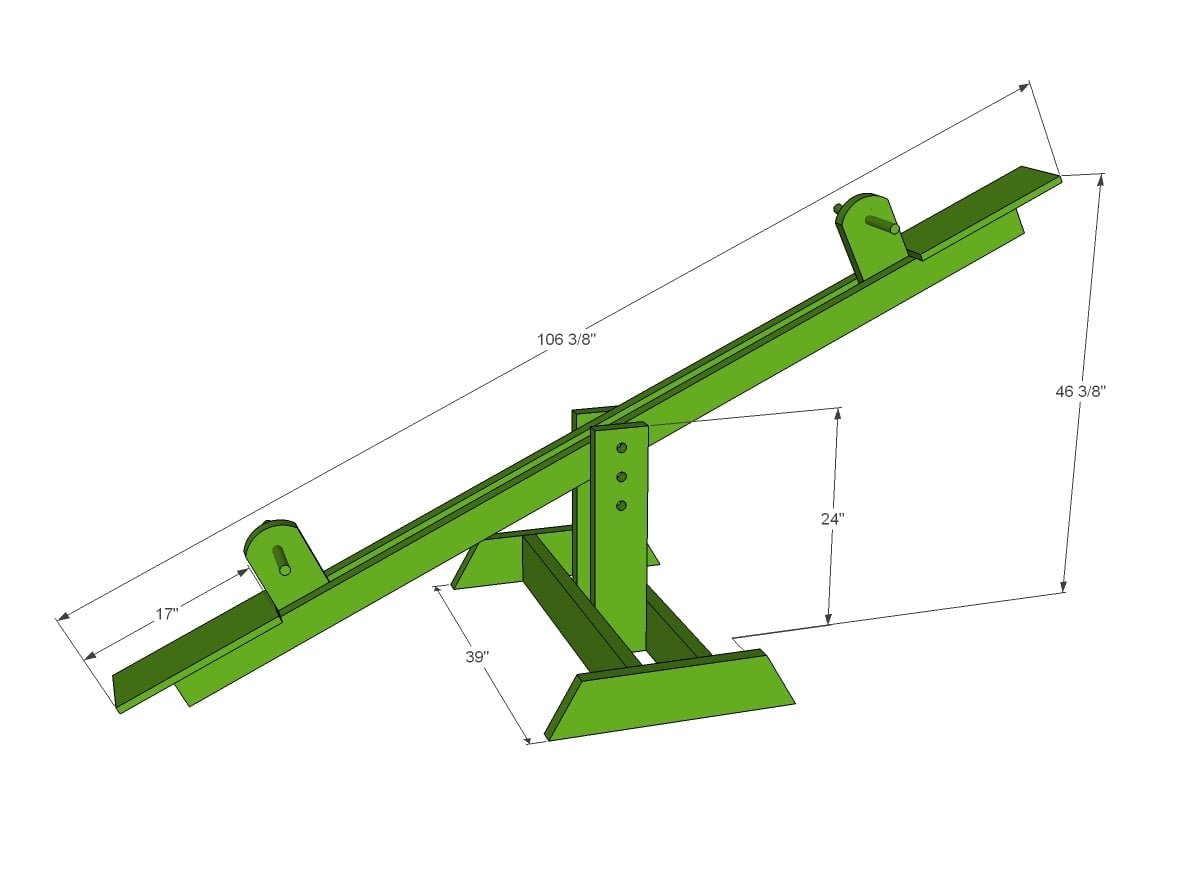
Shopping List
2 – 2x4 @ 8 feet long
2 – 2x6 @ 8 feet long
1 – 10” 5/8” bolt with nut and four washers
1 – 1x8 @ 3 feet long
1 – 24” 1” dowel or closet rod
Cut List
2 – 2x4 @ 96”
2 – 2x6 @ 24” (uprights)
2 – 2x6 @ 36” (long base)
2 – 2x6 @ 24” (short base - both ends cut at 30 degrees off square ends NOT parallel to each other)
2 – 2x6 @ 12” (scrap piece can be shorter than 12” – used for handle)
FROM EACH 2x6 cut one each of the 24”, 36”, 24” and 12” to conserve boards
Tools
- measuring tape
- square
- hammer
- safety glasses
- hearing protection
- drill
- circular saw
- sander
- countersink drill bit
Step-by-step Instructions
Step 1
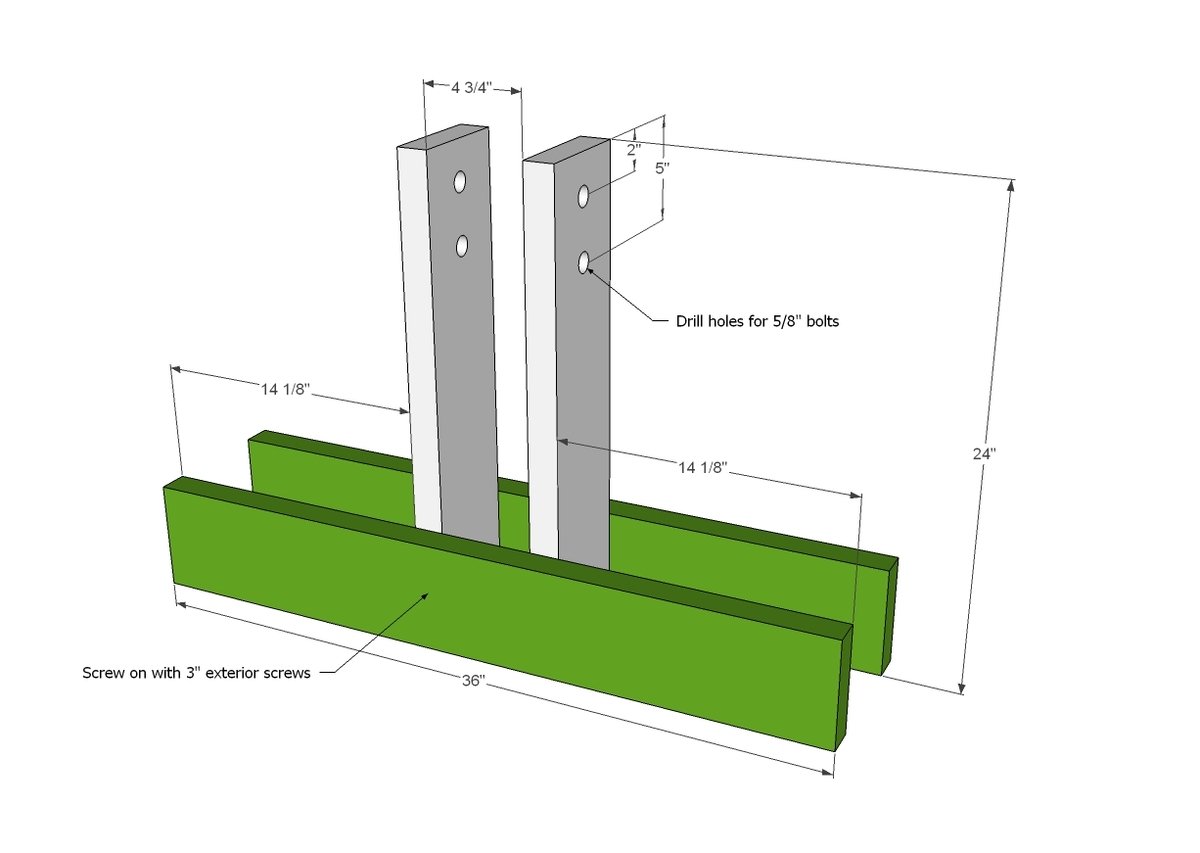
Attach long base supports to uprights with lots of screws and glue.
Step 2
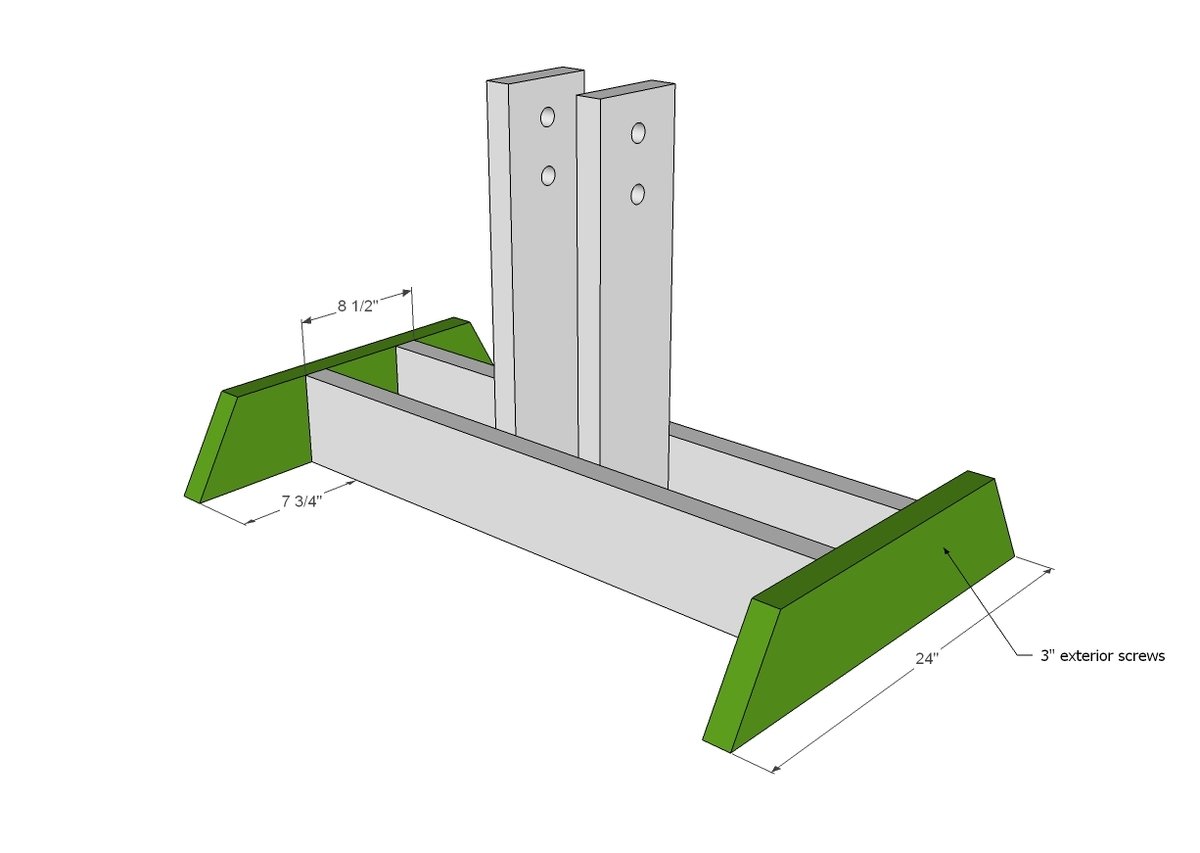
Then add the side supports again with lots of screws and glue.
Step 3
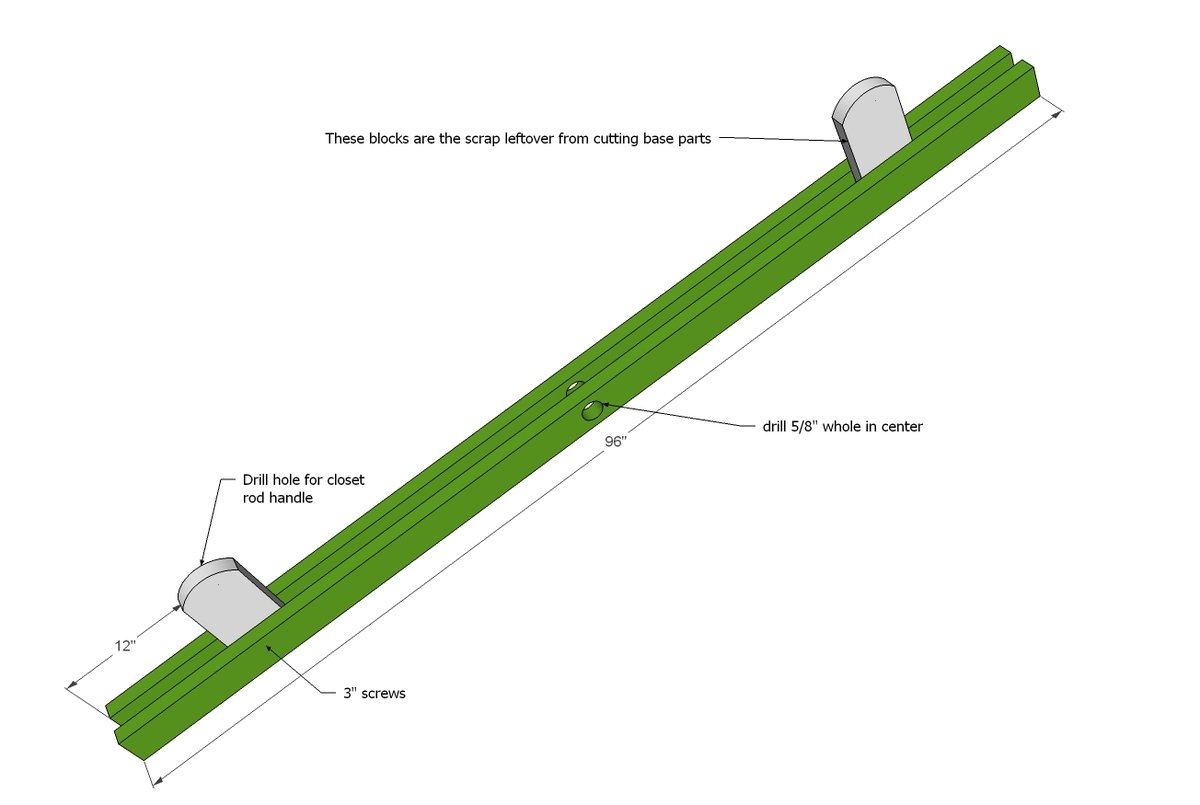
Build the seat part by sandwiching the handle supports between 8 foot long 2x4s and attaching with glue and lots of screws. Drill a 5/8" hole in center of 2x4s for the pivot bolt.
Step 4
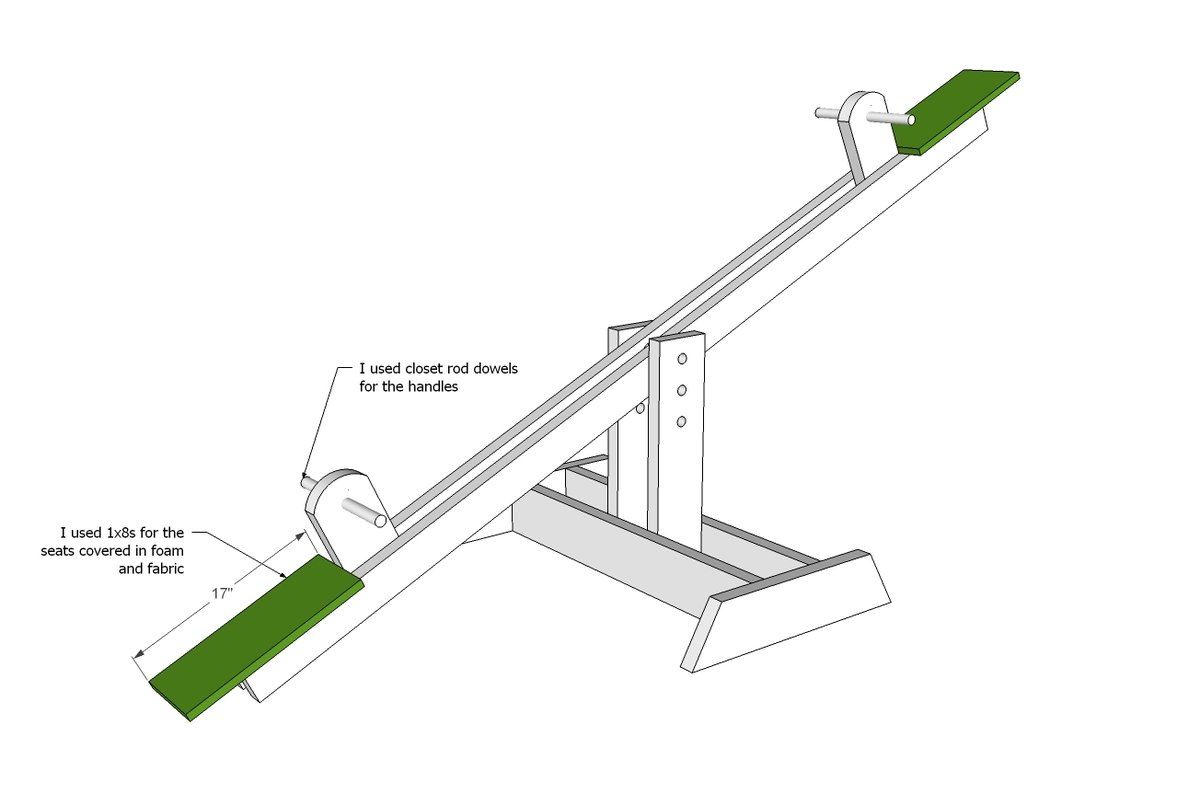
I used scrap 1x8 boards for the seats, covered in a foam chair pad cut in half and outdoor fabric. I drilled three holes in the uprights with 5/8" bit so the seesaw could be adjustable. The most difficult part of this seesaw was getting the bolt holes lined up. We ended up just making the bolt holes a little larger so the bolts could pass through easier. On the bolt, we put washers on each side of the uprights to protect the finish and for a smoother ride. For the handles, we had extra closet rod dowel, so we just cut to size, and drilled a hole and inserted the rod. We then glued and screwed in place.
Finishing
Sand all surfaces, starting with a medium grit and finishing with fine. Wipe off the dust, fill any holes or gaps with wood filler, and sand smooth once dry. Apply primer if you're painting, then finish with your choice of paint or stain and seal with a durable clear topcoat. For outdoor projects, use exterior-rated primer, paint or stain, and sealer so the piece stands up to the weather.
Source (temporary): https://www.ana-white.com/woodworking-projects/wood-seesaw-or-teeter-totter