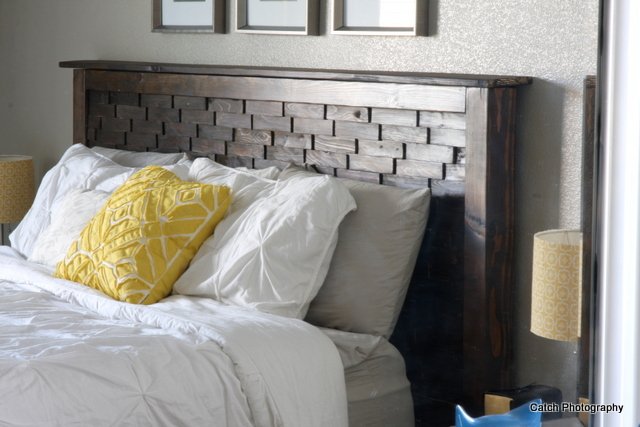
Wood Shim Cassidy Bed
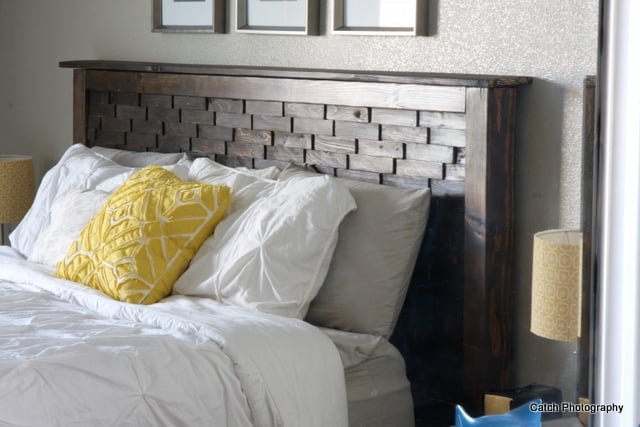
DIY Wood Shim bed plans - Queen. From
Specifications
| Project type | Headboard |
|---|---|
| Room | Bedroom |
| Style | Cottage Style Furniture Plans |
| Difficulty | Intermediate |
| Estimated cost | $100-$150 |
Dimensions
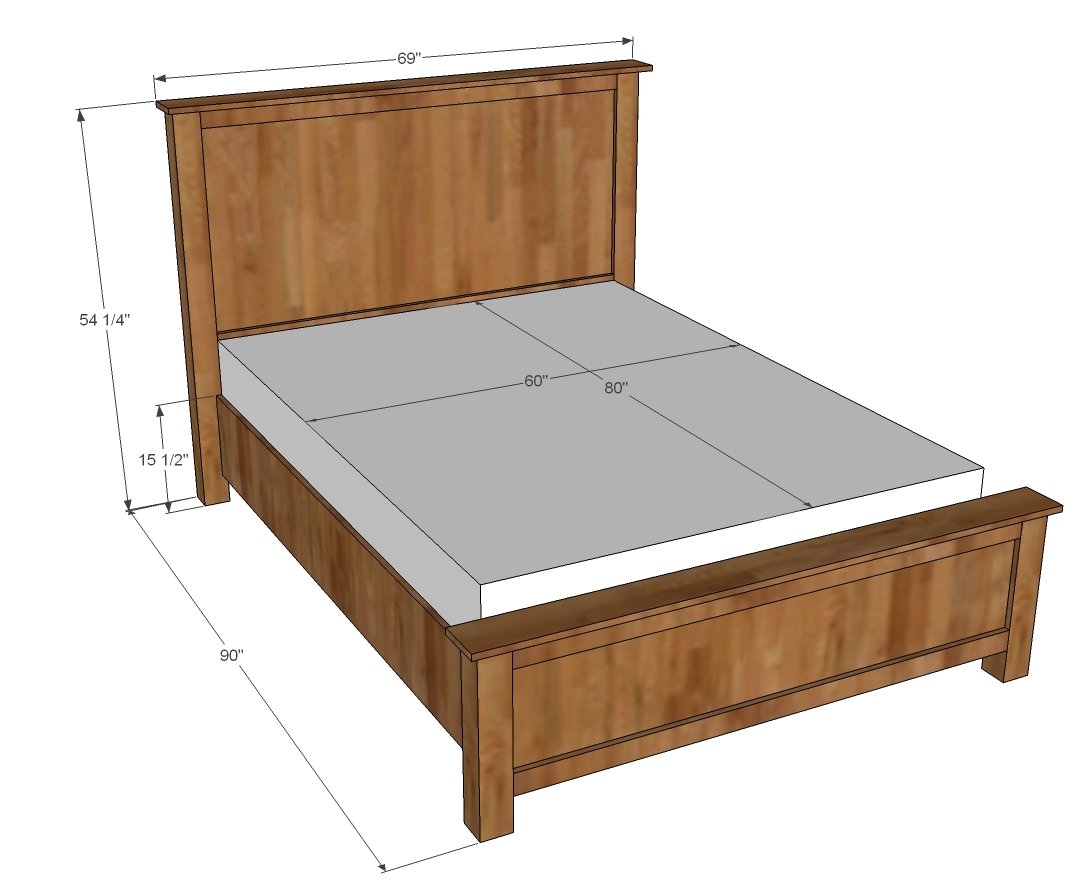
Use the size-specific shopping and cut lists below.
Shopping List
1 - sheet 3/4" plywood
4 - 1x3 @ 8 feet long
2 - 4x4 @ 8 feet long
2 - 1x6 @ 6 feet long
2 - 1x12 @ 8 feet long
2 - 2x4 @ 8 feet long
3 - 2x4 @ 10 feet long
Recommend 1 1/4" pocket hole screws but could use long lag screws (at least 4")
Recommend 2 1/2" pocket hole screws for building frame but could use 3" wood screws
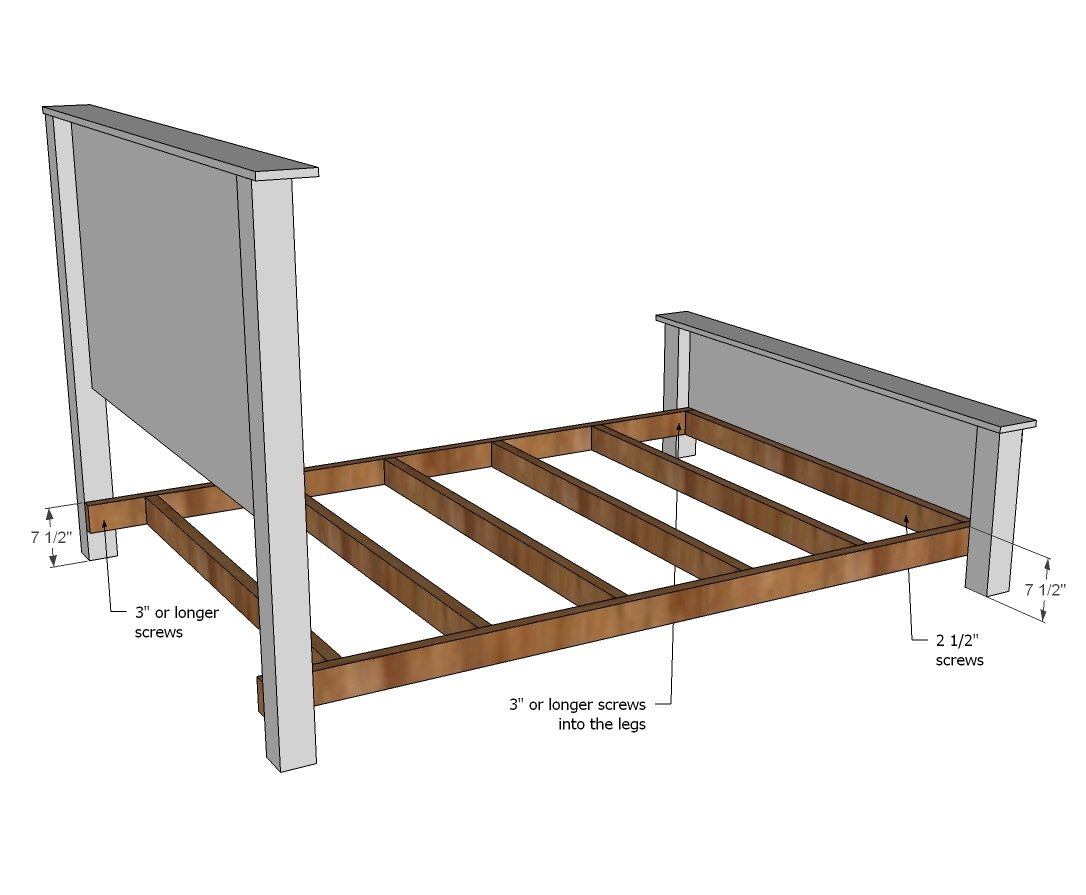
Also need 1 1/4" finish nails, 3" or longer screws for attaching frame to legs, 2" screws for attachin siderails and frame to footboard, small trim screws for attaching headers, and small nails (depending on shim size) for attaching shims to panels.
Cut List
1 - 3/4" plywood 60" x 32" (headboard panel)
1 - 3/4" plywood 60" x 16" (footboard panel)
4 - 1x3 @ 60" (panel trim)
2 - 4x4 @ 53 1/2" (headboard legs)
2 - 4x4 @ 20" (footboard legs)
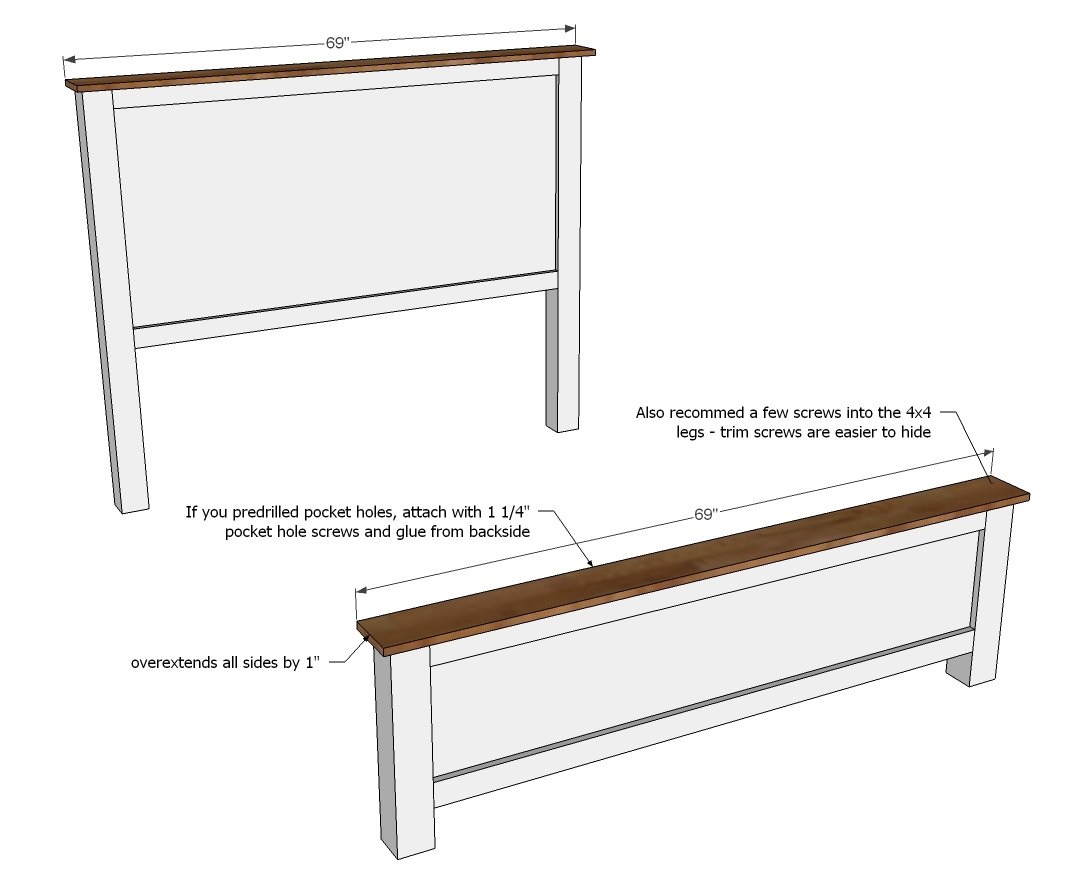
2 - 1x6 @ 69" (headers)
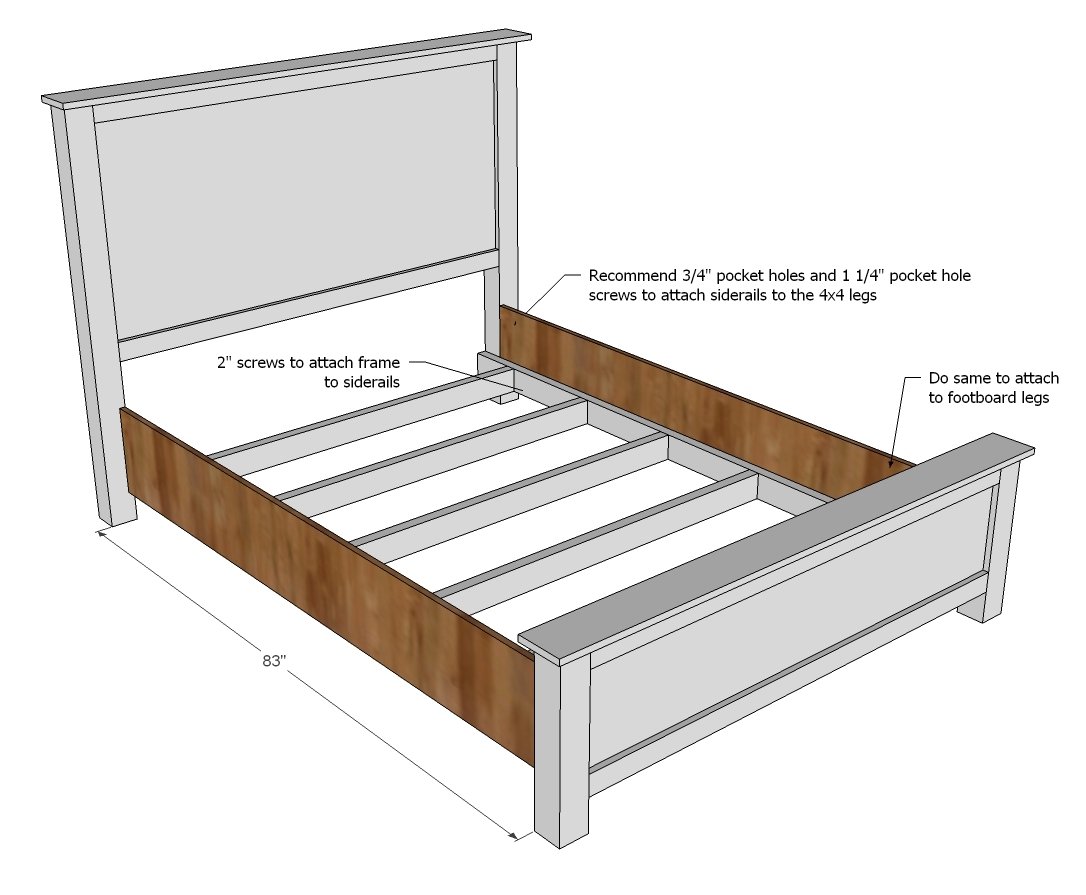
2 - 1x12 @ 83" (siderails)
FRAME
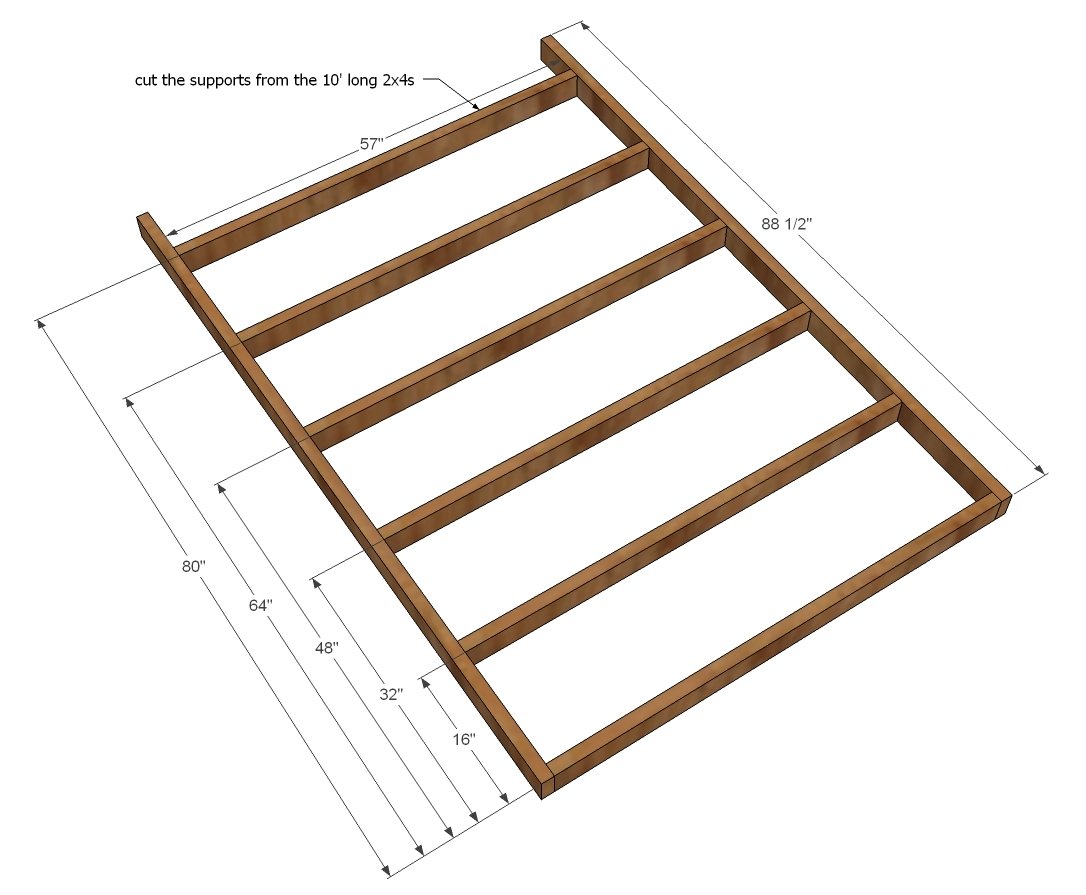
2 - 2x4 @ 88 1/2"
6 - 2x4 @ 57" (CUT FROM 10' 2X4S)
Tools
- measuring tape
- square
- pencil
- safety glasses
- hearing protection
- kreg-jig
- drill
- circular saw
- nailer
- sander
- countersink drill bit
Step-by-step Instructions
Step 1
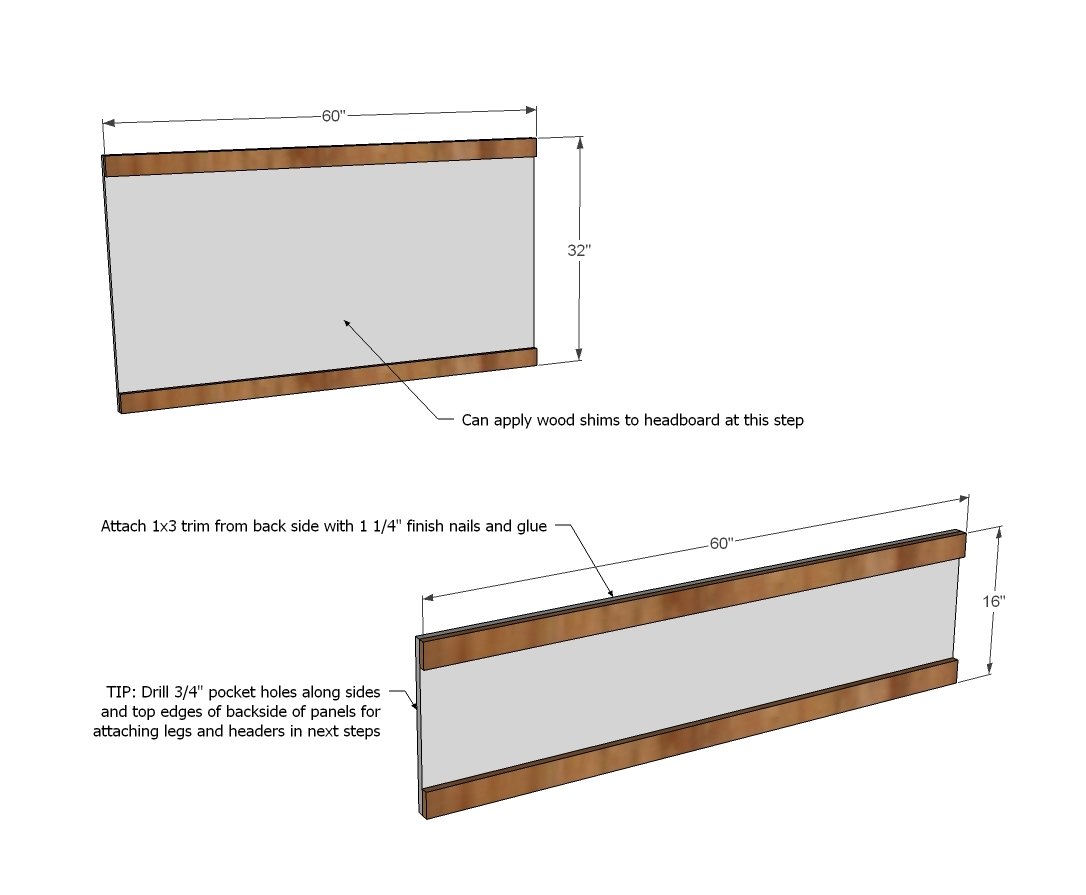
Take your full sheet of plywood and cut it down to 60" long x 48" wide. Then from this piece, cut into a 32" and 16" wide pieces. These are your panels. If you have a Kreg Jig, drill 3/4" pocket holes along side and top edges of both panels for later attaching legs and headers. Attach the 1x3s to the panels at the top and bottom with finish nails on back side and glue. It may make more sense to you to attach the wood shim art now while you can work on a flat surface - totally up to you.
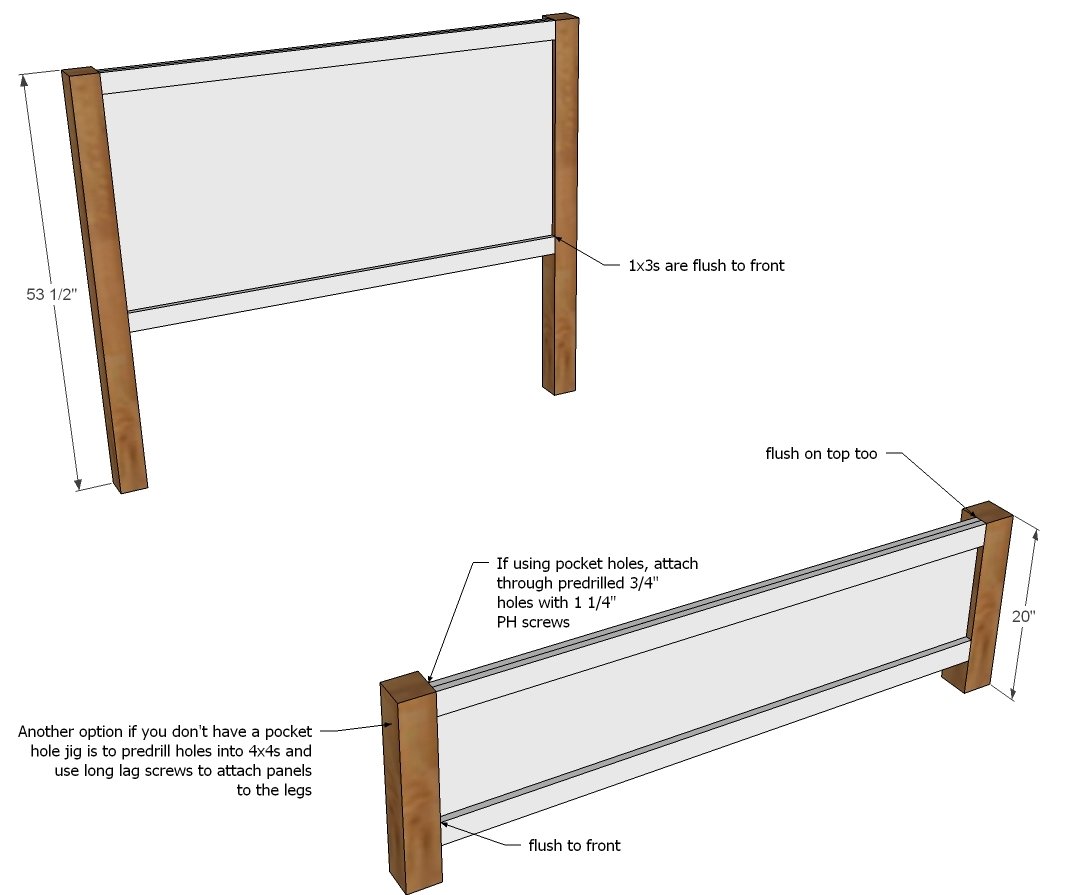
Next, attach legs.
If you aren't using pocket holes, the other option is predrilling holes through the legs and attaching with long lag screws (how long will depend on how deep you drill the holes. What I do is drill a hole a little larger than my screws size about half way through the legs. Then I take a second drill bit the size of my screw shaft and drill a second hole inside the first larger hole all the way through the legs into the panel. This prevents the wood from splitting while the larger hole hides the screw head. Another option is to place 2x2 on the back side of the panels, and use them to attach the legs and the panels together. You could also use metal L brackets (small ones) to attach panels to legs.
Step 3
Attach headers to tops of headboard and footboard. You should definitely screw these as over time they could come up if you don't. I recommend a few trim screws into the 4x4 legs - those will be easy to hide because the trim screw head is so small.
Step 4
Next, build the frame - either using 1 1/2" pocket holes and 2 1/2" pocket hole screws, or you could use 3" wood screws countersunk. Check for square.
Step 5
Step 6
Attach side rails to the frame and 4x4 legs.
Apply the wood shims to the headboard and finish your bed!
You've made your bed!
Finishing
Sand all surfaces, starting with a medium grit and finishing with fine. Wipe off the dust, fill any holes or gaps with wood filler, and sand smooth once dry. Apply primer if you're painting, then finish with your choice of paint or stain and seal with a durable clear topcoat. For outdoor projects, use exterior-rated primer, paint or stain, and sealer so the piece stands up to the weather.
Source (temporary): https://www.ana-white.com/woodworking-projects/wood-shim-cassidy-bed-queen