Wood Slat Low Shelving Unit
Do you need inexpensive shelving to get things put away and off the floor? Our wood slat low shelving unit is very inexpensive to make and easy to build yourself and save. Fill with off the shelf milk crates, baskets or bins and stain up for a beautiful farmhouse style console table. from are easy to modify and build from.
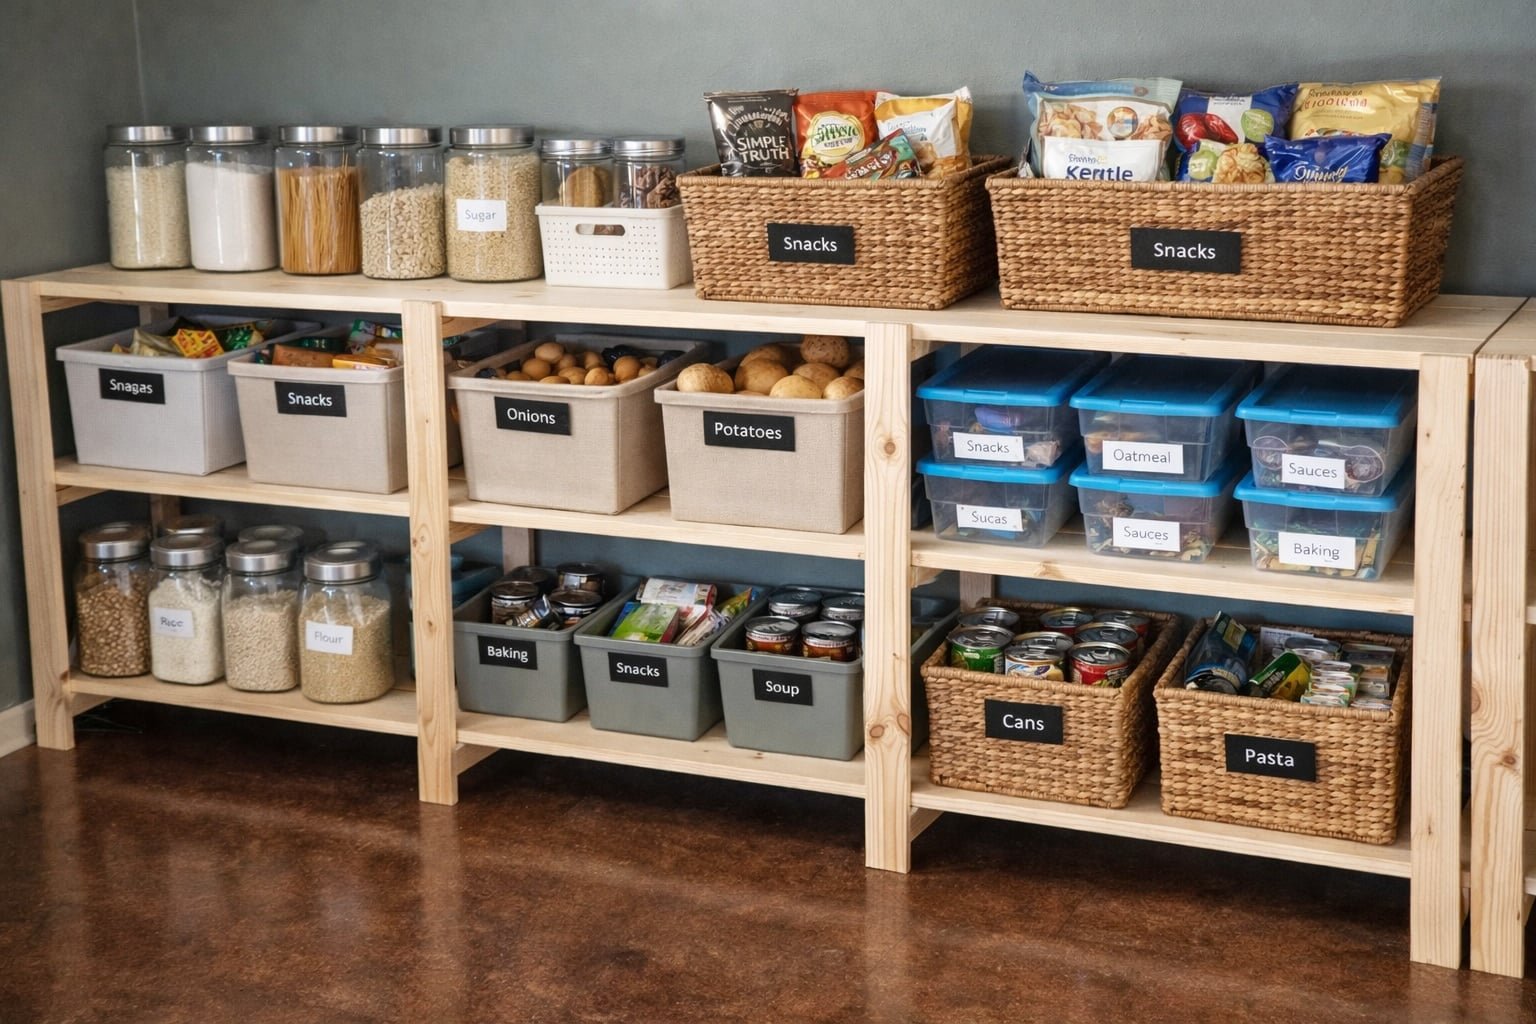
Specifications
| Project type | Bookshelf and Bookcase Plans |
|---|---|
| Room | Storage Solutions |
| Style | Children's and Kid's Room Furniture and Toy Plans |
| Difficulty | Beginner Projects |
Dimensions
Use the size-specific shopping and cut lists below.
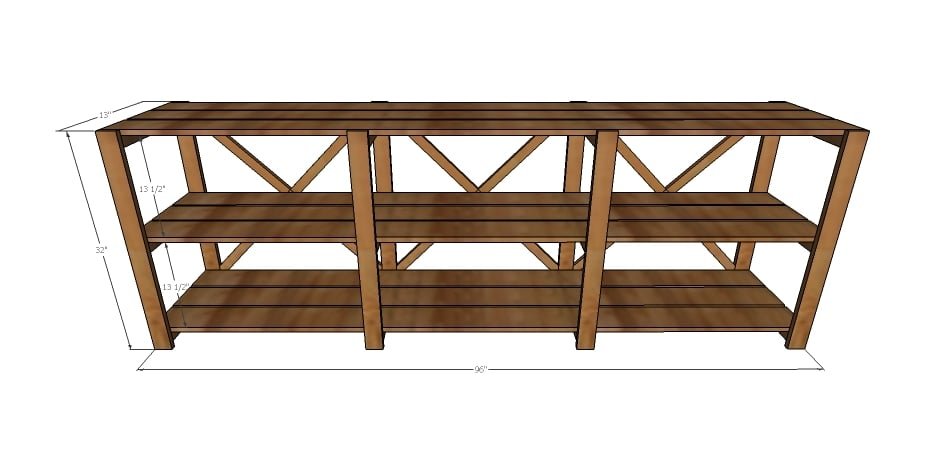
Shopping List
- 12 - 1x4 @ 8 feet long
- 3 - 1x3 @ 8 feet long
- 2 - 2x4 @ 8 feet long
- 2 - 1x2 @ 8 feet long (optional cross supports, can also use 1x3s)
- 2" wood screws (you can also use a shorter wood screw like 1-1/4" for screwing down the shelving)
I used all self tapping construction screws (try the SPAX or similar) so I didn't have to predrill any holes and no wood split out on me.
Cut List
- 8 - 1x3 @ 31-3/4"
- 12 - 2x4 @ 12-1/2"
- 9 - 1x4 @ 8 feet long
- Optional cross supports are cut to fit
Tools
- measuring tape
- square
- pencil
- safety glasses
- hearing protection
- drill
- circular saw
- countersink drill bit
Step-by-step Instructions
Step 1
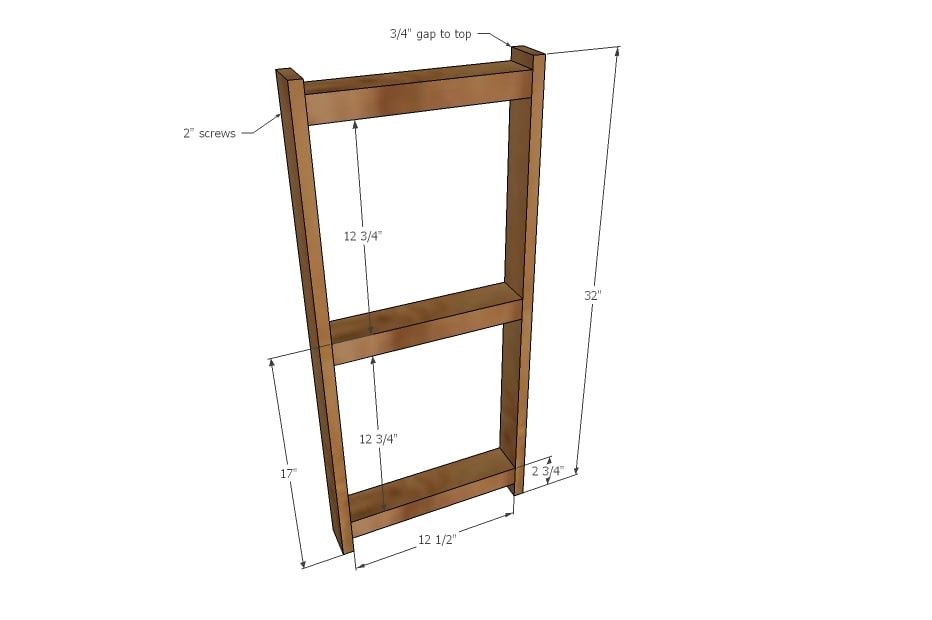
Build the leg sets by attaching the 1x3 legs to the 2x4 supports with 2" wood screws and glue, two screws per joint.
Step 2
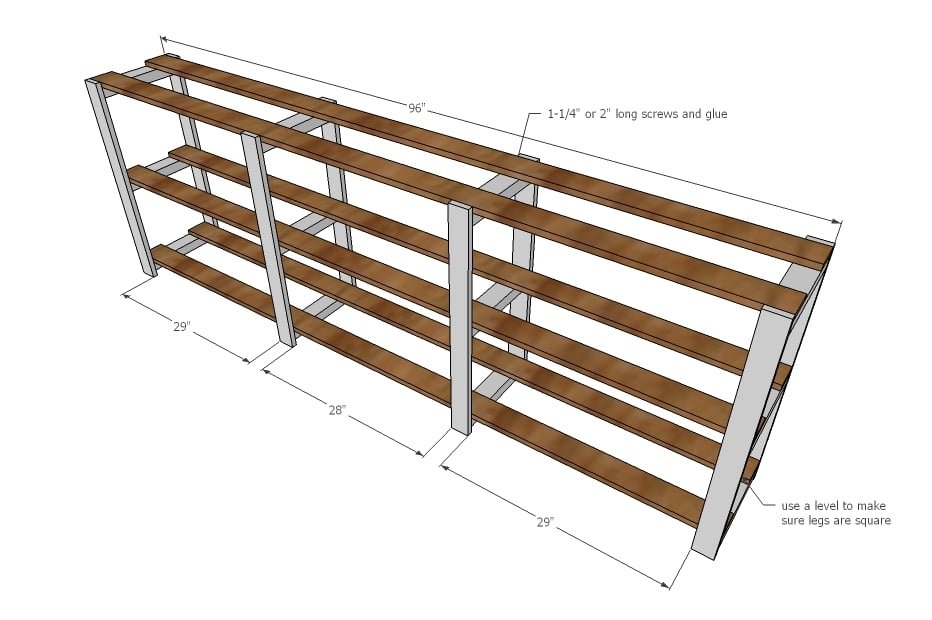
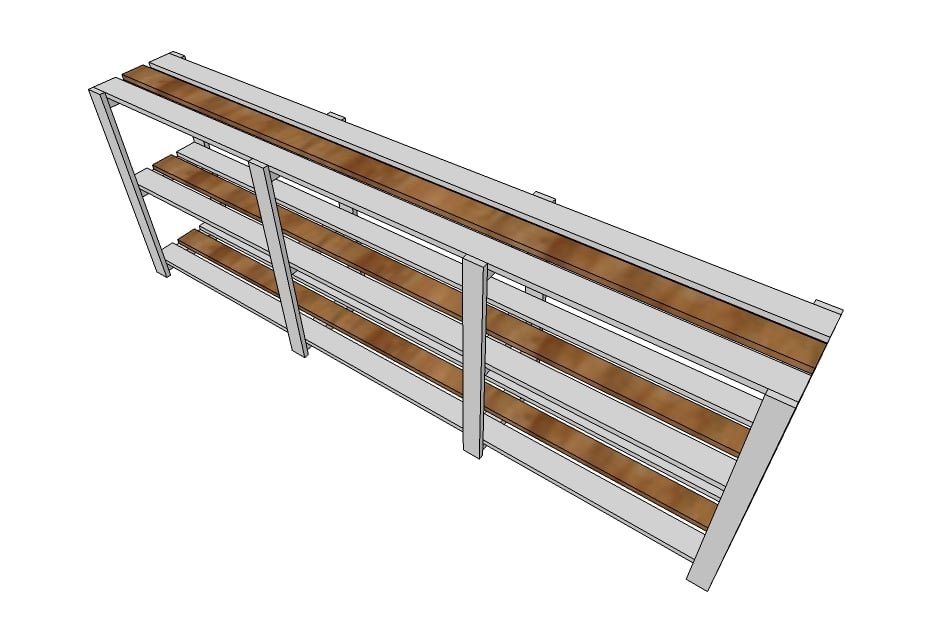
Attach the shelving boards on the outsides first, to the outside legs. Use a level to make sure your legs are level as you attach shelving.
Step 3
Attach center boards last, leaving an even gap between the center board and the side board.
Step 4
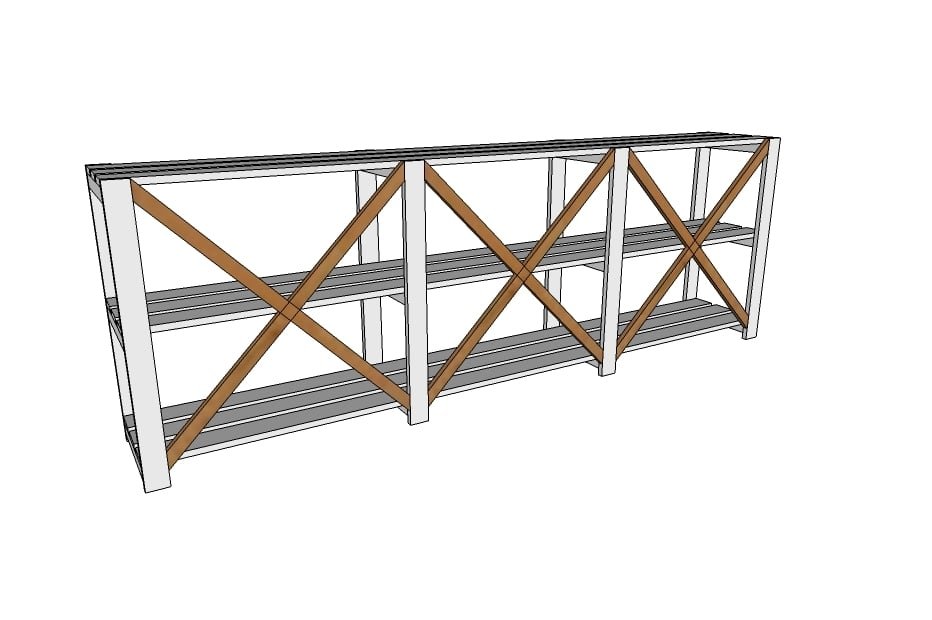
Place 1x2s across back and mark. Cut angles (can adjust a miter saw or use a handheld saw to cut) and attach to back. We found we only needed one cross support.
Finishing
Sand all surfaces, starting with a medium grit and finishing with fine. Wipe off the dust, fill any holes or gaps with wood filler, and sand smooth once dry. Apply primer if you're painting, then finish with your choice of paint or stain and seal with a durable clear topcoat. For outdoor projects, use exterior-rated primer, paint or stain, and sealer so the piece stands up to the weather.
Source (temporary): https://www.ana-white.com/woodworking-projects/wood-slat-low-shelving-unit