Wood Sleigh Free Pattern
Free DIY Sleigh Plan – Build This Holiday Favorite! Make your own wooden sleigh with this fun and easy project! It’s perfect for decorating your mantel, tabletop, or front porch for the holidays. This sleigh has been tested and built, and we’ve included real photos so you can see exactly how it looks when finished. The includes: • A shopping list with all the materials you’ll need • A cut list with exact board lengths • Step-by-step instructions with a printable template • Photos of finished sleighs to inspire your own style Paint it red, black, or any color you like. Add some gifts, greenery, or lights—and enjoy your handmade holiday décor!

Specifications
| Project type | Toys |
|---|---|
| Room | Kids and Toys |
| Style | Children's and Kid's Room Furniture and Toy Plans |
| Difficulty | Beginner Projects |
Dimensions
Use the size-specific shopping and cut lists below.
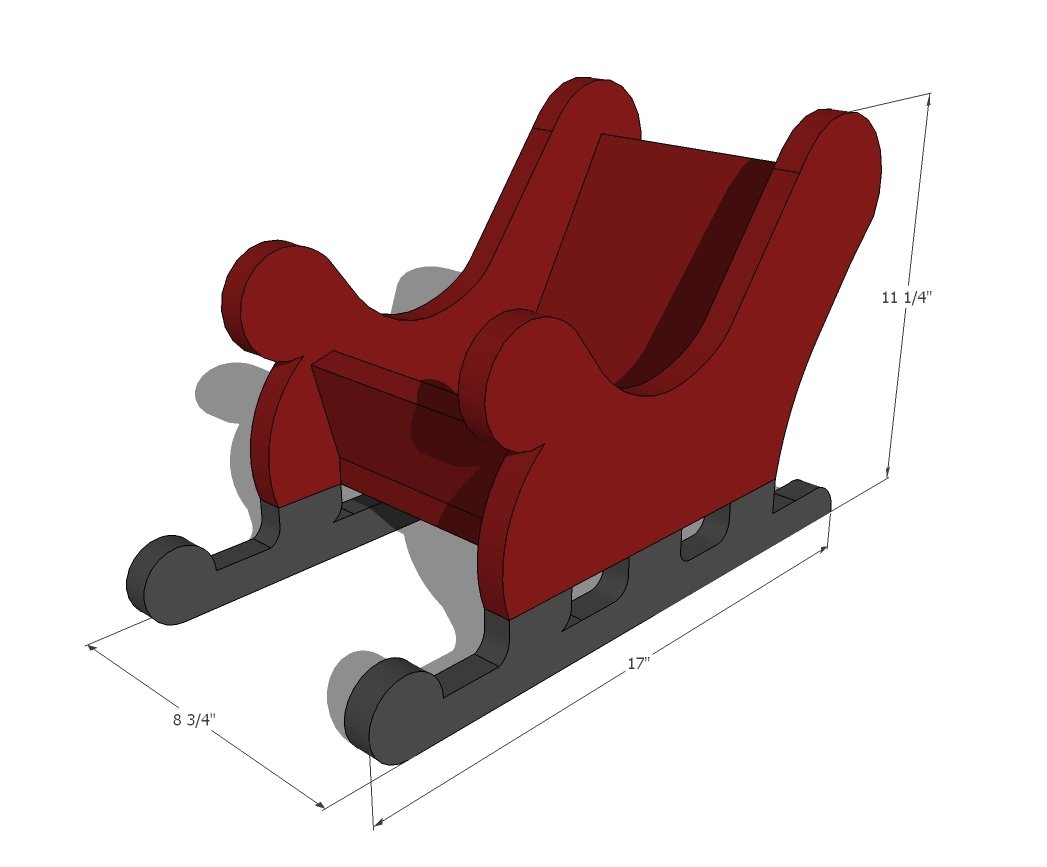
Shopping List
- 1 - 1x12 @ 3 feet long (you can use plywood here too)
- 1 - 1x8 @ 2 feet long (any width board or plywood could be used - just keep the widths consistent - shown in plan with 1x8 width)
- 1 1/4" screws or brad nails and glue
Cut List
- 2 - 1x12 @ 18" (or 2 3/4" plywood @ 18" x 11 1/4")
- 1 - 1x8 @ 7" (bottom)
- 1 - 1x8 @ 8" (longest point, cut bottom edge at 30 degrees BEVEL off square)
- 1 - 1x8 @ 3" (longest point, cut bottom edge at 15 degrees BEVEL off square)
NOTE: If you don't have a miter saw, these edges could be cut square - you'll never see a difference on the outside, but the insides won't match up perfectly)
Tools
- measuring tape
- pencil
- safety glasses
- hearing protection
- jigsaw
- nailer
- countersink drill bit
Step-by-step Instructions
Step 1
Start by printing out this diagram and tracing on to your 1x12. You don't have to cut it out, you can just use a ball point pen over the paper, pressing firmly. It will leave a small indent in the wood. Set your printer to print actual size. You can also use the PDF (above) to print from if that works better for you. If you don't have a printer, I've also included Rebecca's wood sketch at the end of this plan that you can use to draw your own sleigh pattern. Some tips - try using a drill bit the size of your jigsaw blade to drill holes at all starting and stopping points so all you have to do is connect the dots with your jigsaw. Use clamps to hold the board down. Just go slow and pause as you go. The main thing with a jigsaw is just to go slow, make sure that blade isn't beveling, and use the right blade. Here's a little video I put together on jigsaw cutting curved cuts: Be safe!
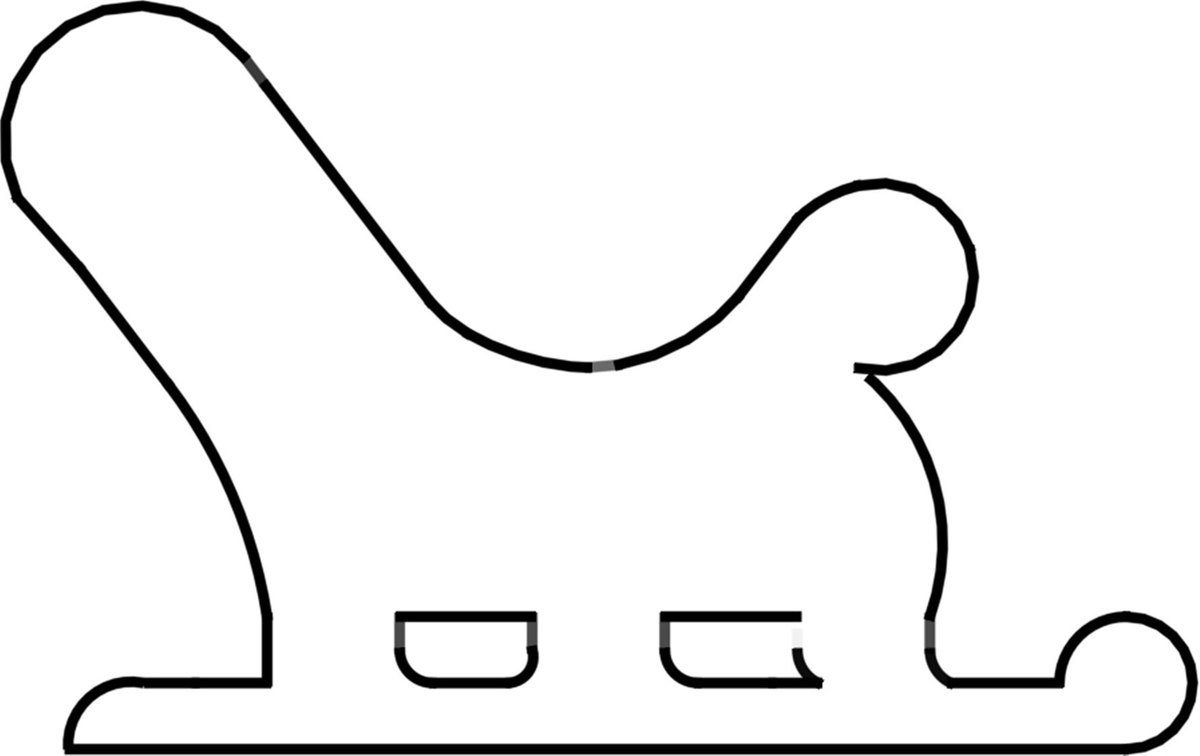
NOTE: It may be easier to paint pieces first.
Once you get your two sides, it's easy peasy from there out. Attach bottom so it's flush to first opening on sleigh legs. You can use nails, countersunk screws or Kreg Jig - it's up to you here. If you use nails, use glue. NOTE: For a wider sleigh, use a wider width board!
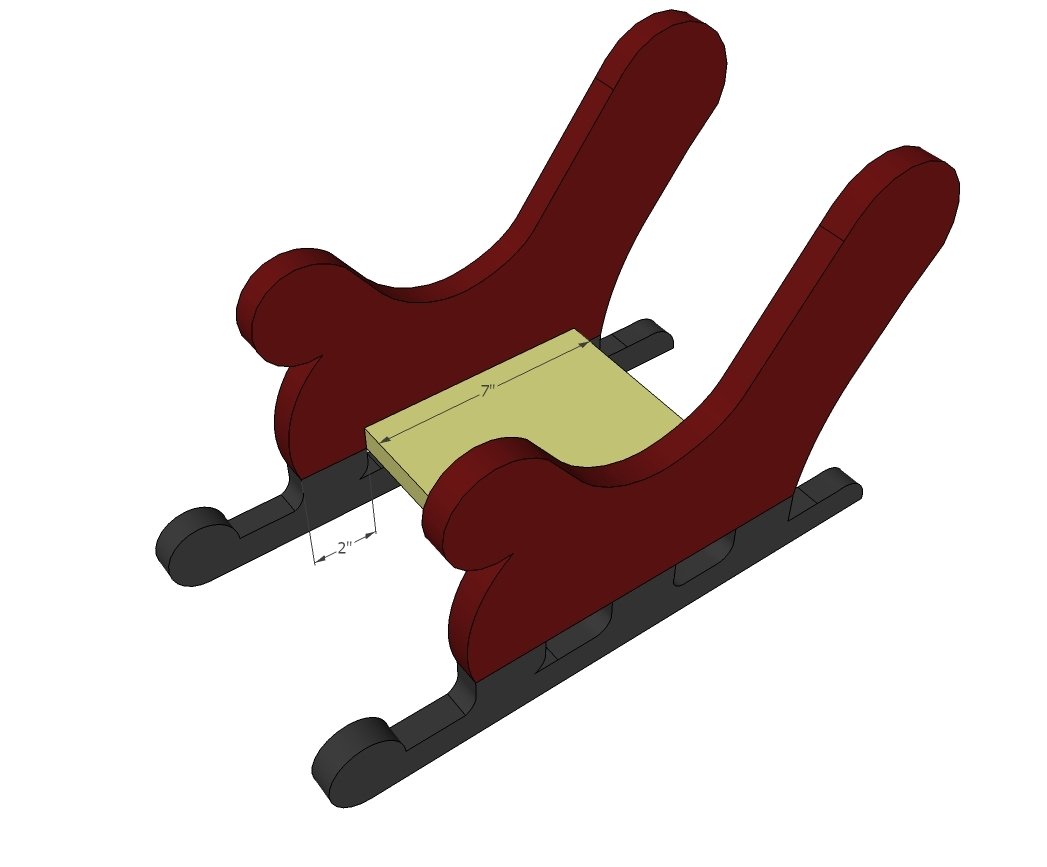
Step 3
I took the sleigh side out just for demonstration purposes. Fit the back in and nail and glue in place.
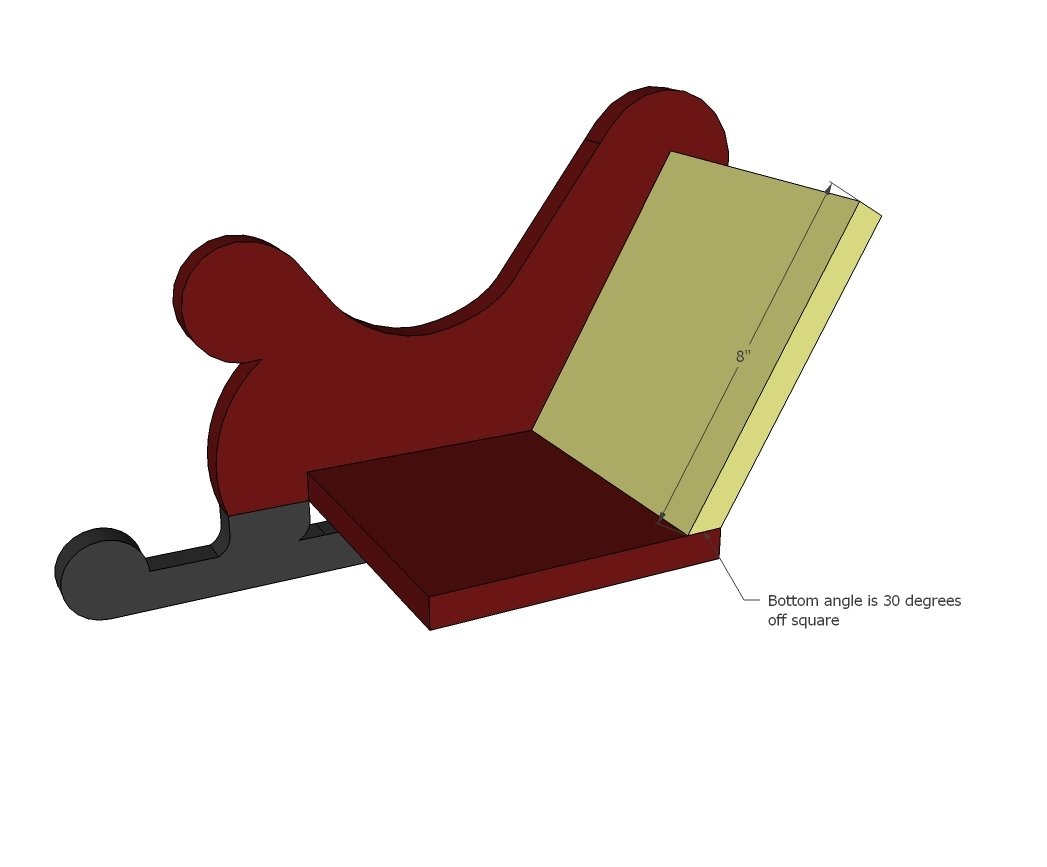
Step 4
And then fit the front in and nail and glue in place.
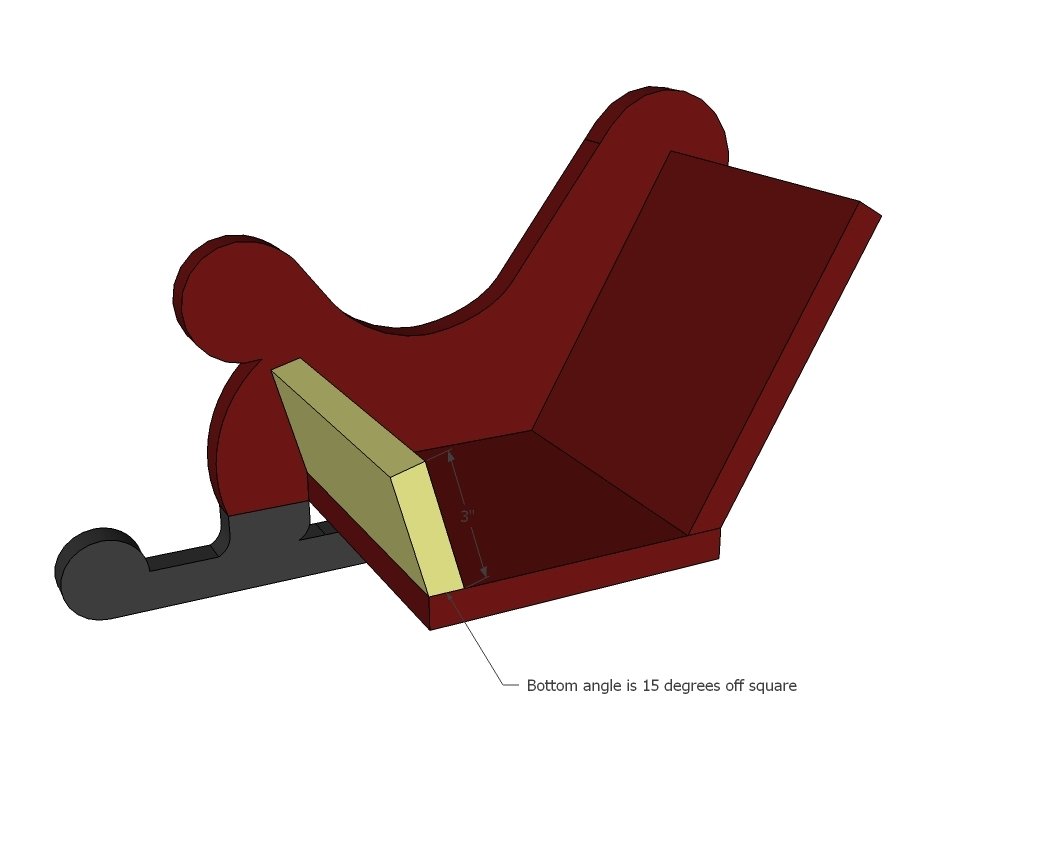
Step 5
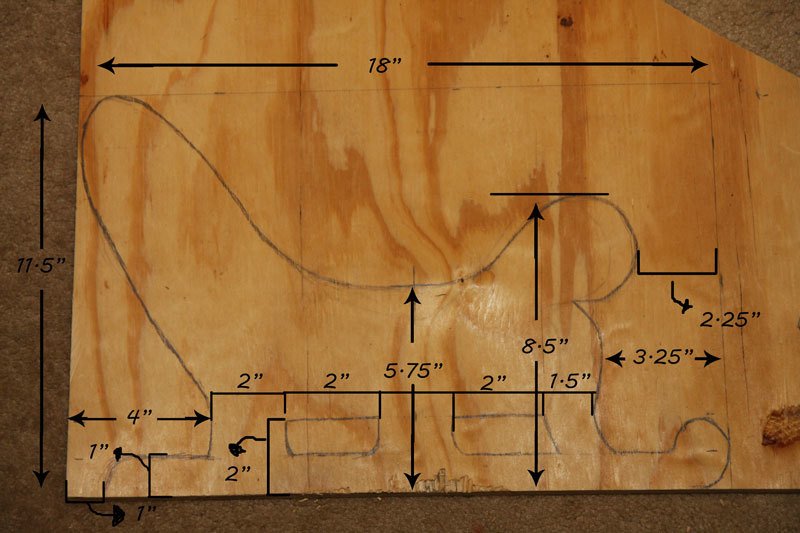
Finishing
Sand all surfaces, starting with a medium grit and finishing with fine. Wipe off the dust, fill any holes or gaps with wood filler, and sand smooth once dry. Apply primer if you're painting, then finish with your choice of paint or stain and seal with a durable clear topcoat. For outdoor projects, use exterior-rated primer, paint or stain, and sealer so the piece stands up to the weather.
Source (temporary): https://www.ana-white.com/woodworking-projects/wood-sleigh-free-pattern